 8
8
Streacom BC1 V2 Open Benchtable Review
Thermal Stress Test »Review System
| System Parts for Case Reviews | |
|---|---|
| Processor: | ATX: Intel Core i5-11600K mATX/ITX: Intel Core i5-10600K Provided by: Intel |
| Motherboards: | ATX: Gigabyte Z590 AORUS PRO AX ITX: Gigabyte Z590I Vision D Provided by: Gigabyte mATX: ASRock B560M Steel Legend Provided by: ASRock |
| Graphics Card: | Gigabyte Radeon RX 6600 Eagle Provided by: Gigabyte ZOTAC GAMING GeForce RTX 3060 Ti Twin Edge OC Provided by: Zotac |
| Memory: | 16 GB XPG SPECTRIX D50 3200 MHz 16 GB XPG SPECTRIX D60G DDR4 3000 MHz 16 GB XPG GAMMIX D20 DDR4 3200 MHz Provided by: ADATA |
| HDD: | Toshiba MG08ADA400E 7200 RPM SATA III Provided by: Toshiba |
| SSD: | ATX:XPG SPECTRIX S20G 500 GB mATX: XPG GAMMIX S50 Lite 1 TB ITX: ADATA Falcon 512 GB ADATA Ultimate SU800 512 GB ADATA Ultimate SU720 500 GB Provided by: ADATA |
| Power Supply: | ATX: Fractal Design ION+ 650W 80 Plus Gold SFX: Fractal Design ION SFX-L 650W 80 Plus Gold Provided by: Fractal Design |
| Cooling: | be quiet! Pure Loop 120/240/280/360 Provided by: be quiet! |
| Thermal Paste: | Arctic MX-5 Thermal Compound Provided by: Arctic |
Assembly
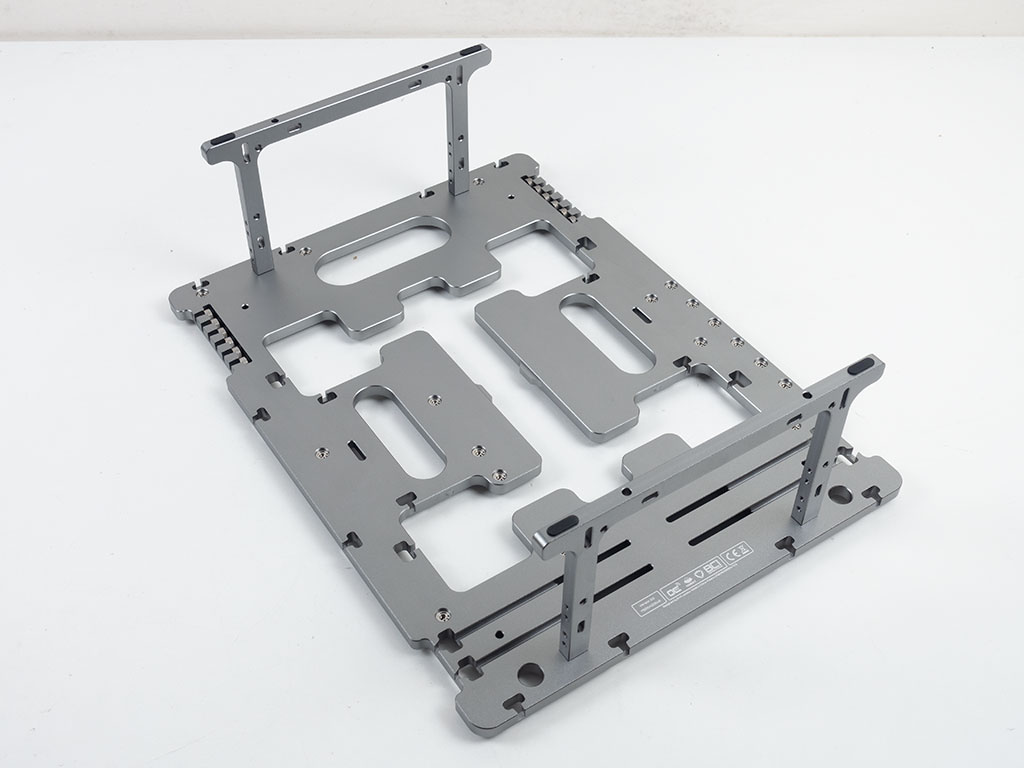


The first step in the assembly process is to attach the two aluminium feet to the base plate. They each have rubber lining on the underside, and the thumb screws are inserted through the plate. Openings for them are recessed slightly as well.
The feet are symmetrical, so you may install the PSU on either of them next. However, picking the one underneath the CPU area leaves the other half of the BC1 V2 underside free for storage drives.

These are attached using screws that are dropped through the plate, similar to the way the pair of stands are secured. You may install up to two 2.5" or 3.5" drives underneath the BC1 V2 here. That said, I would not be surprised if some users end up attaching drives to the sides using the little fan/AIO standoffs.
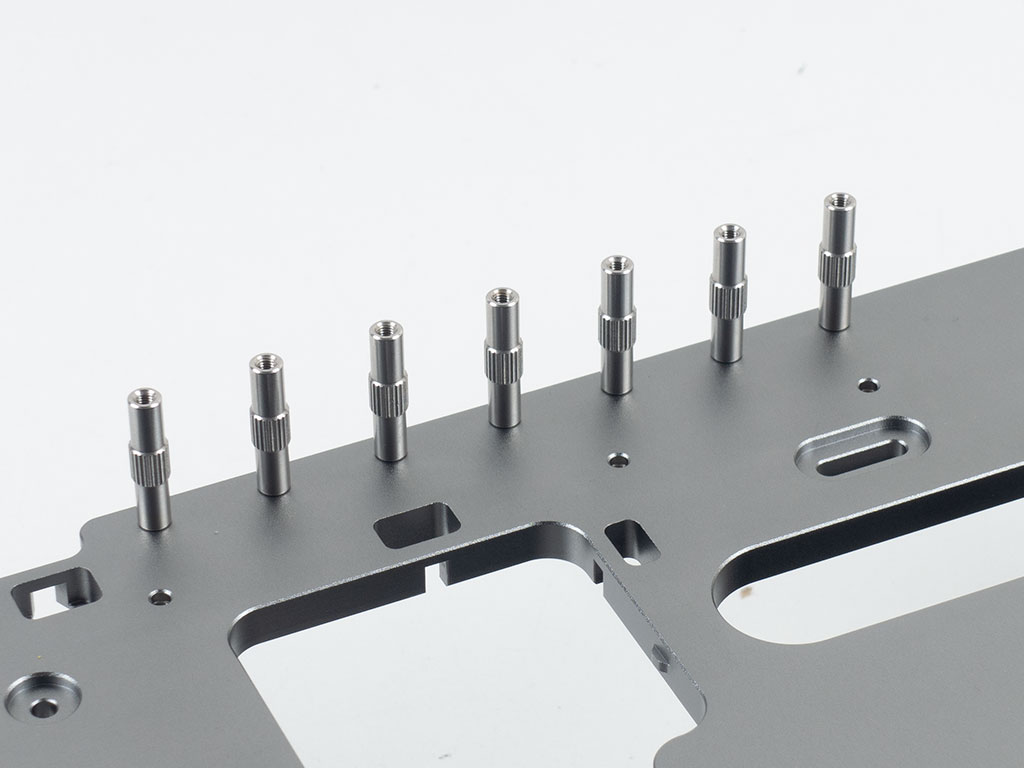

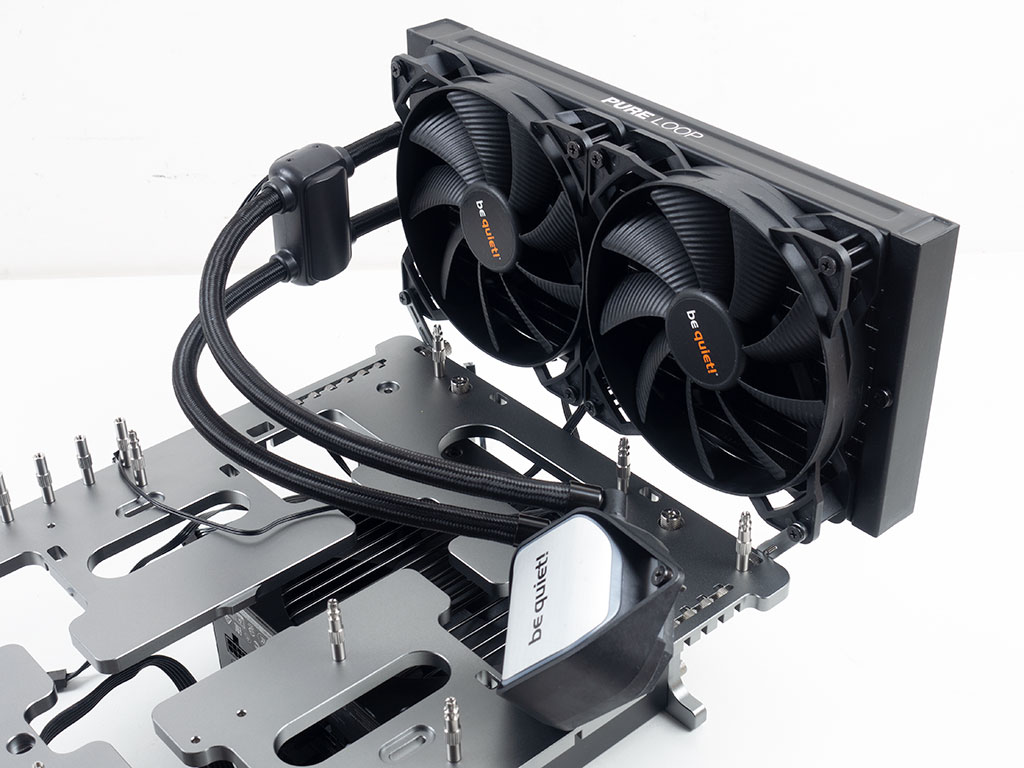
The seven expansion slots use the pins with a thread in the top, into which you will sink the longer pins when adding PCIe devices later on. Placing them instantly shows how your motherboard will be aligned on the main plate. The little mounting plates for cooling are attached through an intricate sandwiching method using a cutout on the edges of the BC1 V1. There are numerous cutouts around the BC1 V2's edge, so there is flexibility on where to install these depending on your build. As you can see, I removed one layer of these spacers as the screws for the 280 mm AIO would not be long enough otherwise. That cooling solution stays in place alright, but moves around gently if pushed down on the top corners with enough force. On the upside, that space underneath the unit can be used to route cables in a pretty clean fashion.
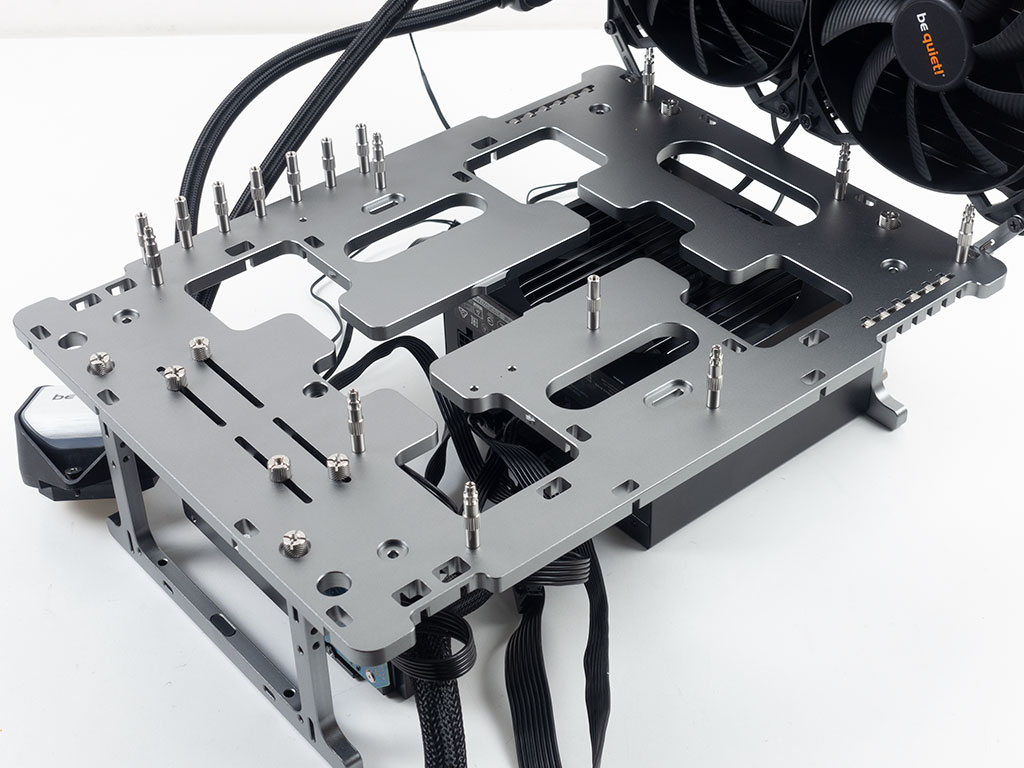

Before installing the motherboard you need to install the eight push pin spacers and that single central classic one for the screw. The board snaps into place in a very satisfying manner, making you wish case brands would employ something like these as well.
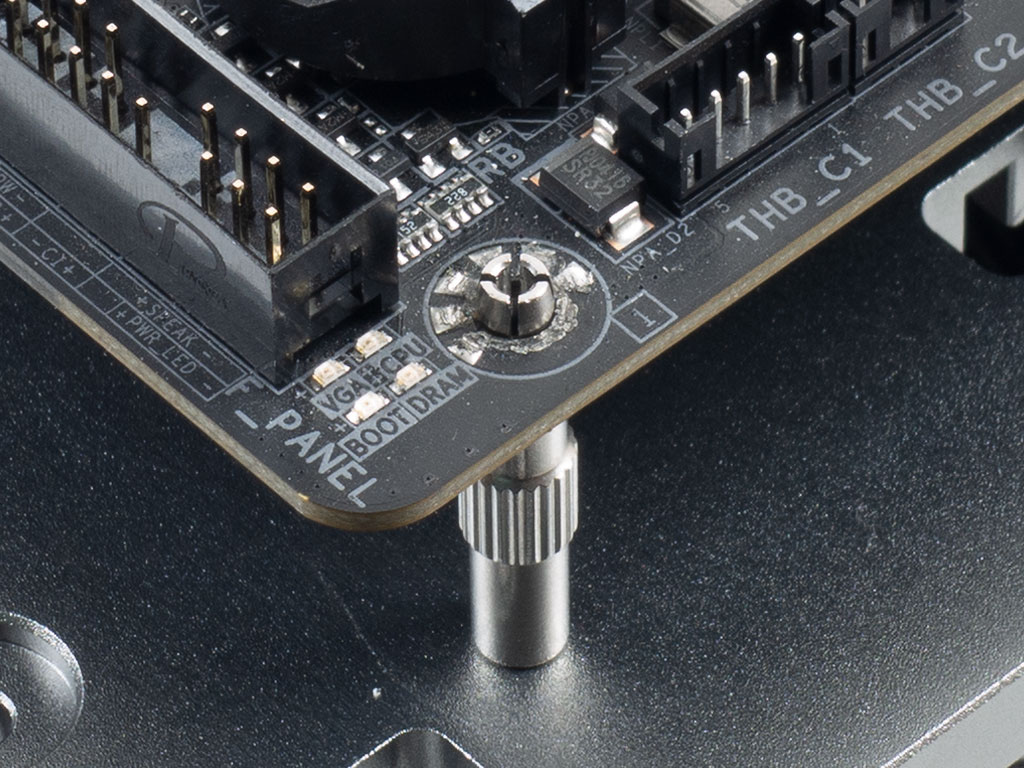

As these push pins are made out of metal, you won't have to worry about wearing them out over time, unlike the widely used plastic variants out there. These are also engineered well enough to easily pull off the motherboard with enough force, which means the board won't go anywhere during normal use, but also rest assured that nothing will break when pulling it off the BC1 V2. The center pin is screw-equipped for that additional element of knowing the motherboard is secured in place well.
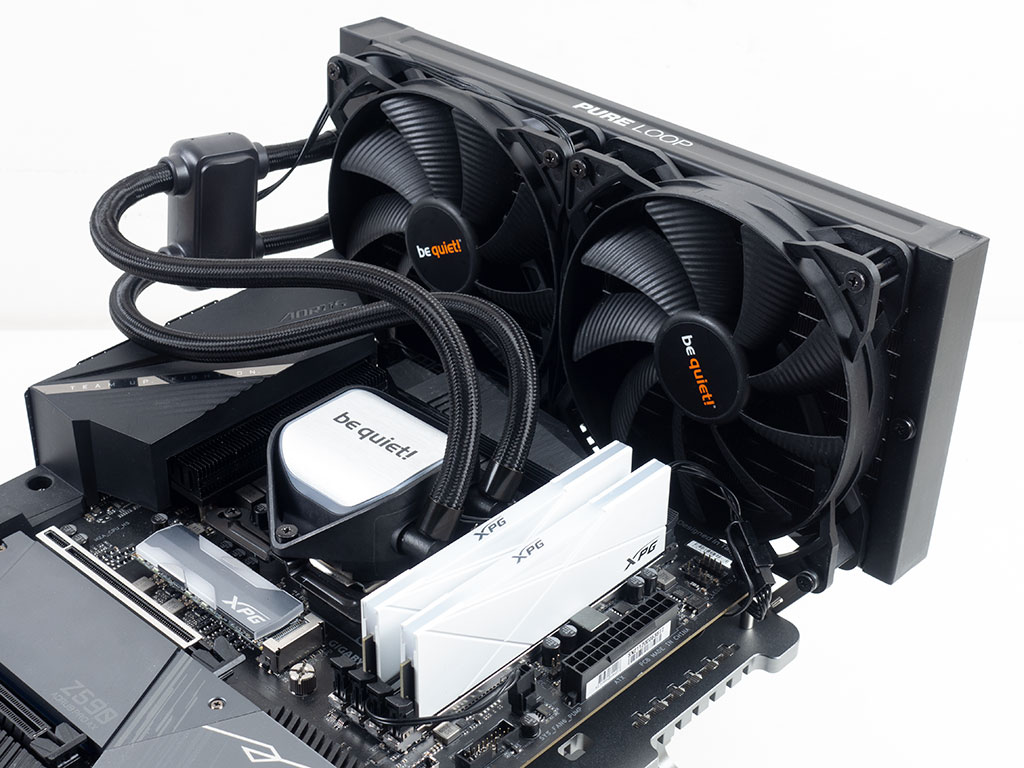
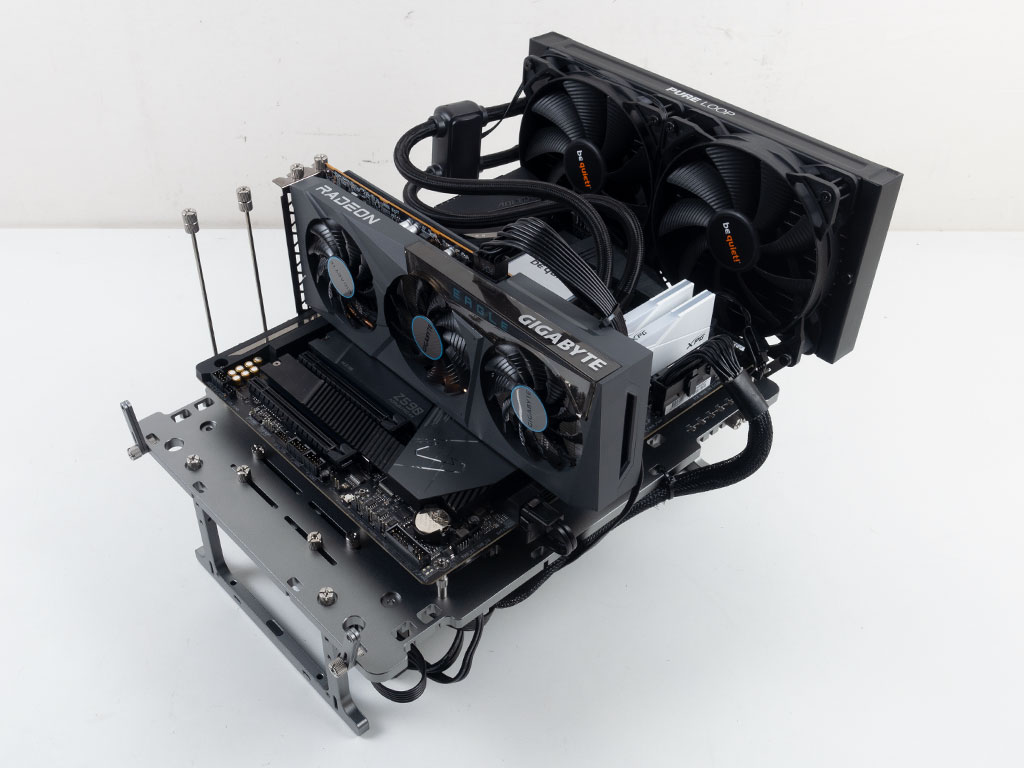
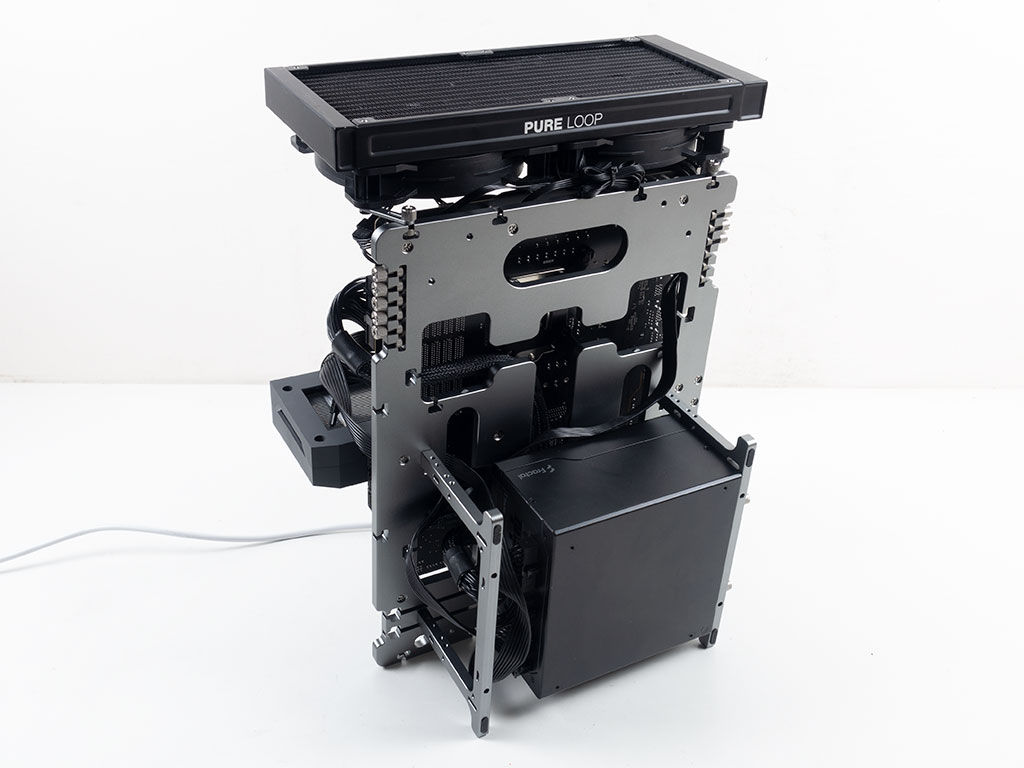
With both the AIO and motherboard in place, you may easily connect everything, this being an open bench table and thus accessible from all sides. While we used a 280 mm radiator setup, you may use any unit of your choosing, even a 420 mm one as there are no exterior walls to worry about. The only downside of going with such a big unit is that it is only secured on two points, but that should not come as a surprise during assembly.
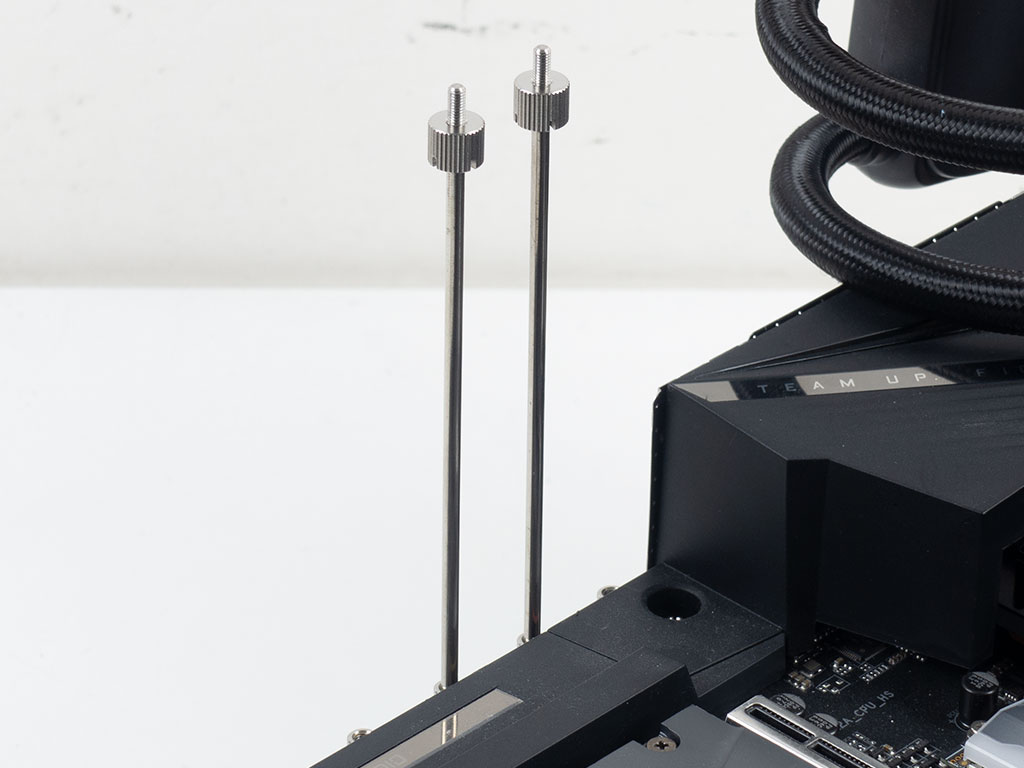


To add a PCIe device like a graphics card, you first have to place the long pins in their appropriate positions with the thumb screws removed from their tops. Once done, place the unit and simply secure it by screwing down those top screws, which will hold it in place perfectly.
Finished Looks
With all the components installed, I used a single black zip tie to hold the 24-pin ATX power cable in place, and a single red zip tie to strap together the loose power supply leads a little bit underneath the bench table. I could see Streacom using the empty space in the handle to engineer some cable management clips that may be detached from the handle and screwed onto the underside for even cleaner cable management—an idea for a V3 in the future, Streacom?
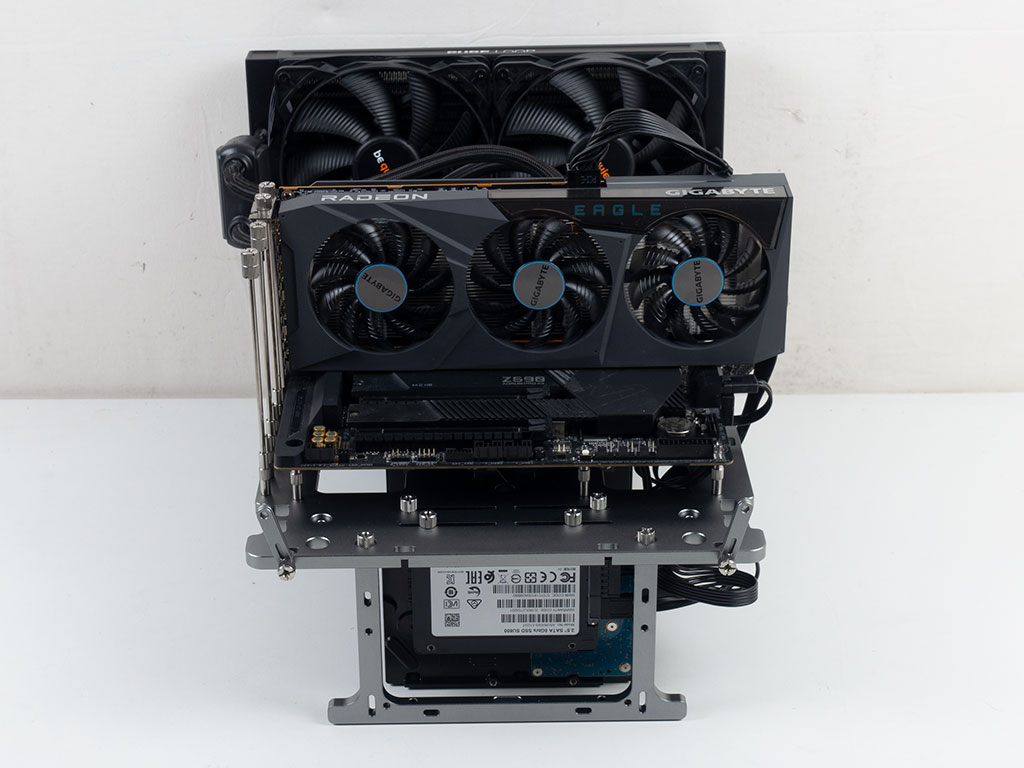
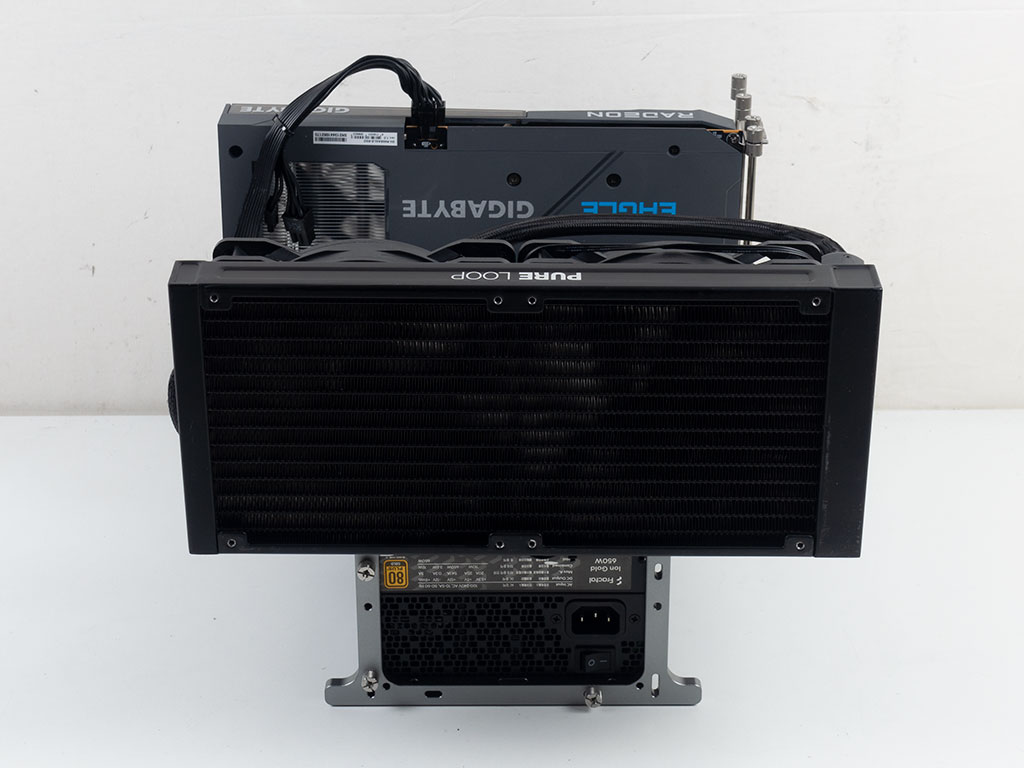
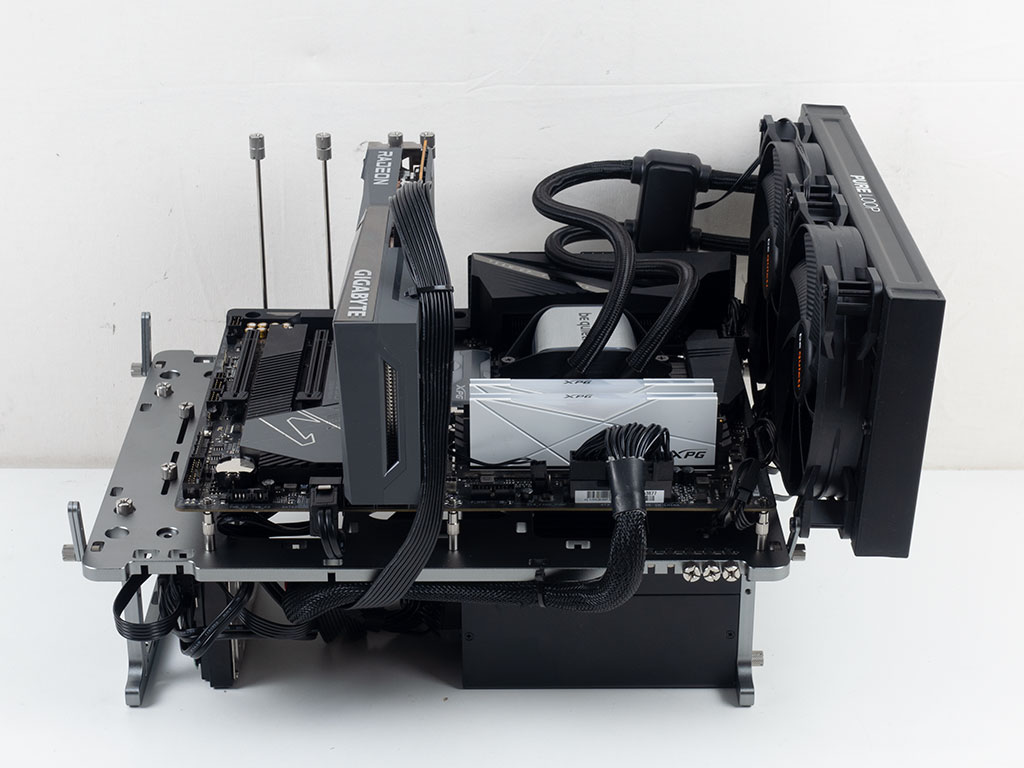
With the desktop-like layout of the Streacom BC1 V2, you can clearly see the GPU fans when looking at it from the left, while the right is just that relatively massive radiator and the PSU, so this is where you will have to route your power cable to.

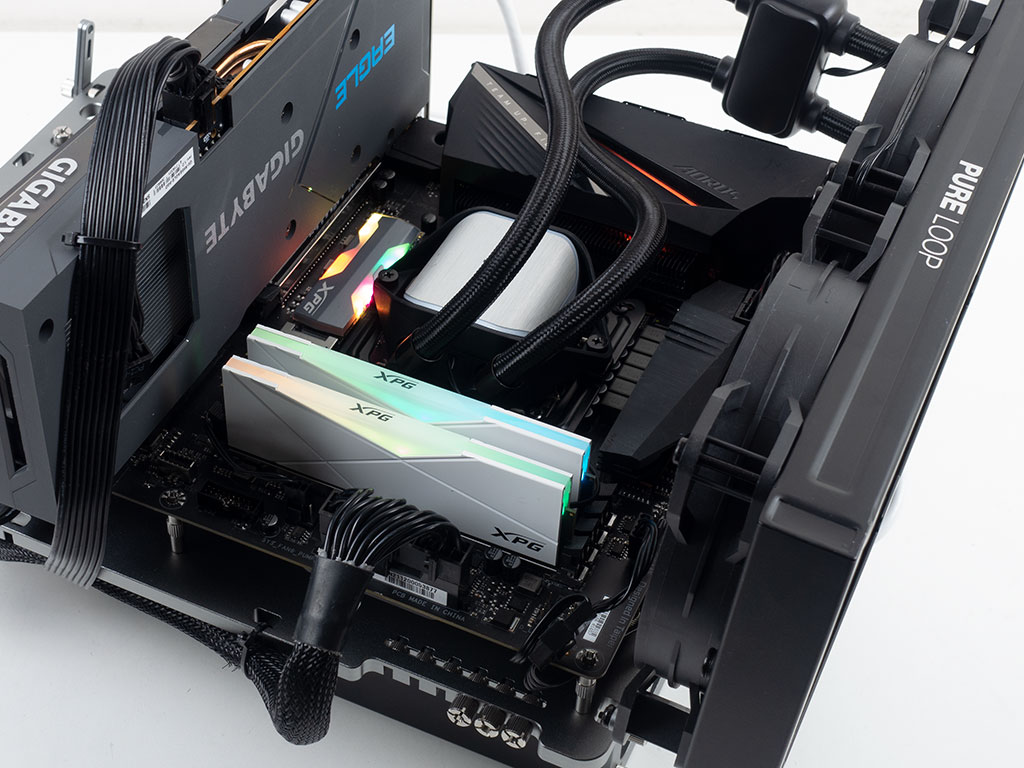
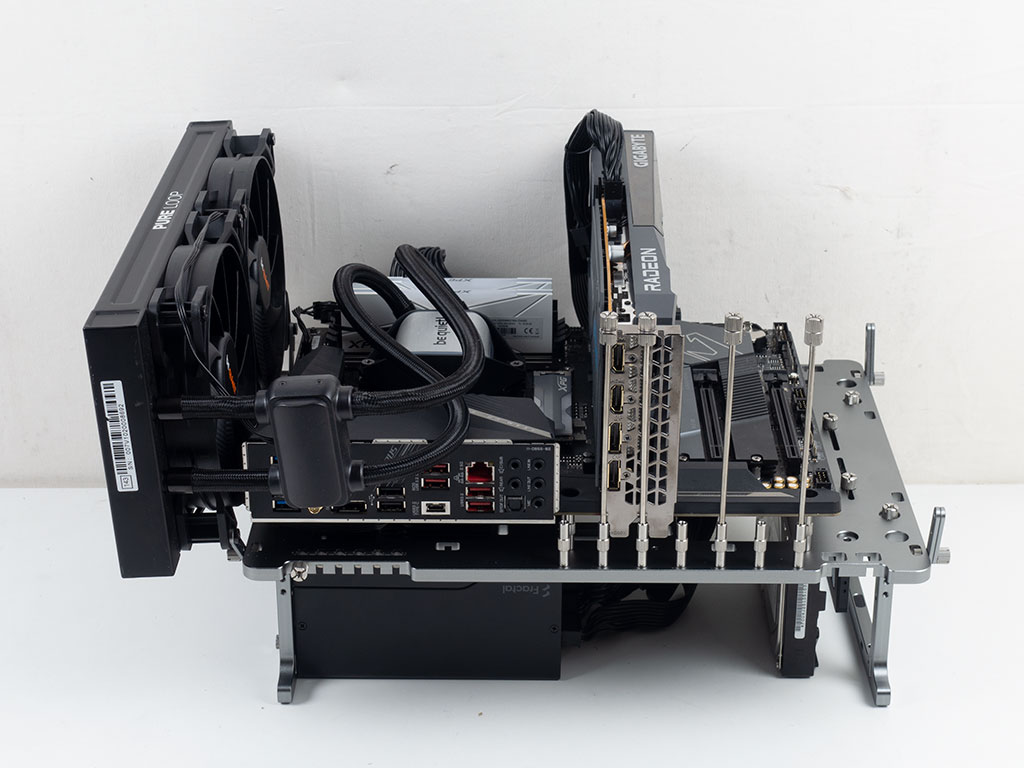
As this is an open bench table, you will have to short the right pins on the motherboard to turn your system on. That said, there are round cutouts in the Streacom BC1 V2 to screw in switches of your own, which makes that easier. Also noteworthy is that there is still a bit of room at the bottom edge of the motherboard, which gives you the space to reach the screws for the hard drives without removing the board itself.
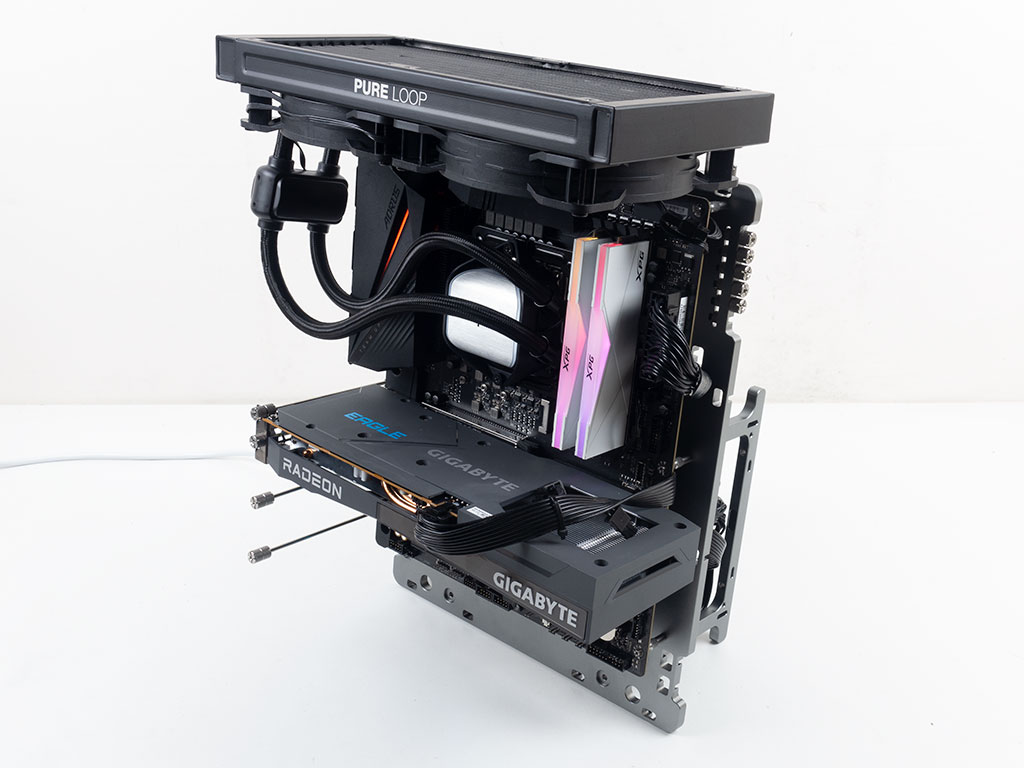
By rotating the feet 90° and screwing them to the bottom left half of the base plate, you can stand the whole setup up as the PSU acts as a heavy base that lowers the center of gravity. In this default setup, you do loose access to the two hard-drive placement opportunities, so this configuration is best-suited for something like a trade show, or as a more permanent desktop solution utilizing M.2 storage exclusively. Alternatively, you may flip that whole system upside down and install the stands the same way in the opposite half of the main plate, which would give you access to the bays once again.
Jan 16th, 2025 14:45 EST
change timezone
Latest GPU Drivers
New Forum Posts
- Real Performance of the RTX 50 Series (Without DLSS 4, According to Nvidia) (12)
- Ryzen 7600 ram 64gb vs 2 /4 channel,vs higher speed (47)
- Your PC ATM (35188)
- Lenovo ideapad 3 15iau7 stuck at 0.2ghz (1)
- Windows 11 causing random stutters / frame-pacing / frame-time issues? (18)
- Need help with PSU advice (27)
- Open box i5 12600k? (6)
- TPU's F@H Team (20387)
- New rtx 5070 (54)
- Advice Needed: Multi-Purpose Server Build (~10,000 NOK / ~900 USD) (1)
Popular Reviews
- NVIDIA GeForce RTX 50 Technical Deep Dive
- AMD Ryzen 7 9800X3D Review - The Best Gaming Processor
- ThieAudio Origin In-Ear Monitors Review - Basshead Love
- ASUS ROG Strix B860-A Gaming Wi-Fi Review
- ASRock Arc B570 Challenger OC Review
- G-Wolves Hati-S2 8K Review
- GPU Test System Update for 2025
- ASUS ROG Strix B850-F Gaming WiFi Review
- LAMZU Maya X Review
- Quick Look: Huion Kamvas 16 (Gen 3) Graphics Tablet
Controversial News Posts
- NVIDIA 2025 International CES Keynote: Liveblog (468)
- AMD Debuts Radeon RX 9070 XT and RX 9070 Powered by RDNA 4, and FSR 4 (348)
- NVIDIA GeForce RTX 5090 Features 575 W TDP, RTX 5080 Carries 360 W TDP (217)
- AMD Radeon RX 9070 XT Alleged Benchmark Leaks, Underwhelming Performance (204)
- 32 GB NVIDIA RTX 5090 To Lead the Charge As 5060 Ti Gets 16 GB Upgrade and 5060 Still Stuck With Last-Gen VRAM Spec (174)
- Potential RTX 5090 and RTX 5080 Pricing in China Leaks (173)
- AMD Radeon RX 9070 XT Boosts up to 3.10 GHz, Board Power Can Reach up to 330W (167)
- AMD Radeon RX 9070 XT Tested in Cyberpunk 2077 and Black Myth: Wukong (166)