 13
13
Swiftech Apogee SKF "Heirloom Series" CPU Water Block Review
Liquid Flow Restriction »Installation


I do not have an AMD test system at this point, but Swiftech has decided to include AMD mounting bracket adapters instead of separate mounting brackets here. These simply clip into the Intel mounting bracket pieces and have the spring-loaded mounting posts pre-installed, which can then move in the hole to go into the respective position for AMD AM2/AM3, AM4, or SP3r2 (TR4) sockets. This means you do not have to disassemble the block for any reason at all, and these adapters end up acting as a jig also in case you do have to disassemble and put it back together.
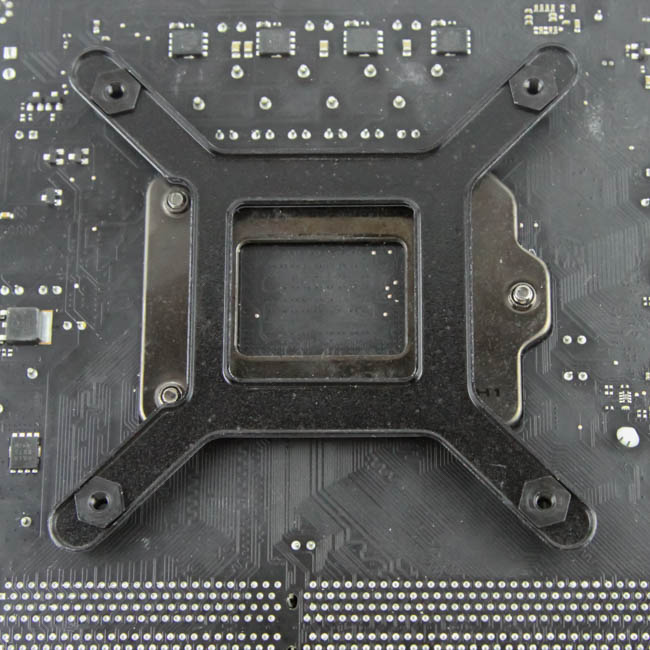
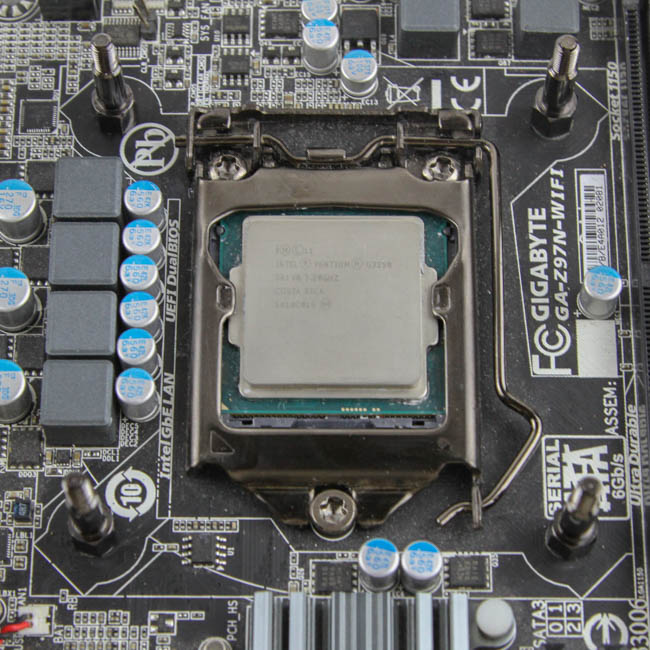
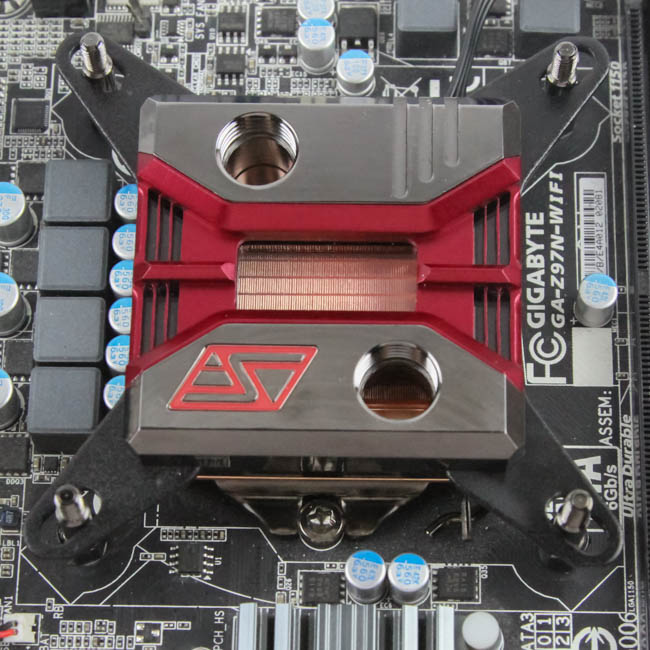
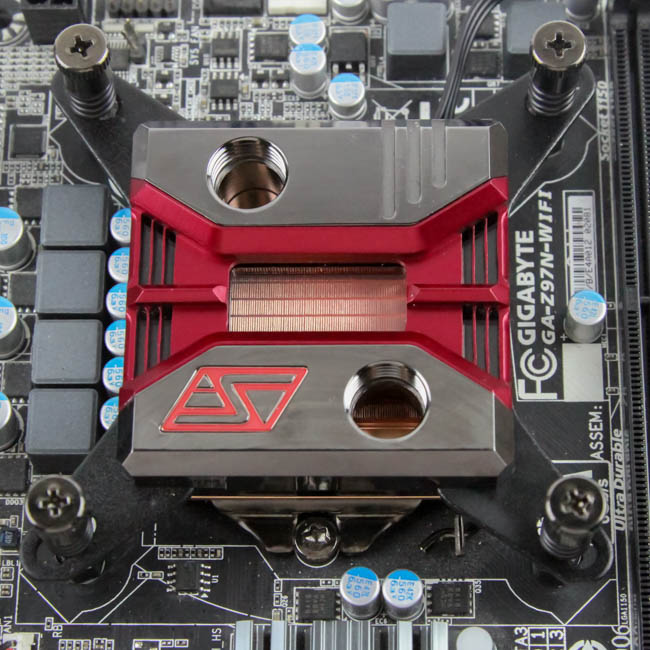
Installation on Intel LGA 115x CPU sockets begins, as always, with the provided backplate. It has four small pieces of insulation foam on the backside already, which touch the motherboard to prevent electrical shorting, so all you need to do is to orient it such that the notches match the screws from the socket ILM, while having the threaded parts in the four corners meet the holes in the PCB for cooler mounting. With that done, simply take the provided LGA 115x mounting posts and screw through the PCB and into the backplate. These posts come with an insulating end already installed, so there is no need to worry about electrical shorting on the business side of the motherboard either. These small things add up and help cut down installation time, which I definitely appreciate. Once done, apply some thermal paste to the CPU IHS, maneuver the block over the four posts, and lock it in place using the four Intel spring-loaded locking nuts. It is recommended to do so in a diagonal manner, in sets of two for uniform mounting pressure.
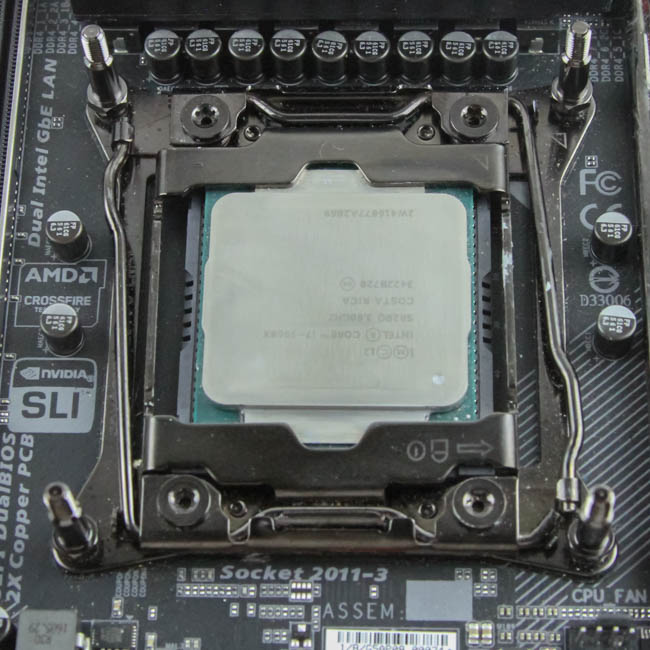
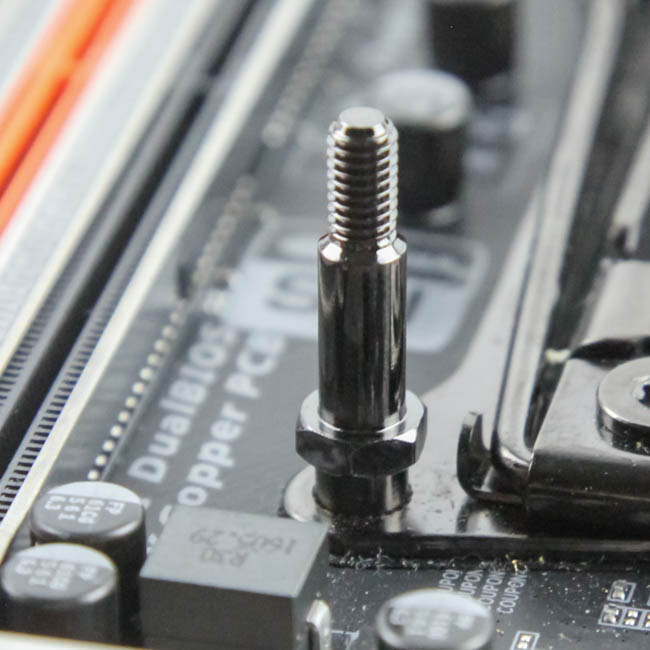

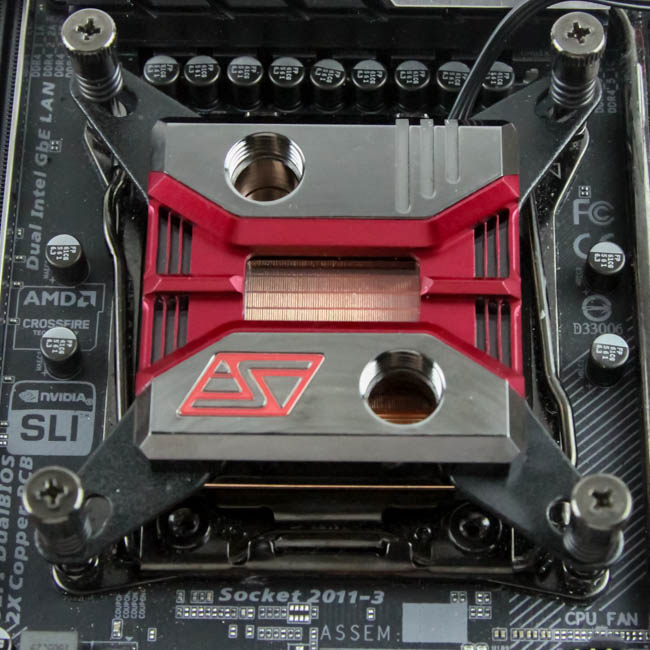
Installation on Intel LGA 2011(-3)/2066 is even simpler as those already have a socket backplate or cooler-mounting threads pre-installed on the motherboard. Simply screw in the M4-threaded mounting posts and repeat the procedure as before. Swiftech provides enough thermal paste for 4-5 runs, so feel free to mount, undo, check for TIM spread, re-apply/adjust TIM application, and re-mount if you so desire.
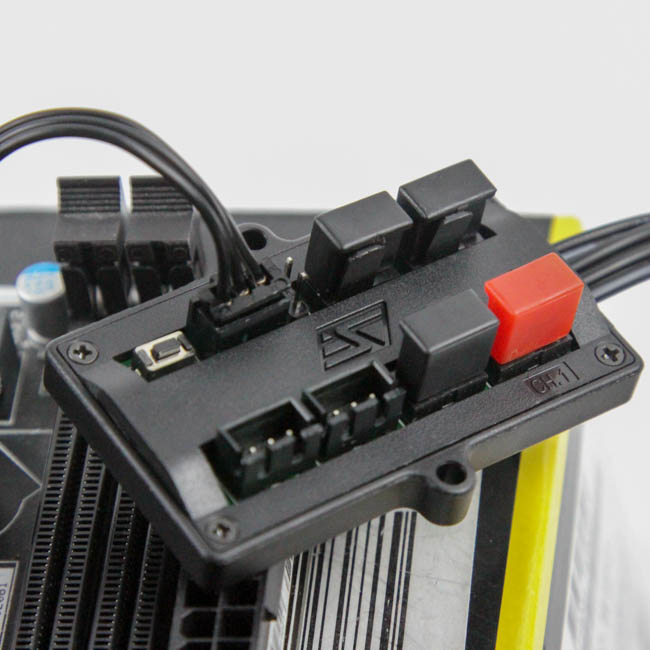
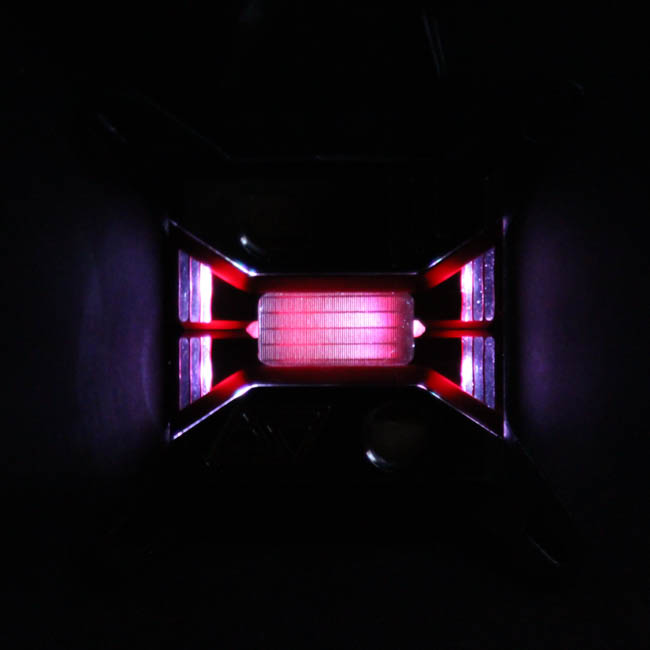
Finally, remember to use the Iris controller if you wish to have the block light up. You will need to connect the controller to a SATA power connector from the PSU before hooking up the cable from the block to any of three available LED headers on the controller - go with the one nearest to the toggle button if this is your only compatible device. Swiftech provides installation hardware for the controller, which also has double-sided tape on it, as well as an extension cable in case the controller is further away from the CPU socket than anticipated.
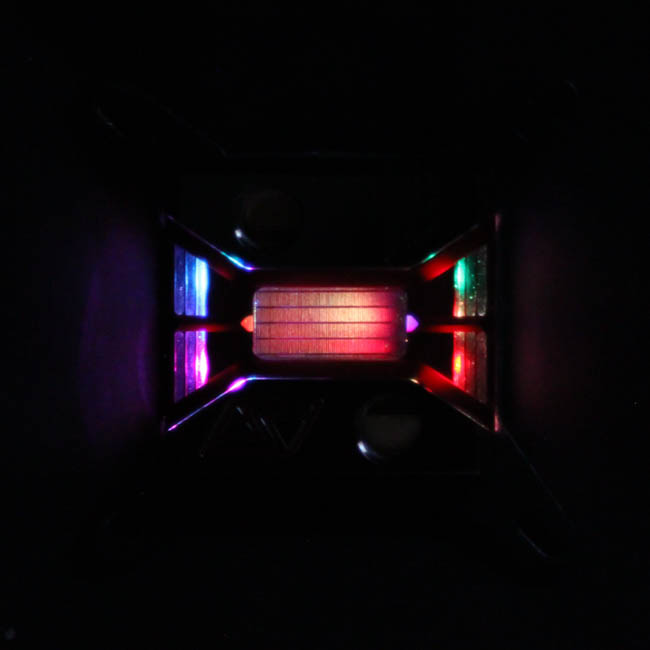
Once done, and the system is powered on, the block will light up white and you can then toggle through the static color options available. Each color (white, red, blue, pink, green, etc.) also has three brightness levels to choose from, and there is an RGB mode as seen above. Swiftech says the LEDs to be compatible with the standard motherboard LED controllers, although they do not provide warranty for any issues that may arise if you use these LEDs with anything other than the provided controller. I also do not have a compatible motherboard here to try it out with, so try it at your own risk.
Overall, this is among the easiest and most reproducible installation methods I have experienced. TIM spread was good using a rice grain in the middle with LGA 115x and a line down the center with LGA 2011-3. Good job, Swiftech.
Jul 10th, 2025 02:19 CDT
change timezone
Latest GPU Drivers
New Forum Posts
- TPU's Nostalgic Hardware Club (20493)
- 3DMARK "LEGENDARY" (326)
- Post Your TIMESPY, PCMARK10 & FIRESTRIKE SCORES! (2019) (321)
- 5070ti overclock...what are your settings? (47)
- 'NVIDIA App' not usable offline? (1)
- G-Sync Not Working in Borderless / Window Mode - Windows 11 (5)
- Screen burn-in (19)
- [GPU-Z Test Build] New Kernel Driver, Everyone: Please Test (78)
- Friend's monitor randomly loses signal (3)
- What's your latest tech purchase? (24234)
Popular Reviews
- NZXT N9 X870E Review
- NVIDIA GeForce RTX 5050 8 GB Review
- Fractal Design Epoch RGB TG Review
- Corsair FRAME 5000D RS Review
- Fractal Design Scape Review - Debut Done Right
- AMD Ryzen 7 9800X3D Review - The Best Gaming Processor
- Sapphire Radeon RX 9060 XT Pulse OC 16 GB Review - An Excellent Choice
- Upcoming Hardware Launches 2025 (Updated May 2025)
- Sapphire Radeon RX 9070 XT Nitro+ Review - Beating NVIDIA
- PowerColor ALPHYN AM10 Review
TPU on YouTube
Controversial News Posts
- Intel's Core Ultra 7 265K and 265KF CPUs Dip Below $250 (288)
- Some Intel Nova Lake CPUs Rumored to Challenge AMD's 3D V-Cache in Desktop Gaming (140)
- NVIDIA Launches GeForce RTX 5050 for Desktops and Laptops, Starts at $249 (117)
- AMD Radeon RX 9070 XT Gains 9% Performance at 1440p with Latest Driver, Beats RTX 5070 Ti (116)
- NVIDIA GeForce RTX 5080 SUPER Could Feature 24 GB Memory, Increased Power Limits (115)
- Microsoft Partners with AMD for Next-gen Xbox Hardware (105)
- Intel "Nova Lake‑S" Series: Seven SKUs, Up to 52 Cores and 150 W TDP (100)
- NVIDIA DLSS Transformer Cuts VRAM Usage by 20% (97)