 11
11
Swiftech H360 X3 AIO Review
Finished Looks »Installation
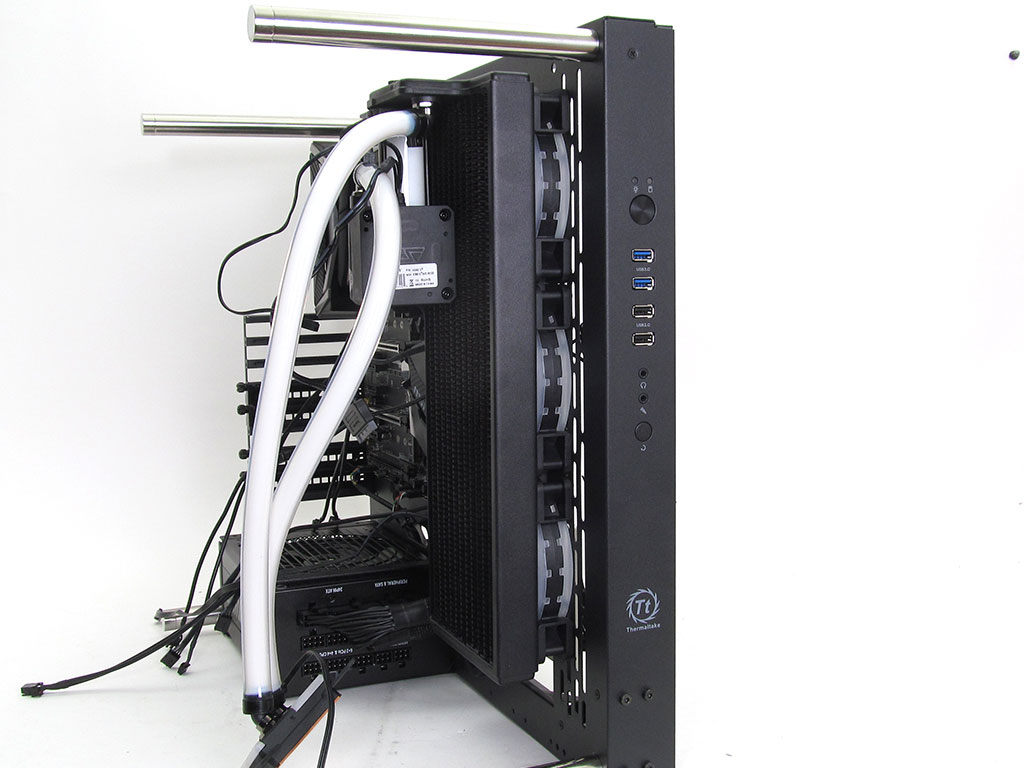
When installing the Swiftech H360 X3 do yourself a favor and mount the radiator and fans first. While this won't always be possible depending on the case, it does make the overall process a great deal easier.
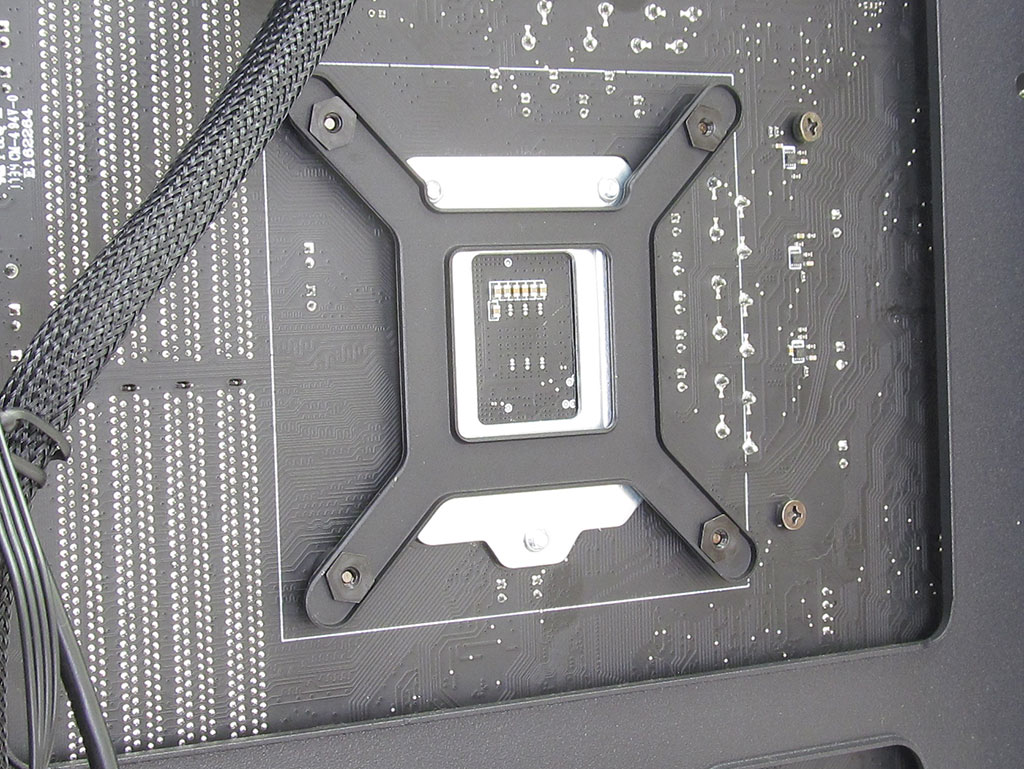

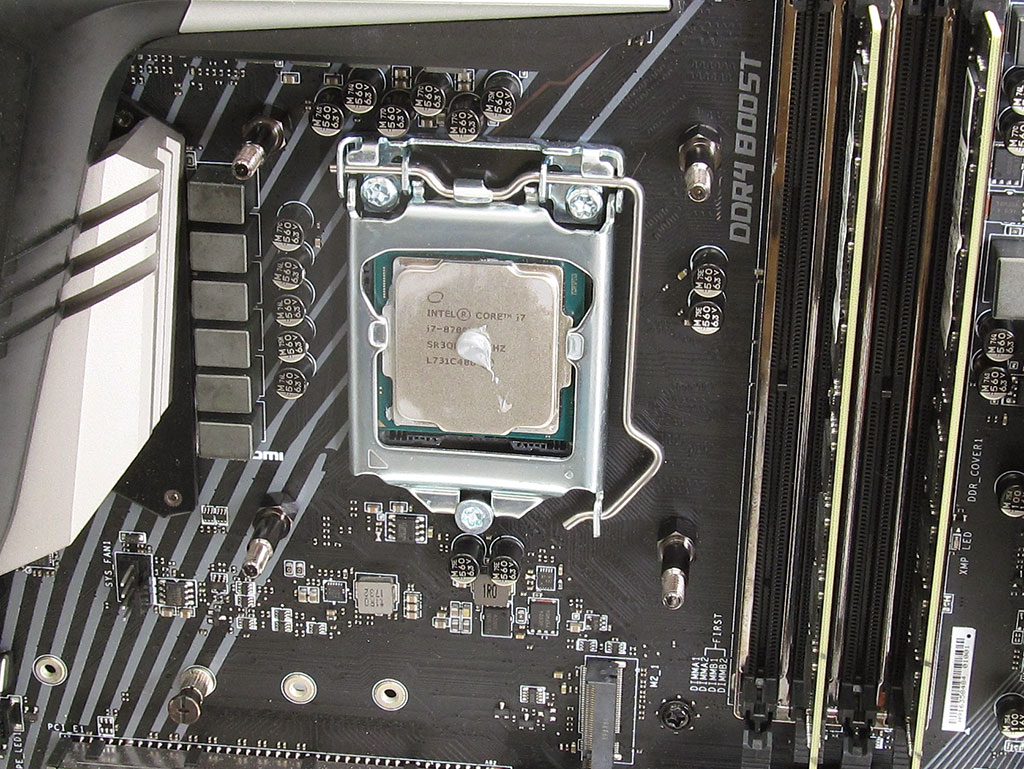
With the radiator, fans, and pump already mounted, the next step is to prepare to mount the CPU block. To start, position the backplate on the motherboard and use the included screw pillars to secure it. With that done, you can apply some thermal compound in preparation for mounting the block itself.

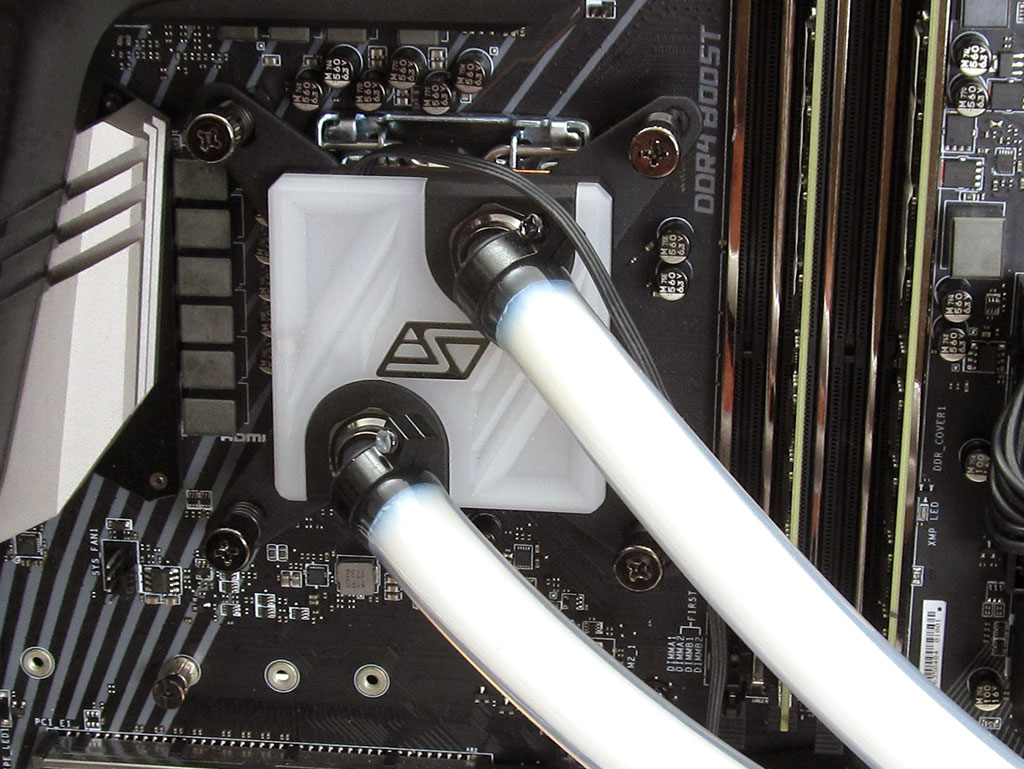
Slide the block on to the screw pillars to then secure it in place with the spring-equipped thumb screws. That is literally all there is to it for installing the hardware itself.

The final step requires plugging everything in. First, find a good spot to position the IRIS RGB controller where all the various plugs can reach. Then, plug the fans and RGB LED power plugs into the controller. Finally, hook up SATA power for the pump and controller. With everything plugged in, you are ready to go.
Swiftech's H360 X3 is relatively easy to install, and I would rate it an 8 on a scale of 1 (hardest) to 10 (easiest) in terms of installation. While the process is relatively quick and painless, it will still require a bit of patience due to the sheer size of this all-in-one liquid cooler. This issue can be made worse depending on chassis choice. In respect to the test system, the overall process was easy enough to where first-time builders should be able to handle this without a problem. I say this mostly because the instructions that are included were clear and concise; they didn't require a magnifying glass to read or understand.
Jul 15th, 2025 15:51 CDT
change timezone
Latest GPU Drivers
New Forum Posts
- Solidigm NVMe Custom Modded Driver for All NVMe Brands SSDs & Any NVMe SSDs (229)
- Stupid things one has done with hardware (64)
- No offense, here are some things that bother me about your understanding of fans. (143)
- Recommend me a decent budget card :) (33)
- What's your latest tech purchase? (24278)
- TOS 6 on Ugreen NAS (0)
- Folding Pie and Milestones!! (9620)
- TPU's F@H Team (20436)
- Is there a WIFI chip I should get? (4)
- TPU's Nostalgic Hardware Club (20513)
Popular Reviews
- MSI GeForce RTX 5060 Gaming OC Review
- Our Visit to the Hunter Super Computer
- Lexar NM1090 Pro 4 TB Review
- SilverStone SETA H2 Review
- NVIDIA GeForce RTX 5050 8 GB Review
- Fractal Design Epoch RGB TG Review
- Sapphire Radeon RX 9060 XT Pulse OC 16 GB Review - An Excellent Choice
- AMD Ryzen 7 9800X3D Review - The Best Gaming Processor
- Upcoming Hardware Launches 2025 (Updated May 2025)
- Corsair FRAME 5000D RS Review
TPU on YouTube
Controversial News Posts
- Intel's Core Ultra 7 265K and 265KF CPUs Dip Below $250 (288)
- Some Intel Nova Lake CPUs Rumored to Challenge AMD's 3D V-Cache in Desktop Gaming (140)
- AMD Radeon RX 9070 XT Gains 9% Performance at 1440p with Latest Driver, Beats RTX 5070 Ti (131)
- NVIDIA Launches GeForce RTX 5050 for Desktops and Laptops, Starts at $249 (122)
- NVIDIA GeForce RTX 5080 SUPER Could Feature 24 GB Memory, Increased Power Limits (115)
- Microsoft Partners with AMD for Next-gen Xbox Hardware (105)
- Intel "Nova Lake‑S" Series: Seven SKUs, Up to 52 Cores and 150 W TDP (100)
- NVIDIA DLSS Transformer Cuts VRAM Usage by 20% (99)