 9
9
Tecware Phantom RGB Keyboard Review
Disassembly »Closer Examination

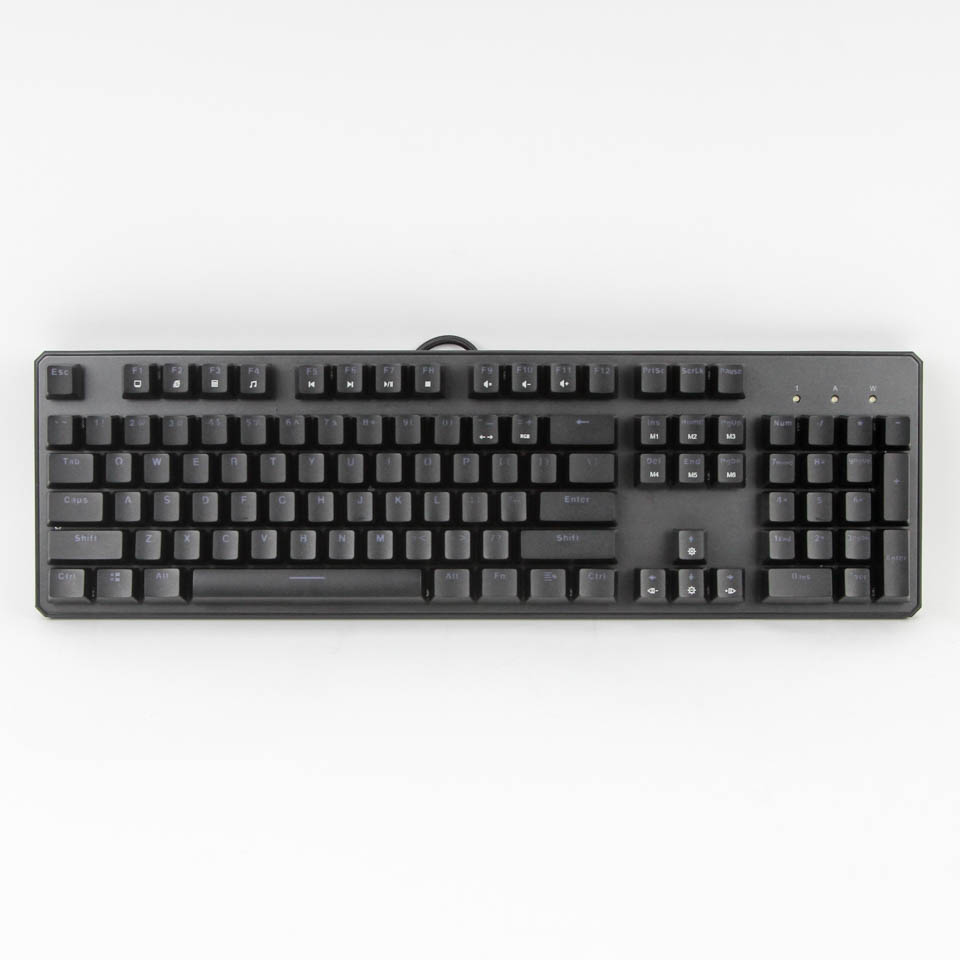
As we saw before, the Tecware Phantom RGB keyboard comes in a thin foam wrap to keep it pristine and free of dust out of the box, as well as a plastic clamshell over it for further protection. Removing both, we get our first good look at the keyboard, and it adopts a black color scheme as with the vast majority of all keyboards today. The keyboard itself is a cleaner design choice than others in the market with its black color scheme and smaller-than-average bezels on all sides. The corners are cut literally to add some flair, and there is a light glossy edge with "Phantom" as the only visible branding toward the front facing the user. The keyboard fits into any environment nicely thus—work or otherwise.
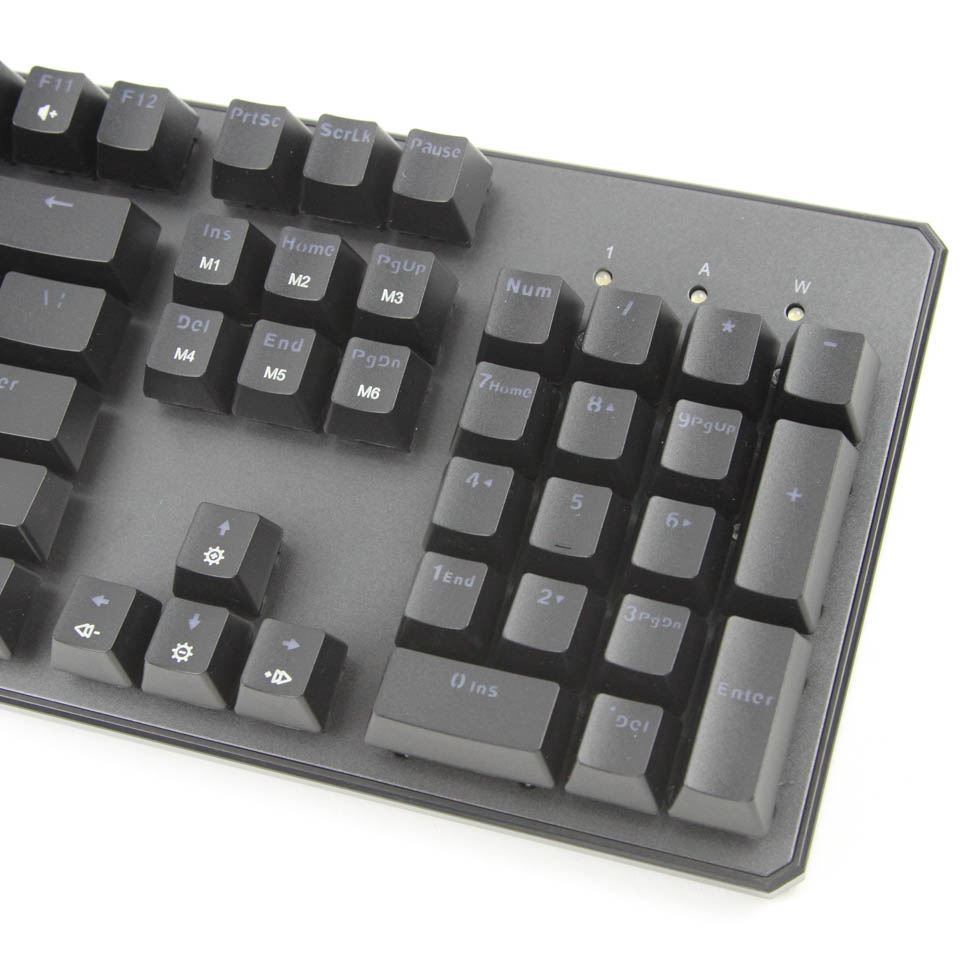
The numpad and alphanumeric section have the general secondary legends alongside the primary ones, which, combined with the single legends being in the top center, is indicative of where the backlighting will be more uniform. There are keyboard-specific secondary legends below the primary legends, however, and those may not end up as bright as those at the top. All general legends, primary or otherwise, are doubleshot injected with the more-traditional seams in loops, which affects the typeface. Some of the secondary legends are also squeezed in tight next to the primary ones, especially on the numpad, so it is not the best execution I have seen.

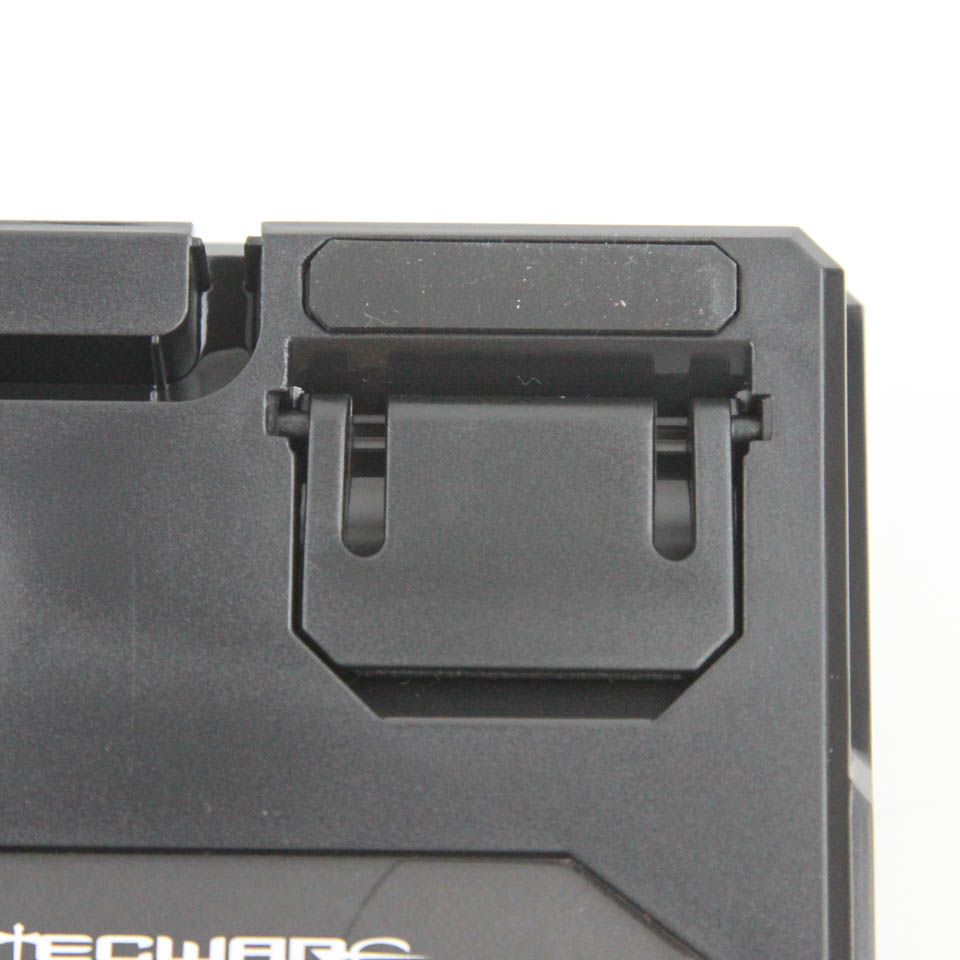
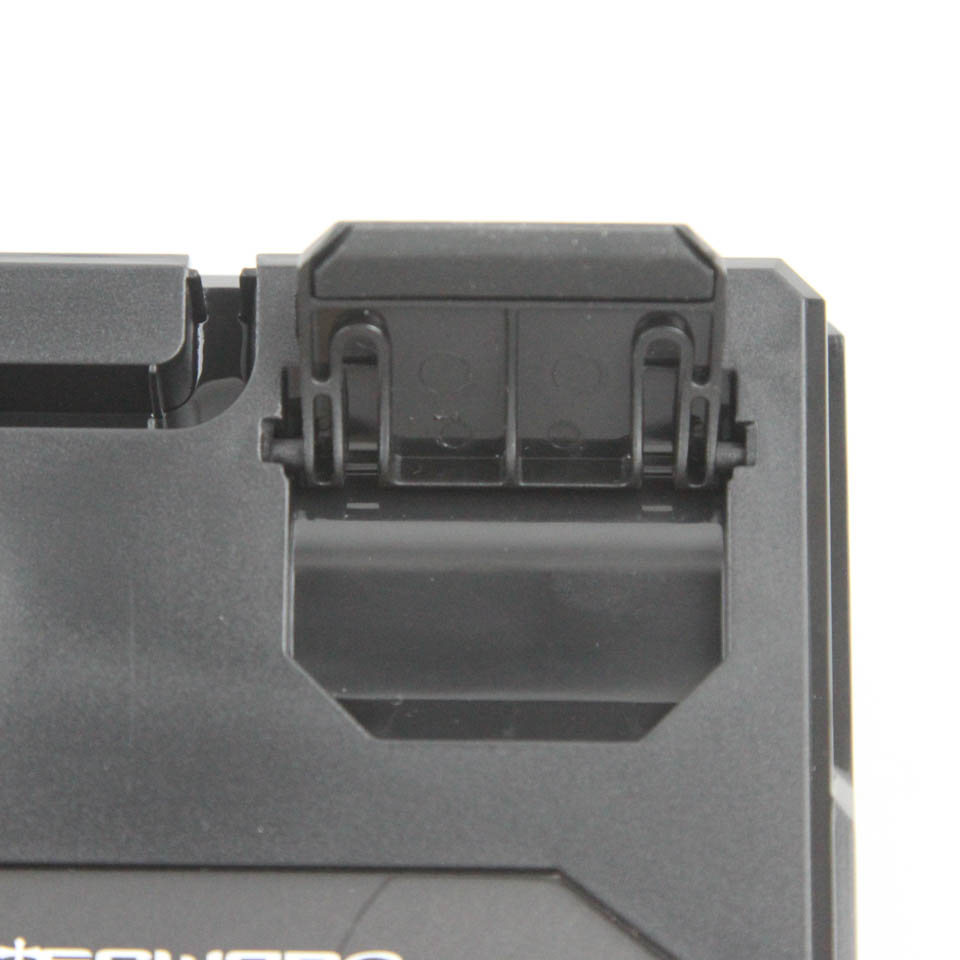
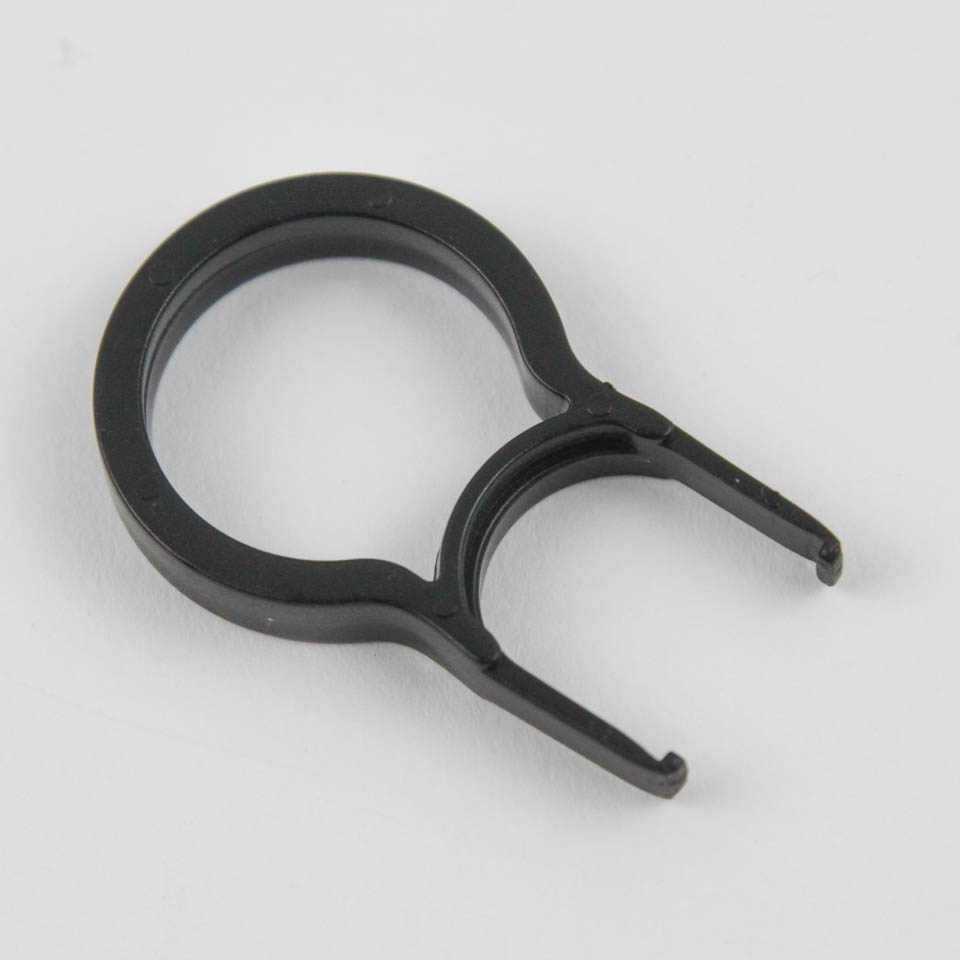
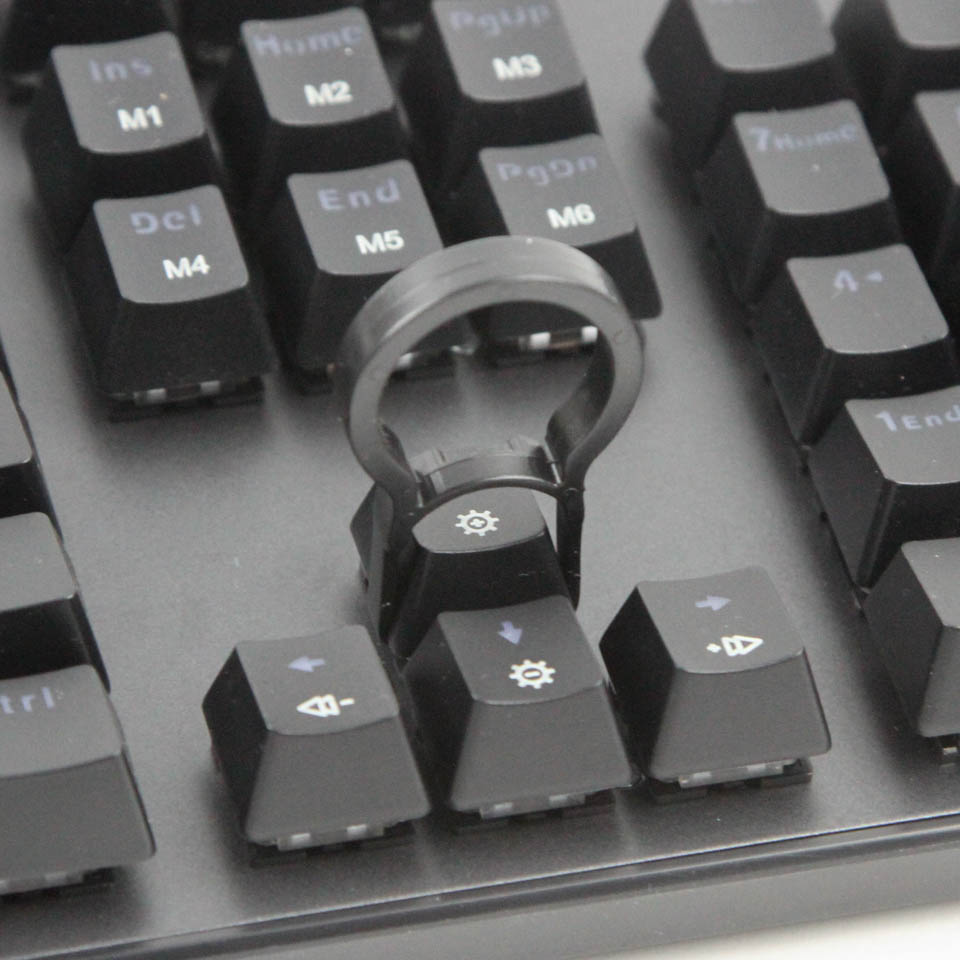
Flipping the keyboard around, we see the usual certification sticker in the middle, towards the right, which also has more branding. There are also cutouts at the top to allow for three cable-routing options depending on where the cable is directed towards. A small QC sticker is seen as well, and there are four rubber pads on the corners in the back to keep the keyboard from sliding around on the desk. In addition, two feet at the top open up to optionally elevate the keyboard, and they have rubber pads on the bottom to prevent them from getting scratched and help with grip on the resting surface. Last but certainly not least is a cutout to accommodate the included keycap puller. It is a plastic ring-style puller, which can potentially scratch the sides of keycaps, but comes in handy on keyboards with modular switch designs.
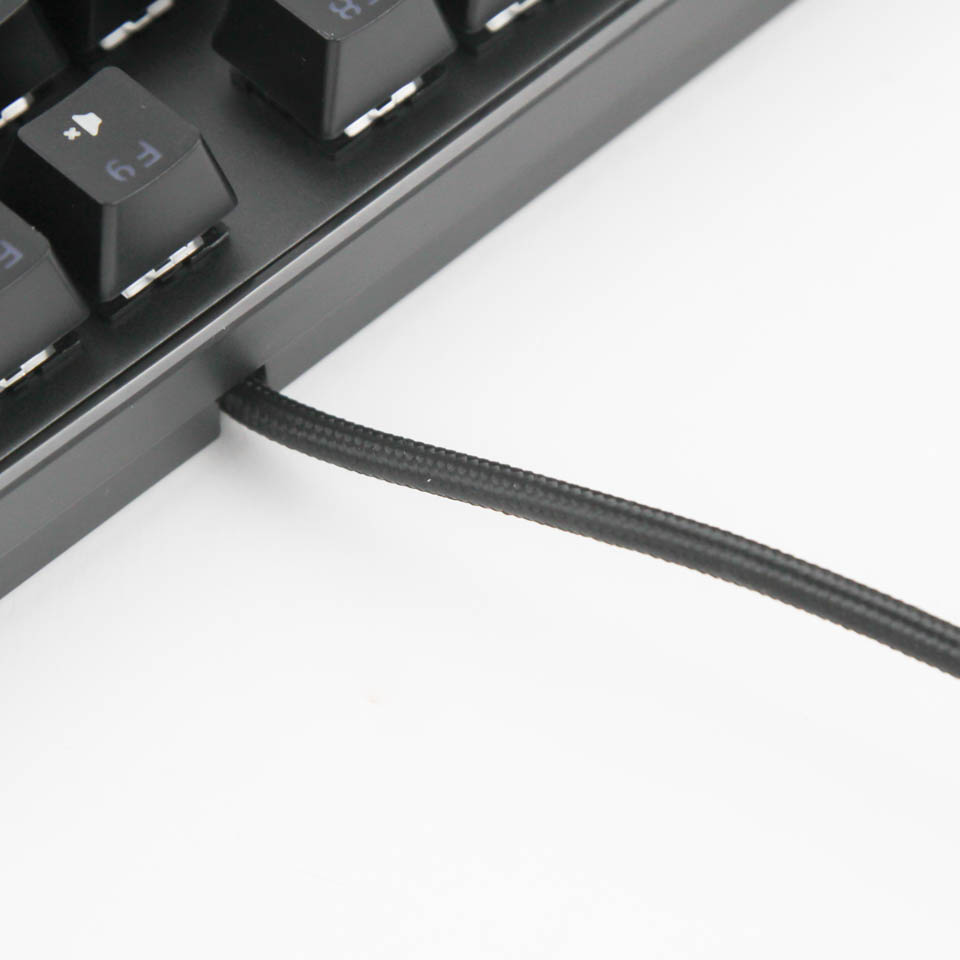
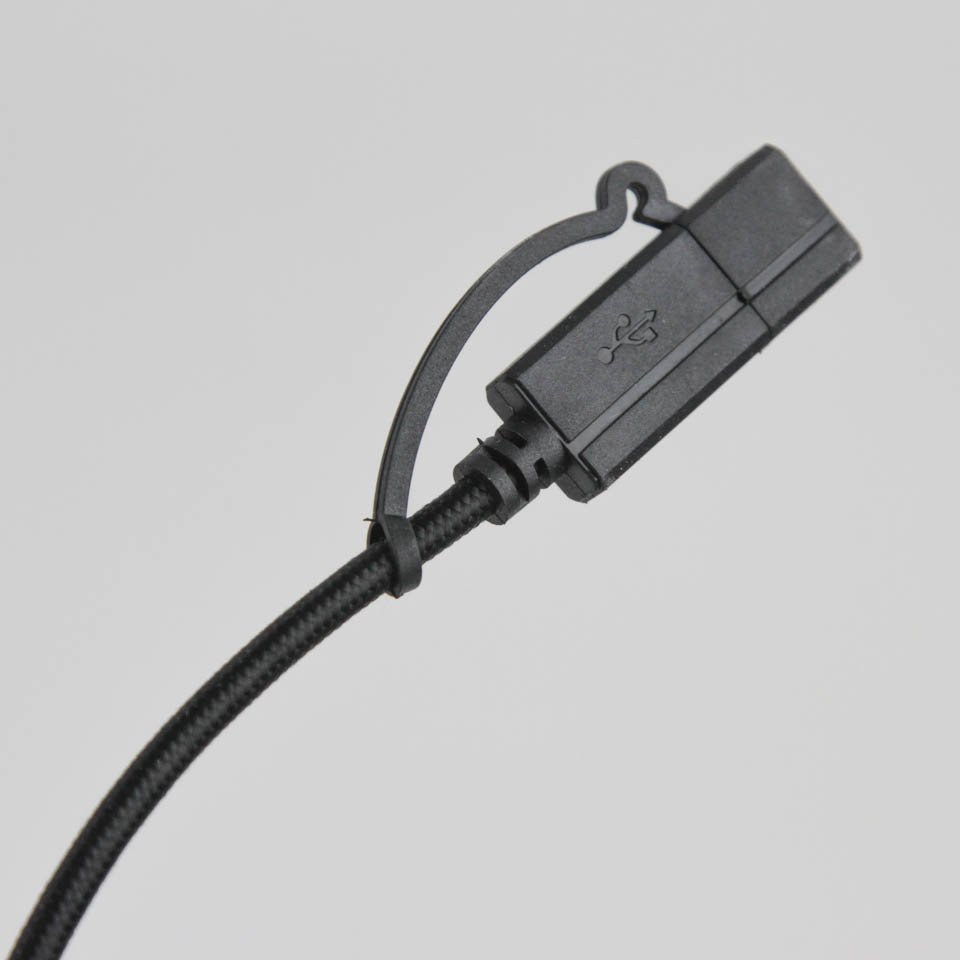
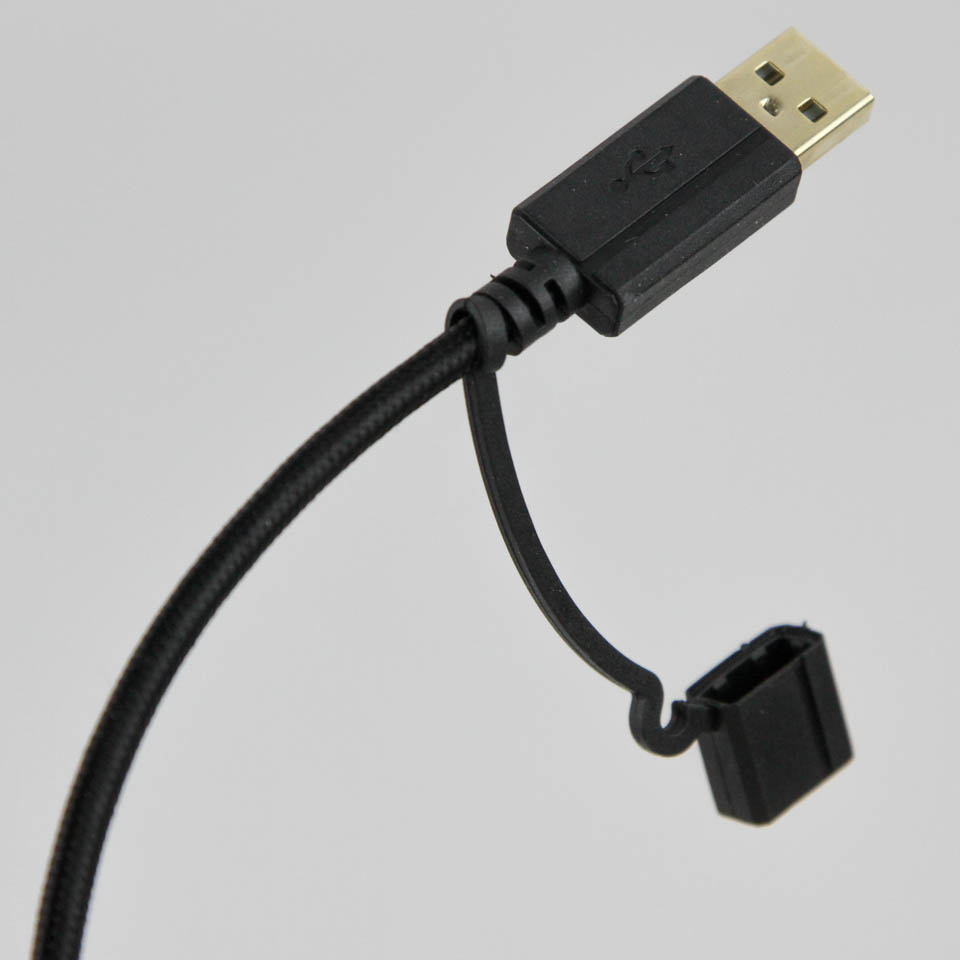
The non-detachable cable juts out of the middle of the keyboard by default, but can be routed towards the left or right as seen above. It is sleeved well, completely black to match the rest of the keyboard, and terminates in a male USB Type-A connector. The connector is inside a large plastic housing for protection when not in use and gold-plated to add some oxidation resistance. USB 2.0 will suffice here for data and power alike, even with the RGB LEDs throughout, although there is really no lack of USB 3.1 Gen 1 (USB 3.0) ports these days.

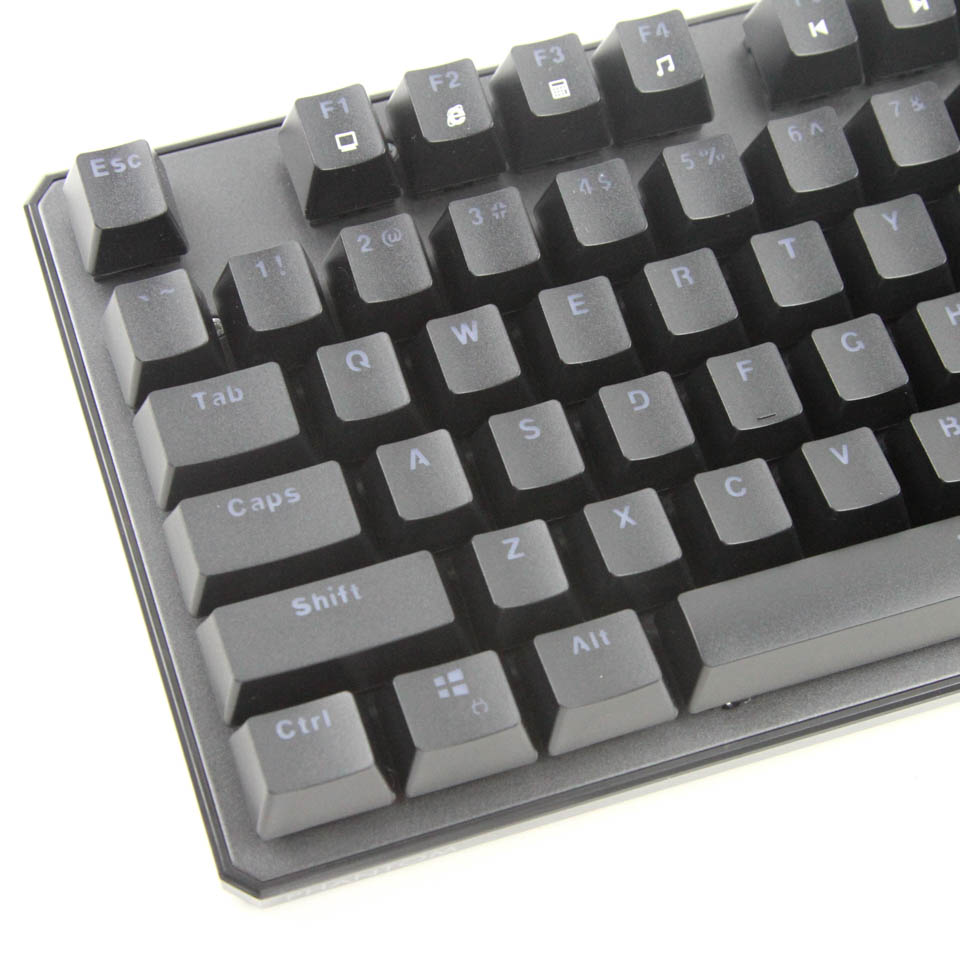
The keycaps have an OEM profile, and the various rows are thus sculpted accordingly. They have a floating design, which allows for easier cleaning, but causes more light bleed and may or may not be to your liking. The keycaps are better than average with relatively thick ABS plastic (average wall thickness of 1.24 mm) combined with doubleshot injected legends for most of them. It is not a perfect solution as far as stock keycaps go, however, with ABS plastic still developing a shine with use and all the keyboard-specific legends effectively pad printed in an opaque white that will not let light through. As expected, backlighting will be affected depending on where the legends are located. Third-party keycap compatibility is high owing to a "standard" bottom-row spacing, but you will lose out on keyboard-specific legends that help with onboard controls and functionality.

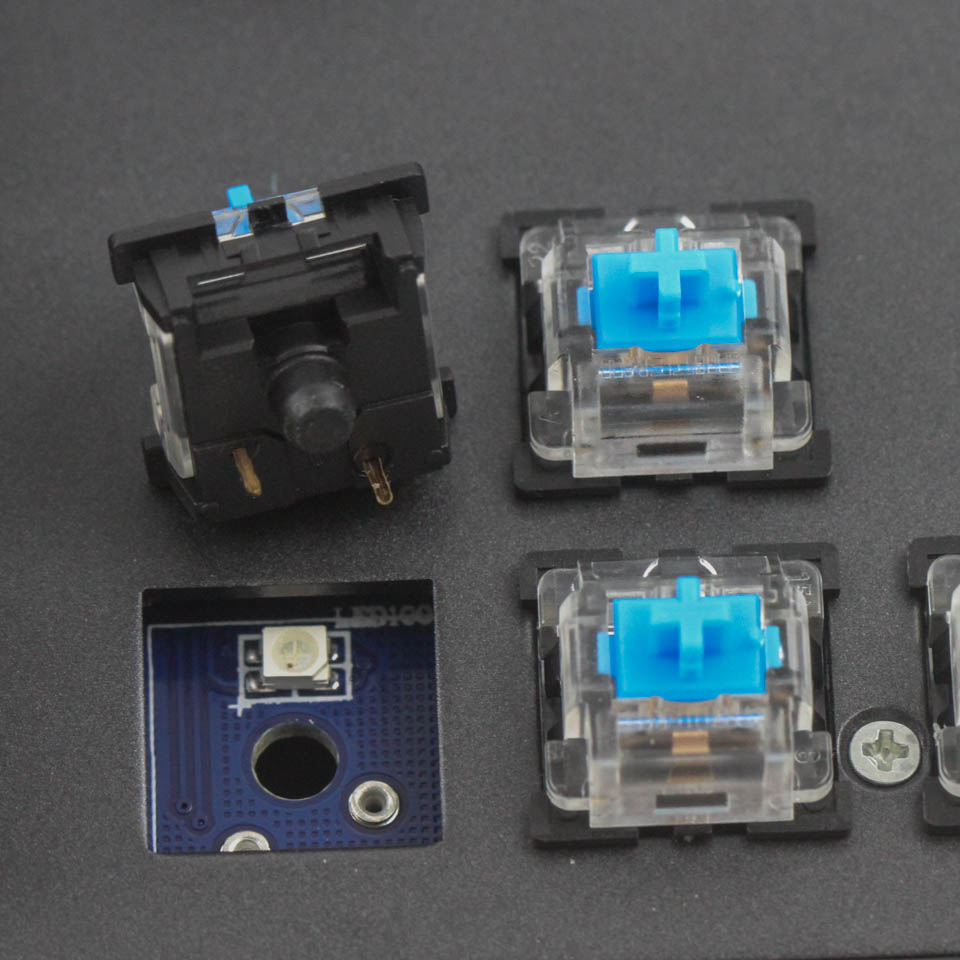
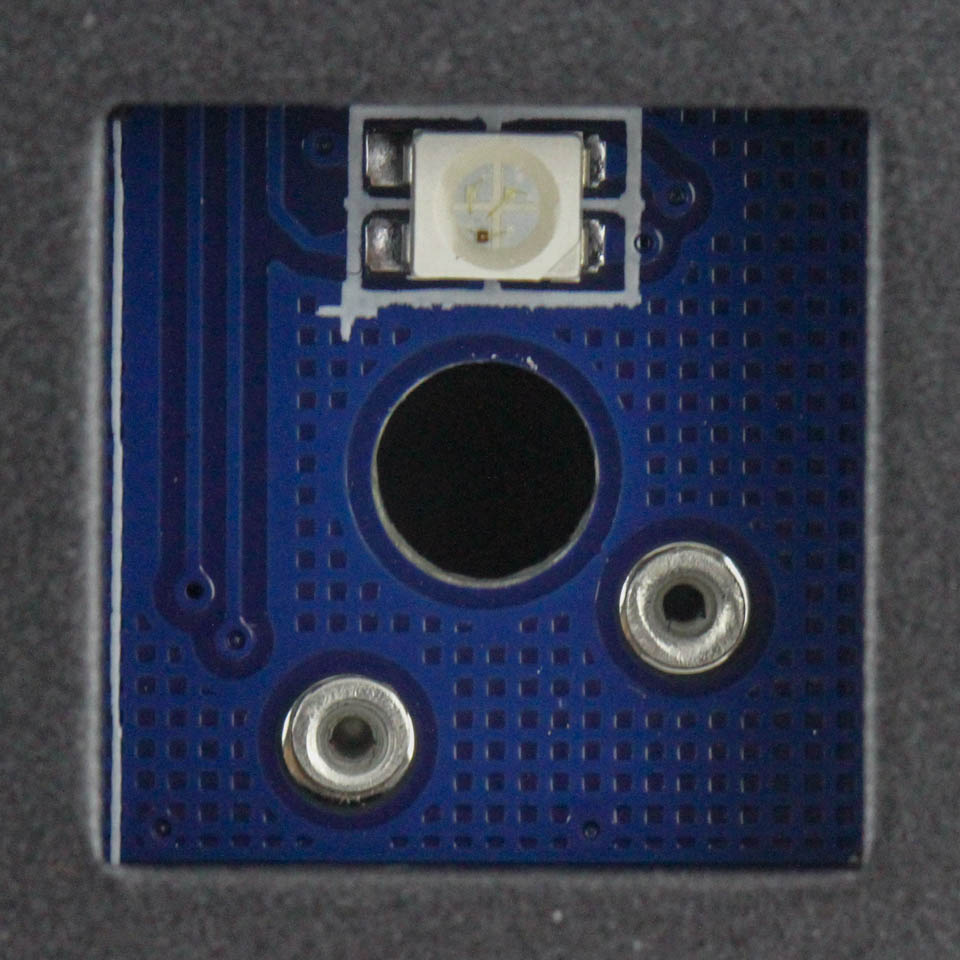
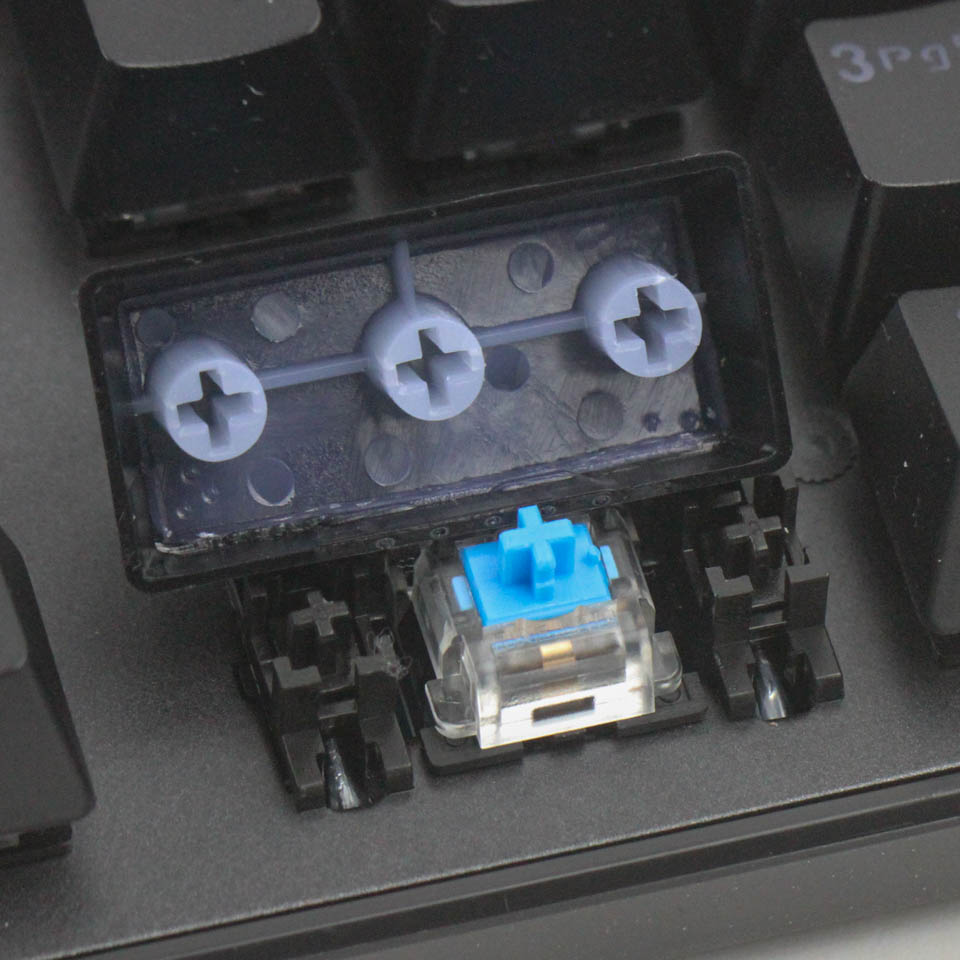
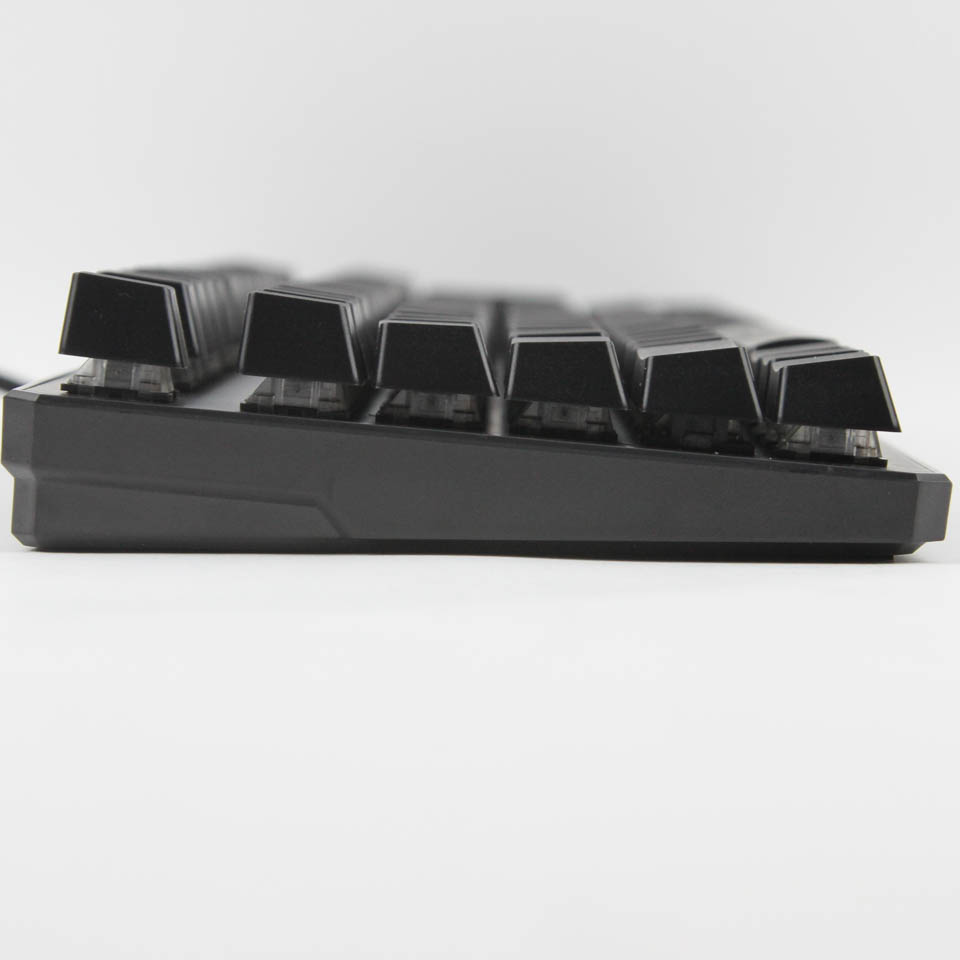
There are three Outemu RGB mechanical switch options here, and my sample came with the Outemu Blue RGB switches. Interestingly, these are without the small box walls around the stem that adds that extra little bit of dust and spill resistance. The LEDs are visible through a clear section in the switch housing, which results in some diffusion of the lighting at the expense of maximum brightness. The CIY switch design is handy for when you want to easily replace switches with other compatible ones, including the four replacement switches included with the keyboard. The switch puller works well enough, and be sure to hook it into the notches and pull while wiggling from side to side to prevent any damage to the switch or keyboard PCB. With the switch removed, we can see the pad contacts on the PCB as well the RGB LED. This mechanism allows for hot-swapping switches, as well as a more customized keyboard for those wanting to use a mixture of different switches in specific areas. The larger keycaps use Cherry-style stabilizers, which makes those keycaps easier to remove and install as well, but at the expense of a slightly mushy and unsatisfying feeling when depressed normally.
Jul 3rd, 2025 22:02 CDT
change timezone
Latest GPU Drivers
New Forum Posts
- GPU-Z Display Bug via DP 2.1? (5)
- [GPU-Z Test Build] New Kernel Driver, Everyone: Please Test (35)
- What Windows is overall the best to you and why? (269)
- How do you view TPU & the internet in general? (With poll) (58)
- HP Zbook 15 G2 GPU Upgrade (12)
- Will you buy a RTX 5090? (610)
- What phone you use as your daily driver? And, a discussion of them. (1756)
- What would you buy? (51)
- A Final Fantasy IX Reminiscence - My love letter and homage to one of the best stories ever told (90)
- GravityMark v1.89 GPU Benchmark (309)
Popular Reviews
- ASUS ROG Crosshair X870E Extreme Review
- Crucial T710 2 TB Review - Record-Breaking Gen 5
- Fractal Design Scape Review - Debut Done Right
- PowerColor ALPHYN AM10 Review
- Sapphire Radeon RX 9060 XT Pulse OC 16 GB Review - An Excellent Choice
- Upcoming Hardware Launches 2025 (Updated May 2025)
- AMD Ryzen 7 9800X3D Review - The Best Gaming Processor
- Sapphire Radeon RX 9070 XT Nitro+ Review - Beating NVIDIA
- SCHENKER KEY 18 Pro (E25) Review - Top-Tier Contender
- AVerMedia CamStream 4K Review
TPU on YouTube
Controversial News Posts
- Intel's Core Ultra 7 265K and 265KF CPUs Dip Below $250 (288)
- NVIDIA Grabs Market Share, AMD Loses Ground, and Intel Disappears in Latest dGPU Update (212)
- Some Intel Nova Lake CPUs Rumored to Challenge AMD's 3D V-Cache in Desktop Gaming (140)
- NVIDIA GeForce RTX 5080 SUPER Could Feature 24 GB Memory, Increased Power Limits (115)
- Microsoft Partners with AMD for Next-gen Xbox Hardware (105)
- NVIDIA Launches GeForce RTX 5050 for Desktops and Laptops, Starts at $249 (105)
- Intel "Nova Lake‑S" Series: Seven SKUs, Up to 52 Cores and 150 W TDP (100)
- NVIDIA DLSS Transformer Cuts VRAM Usage by 20% (97)