 12
12
ViewSonic ELITE XG240R 144 Hz FreeSync Monitor Review
Picture Quality, Uniformity & Calibration »Controls and OSD


Oh dear, the controls. This aspect of the ViewSonic XG240R is downright bad, and that's putting it mildly. To navigate through the OSD, you have to use a set of five buttons positioned below the bottom-right side of the panel frame. The buttons are quite hard to press, to where the hard plastic will hurt your fingers. Their corresponding functions show up on the screen once you press them, which is nice, but the overall user experience is still very unpleasant. The OSD isn't organized intuitively. For example, there's no way to access the brightness slider quickly. It's not even located on the first page of the OSD, like it should be. To reach it, you'll have to slide over to the Display menu, confirm your selection, scroll down to Image Adjust, confirm that, go down to Brightness and confirm that, too—only then will you be able to actually change the brightness of the screen. That's eight painful clicks, both literally and metaphorically, to reach something as basic as the brightness slider. I don't know what they were thinking, but I know for a fact that ViewSonic can do a much better job with monitor controls and the general OSD layout as those are aspects I actually like on many of their other models.
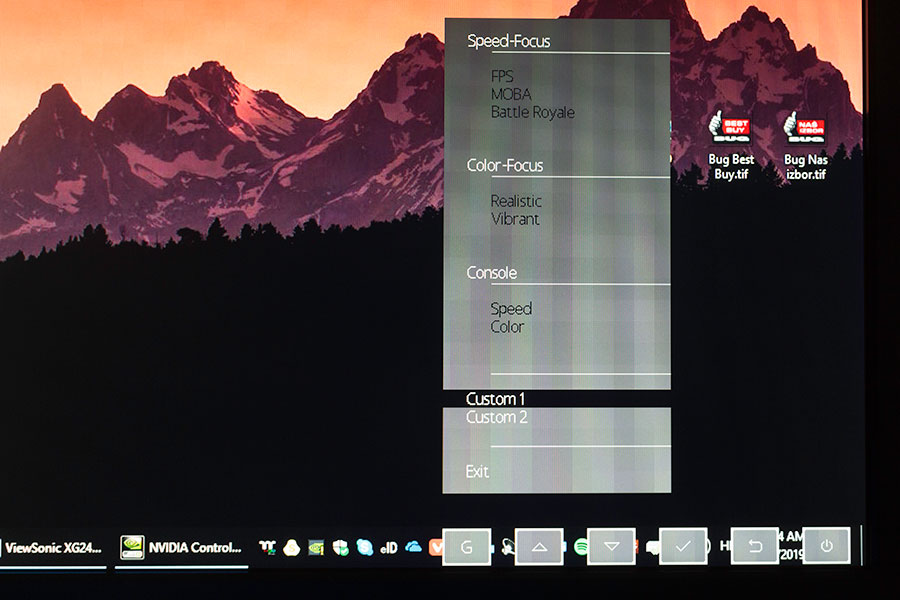
The only quick menu is accessed by pressing the button with a "G" above it. Here, we can quickly switch between various gaming profiles split into several categories—Speed-Focus, Color-Focus, Console, and Custom1/Custom2. Out of the box, the monitor is set to the FPS profile in the Speed-Focus category.
The first OSD menu is Gaming Settings. Here, we can configure two custom color profiles by manually adjusting the brightness, contrast, saturation, gamma, overdrive, black stabilization, and similar picture-related options. It's also possible to limit the refresh rate for both custom profiles (60, 100, or 144 Hz), toggle the Blue Light Filter on and off, and rename the profiles to make them more distinguishable. The existence of those custom profiles is nice and should be a standard for any monitor, gaming or otherwise. The Gaming Settings menu also lets us limit the refresh rate for all profiles, as well as turn AMD FreeSync on and off. It's off by default, so you should definitely change that regardless of your graphics card assuming you want to use the adaptive synchronization to get the smoothest-possible gaming performance.
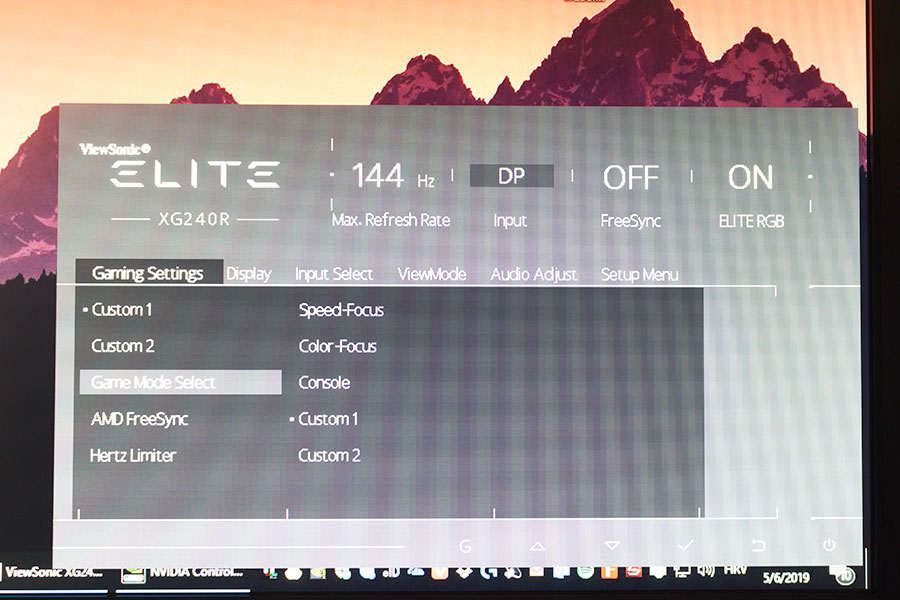
The Display menu is where you can adjust everything related to the picture quality. The Color Temperature sub-menu lets us choose a descriptive color value (Bluish, Cool, Native, Warm) or adjust the R, G and B channel gains manually (Full Color Control). The Color Adjust sub-menu is where you can change the gamma (1.8–2.8 in 0.2 increments), saturation (0–100), black stabilization (0–22), color space (RGB or YUV), and color range (auto, full, or limited). Finally, in the Image Adjust sub-menu, we can select the ViewScale (Full, Aspect, 1:1, 4:3, 16:10, 16:9), contrast (0–100), brightness (0–100), sharpness (0–100), and Blue Light Filter (0–100).
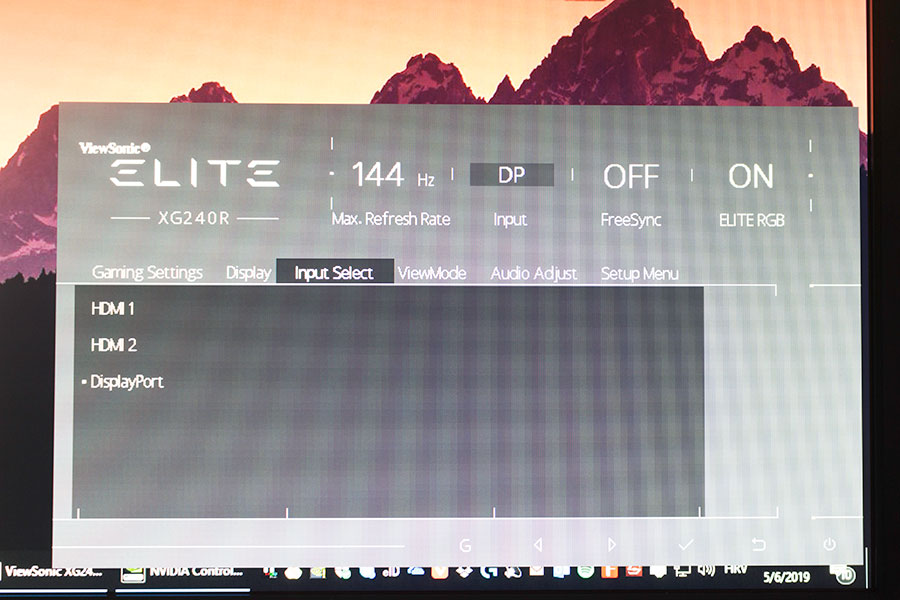
The Input Select menu let's us switch between three available video inputs—HDMI 1, HDMI 2, and DisplayPort.
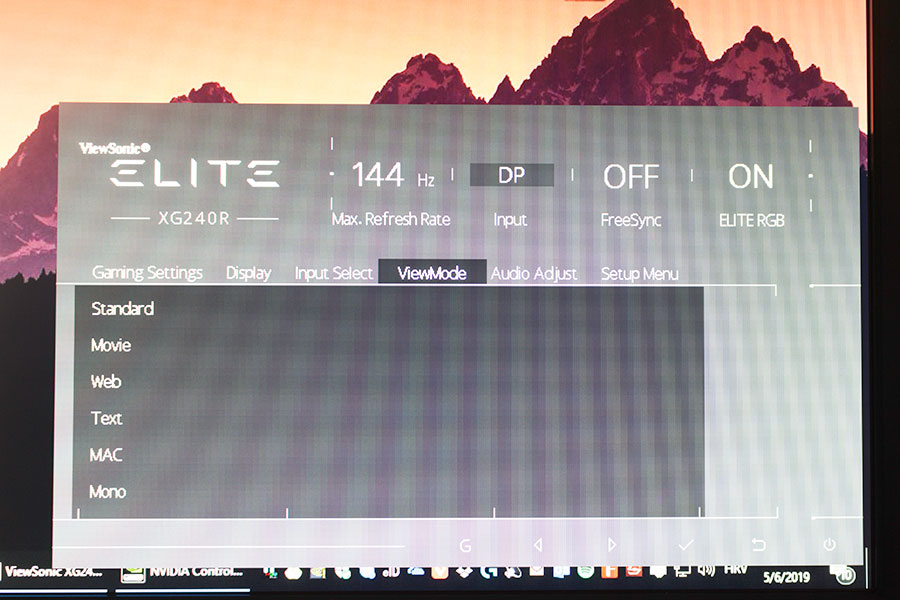
The ViewMode menu contains six picture profiles—Standard, Movie, Web, Text, MAC, and Mono. Those aren't to be confused with the gaming profiles available through the quick menu, although both the ViewMode and gaming profiles will enforce their own combination of monitor settings and basically override each other.
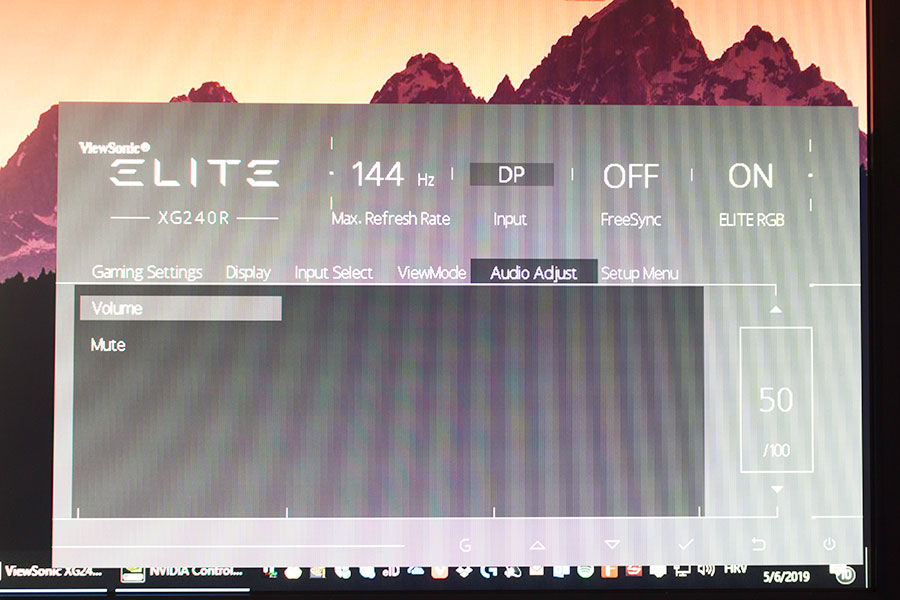
In the Audio Adjust menu, we can adjust the volume of the built-in stereo speakers as well as mute them.
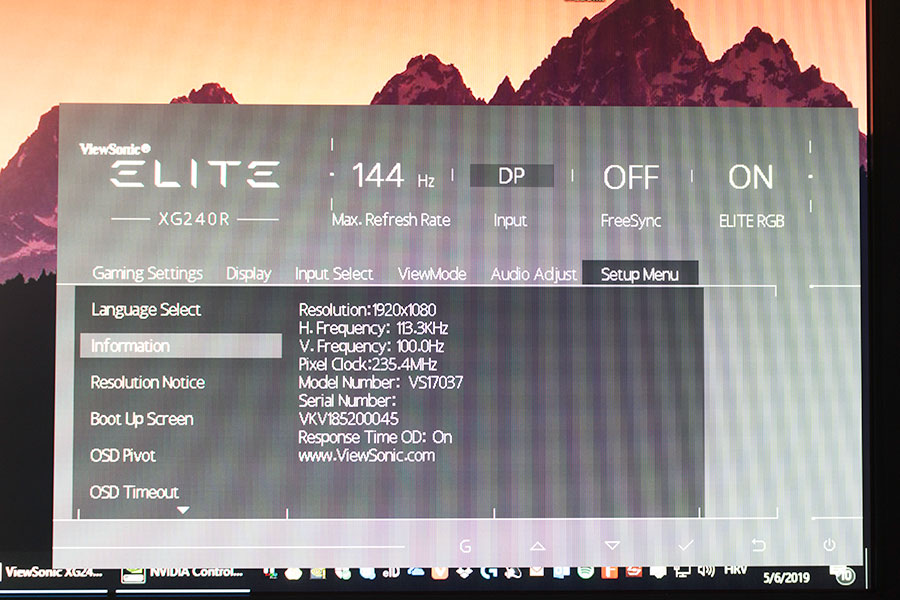
The Setup menu is where we can change the OSD language, turn off its transparency and adjust its timeout, get some basic info about the monitor (resolution, refresh rate, pixel clock, serial number, etc.), turn the power LED on and off, activate automatic sleep mode, as well as ECO mode (Standard, Optimize, and Conserve—it basically limits the power of the backlight), turn the rear RGB LED strips on and off, and completely reset the OSD settings.
Jul 10th, 2025 02:48 CDT
change timezone
Latest GPU Drivers
New Forum Posts
- Do you still use Antivirus software on your latest hardware? (75)
- Screen burn-in (21)
- TPU's Nostalgic Hardware Club (20493)
- 3DMARK "LEGENDARY" (326)
- Post Your TIMESPY, PCMARK10 & FIRESTRIKE SCORES! (2019) (321)
- 5070ti overclock...what are your settings? (47)
- 'NVIDIA App' not usable offline? (1)
- G-Sync Not Working in Borderless / Window Mode - Windows 11 (5)
- [GPU-Z Test Build] New Kernel Driver, Everyone: Please Test (78)
- Friend's monitor randomly loses signal (3)
Popular Reviews
- NZXT N9 X870E Review
- NVIDIA GeForce RTX 5050 8 GB Review
- Fractal Design Epoch RGB TG Review
- Corsair FRAME 5000D RS Review
- Fractal Design Scape Review - Debut Done Right
- AMD Ryzen 7 9800X3D Review - The Best Gaming Processor
- Sapphire Radeon RX 9060 XT Pulse OC 16 GB Review - An Excellent Choice
- Upcoming Hardware Launches 2025 (Updated May 2025)
- Sapphire Radeon RX 9070 XT Nitro+ Review - Beating NVIDIA
- PowerColor ALPHYN AM10 Review
TPU on YouTube
Controversial News Posts
- Intel's Core Ultra 7 265K and 265KF CPUs Dip Below $250 (288)
- Some Intel Nova Lake CPUs Rumored to Challenge AMD's 3D V-Cache in Desktop Gaming (140)
- NVIDIA Launches GeForce RTX 5050 for Desktops and Laptops, Starts at $249 (117)
- AMD Radeon RX 9070 XT Gains 9% Performance at 1440p with Latest Driver, Beats RTX 5070 Ti (116)
- NVIDIA GeForce RTX 5080 SUPER Could Feature 24 GB Memory, Increased Power Limits (115)
- Microsoft Partners with AMD for Next-gen Xbox Hardware (105)
- Intel "Nova Lake‑S" Series: Seven SKUs, Up to 52 Cores and 150 W TDP (100)
- NVIDIA DLSS Transformer Cuts VRAM Usage by 20% (97)