 13
13
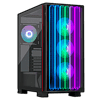
Yeyian Mirage X Review
Review System Setup »A Closer Look - Inside
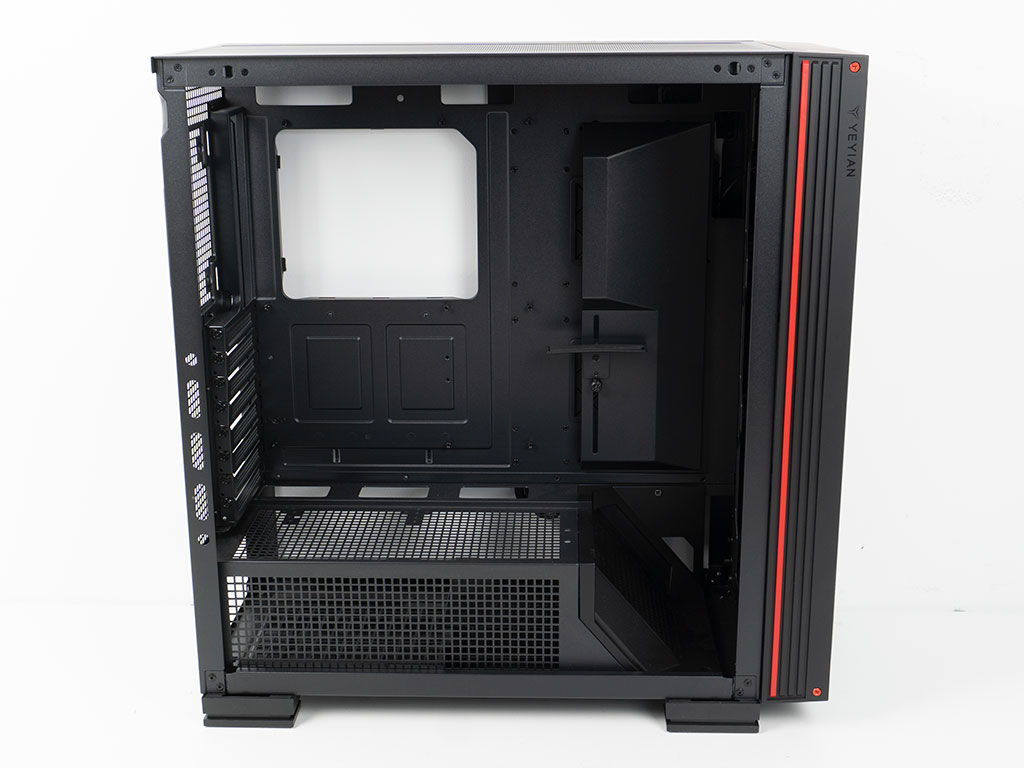

With the side panels removed, the interior of the Yeyian Mirage X provides the traditional modern layout we have come to expect from a tower enclosure. That said, there are plenty of unique details starting with the shroud. It is completely perforated and can hold two 120 mm fans. Alternatively, there are mounting holes for a vertical GPU mounting system. The cable routing holes are raised on a ledge slightly, which is a nice touch as well, but we would have loved to see grommets on these, just to keep things as tidy as possible. Yeyian has also designed an angled component on the forward facing component of the shroud, which is perforated.
On the opposite side you will find a metal cover with hinges, to help with containing any cable mess you may have. This is a nice touch, but with the solid side panel, it feels quite redundant.
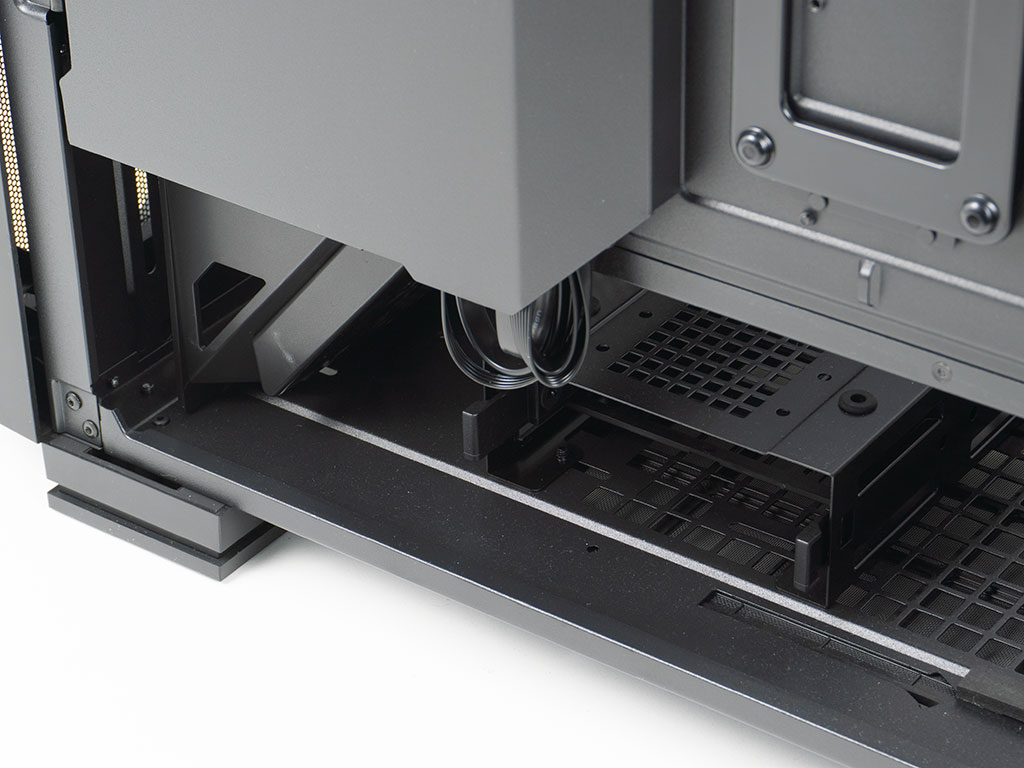

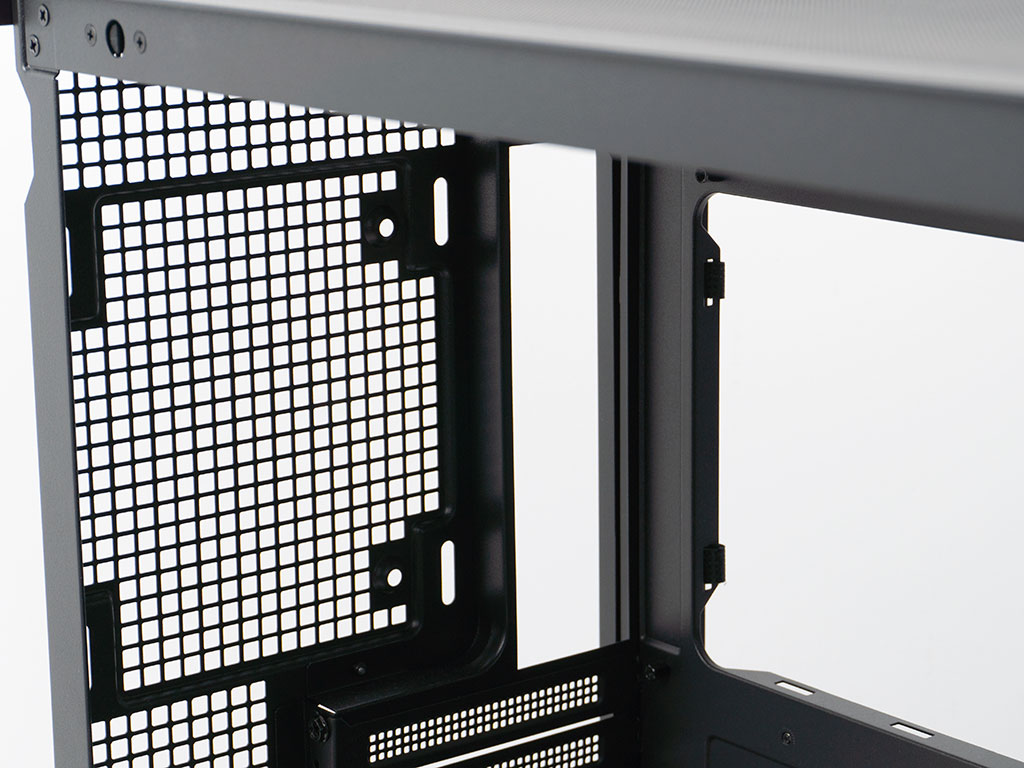
Underneath the shroud, you will find a 3.5" cage with a singular tray. Yeyian mentions that the Mirage X can hold one such drive, but if you look closely, there are rubber rings on top of the cage which will allow you to install a second drive as part of a more permanent setup. Above that is the bare opening for the intake fans or a radiator of up to 420 mm size.
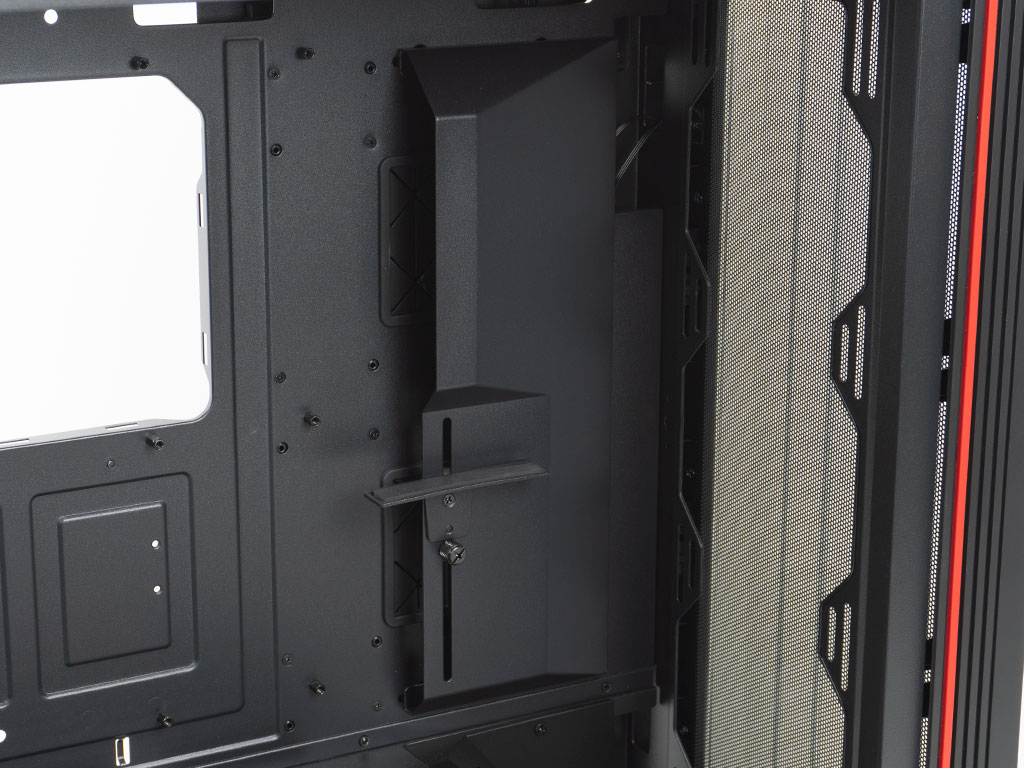
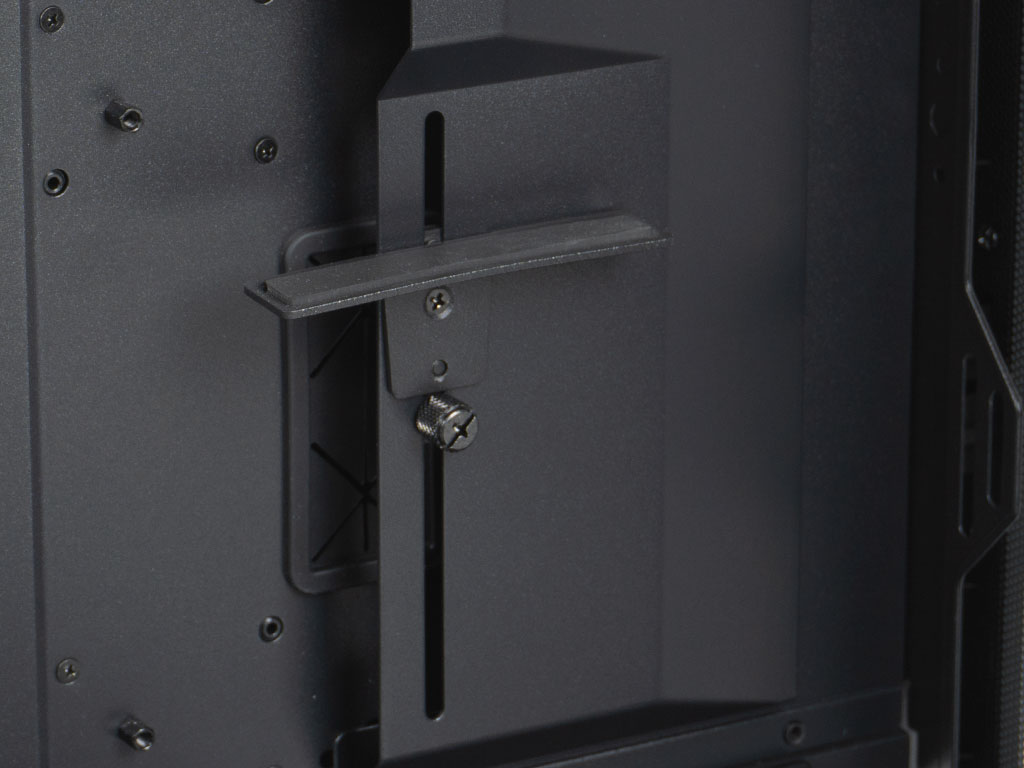
Inside the case, you will find another cover to minimize the amount of exposed cabling. It is shaped well to allow for bulkier leads to fit in the top half, while skinnier variants like those for fans or SATA connectivity can still be routed underneath the bottom section. Here, you will also find a simple but sturdy GPU support bracket. It is lined with a rubber layer as an anti-vibration measure. Being shaped the way it is, odds are it won't be interfering with any fans on the heatsink of your graphics card either.
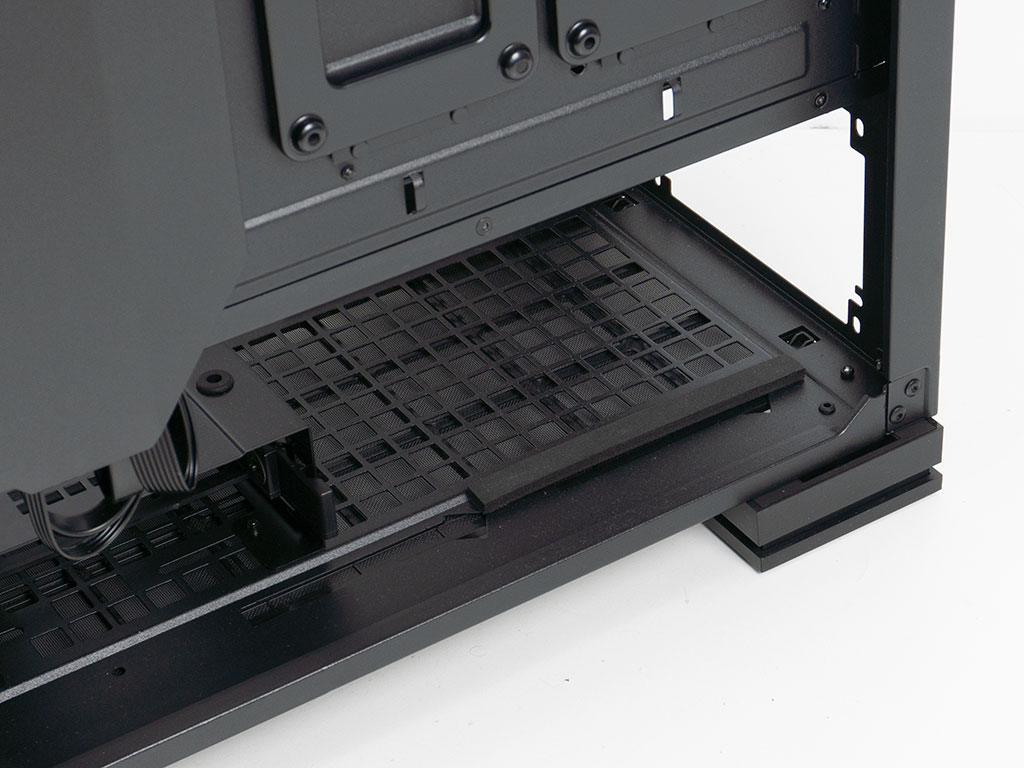
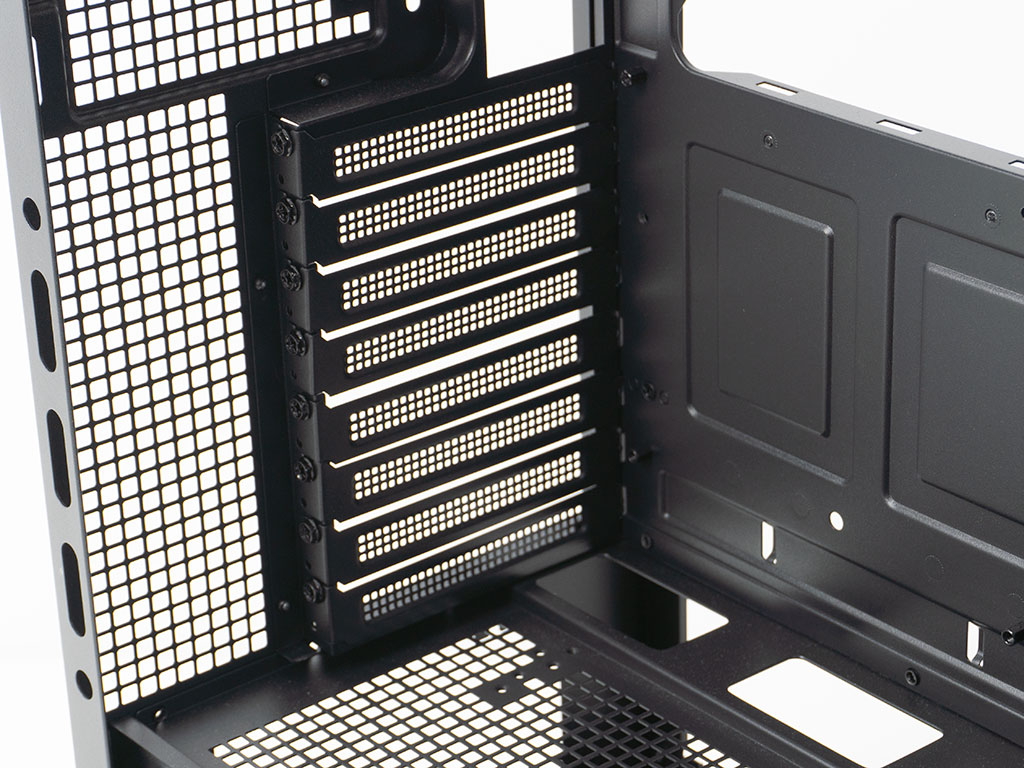
In the rear, once again under the shroud, the PSU bay uses foam strips for the unit to rest on. Above that, the eight covers for the expansion slots are held in place with classic screws which can be accessed through holes in the framing through which to slide the screwdriver. This is just fine, but having thumb screws here instead would have been a welcome sight. In the very top there is that aforementioned fan placement possibility, with plenty of clearance above it for anything you may install in the ceiling of the Mirage X.
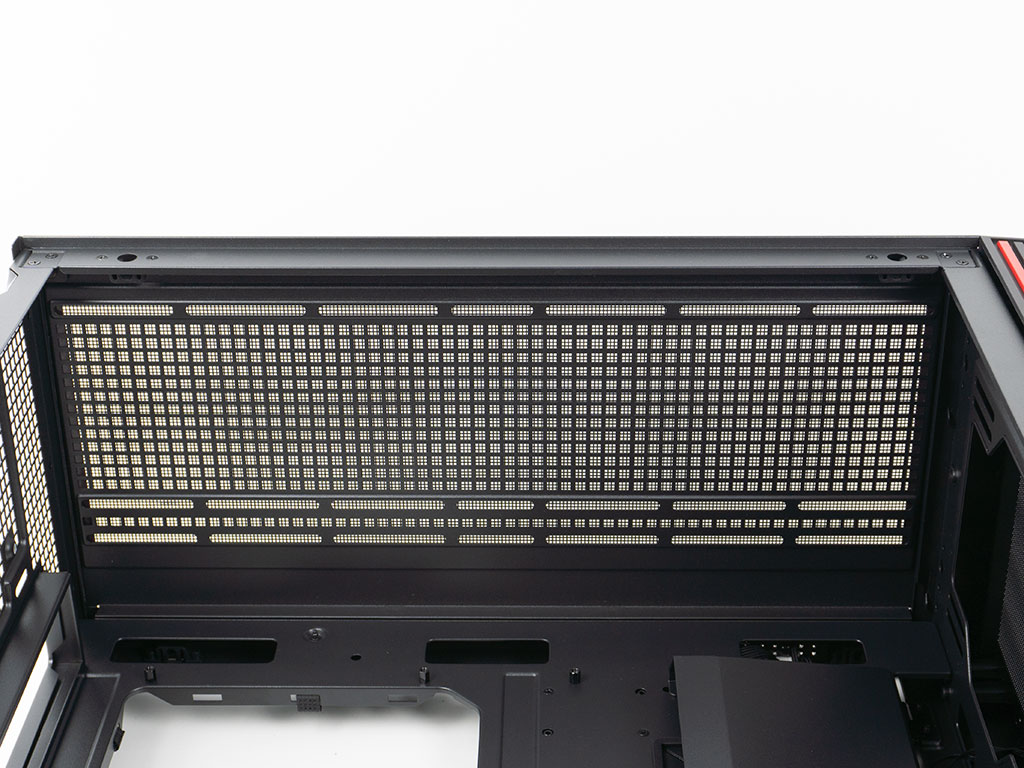
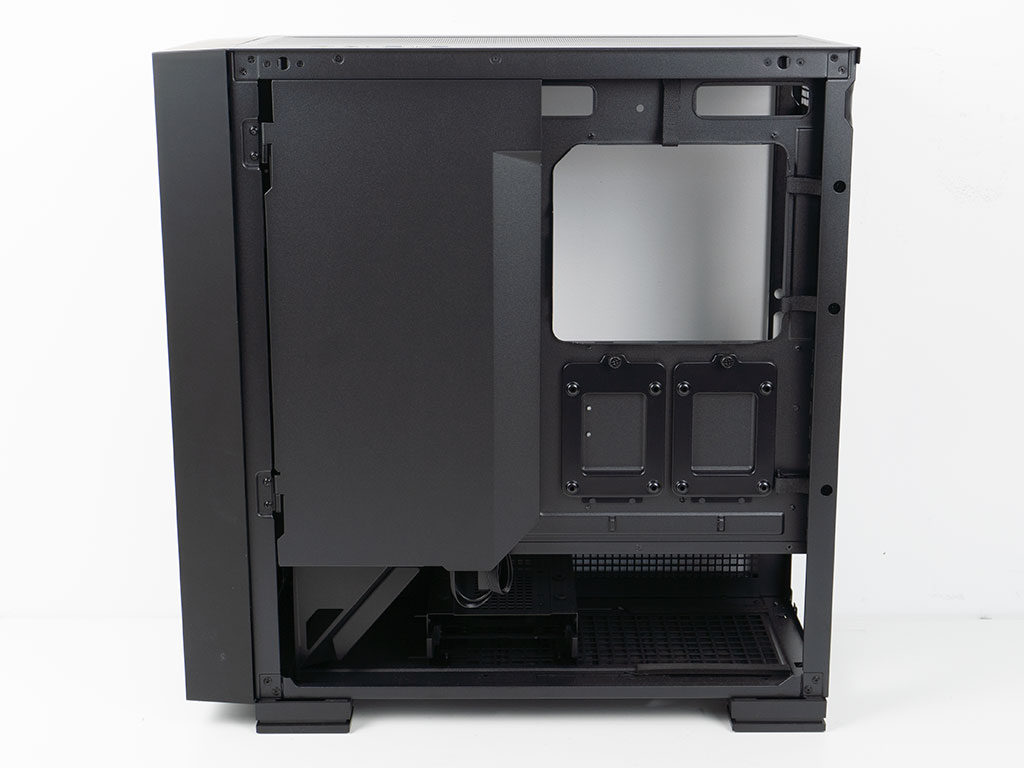
Speaking of ceiling, the one in this case is 100% utilized for cooling purposes. As such three 140 mm fans will fill out the entire surface area, which is also the reason why a 420 mm radiator with its stubs at either end would not fit. Thus, you are limited to a 360 mm variant in this part of the enclosure. That also goes well as it also means that you could combine that with a larger 420 mm radiator in the front at the same time.
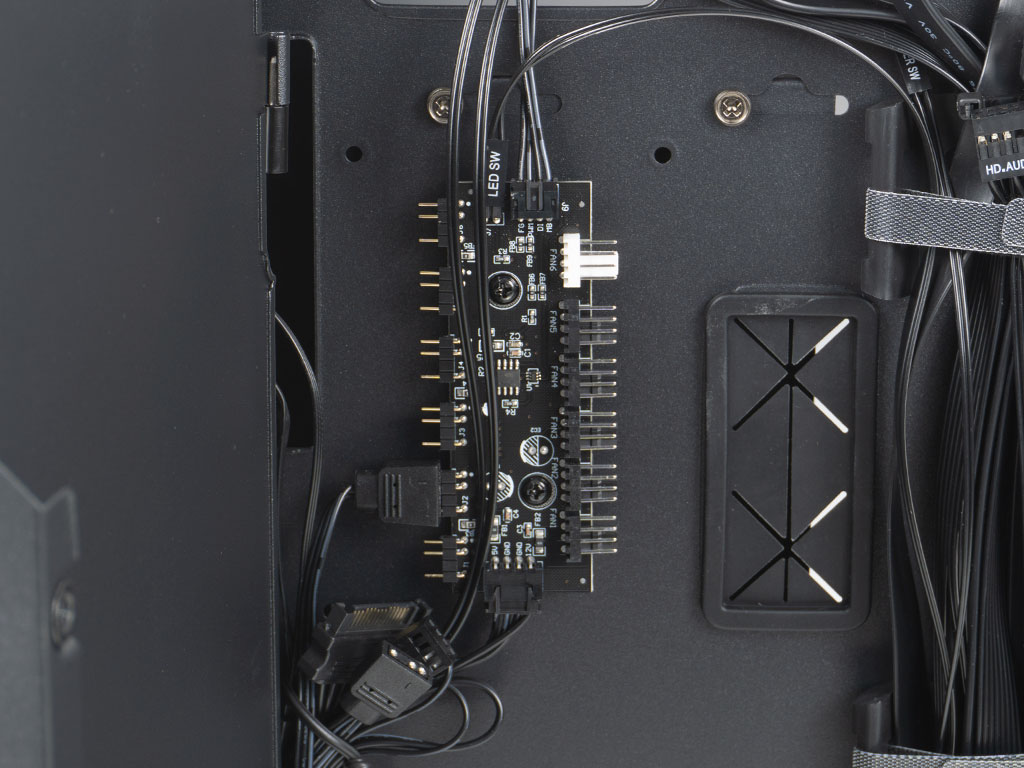
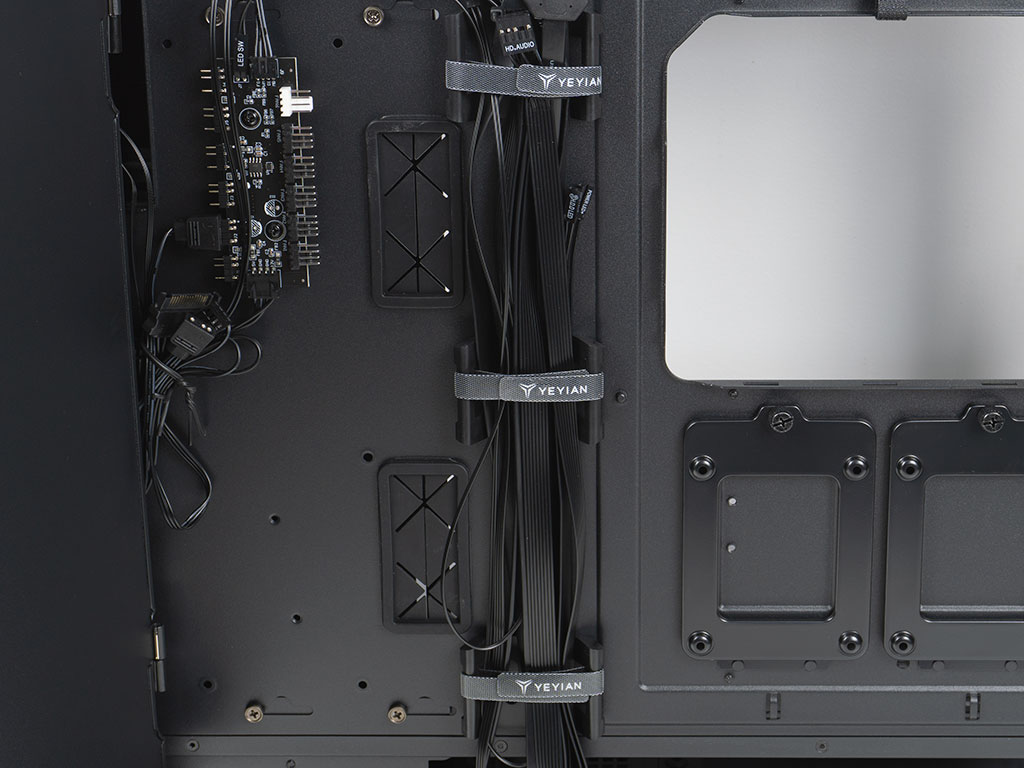
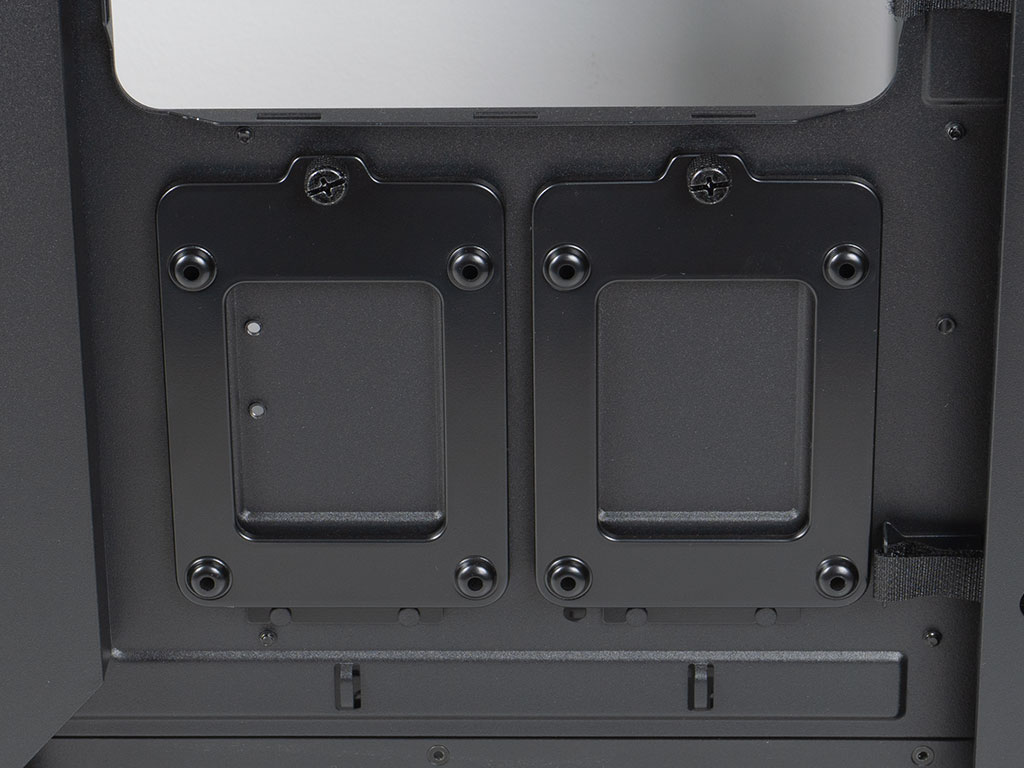
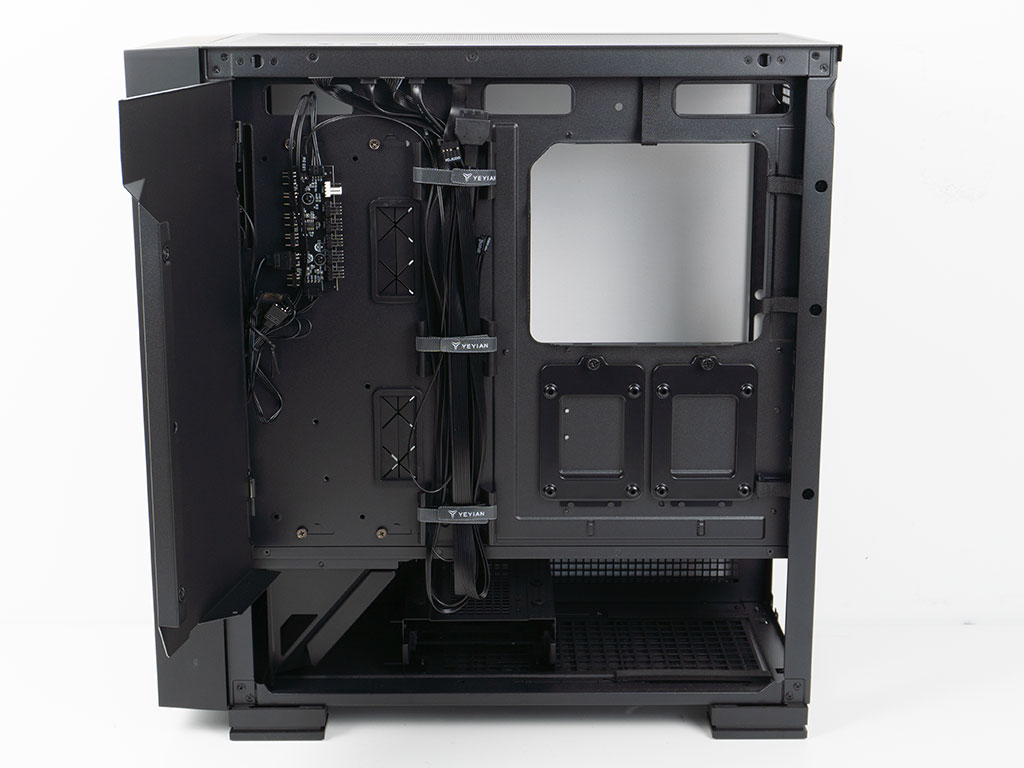
The controller is located in the top left corner, nicely out of the way of any potential cable routing. It features six PWM and the same number of ARGB headers. The white header is used to report back the PWM pulse to the motherboard header, dictating what the rest of the connected fans run at, so it is important to have that port used. Looking at the Velcro setup, there are three at the center of the motherboard tray, but Yeyian has also lined the top and right edges with Velcro straps, so there is really no need for any zip ties and as such, the Mirage X doesn't offer a lot of hooks to use for those type of fasteners either. Under the opening for the CPU cooler backplate, you will find two individual trays for 2.5" drives as well.
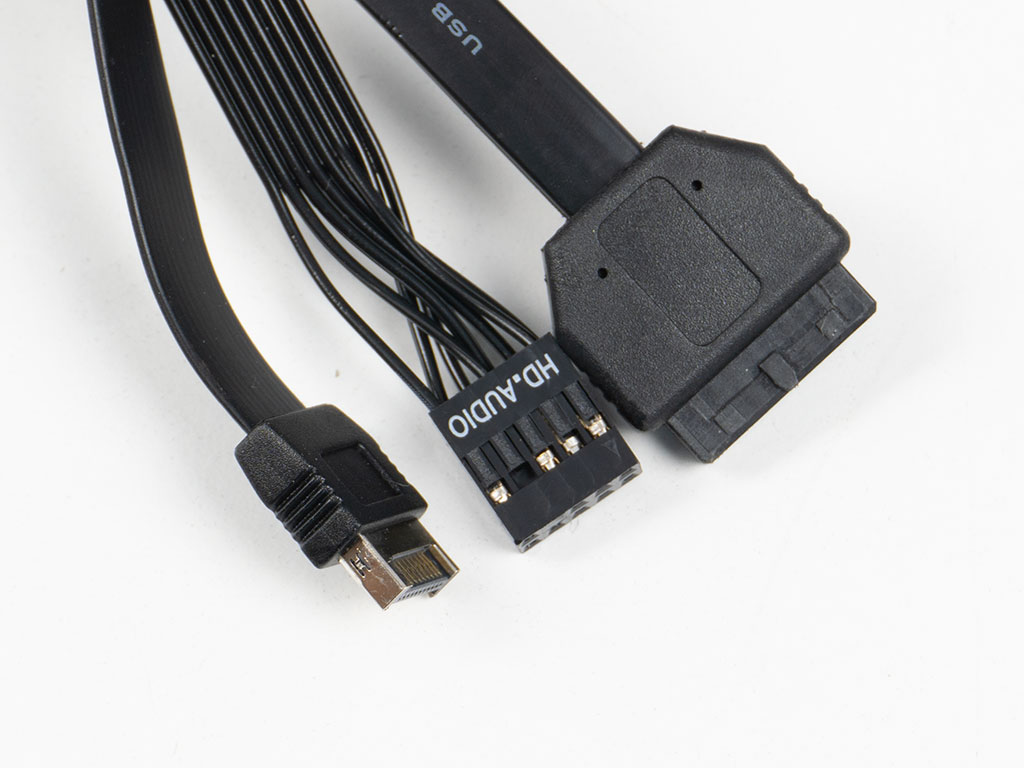

All the wiring within the Yeyian Mirage X is of the standard variety using black sleeving. A nice touch is the consistent use of flat-band cables, which makes cable routing these a little easier.
Jul 15th, 2025 16:16 CDT
change timezone
Latest GPU Drivers
New Forum Posts
- Stupid things one has done with hardware (65)
- No offense, here are some things that bother me about your understanding of fans. (144)
- RTX 5070 discussion (11)
- I would give anything for Valve's Steam to have an option to disable the Big Picture Mode button. How many times have I accidently clicked it, fml (52)
- Choosing the right motherboard (6)
- Solidigm NVMe Custom Modded Driver for All NVMe Brands SSDs & Any NVMe SSDs (229)
- Recommend me a decent budget card :) (33)
- What's your latest tech purchase? (24278)
- TOS 6 on Ugreen NAS (0)
- Folding Pie and Milestones!! (9620)
Popular Reviews
- MSI GeForce RTX 5060 Gaming OC Review
- Our Visit to the Hunter Super Computer
- Lexar NM1090 Pro 4 TB Review
- SilverStone SETA H2 Review
- NVIDIA GeForce RTX 5050 8 GB Review
- Fractal Design Epoch RGB TG Review
- Sapphire Radeon RX 9060 XT Pulse OC 16 GB Review - An Excellent Choice
- AMD Ryzen 7 9800X3D Review - The Best Gaming Processor
- Upcoming Hardware Launches 2025 (Updated May 2025)
- Corsair FRAME 5000D RS Review
TPU on YouTube
Controversial News Posts
- Intel's Core Ultra 7 265K and 265KF CPUs Dip Below $250 (288)
- Some Intel Nova Lake CPUs Rumored to Challenge AMD's 3D V-Cache in Desktop Gaming (140)
- AMD Radeon RX 9070 XT Gains 9% Performance at 1440p with Latest Driver, Beats RTX 5070 Ti (131)
- NVIDIA Launches GeForce RTX 5050 for Desktops and Laptops, Starts at $249 (122)
- NVIDIA GeForce RTX 5080 SUPER Could Feature 24 GB Memory, Increased Power Limits (115)
- Microsoft Partners with AMD for Next-gen Xbox Hardware (105)
- Intel "Nova Lake‑S" Series: Seven SKUs, Up to 52 Cores and 150 W TDP (100)
- NVIDIA DLSS Transformer Cuts VRAM Usage by 20% (99)