 5
5
Antec Draco 10 Review
Assembly & Finished Looks »A Closer Look - Inside
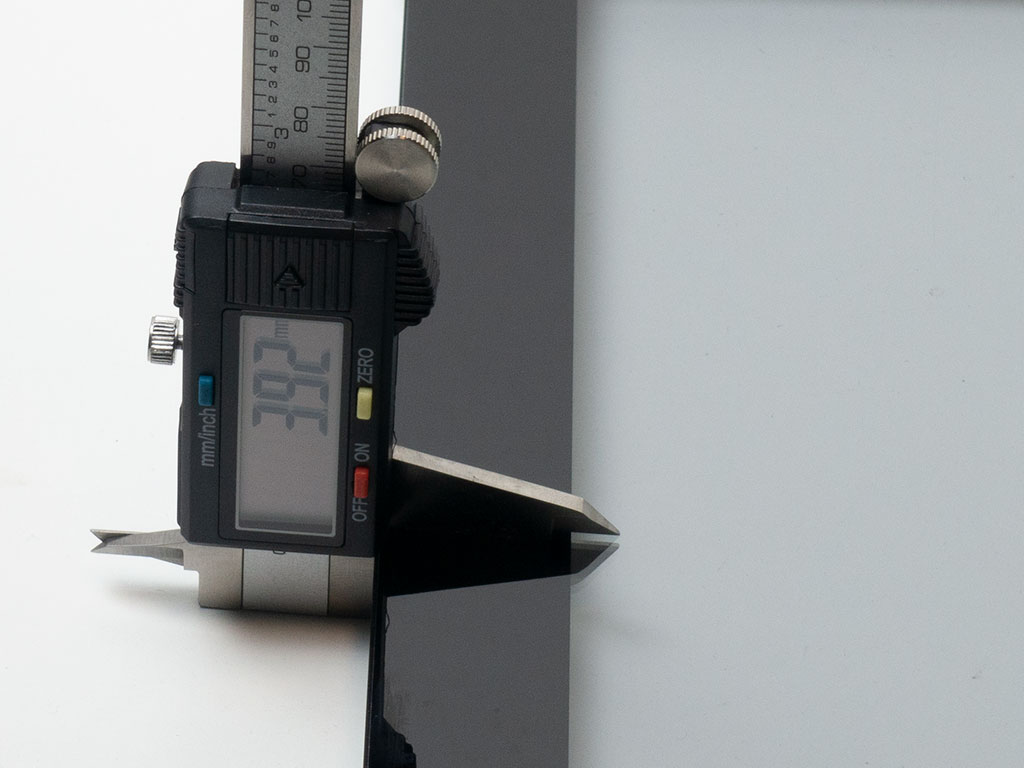
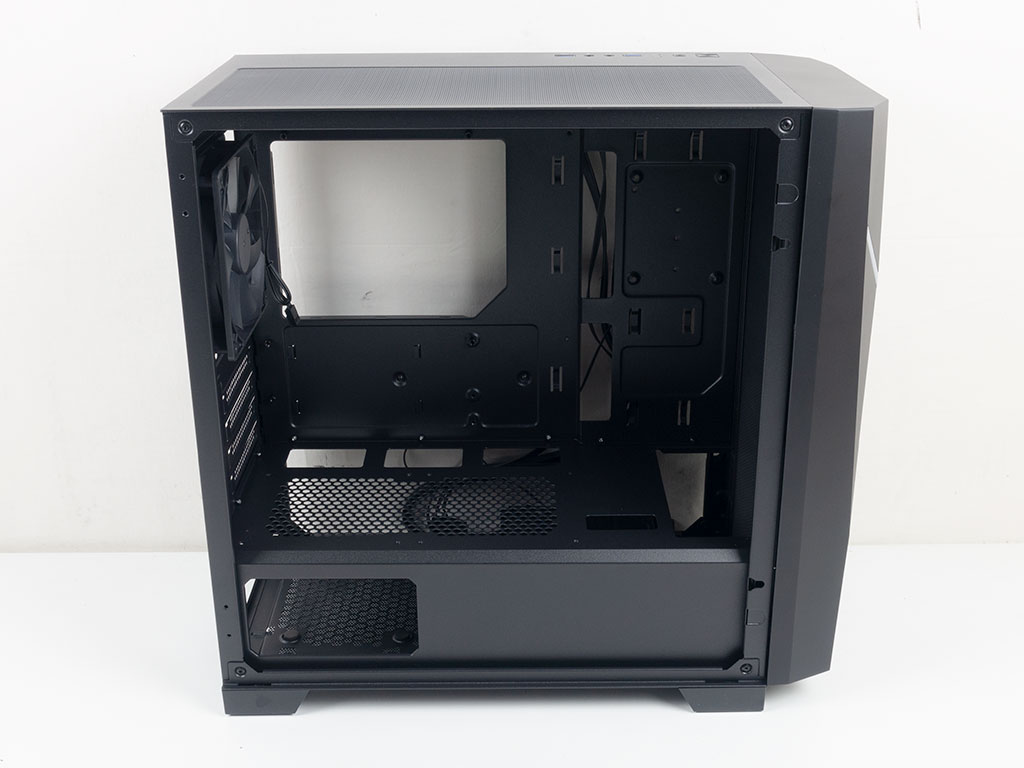
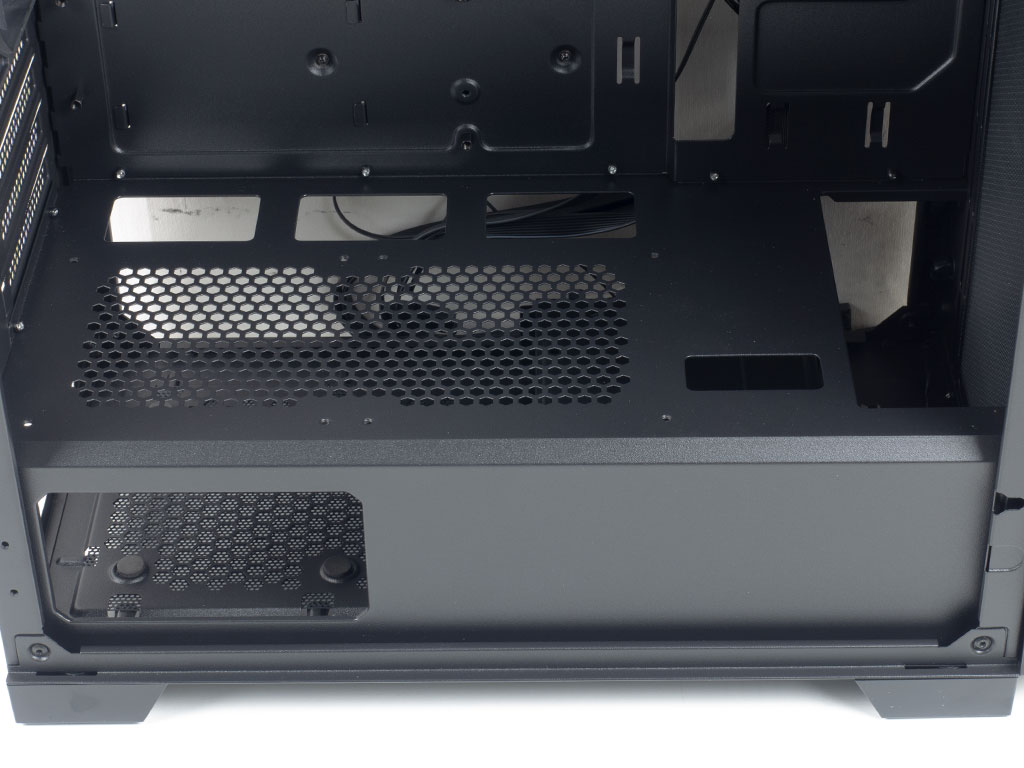
Before diving into the interior, a quick check of the glass panel reveals that it is 4 mm thick. With most brands going for 3 mm on entry and mainstream level cases, Antec opting for thicker, and thus sturdier, glass panels is nice to see. Looking at the inside of the Draco 10, it is essentially run of the mill for modern mATX cases, with a metal shroud covering the PSU and 3.5" drive bays. Interestingly enough, there are mounting holes for two 120 mm fans on the shroud, but Antec officially does not mention these in the specifications. Well-placed openings in the cover should make cable management pretty easy, with one specifically for routing PCIe power through on its own.
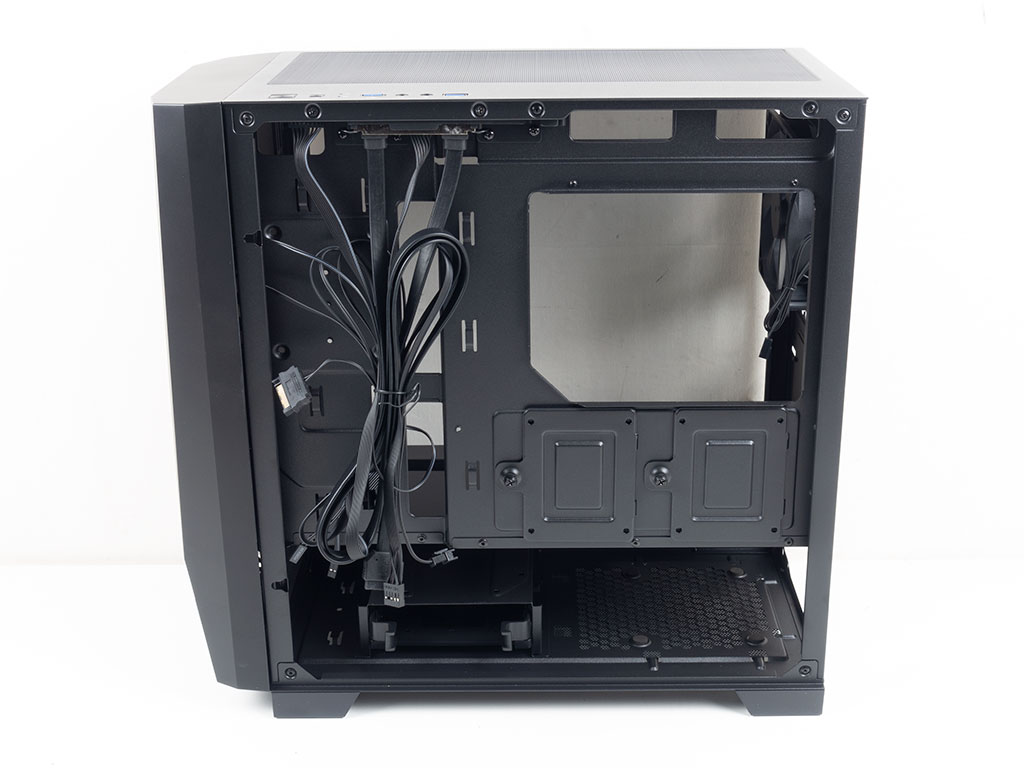
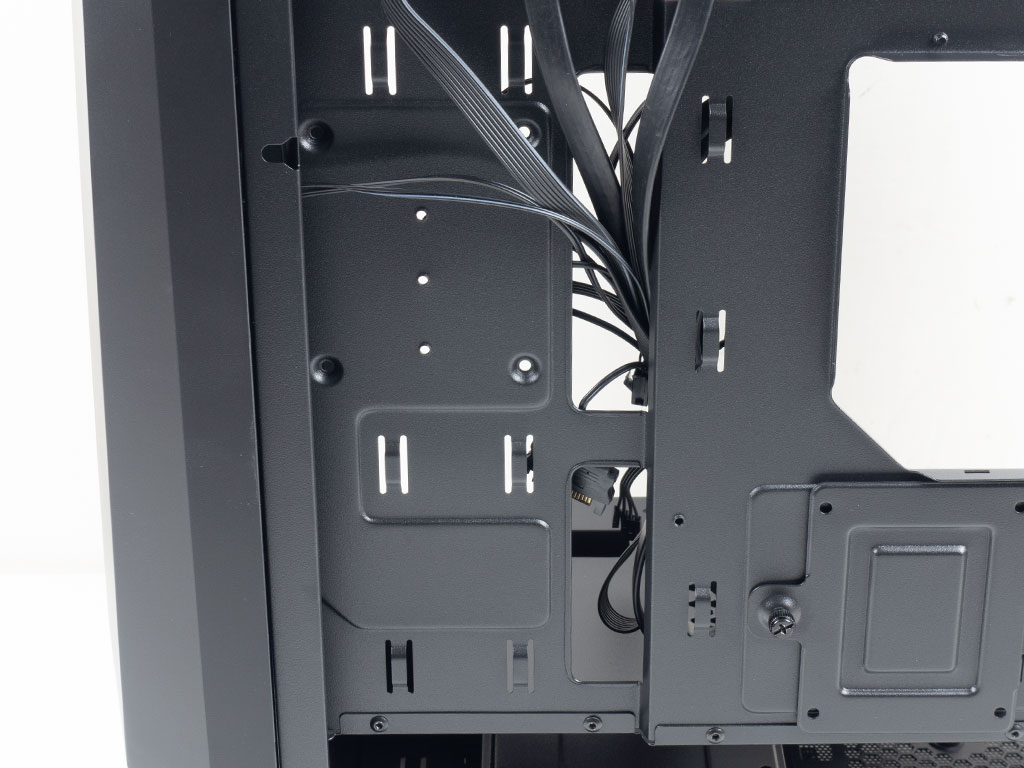
Flipping the Draco 10 around, there is very little room behind the motherboard tray. This case is designed with just enough clearance for the two SSDs to fit behind the motherboard, while a slightly deeper trench towards the front of the case is intended for all major cable-routing. If you look closely, this is also where you may install a third 2.5" drive, which will be visible through the glass panel as well, perfect for showing off such hardware.

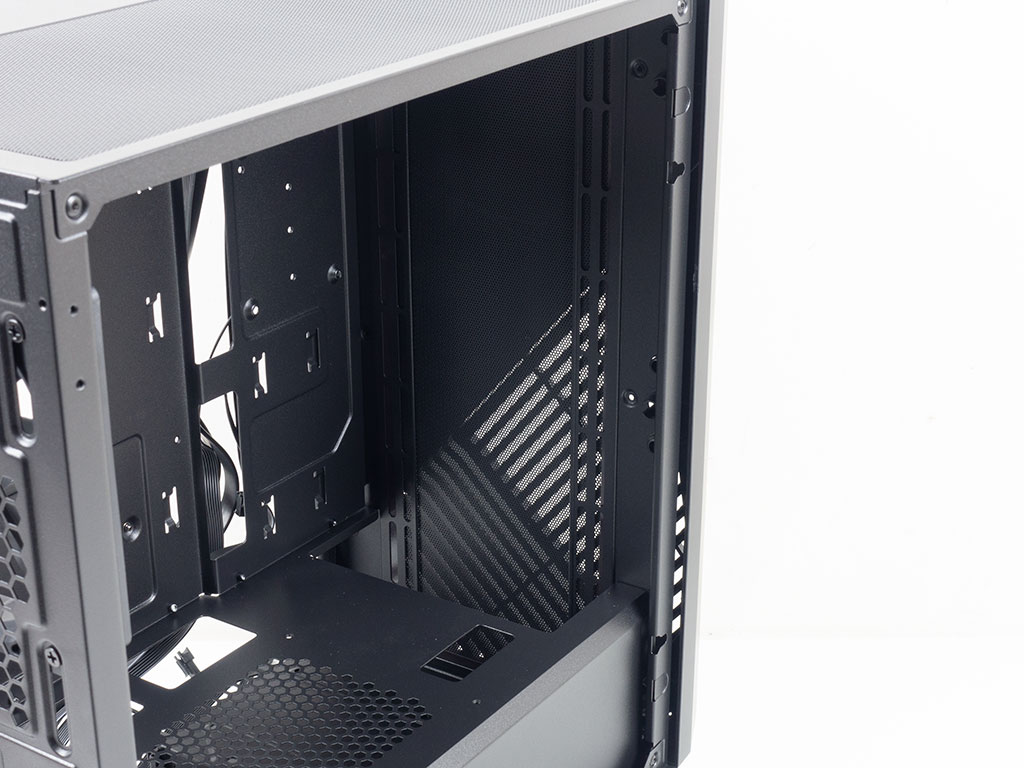
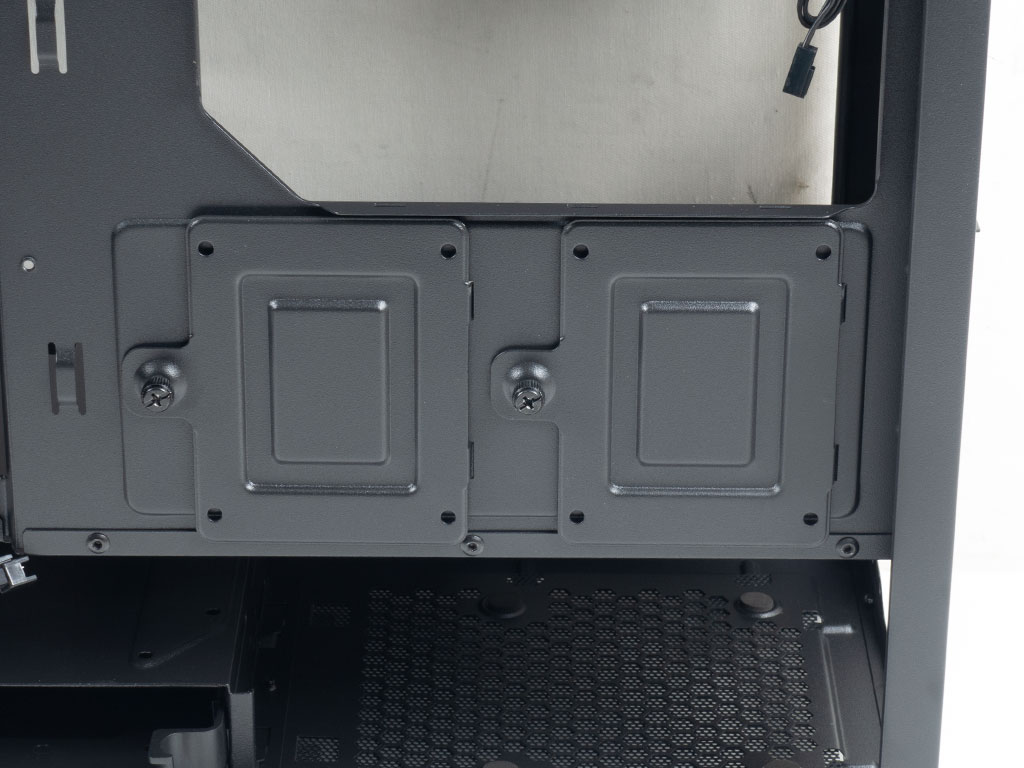
In the front starting at the bottom is the metal hard-drive cage with a single plastic tray. The second mounting position is on top of the cage, and thus a more permanent spot for your 2.5" or 3.5" drive. This brings the drive count to a good five within the Draco 10, plenty for the target audience of the chassis, which may not want to spend the extra cash on expensive NVMe drives. Above that is just the opening for fans or a radiator behind the dust filter.

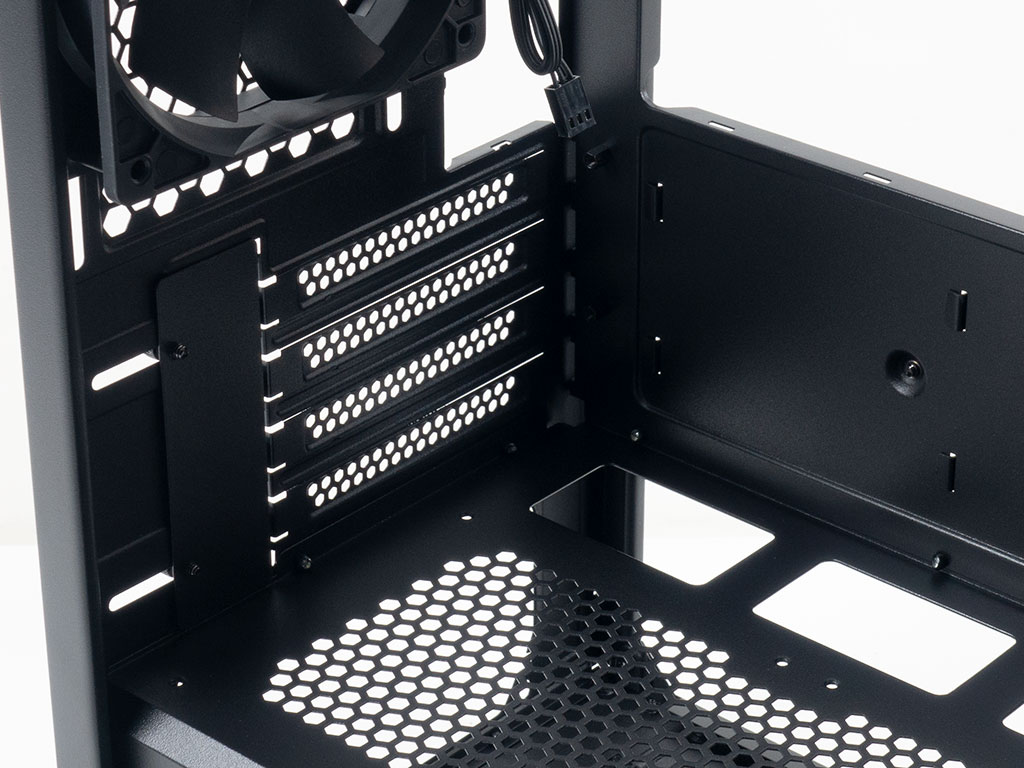

The PSU bay in the rear is simple, yet functional with four foam pads for the unit to rest on. Above that are the four expansion slots using traditional case screws and the aforementioned 120 mm, RPM-controlled exhaust fan.
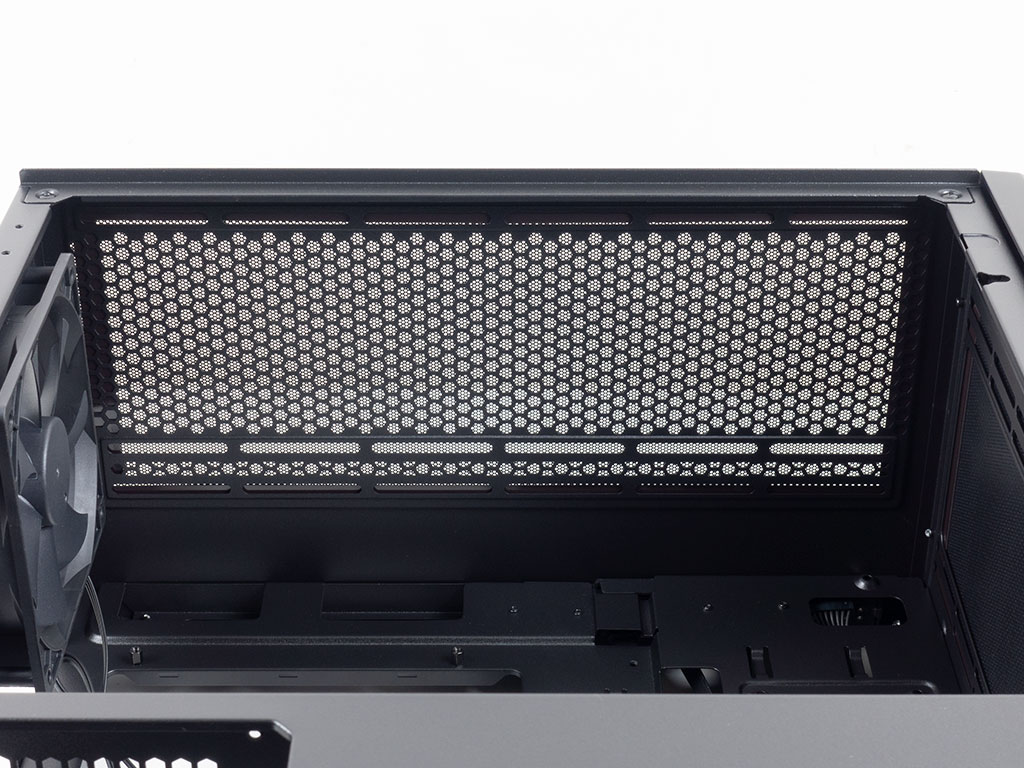
Taking a quick look at the ceiling, it becomes apparent that the mounting positions for the fans or radiator have been placed as far away from the motherboard tray as possible, so you should have no issues going with an AIO here.
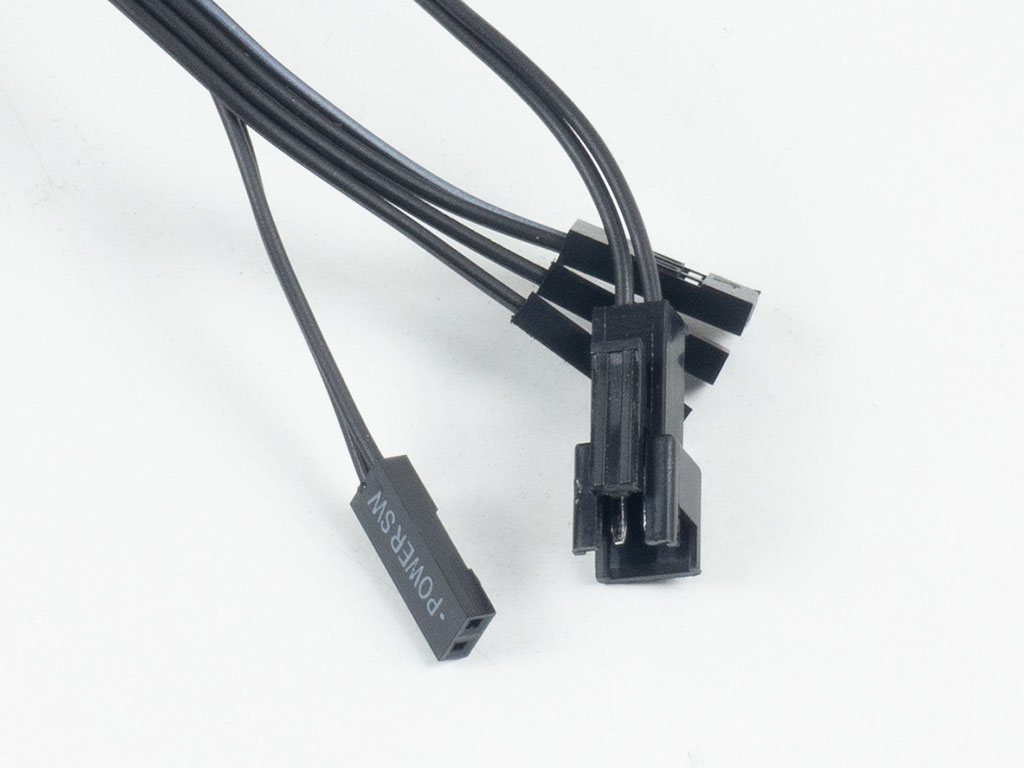
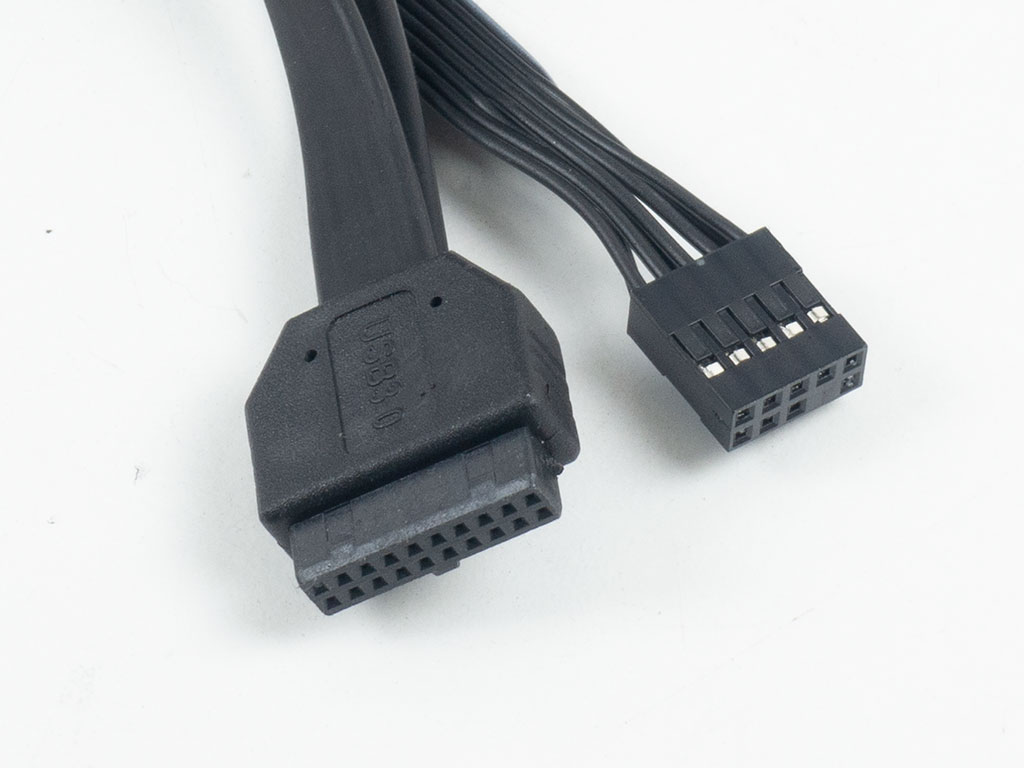
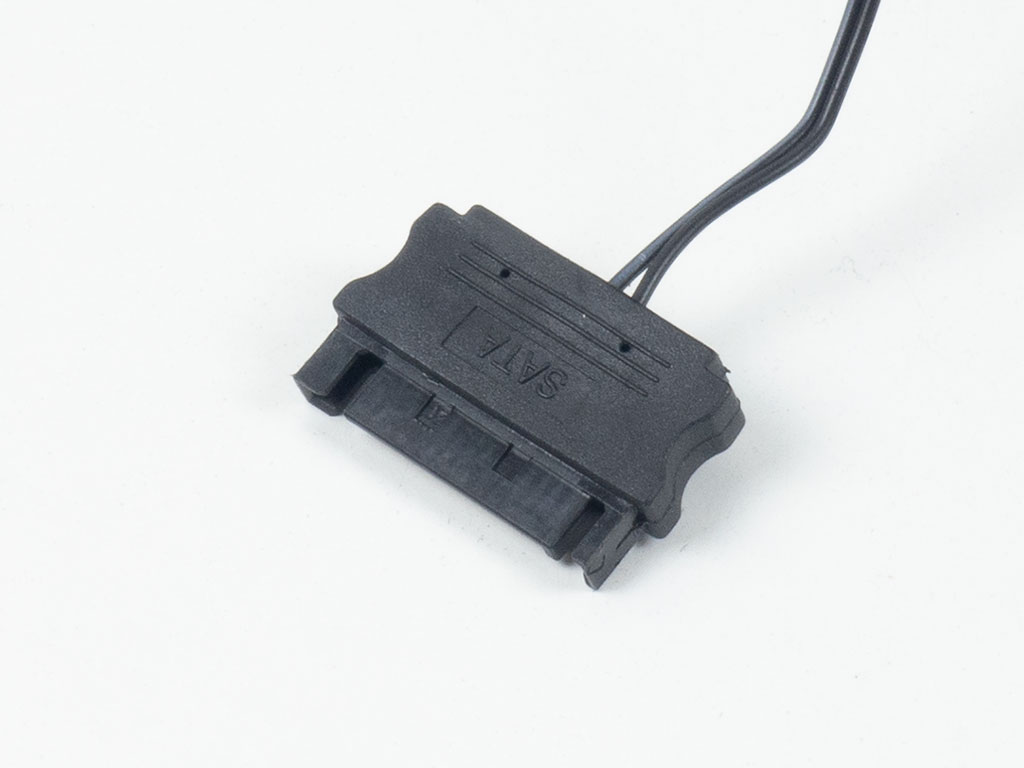
All the cables with the exception of the lead for the lighting effects in the front are of the default variety. Antec utilizes a 2-pin clip on a repurposed reset cable from the top panel. There is also no way to connect the front ARGB to the motherboard for system-wide control—clearly a cost-saving measure, and because users buying this case are more likely to go with a basic motherboard without such bells and whistles. Finally, a SATA power cable provides the juice needed for the lighting in the front.
Jul 15th, 2025 16:26 CDT
change timezone
Latest GPU Drivers
New Forum Posts
- No offense, here are some things that bother me about your understanding of fans. (145)
- Stupid things one has done with hardware (65)
- RTX 5070 discussion (11)
- I would give anything for Valve's Steam to have an option to disable the Big Picture Mode button. How many times have I accidently clicked it, fml (52)
- Choosing the right motherboard (6)
- Solidigm NVMe Custom Modded Driver for All NVMe Brands SSDs & Any NVMe SSDs (229)
- Recommend me a decent budget card :) (33)
- What's your latest tech purchase? (24278)
- TOS 6 on Ugreen NAS (0)
- Folding Pie and Milestones!! (9620)
Popular Reviews
- MSI GeForce RTX 5060 Gaming OC Review
- Our Visit to the Hunter Super Computer
- Lexar NM1090 Pro 4 TB Review
- SilverStone SETA H2 Review
- NVIDIA GeForce RTX 5050 8 GB Review
- Fractal Design Epoch RGB TG Review
- Sapphire Radeon RX 9060 XT Pulse OC 16 GB Review - An Excellent Choice
- AMD Ryzen 7 9800X3D Review - The Best Gaming Processor
- Upcoming Hardware Launches 2025 (Updated May 2025)
- Corsair FRAME 5000D RS Review
TPU on YouTube
Controversial News Posts
- Intel's Core Ultra 7 265K and 265KF CPUs Dip Below $250 (288)
- Some Intel Nova Lake CPUs Rumored to Challenge AMD's 3D V-Cache in Desktop Gaming (140)
- AMD Radeon RX 9070 XT Gains 9% Performance at 1440p with Latest Driver, Beats RTX 5070 Ti (131)
- NVIDIA Launches GeForce RTX 5050 for Desktops and Laptops, Starts at $249 (122)
- NVIDIA GeForce RTX 5080 SUPER Could Feature 24 GB Memory, Increased Power Limits (115)
- Microsoft Partners with AMD for Next-gen Xbox Hardware (105)
- Intel "Nova Lake‑S" Series: Seven SKUs, Up to 52 Cores and 150 W TDP (100)
- NVIDIA DLSS Transformer Cuts VRAM Usage by 20% (99)