 5
5
EKWB and Bykski Water Blocks tested on Asus GTX 1080 Ti Strix
Closer Examination- Bykski »Closer Examination- EKWB

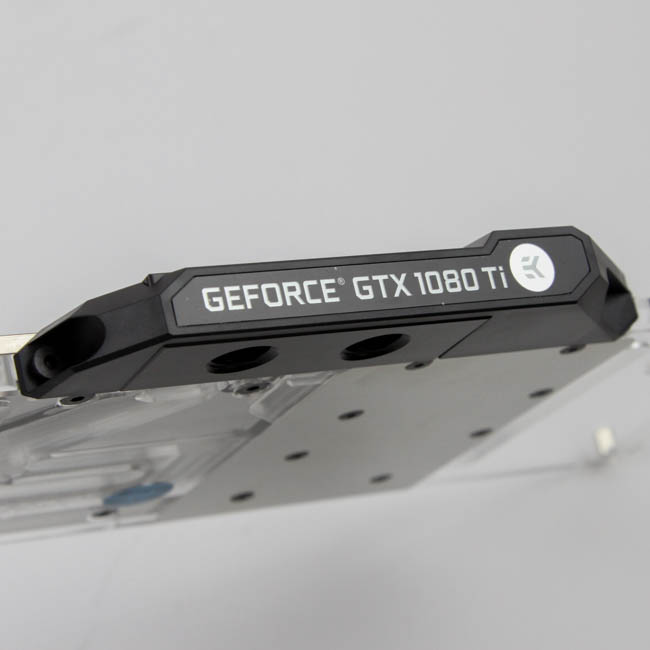
The EK-FC1080 GTX Ti Strix comes enclosed in two separate plastic wraps that are held together via three separate tamper-proof seals. Once removed, we see the block in all its glory. The nicke-plexi option I have here is undoubtedly more popular than the nickel-acetal version according to EKWB's own sales numbers for third-party PCB blocks in the past, and we see a massive full-cover, full-length block here with as much plexi as can be for the water channel and even more so with cutouts to fit taller capacitors on either side. A stainless steel plate is used in the middle to connect the water channel over the VRMs to that over the core and VRAM because of taller components on the PCB here, right where plexi simply cannot be milled as thin. The only other option available would have been to make thicker blocks overall, which would have had these go past the single-slot in thickness we have here.
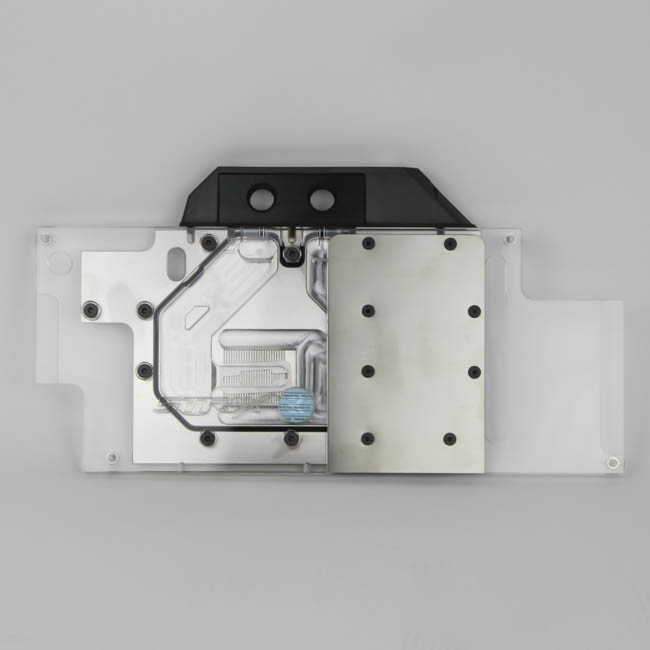
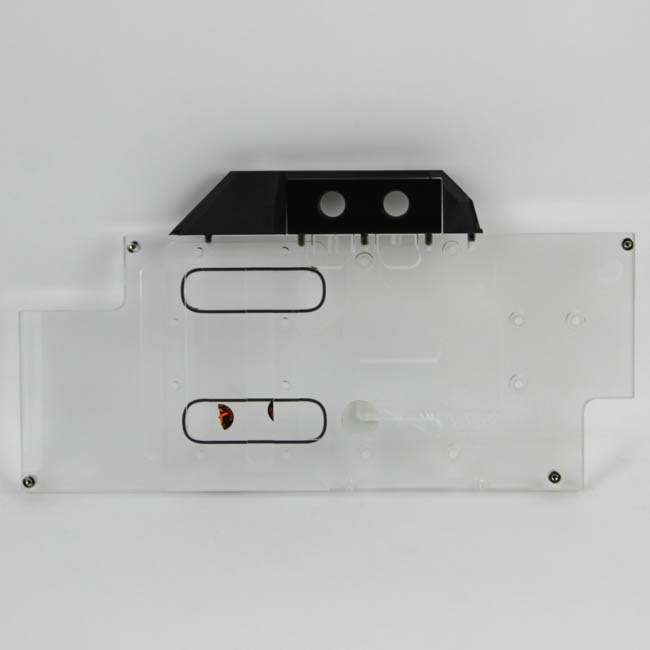
We have a Strix marking on the plexi top where the coolant underneath undergoes a split central-inlet flow over the GPU core, and another EKWB logo sticker next to it - as with the backplate with another protective layer on top that can be peeled off. The I/O manifold has a cover on top that provides an angled look to what was before a sharp rectangle, and the cover also has the GPU named and a third EKWB logo here, although there is no backlighting to these as with some cards with stock coolers.
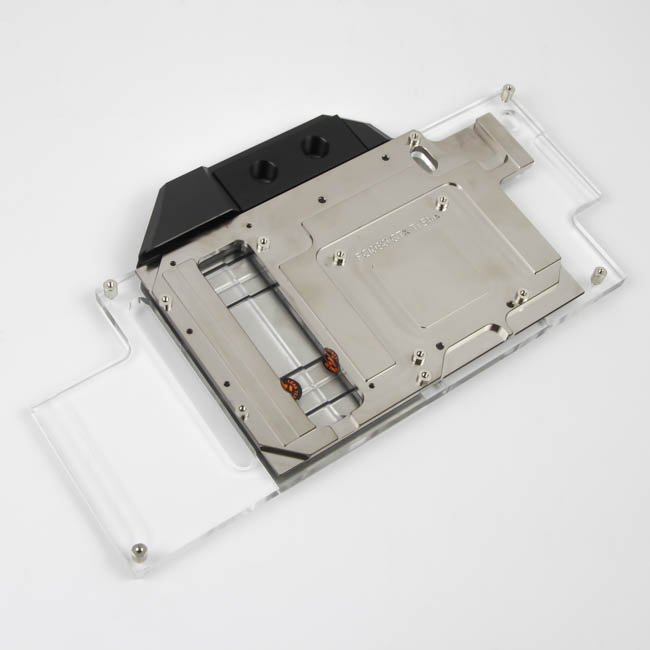

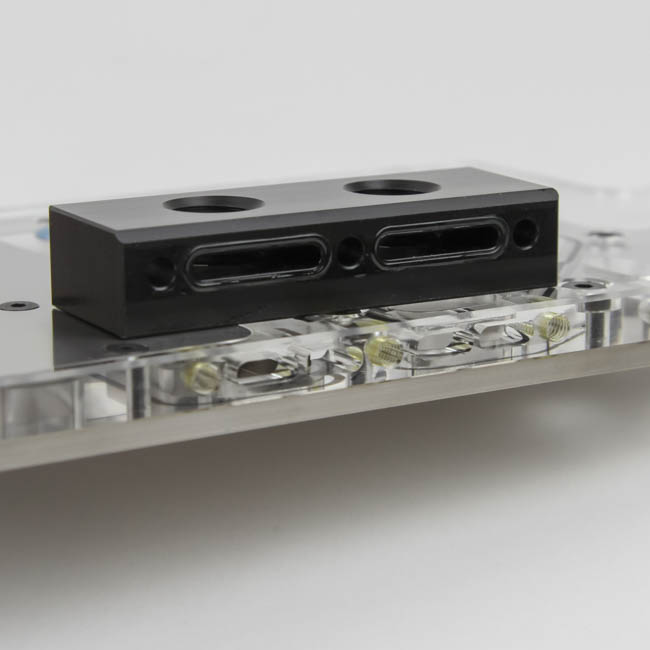
Flipping it over, we see that the block has a total of four BSP G1/4" threaded ports in an acetal terminal. I would have preferred a plexi terminal instead, although there is no plexi cover yet from them, so it would not look as nice. We can also see more clearly here the two sections of the water channel with the gap in between, and also that the cold plate itself does not extend down the full length of the PCB for good reason - it would not perform any better and would just add more material cost and mass to the block as a whole. There are two QC stickers on the cold plate's underside, and you do not lose warranty if you open the block up for cleaning or otherwise. The product name is etched into the cold plate, and we have a mirror finish applied throughout, including on the raised sections that make contact with the components on the PCB via thermal paste/pads in between. There are also several threaded nickel-plated brass standoffs which are used to help install the block.
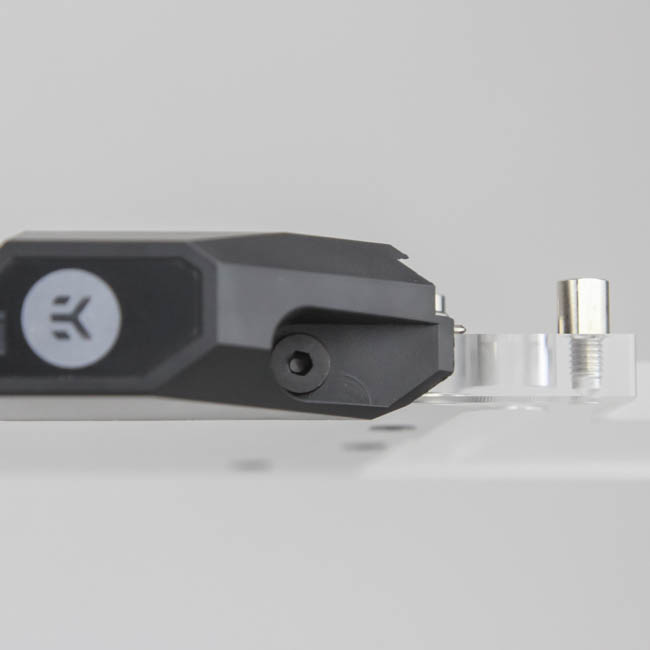
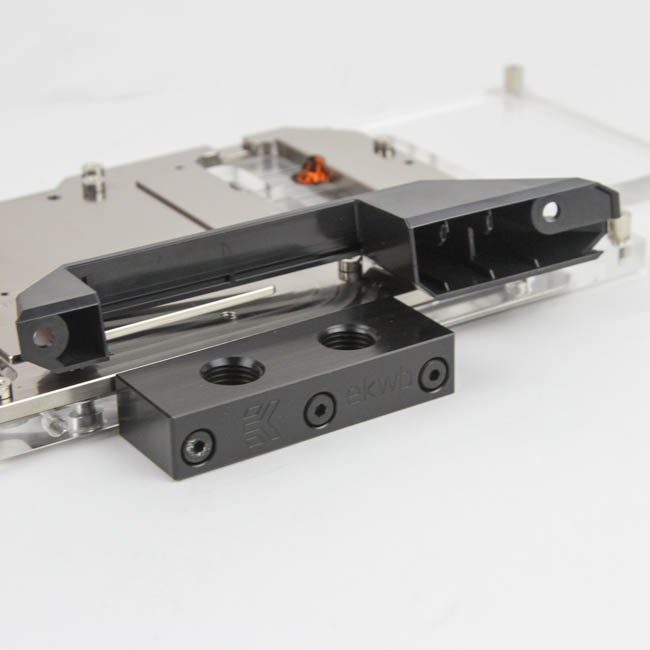
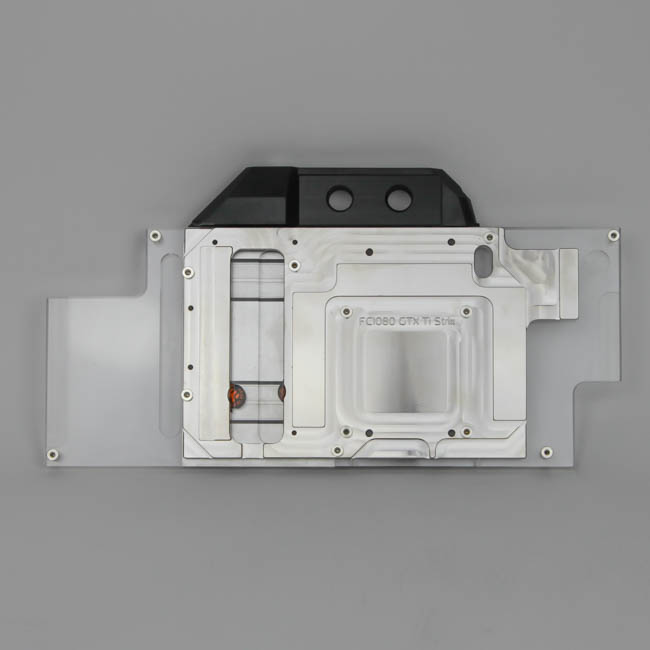
As always, full disassembly was done post-testing. The cover over the I/O port terminal is aesthetic only and can be removed by taking off the two hex head screws on either side. This now reveals the older terminal design with three more screws that run through and into the plexi top, and removing these shows two separate O-rings which keep the coolant confined to entering and exiting the two ports only. There is also some lubricant here to prevent the rubber O-rings from drying out.
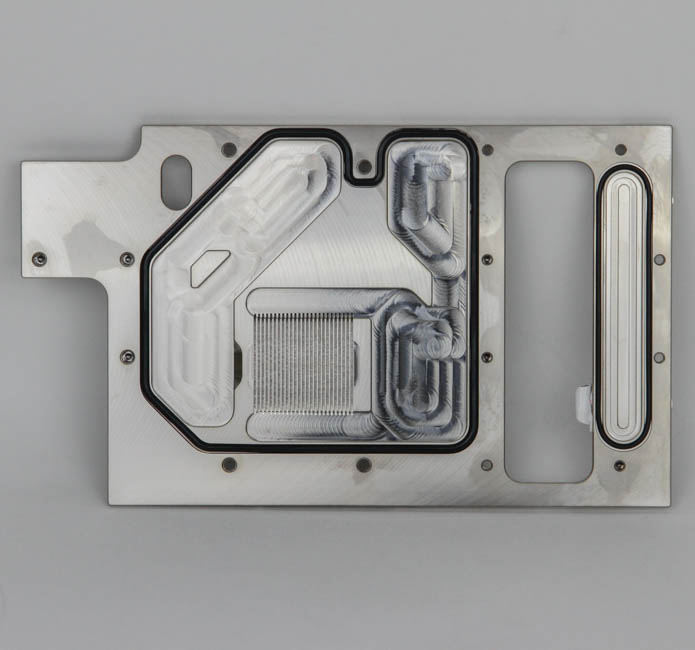
To fully disassemble the block, one has to remove all the hex head screws on the front. You do not need to remove the terminal to separate the cold plate from the top as seen above, but not pictured here is the thin stainless steel plate that goes over the thinner plexi section with the two oval O-rings in the top. The plexi top has been polished to be clear only where the coolant is visible through it, and not in the sections surrounding it, which includes either end of the cooling engine. This means that you will not be able to see the PCB and other components clearly, although some sandpaper and elbow grease can easily change this.
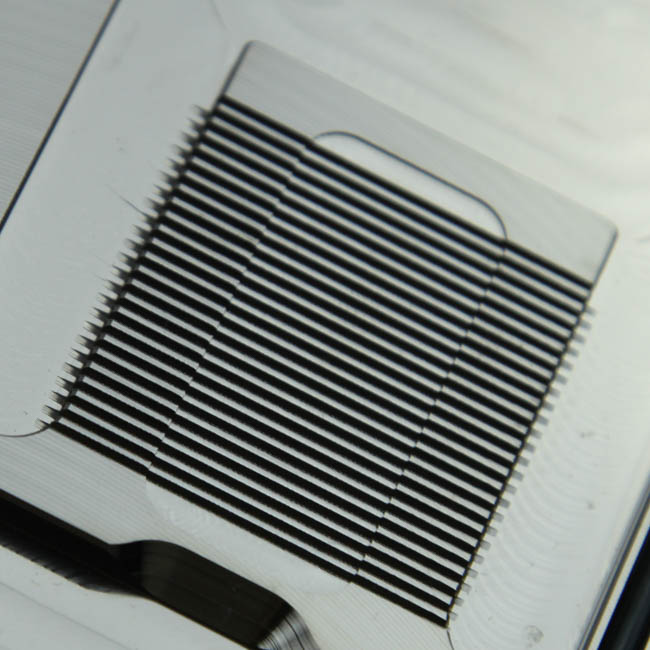
The cold plate has machining marks, though not to such a degree that it will affect the functionality or performance of the block. As we saw before, EKWB employs a split central-inlet flow design here, and they were the first to do so in this field a few years back with their water blocks for the reference NVIDIA GTX 980 series too, with others catching on over time. There are 24 microfins with a thin jet plate over the core here, although the jet plate was so thin it nearly warped when installed.
When re-assembling, just remember to put the O-rings back in place if they got dislodged and reverse these steps accordingly. As always, TechPowerUp is not liable for any issues that arise from your disassembly of the waterblock.
Jul 13th, 2025 06:39 CDT
change timezone
Latest GPU Drivers
New Forum Posts
- Screen burn-in (37)
- [GPU-Z Test Build] New Kernel Driver, Everyone: Please Test (93)
- RX 9000 series GPU Owners Club (1134)
- What would you buy? (81)
- 9800x3D - 6400 CL32 1:1 not stable (14)
- What's your latest tech purchase? (24246)
- Radeon RX 6700, 6700 XT & 6750 XT users club (1139)
- The Filthy, Rotten, Nasty, Helpdesk-Nightmare picture clubhouse (2724)
- Stupid buggy POS Realtek WiFi RTL8852BE (23)
- Upgrade from old x58 system (11)
Popular Reviews
- Fractal Design Epoch RGB TG Review
- Lexar NM1090 Pro 4 TB Review
- Our Visit to the Hunter Super Computer
- Corsair FRAME 5000D RS Review
- NVIDIA GeForce RTX 5050 8 GB Review
- NZXT N9 X870E Review
- Sapphire Radeon RX 9060 XT Pulse OC 16 GB Review - An Excellent Choice
- AMD Ryzen 7 9800X3D Review - The Best Gaming Processor
- Upcoming Hardware Launches 2025 (Updated May 2025)
- Chieftec Iceberg 360 Review
TPU on YouTube
Controversial News Posts
- Intel's Core Ultra 7 265K and 265KF CPUs Dip Below $250 (288)
- Some Intel Nova Lake CPUs Rumored to Challenge AMD's 3D V-Cache in Desktop Gaming (140)
- AMD Radeon RX 9070 XT Gains 9% Performance at 1440p with Latest Driver, Beats RTX 5070 Ti (131)
- NVIDIA Launches GeForce RTX 5050 for Desktops and Laptops, Starts at $249 (120)
- NVIDIA GeForce RTX 5080 SUPER Could Feature 24 GB Memory, Increased Power Limits (115)
- Microsoft Partners with AMD for Next-gen Xbox Hardware (105)
- Intel "Nova Lake‑S" Series: Seven SKUs, Up to 52 Cores and 150 W TDP (100)
- NVIDIA DLSS Transformer Cuts VRAM Usage by 20% (97)