 14
14
be quiet! Dark Base Pro 900 Rev. 2 Review
Assembly & Finished Looks »A Closer Look - Inside
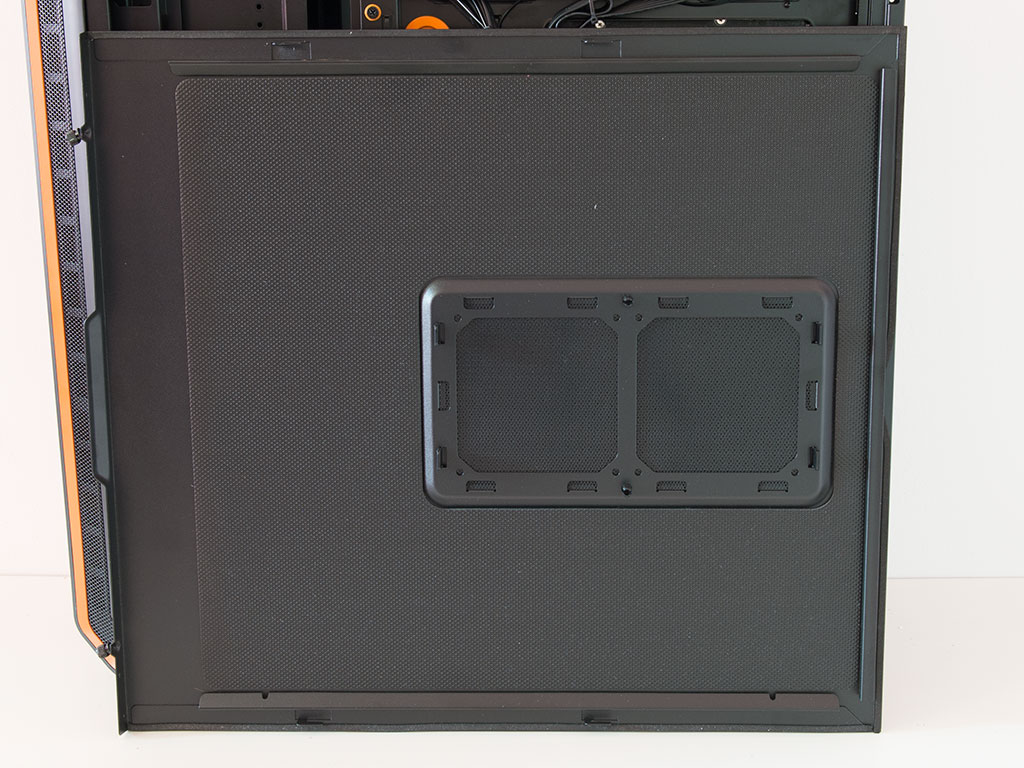
Before we dive into the interior, let's take a closer look at the solid side panel. As you can see, sound-dampening material has been placed across most of the surface area, and the aforementioned air duct offers mounting holes for two 120 mm fans. However, there is not really enough space behind the motherboard tray to place fans here. The simple reality is that be quiet! has designed the panel such that it may be used on both sides of the chassis. Those who buy the variant lacking the glass side panel will simply see one of these solid units flipped and installed in its place. The duct can be taken off the panel and rotated 180° for the brand logo to be displayed with the right side up.


While the internal layout of the Dark Base Pro 900 rev. 2 is quite traditional, the level of engineering and design that has gone into it will put some long-time chassis brands to shame. be quiet! has done an excellent job in engineering as much of the enclosure themselves instead of using off-the-shelf tooling. As we are reviewing the variant with orange color accents, those continue inside the frame with the various rubber grommets and bits.
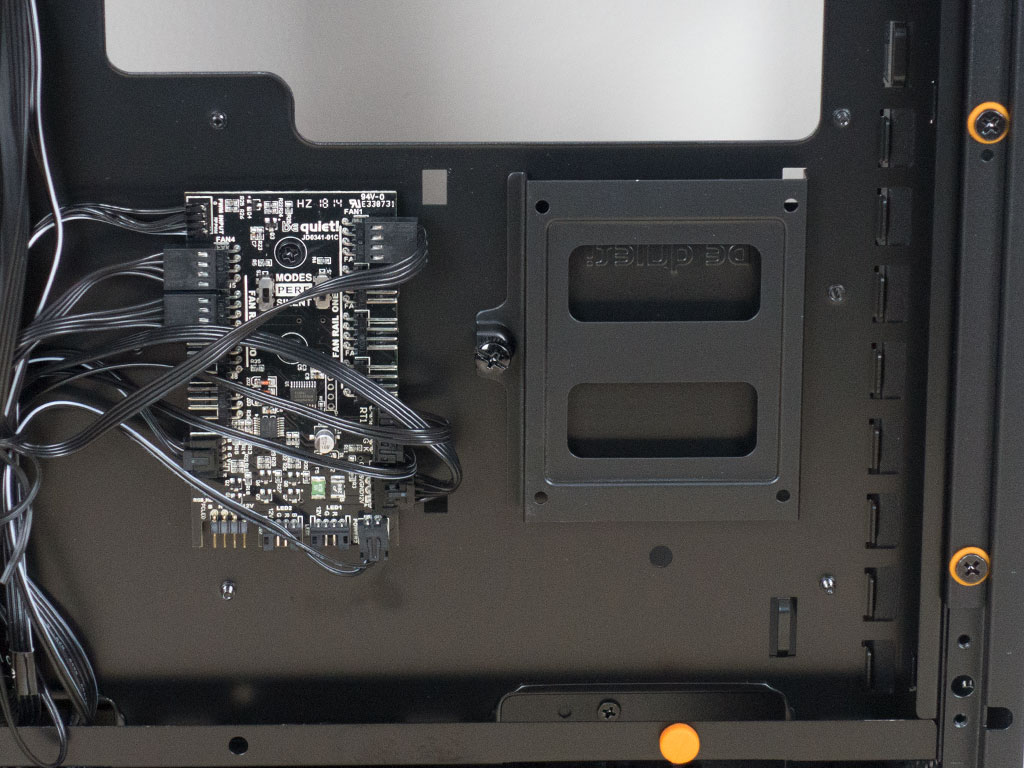
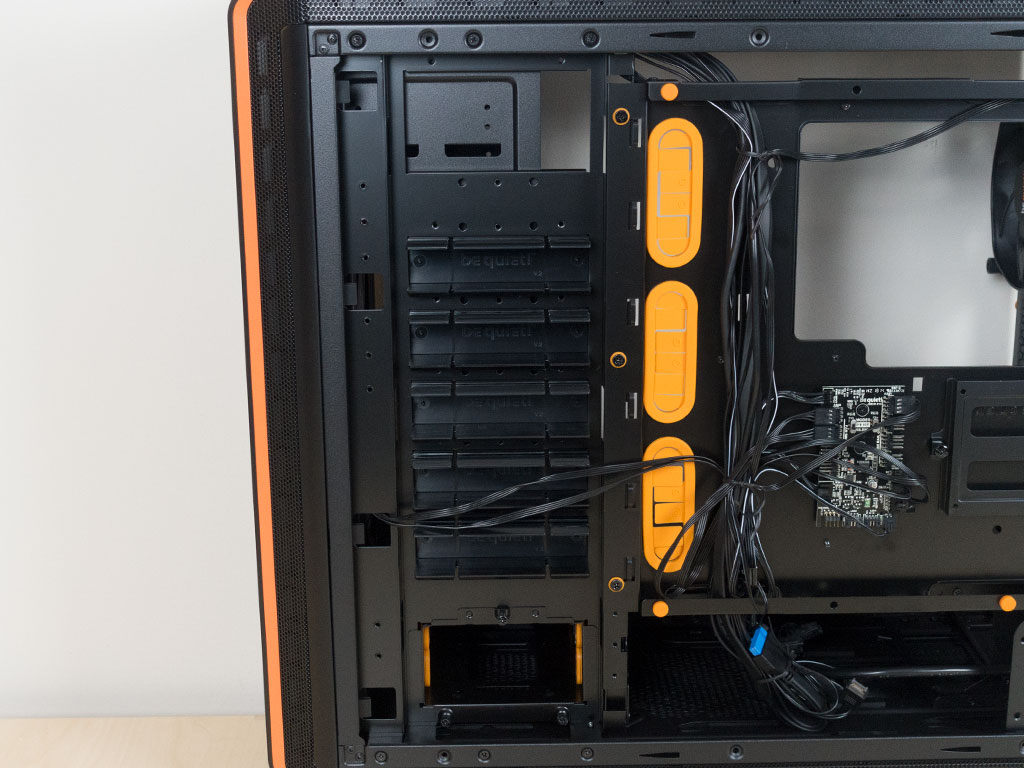
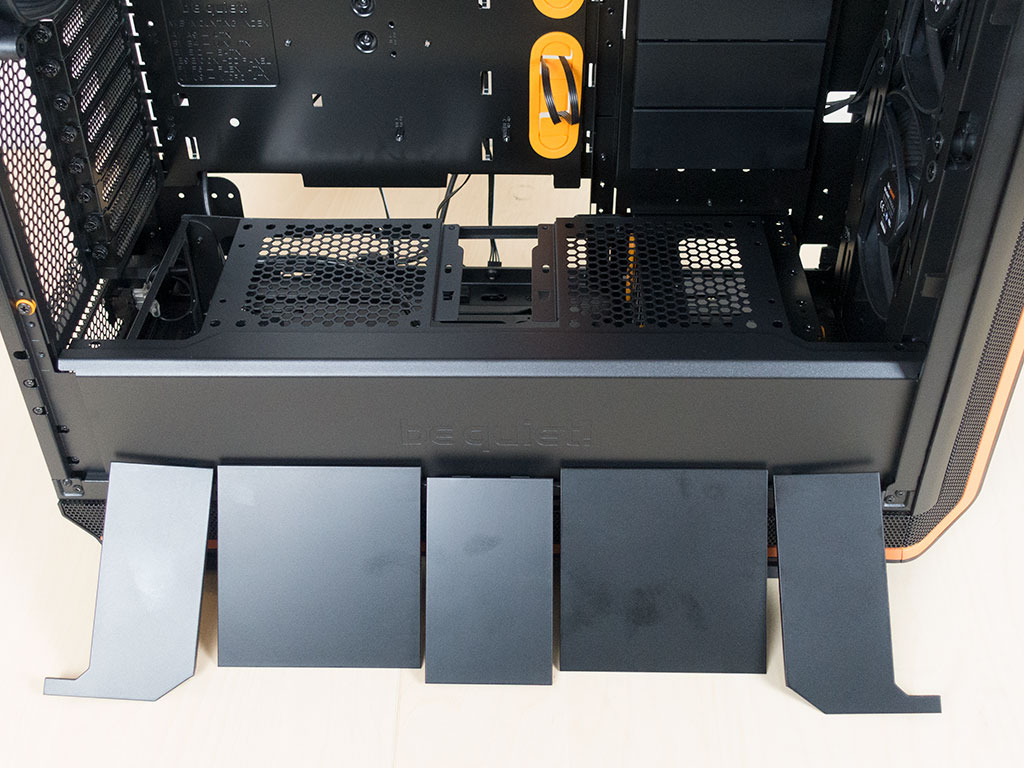
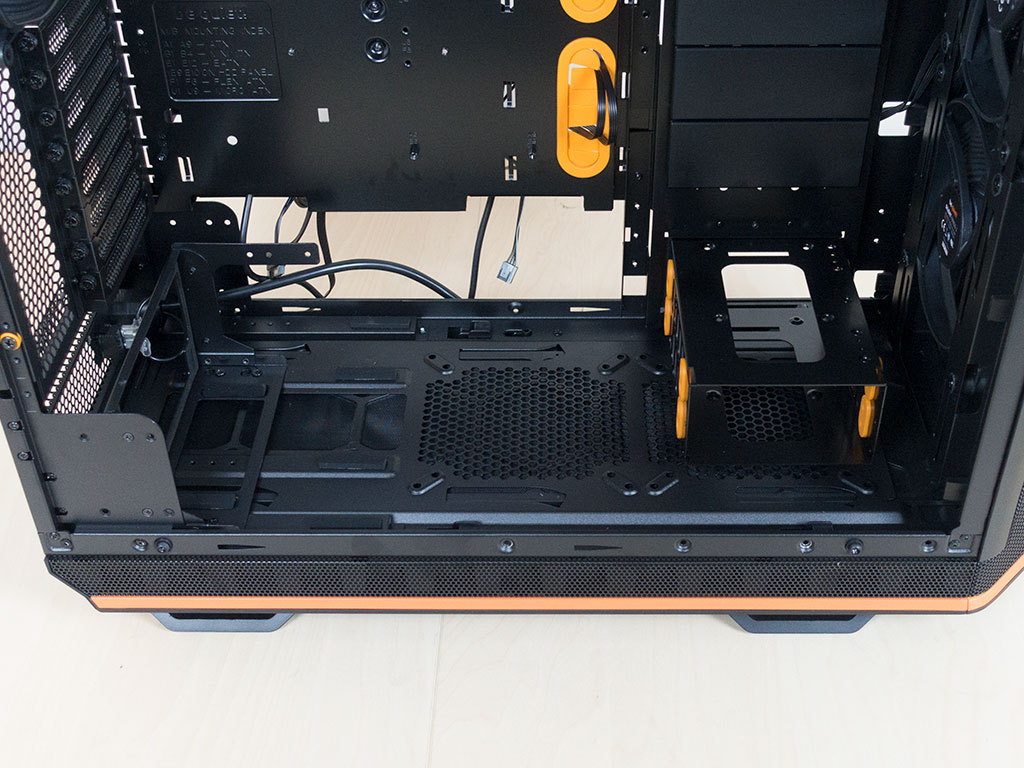
Besides the large opening in the motherboard tray, you will also find a PCB, which now allows you to control both fans and RGB elements. There is also a 2.5" frame to allow for a single such drive to be placed here, behind the motherboard tray. The previous seven individual hard-drive trays are no longer present. Instead, be quiet! has chosen to cover the five individual ones, pre-install a larger cage underneath the shroud for two hard drives, and provide that larger cover for you to close the gap in the very top if you want. With the three separate hard-drive cages, installing a total of five 3.5 or ten 2.5 " drives is the new norm in the Dark Base Pro 900 rev. 2.
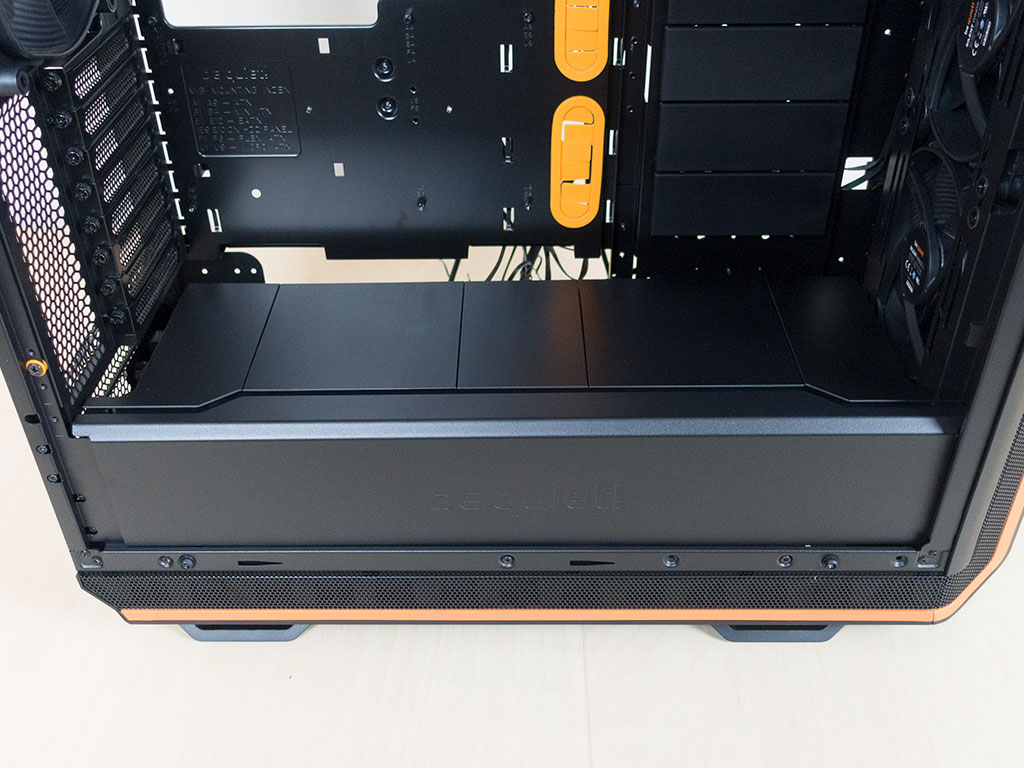
If you ask me about the biggest, most obvious change between the original and the Dark Base Pro 900 rev. 2, it definitely is the shroud on the bottom of the chassis. be quiet! has once again flexed its engineering muscles and managed to design one that fits into the case without having to change the tooling. This means that owners of the original version can buy this and the altered HDD configuration separately to upgrade. There are several plastic covers on the shroud you may remove to install fans or a 2.5" SSD. Naturally, to reach the PSU bay, you have to take off the shroud completely. This is probably the only tangible downside as it translates into a bit more work.
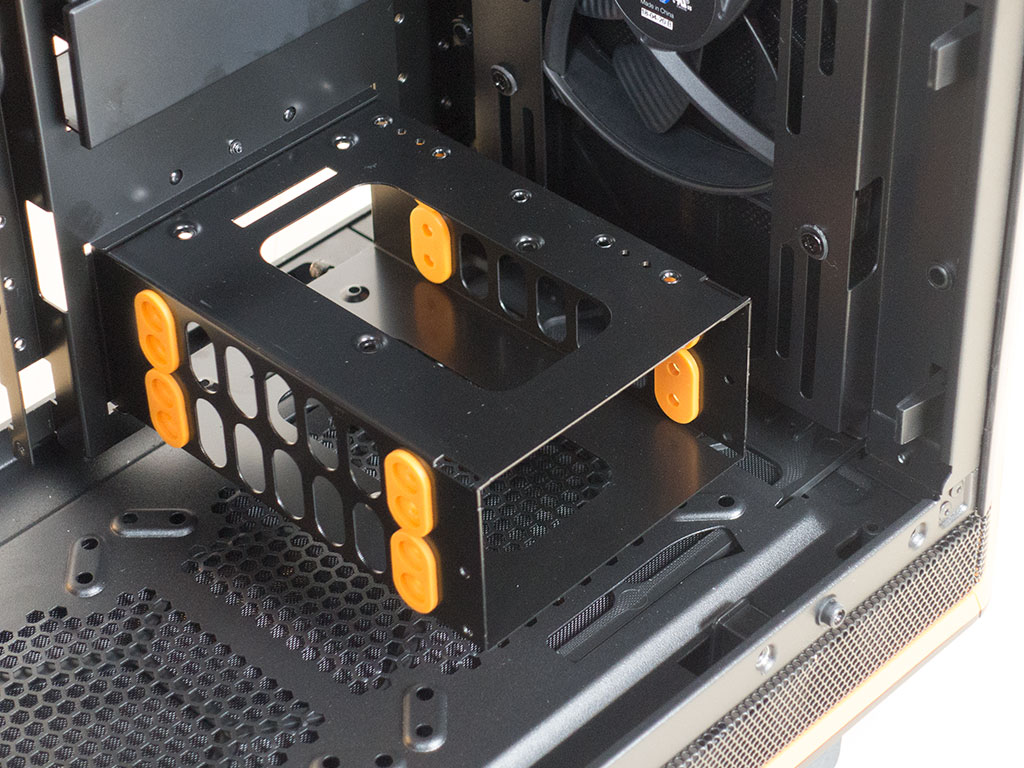
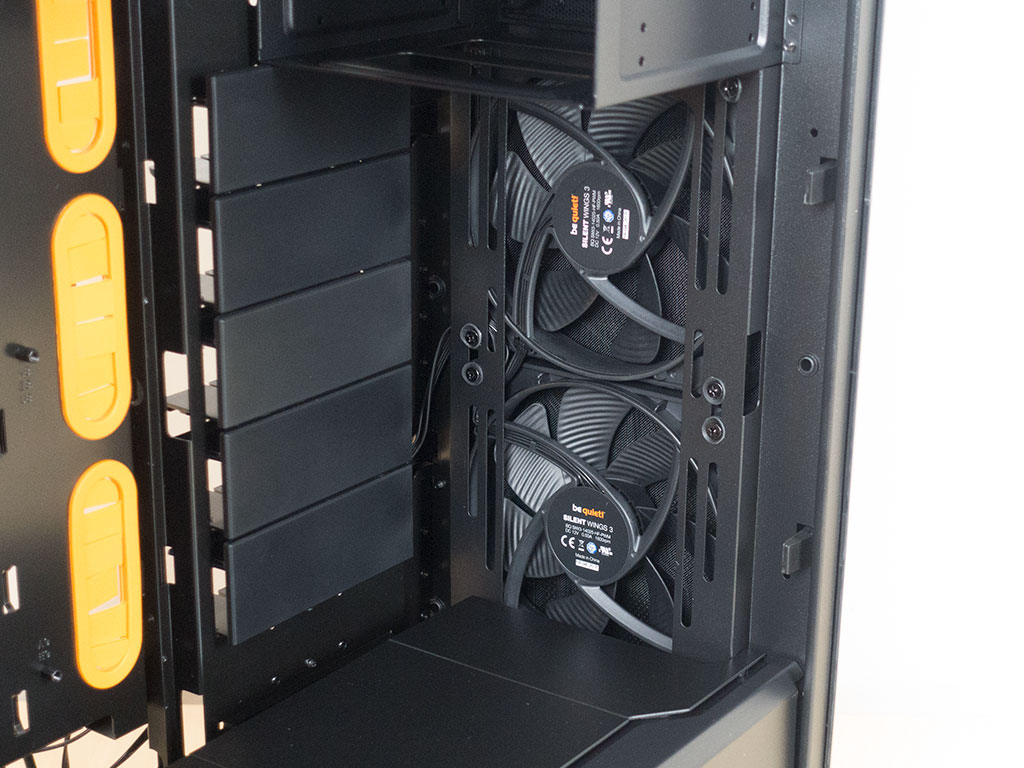
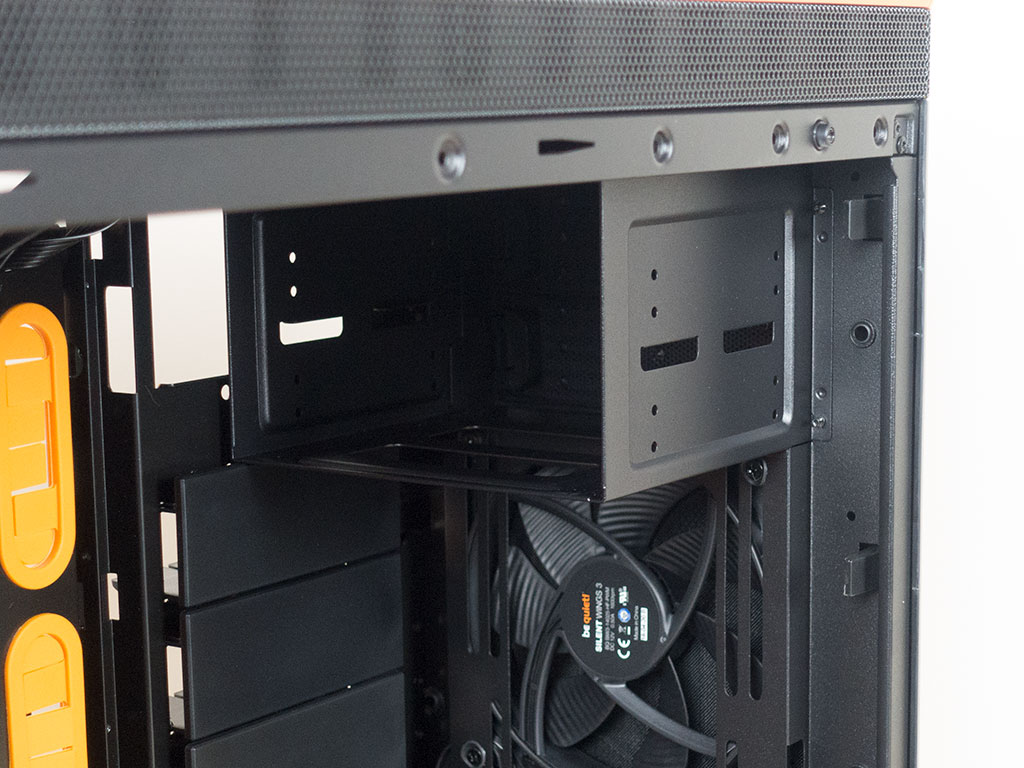
Looking into the front with the shroud off, you will notice that the bottom HDD cage looks similar to the individual ones, but is meant to hold two drives. Above that, the two 140 mm intake fans are visible. While they are of the same model and size as the original, they are now rated for 1600 RPM vs. 1000 RPM. Naturally, you may also place a large radiator in this area of the chassis. The simple but effective 5.25" cage above these utilizes thumbscrews to hold drives in place. You could remove it to make way for additional hard drives here, but would need to source that new, larger cage separately.
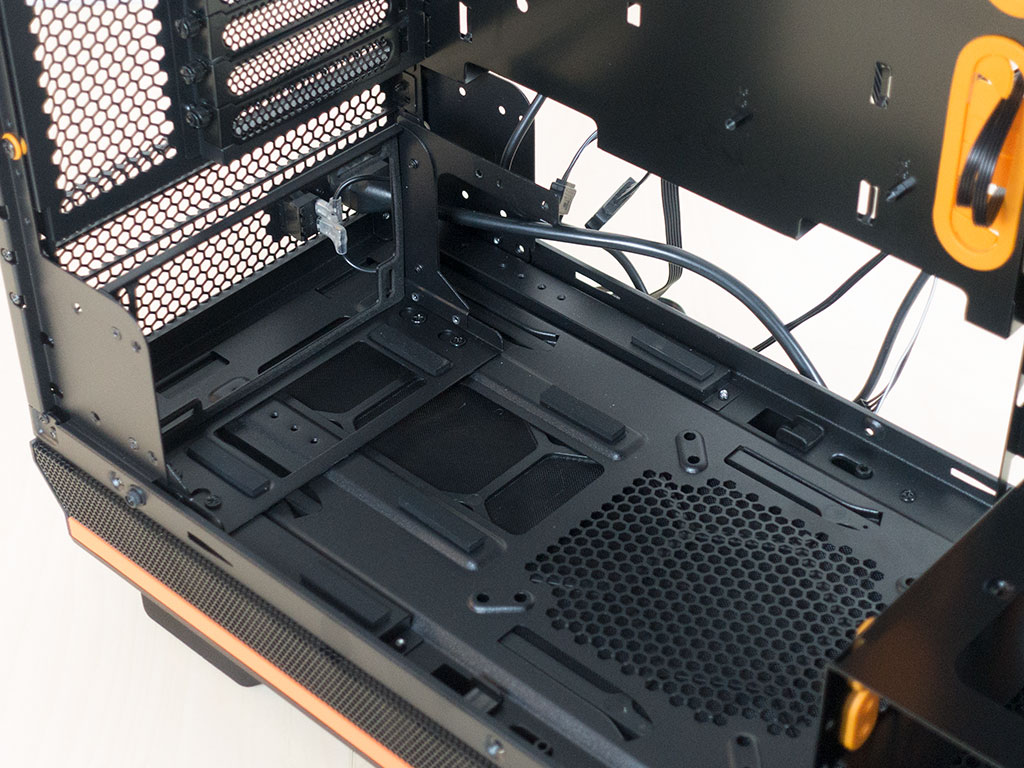
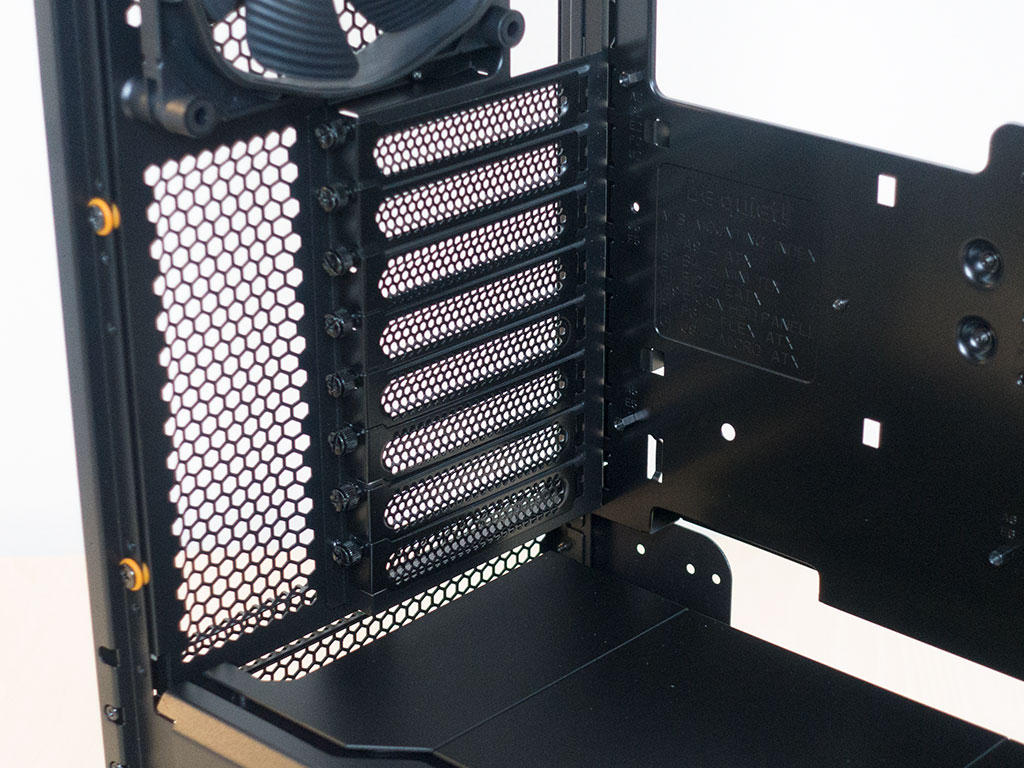
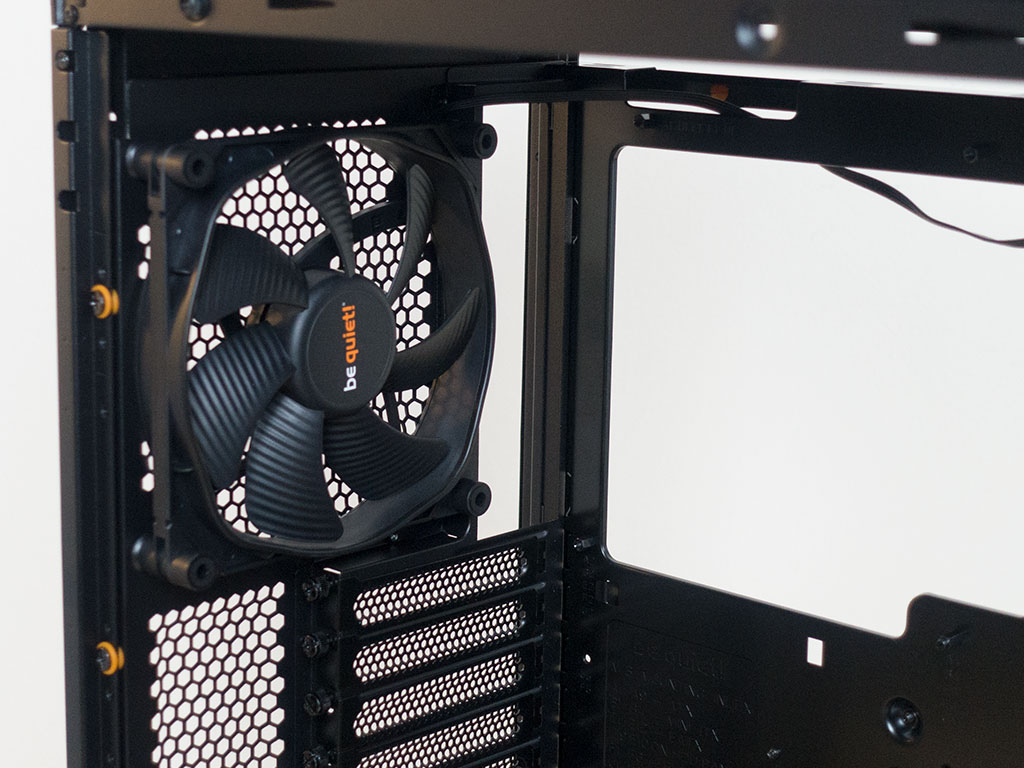
Turning our focus to the rear, the PSU bay has been moved away from the rear by a bracket. Out of the box, this contraption is about an inch away from the rear metal-mesh wall, but you may move it around due to additional screw mounts on the floor of the chassis. Above that, you will find the eight expansion-slot covers, each held in place by a thumbscrew. If you look closely, you will also see some orange rubber elements and black screws on the frame of the chassis. Looks like the motherboard tray can be taken out of the chassis. In the very top, the 140 mm exhaust fan is once again of retail quality (be quiet! SilentWings 3) so that you may simply buy additional ones of the exact same model to extend the cooling capability of the Dark Base Pro 900 rev. 2.
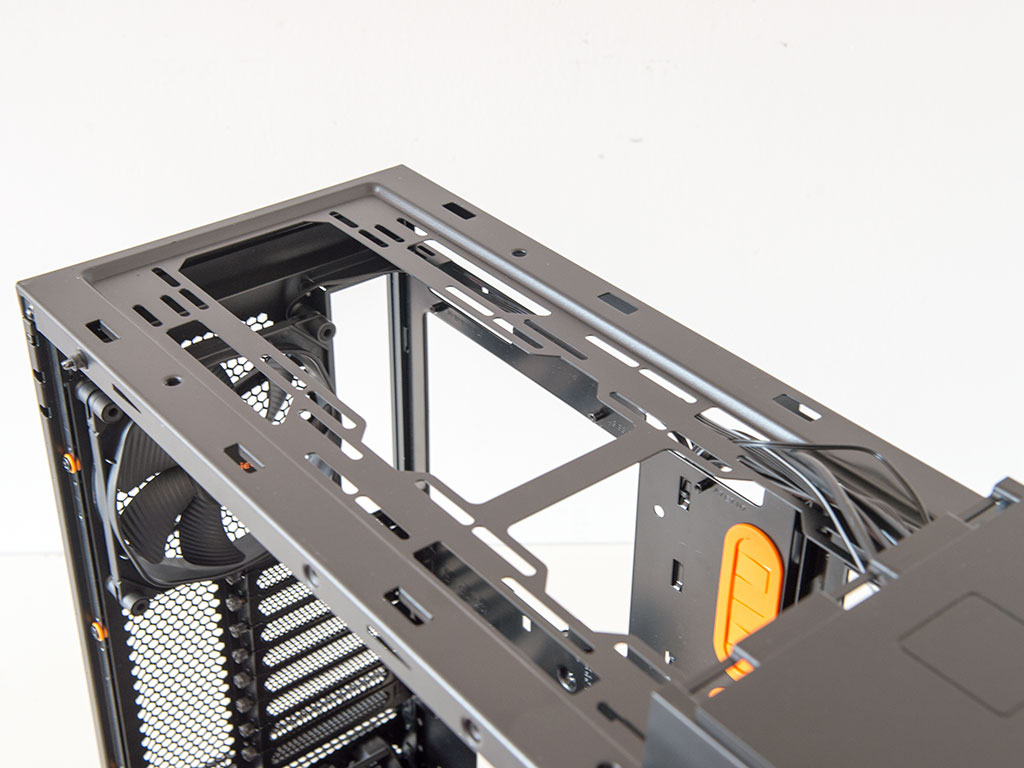
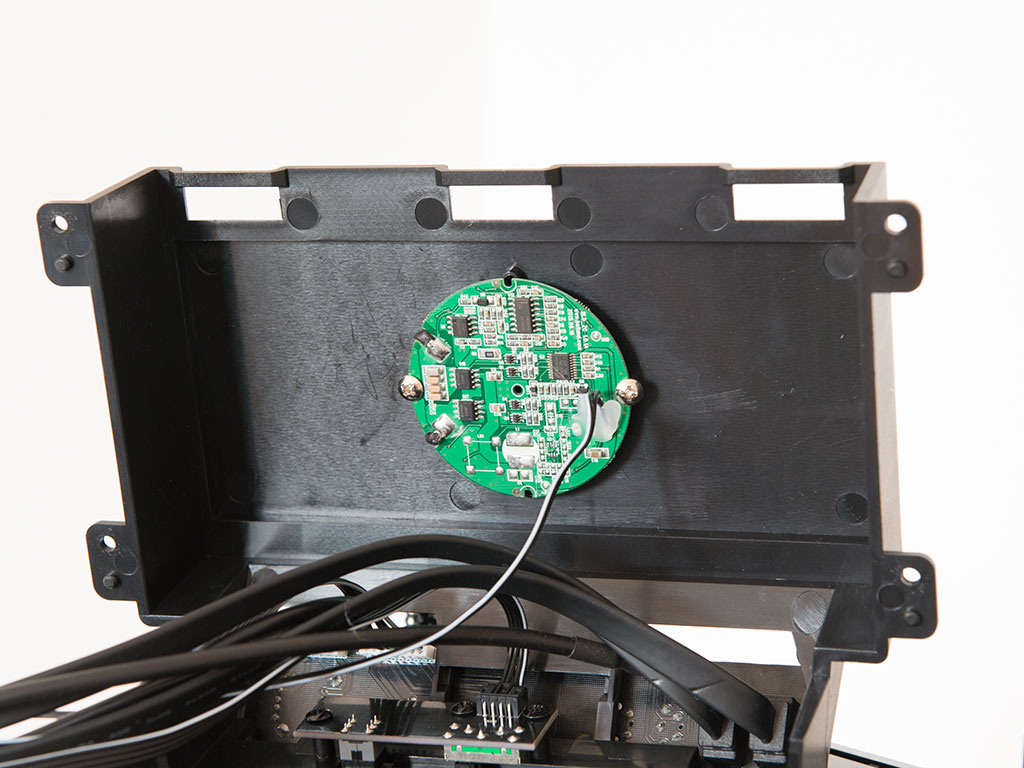
There are so many cutouts in the ceiling that I had to double check on all the possible configurations here. In fact, you can install any radiator of up to 360 mm or 420 mm in size here, though you may have to sacrifice the top 5.25" bay to make room. Regardless, for those who want to go all out on liquid cooling, that should be no deal breaker at all. The Qi charger consists of an intricate, circular PCB right below the plastic cover. There are two leads that supply the unit with power which is then passed on to the mobile device wirelessly.
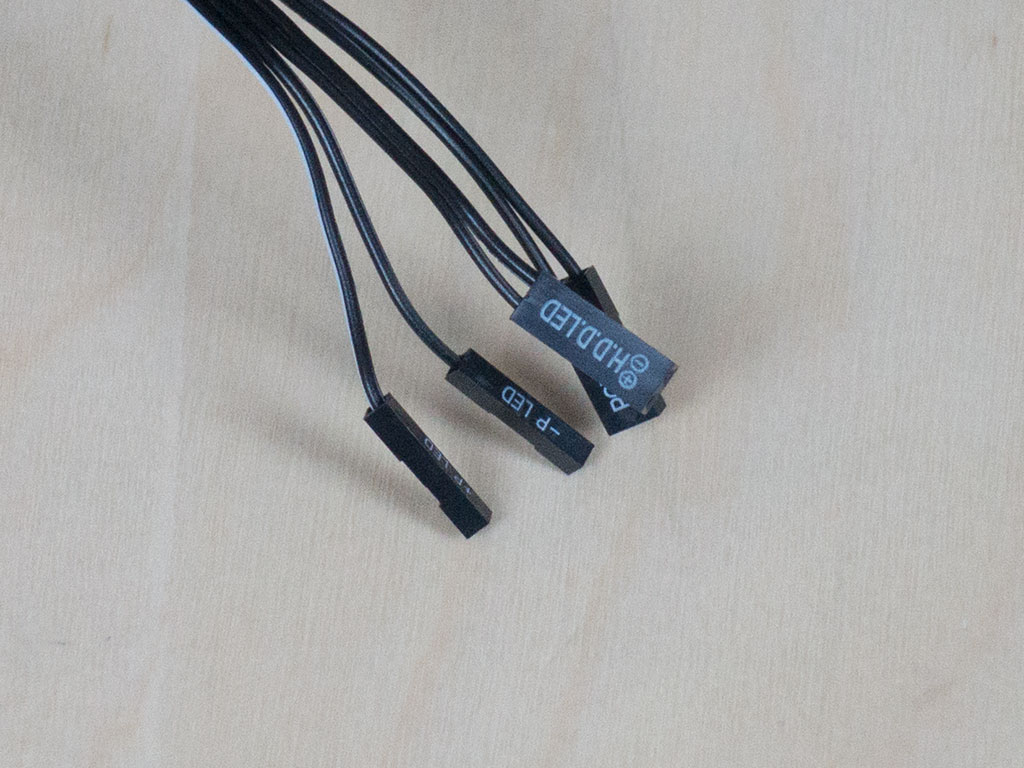
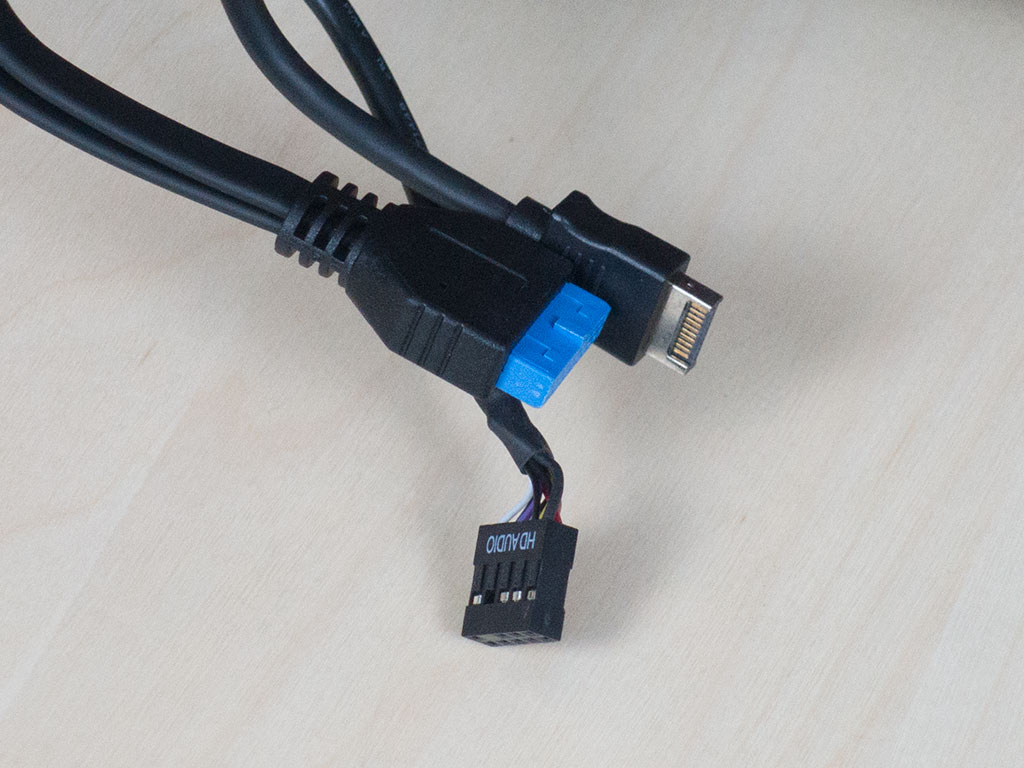
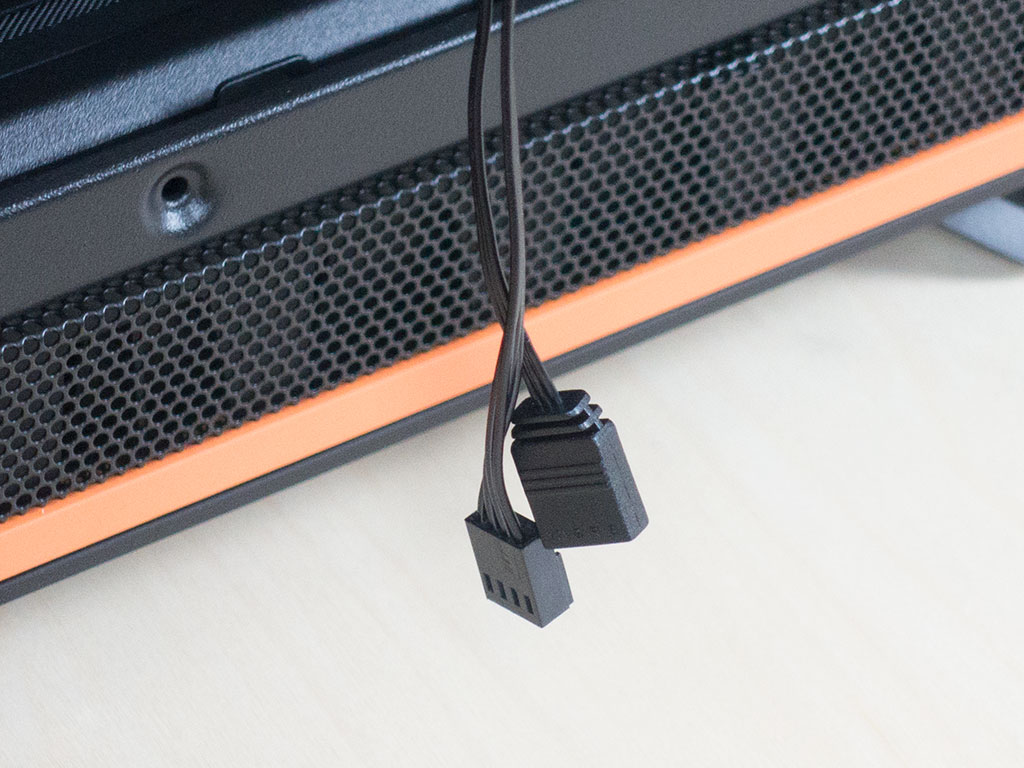

Besides that, all the cables within the be quiet! Dark Base Pro 900 rev. 2 are of the standard variety. You will find two SATA power connector—one for the PCB and one for the Qi charging pad and fast charging port. Naturally, there is also the the 4-pin PWM fan alongside a standard RGB header now.
Jul 12th, 2025 01:14 CDT
change timezone
Latest GPU Drivers
New Forum Posts
- Will you buy a RTX 5090? (641)
- 'NVIDIA App' not usable offline? (8)
- Can you guess Which game it is? (222)
- What are you playing? (23920)
- RX 9070 XT freezing/locking up only on desktop, anyone else? (43)
- NVIDIA RTX PRO 6000 Workstation Runs Much Hotter Than 5090 FE (22)
- Quick charging your USB devicesUSB 3.2 Gen 2x2 Type-C® front-panel. (1)
- GTX 1050 GPU Owners Club (12)
- ASUS ProArt GeForce RTX 4060 Ti OC Edition 16GB GDDR6 Gaming - nvflash64 VBIOS mismatch (2)
- No offense, here are some things that bother me about your understanding of fans. (33)
Popular Reviews
- Fractal Design Epoch RGB TG Review
- Corsair FRAME 5000D RS Review
- Lexar NM1090 Pro 4 TB Review
- NVIDIA GeForce RTX 5050 8 GB Review
- NZXT N9 X870E Review
- Sapphire Radeon RX 9060 XT Pulse OC 16 GB Review - An Excellent Choice
- AMD Ryzen 7 9800X3D Review - The Best Gaming Processor
- Upcoming Hardware Launches 2025 (Updated May 2025)
- Our Visit to the Hunter Super Computer
- Chieftec Iceberg 360 Review
TPU on YouTube
Controversial News Posts
- Intel's Core Ultra 7 265K and 265KF CPUs Dip Below $250 (288)
- Some Intel Nova Lake CPUs Rumored to Challenge AMD's 3D V-Cache in Desktop Gaming (140)
- AMD Radeon RX 9070 XT Gains 9% Performance at 1440p with Latest Driver, Beats RTX 5070 Ti (131)
- NVIDIA Launches GeForce RTX 5050 for Desktops and Laptops, Starts at $249 (119)
- NVIDIA GeForce RTX 5080 SUPER Could Feature 24 GB Memory, Increased Power Limits (115)
- Microsoft Partners with AMD for Next-gen Xbox Hardware (105)
- Intel "Nova Lake‑S" Series: Seven SKUs, Up to 52 Cores and 150 W TDP (100)
- NVIDIA DLSS Transformer Cuts VRAM Usage by 20% (97)