 6
6
Chieftec Dragon CH-07B-R Review
Assembly & Finished Looks »A Closer Look - Inside
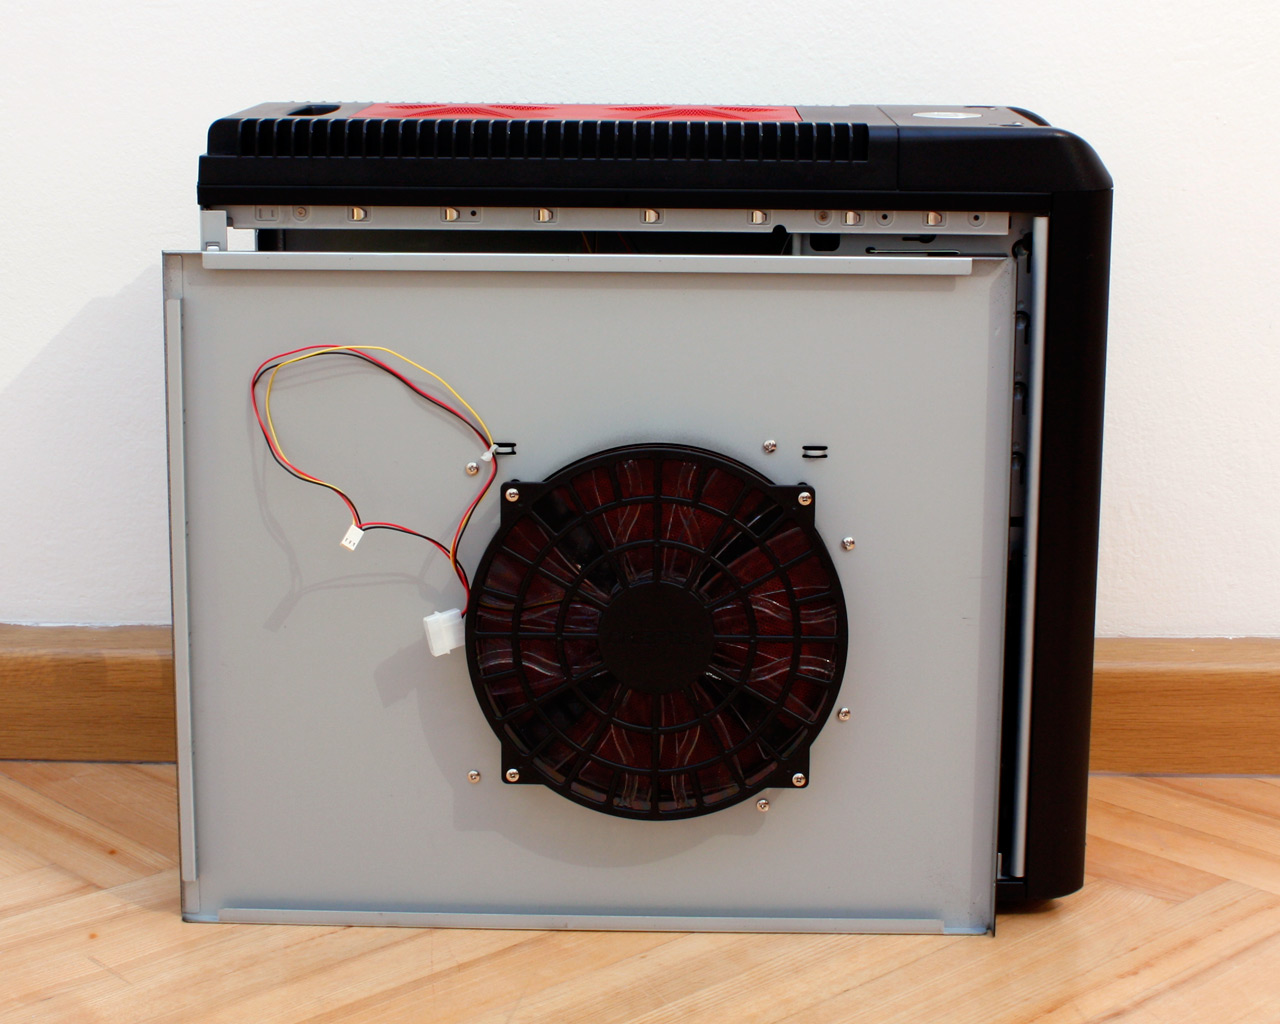
To gain access to the Dragon, simply unscrew the two thumb screws holding the main panel in place. The large 220 mm fan has been mounted on the inside of the case, which may get in the way of large CPU coolers. As you can see, a large dust guard has been placed on the cooling unit and it features both a mainboard and a Molex connector, so you are free to choose how to power the fan.

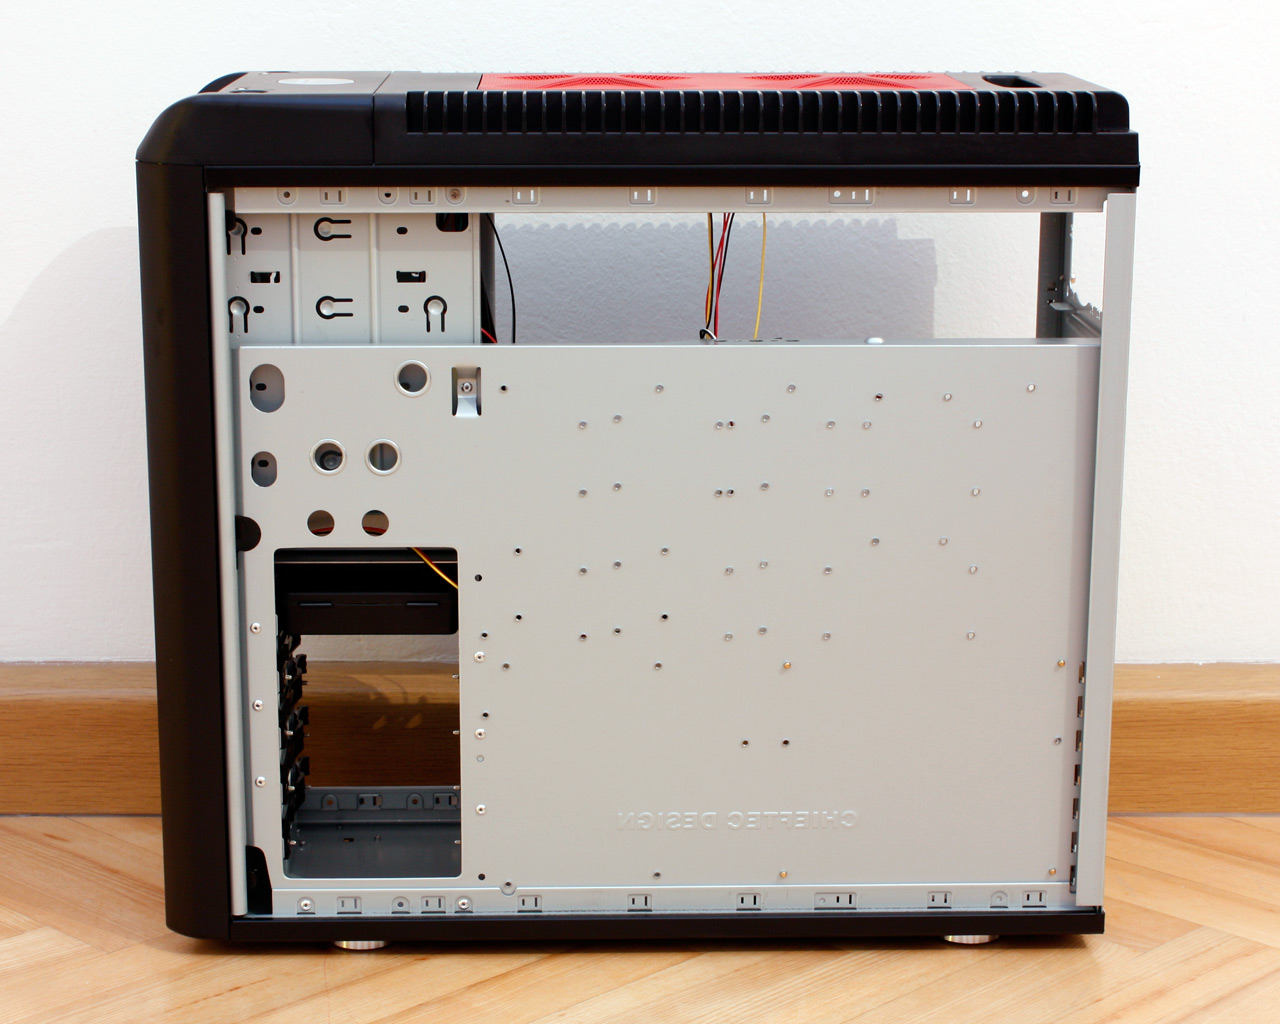
The interior of the Dragon looks nothing out of the ordinary regarding the general layout. It is noticeable though, that the case structure is unique to the Chieftec cases and an in-house design. You will have to use a screwdriver to remove the other, solid side panel, as this cover is held in place by traditional screws. If you look closely, there is really no reason to actually remove this one, as there is no hole under the mainboard tray, nor is the tray removable. Speaking of which - the tray is very large so you will be able to install mATX, ATX or even eATX boards into the Dragon. This makes this case quite attractive to those with the latter kind, looking for something fairly snazzy without having to go with a server or workstation case. I have to say, the interior does look much like a workstation case, without a lot of gaming related features.
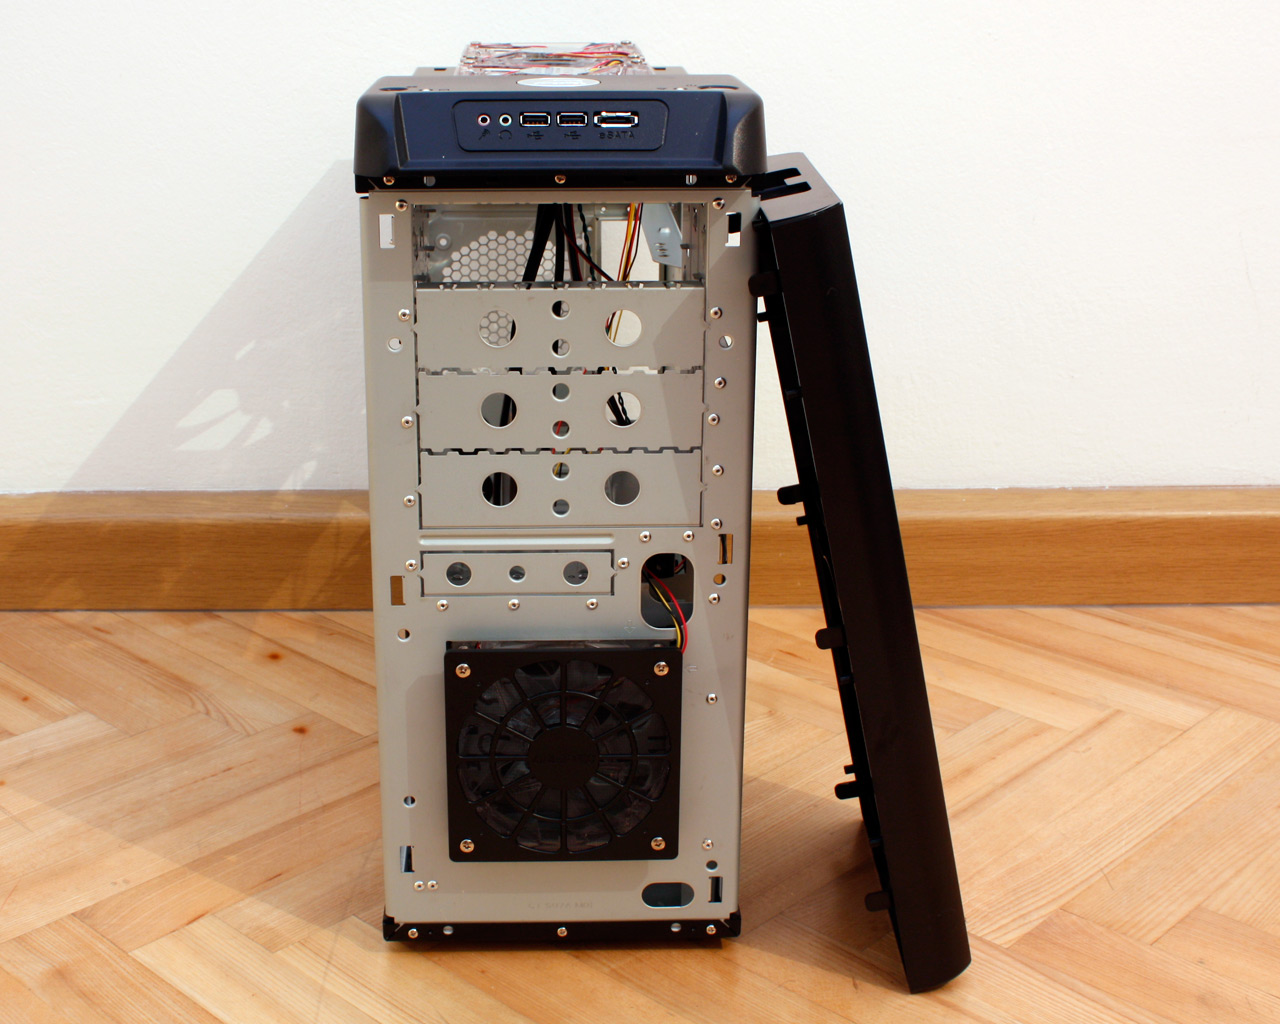

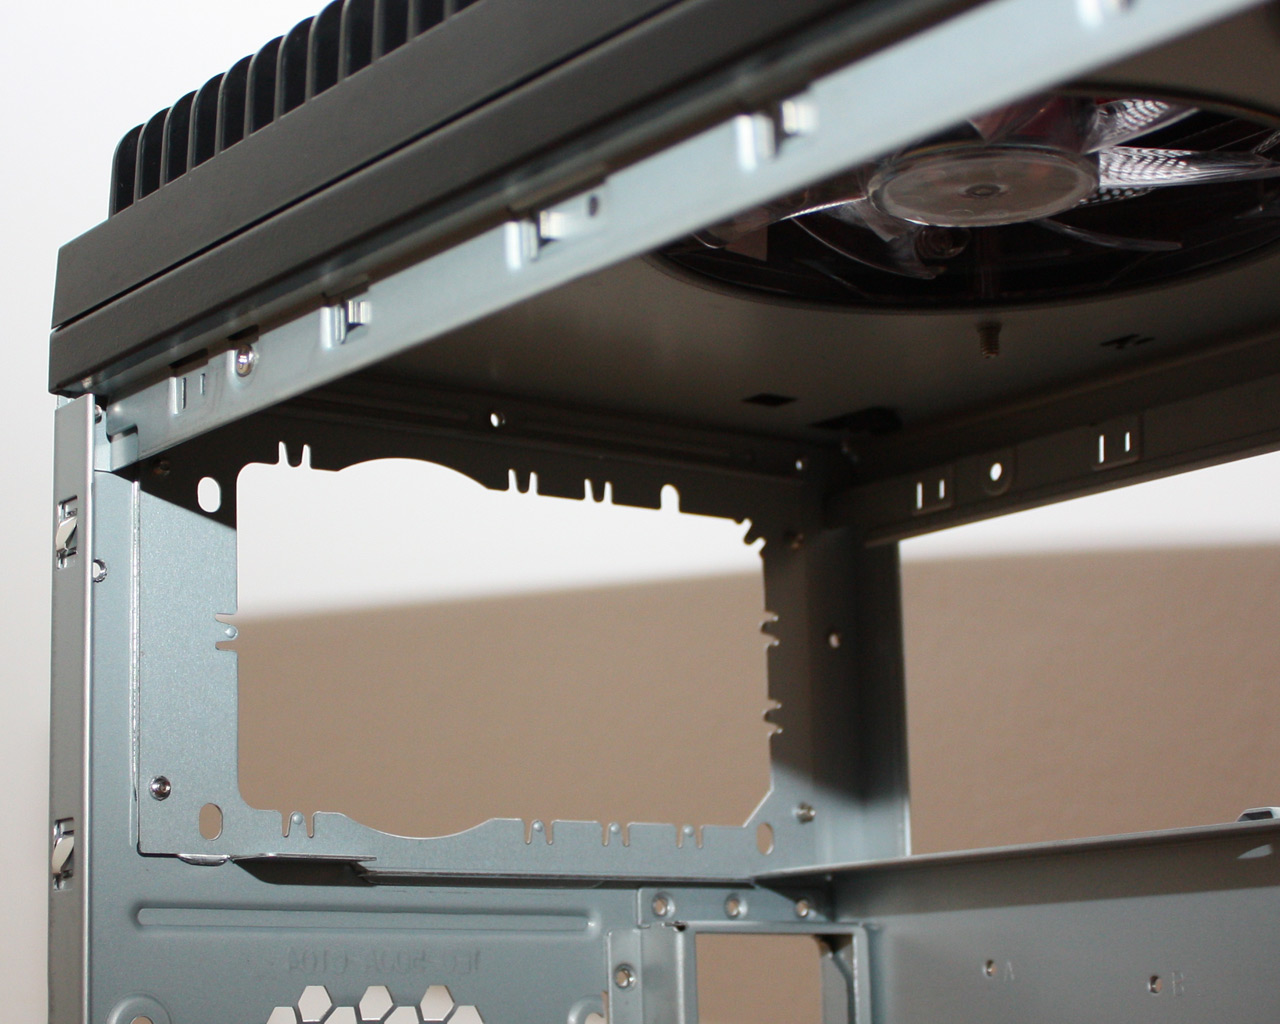
To gain access to the front drive bay covers, you can either push the top one out of the case by reaching in and exerting pressure on it from the inside, or you may pull the entire plastic part off the case. The same goes for the front fan, as you can simply remove the metal part covering the fan, instead of pulling off the entire front. Chieftec has put two large holes into each metal drive bay shield, which have rounded corners. This means that you can just use your fingers to break it out of the chassis - certainly a nice touch. The intake fan which cools the hard drives also has a dust filter on it. This means that all incoming air is filtered, so you will not have to worry about that aspect. You may also take off the top by removing three screws in the back and two further ones on the inside ceiling of the chassis. The two 120 mm fans can then be easily inspected or even exchanged if you wish. It should become apparent at this point, that the power supply will block at least the rear ceiling fan partially, which also destroys any hopes of installing a dual radiator right here - too bad, one more less interesting gaming feature. Upon removing all the plastic parts which may be taken off, we are left with a bare structure, which makes a very solid and high quality impression - even "naked".
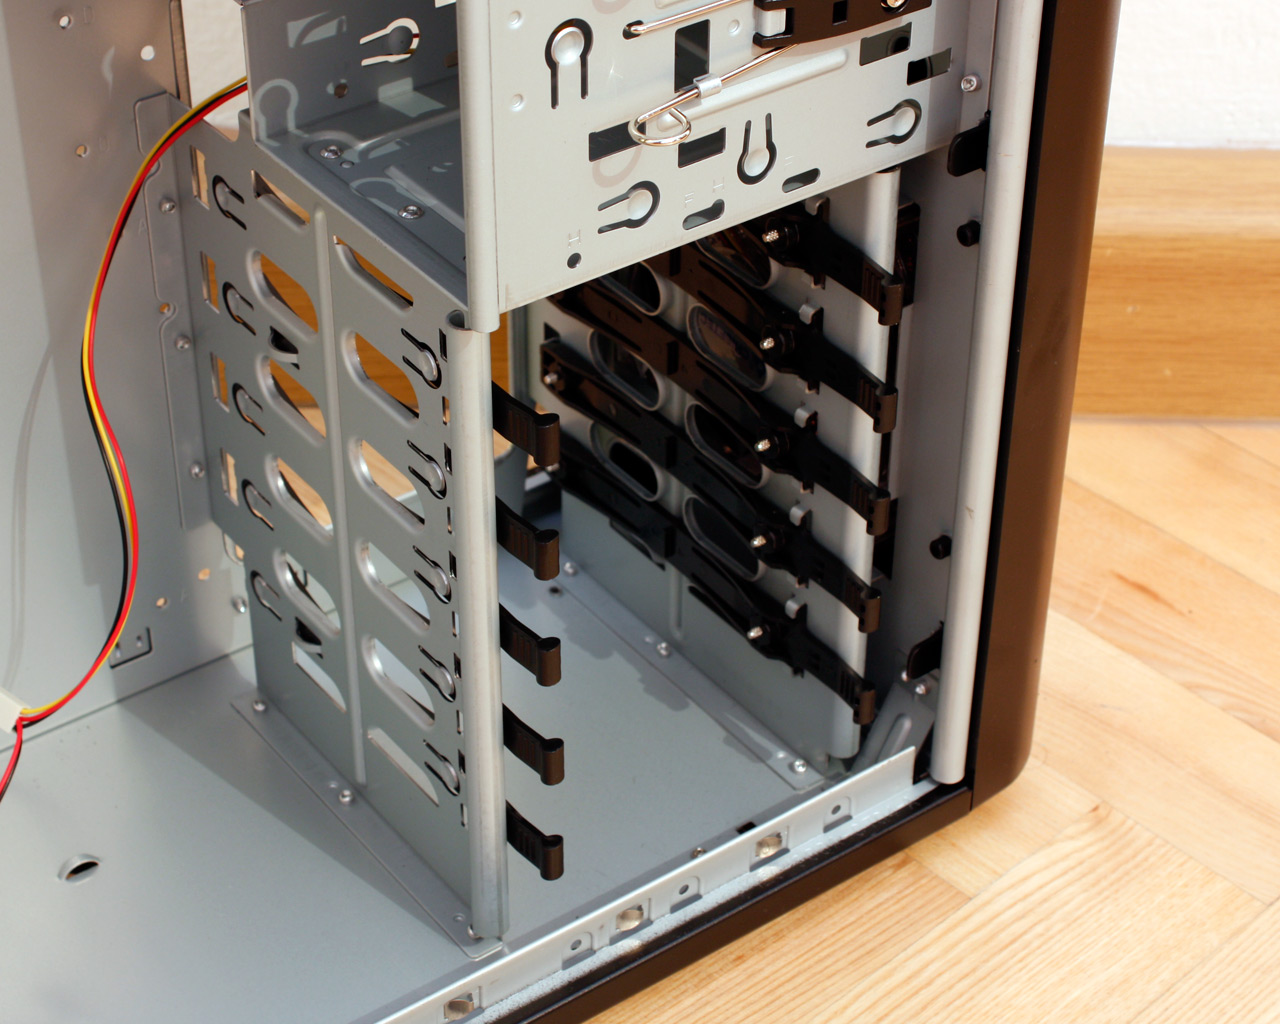
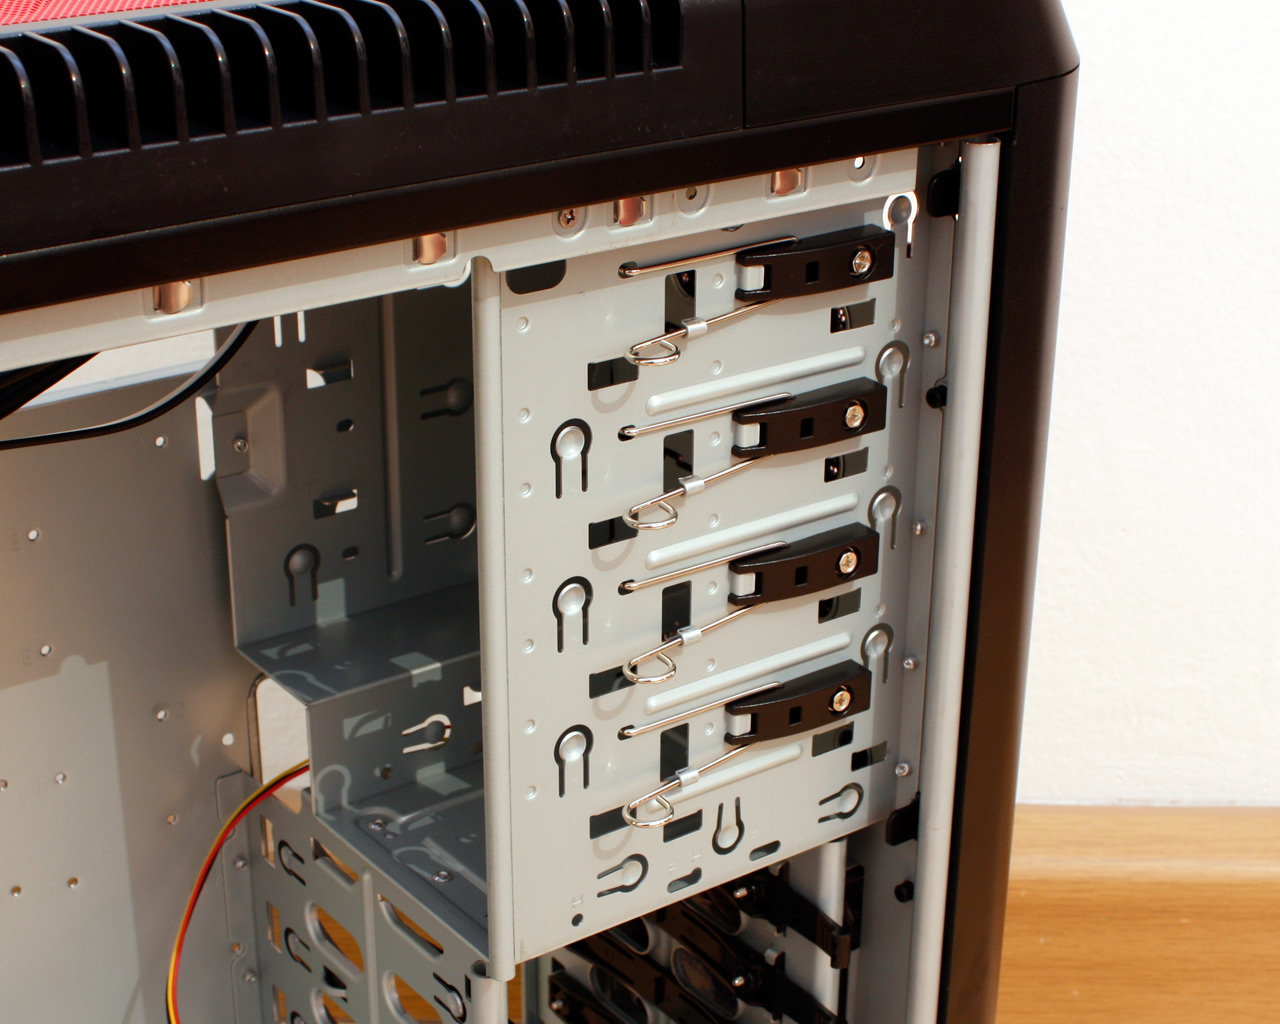
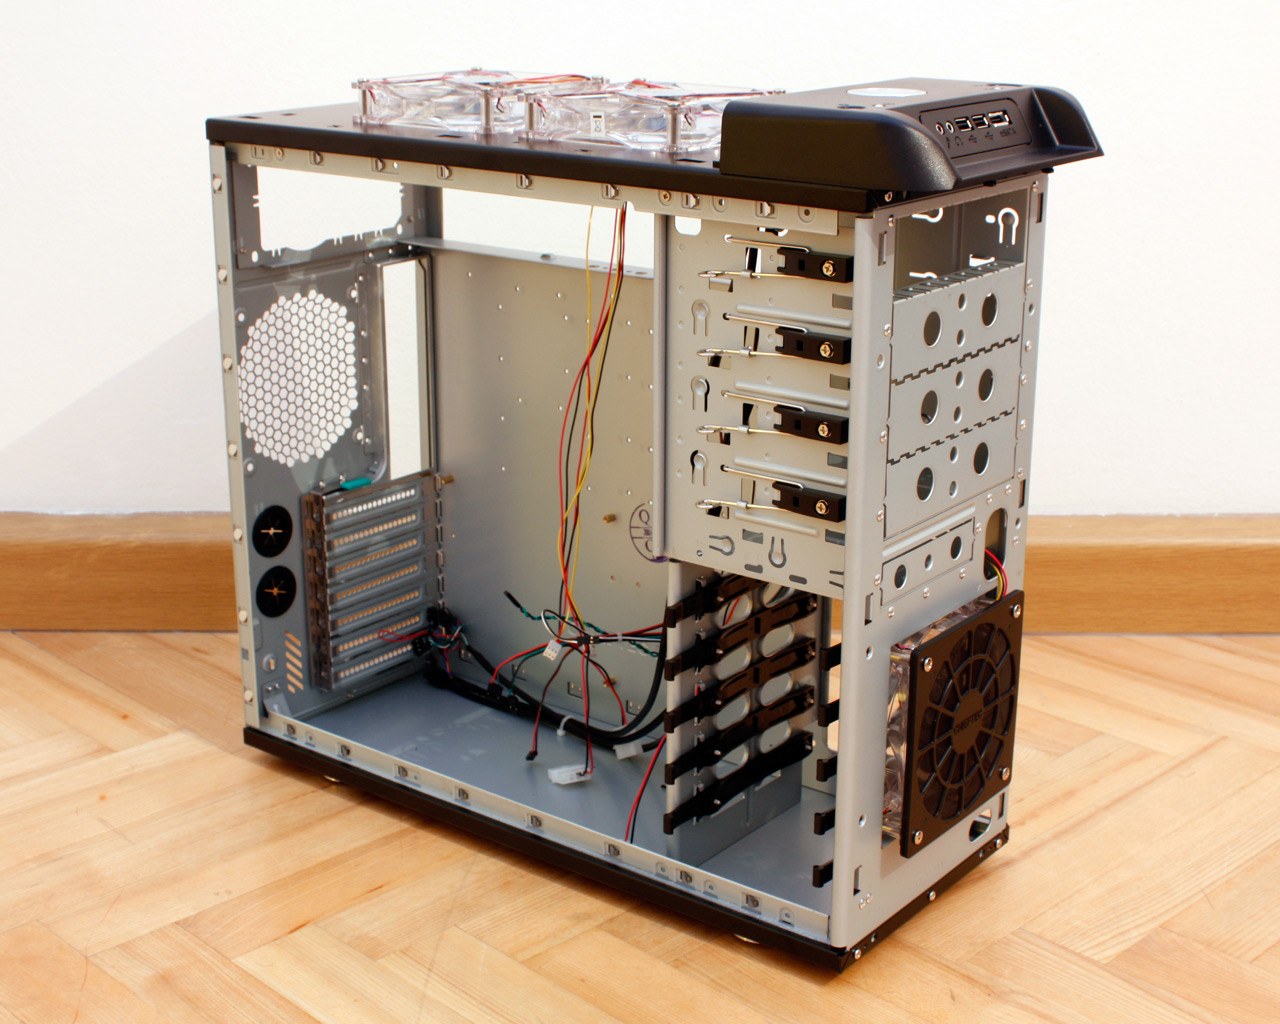
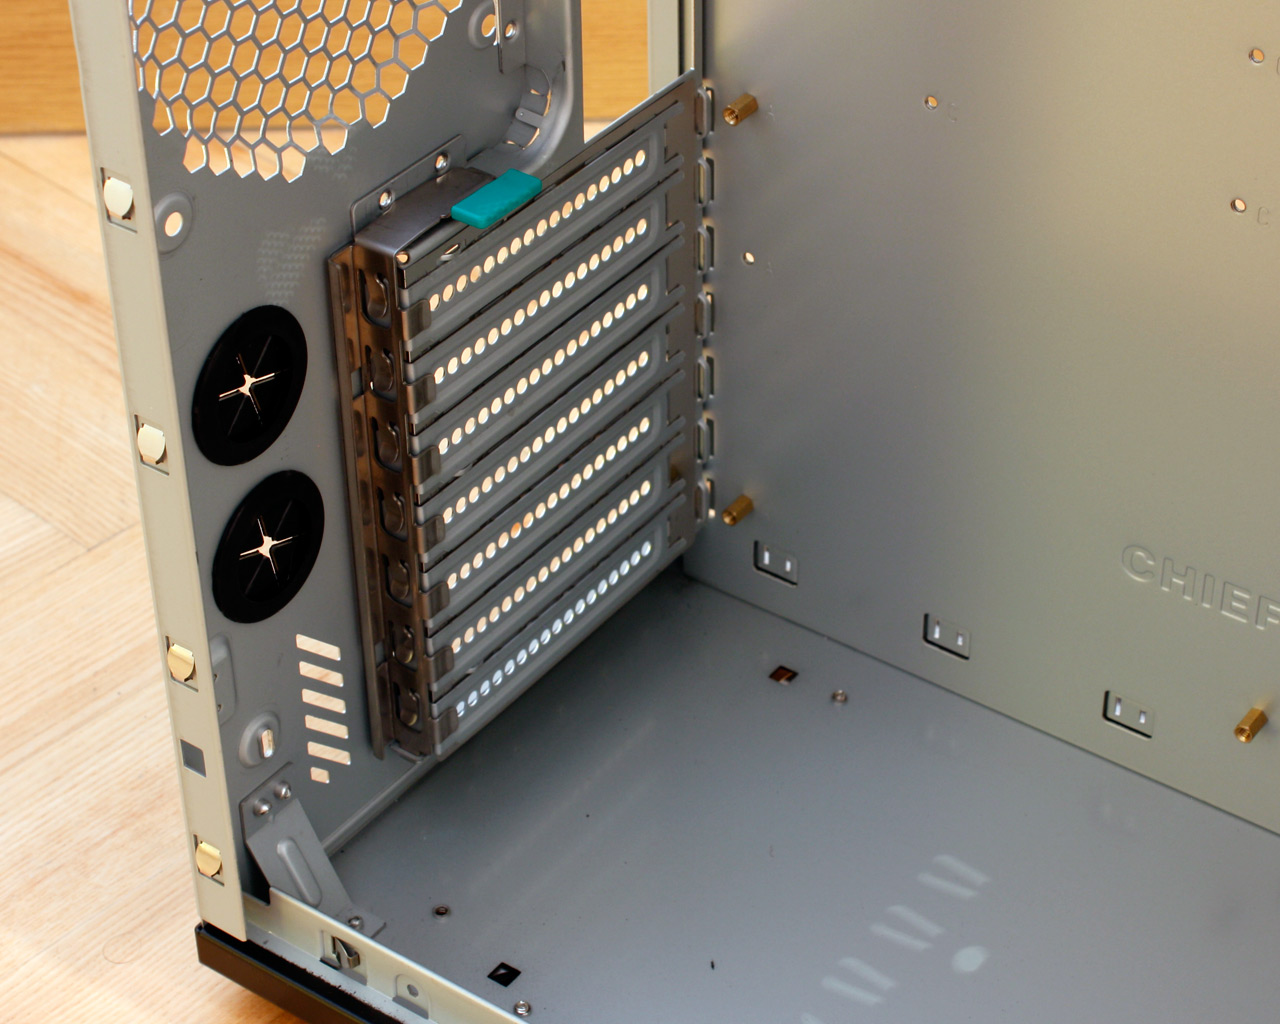
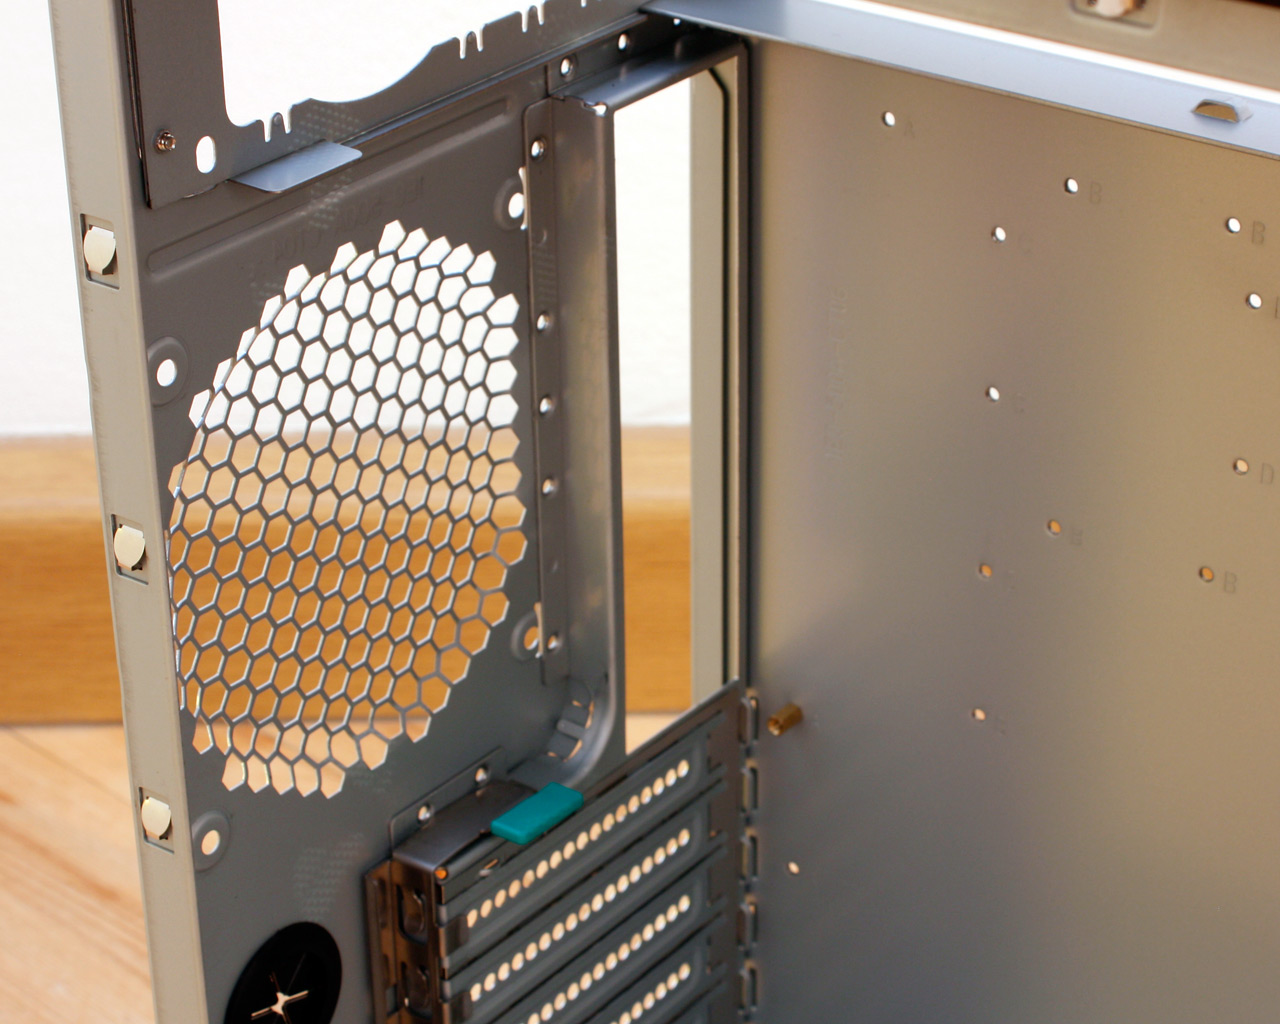
The Dragon features five actual hard drive bays, which can be considered above average, as most mid towers only manage to squeeze four in there. Chieftec has included a simple but effective rail system to install the hard drives without the need for screws or tools. There are no rubber or foam spacers to get rid of any vibration with such a visible method, but Chieftec has cut out little metal knobs, which press down on the rails to solve that issue. The external drive bays consist of four 5.25 inch and a single 3.5 inch bay. The latter is actually not an external bay and Chieftec counts this one as a hard drive bay as well, reaching the advertised six such slots. This one does not feature any rails and the drive is secured with the supplied screws. I would have liked to see an external 3.5 inch bay instead of this, but it should be nice spot for the main hard drive of the system.
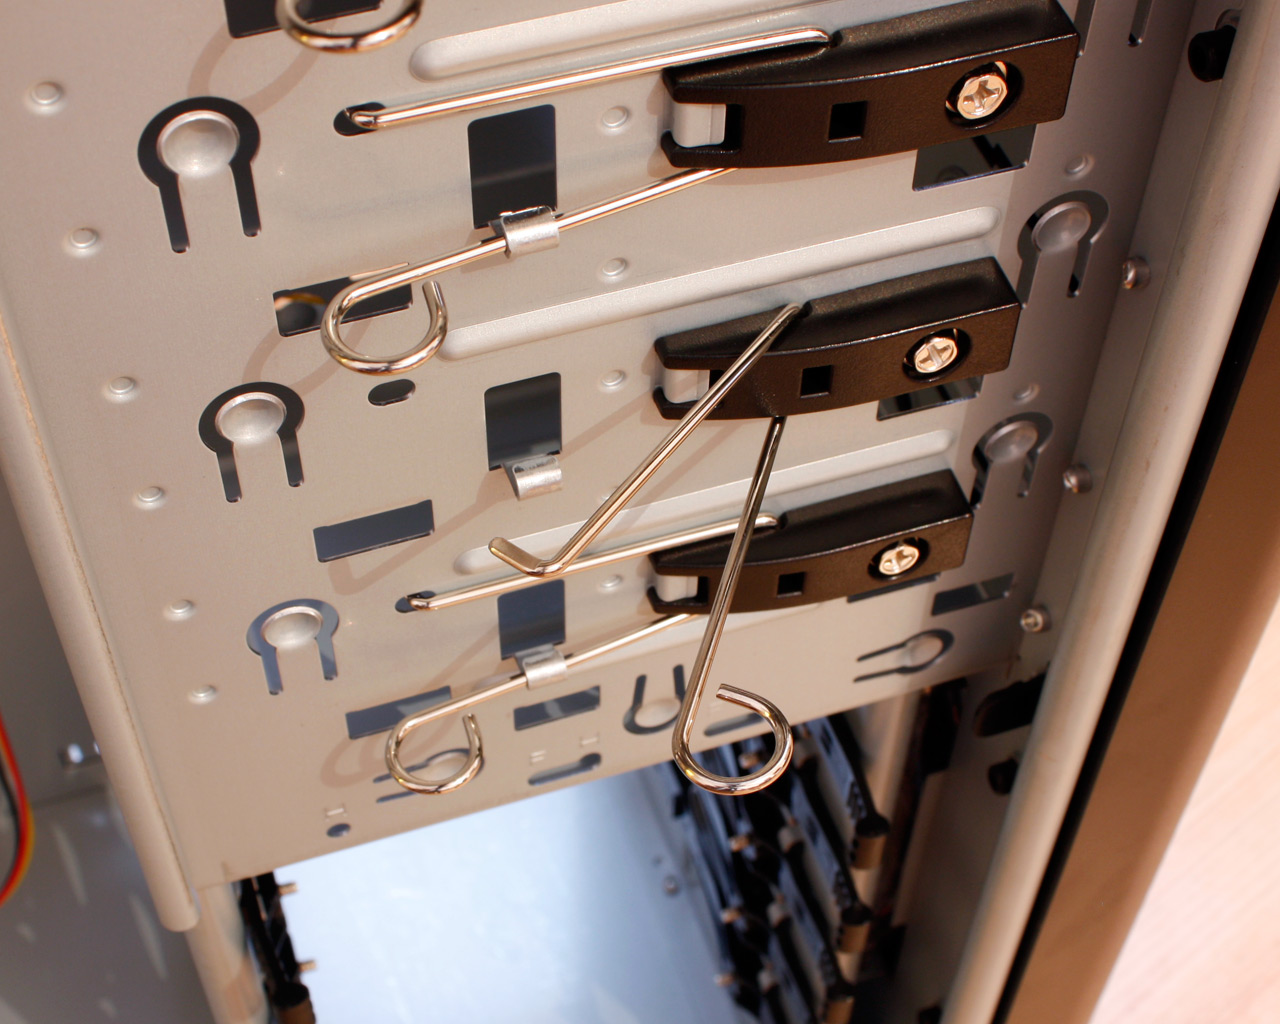
The large bays have a unique locking mechanism, which consists of a bent metal rod, which pokes into the screw hole of the drive. I am curious how well it will actually hold a drive. Chieftec does give you the option to use additional screws on the other side, but that kind of defeats the purpose.
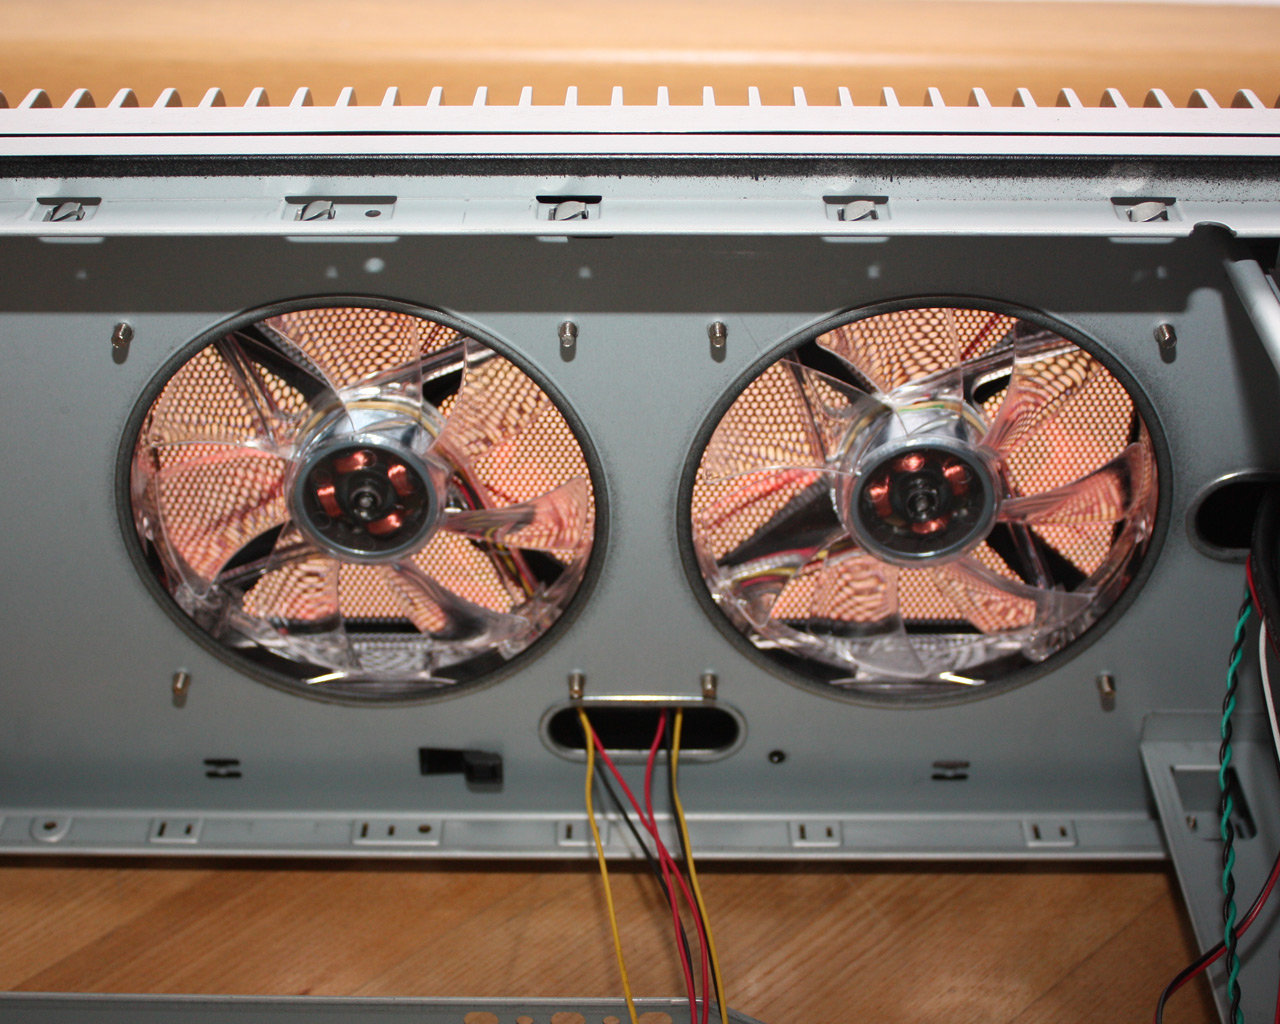
Let's take a look at the rear, starting at the bottom. The mainboard expansion slots have a simple but sturdy locking bar across the entire side. This piece is removed to install the cards and then clipped back into place. Even though this is a simple system I do think that it will work fairly well, even with heavy dual height graphic cards. The only small downside is the fact, that you will have all cards hanging in there loosely during the installation process, as there is one lock to hold them all in place at once. The middle area does not bear any real surprises. You may install a single 120 mm fan here, which Chieftec did not include. It would have been interesting to see the case packed full of fans and that would have been an additional marketing feature for Chieftec. The PSU bay is located up top in the rear - as mentioned before. You can clearly see one of the ceiling fans, which will be blocked by any power supply, no matter how small it is. These top fans are clear and feature blue LEDs as well. There are no guards or dust filter on these.
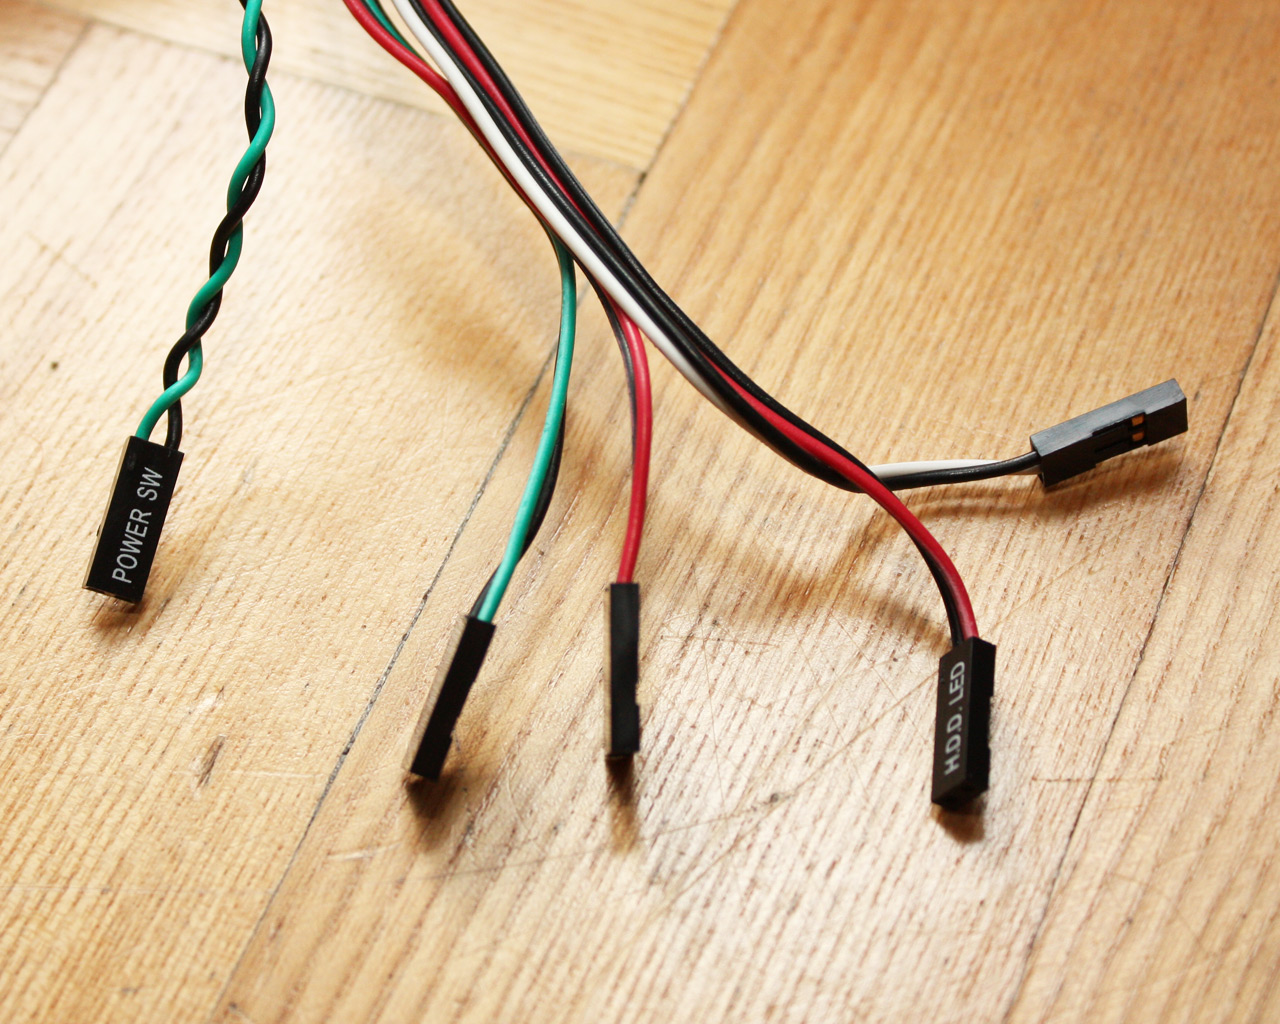
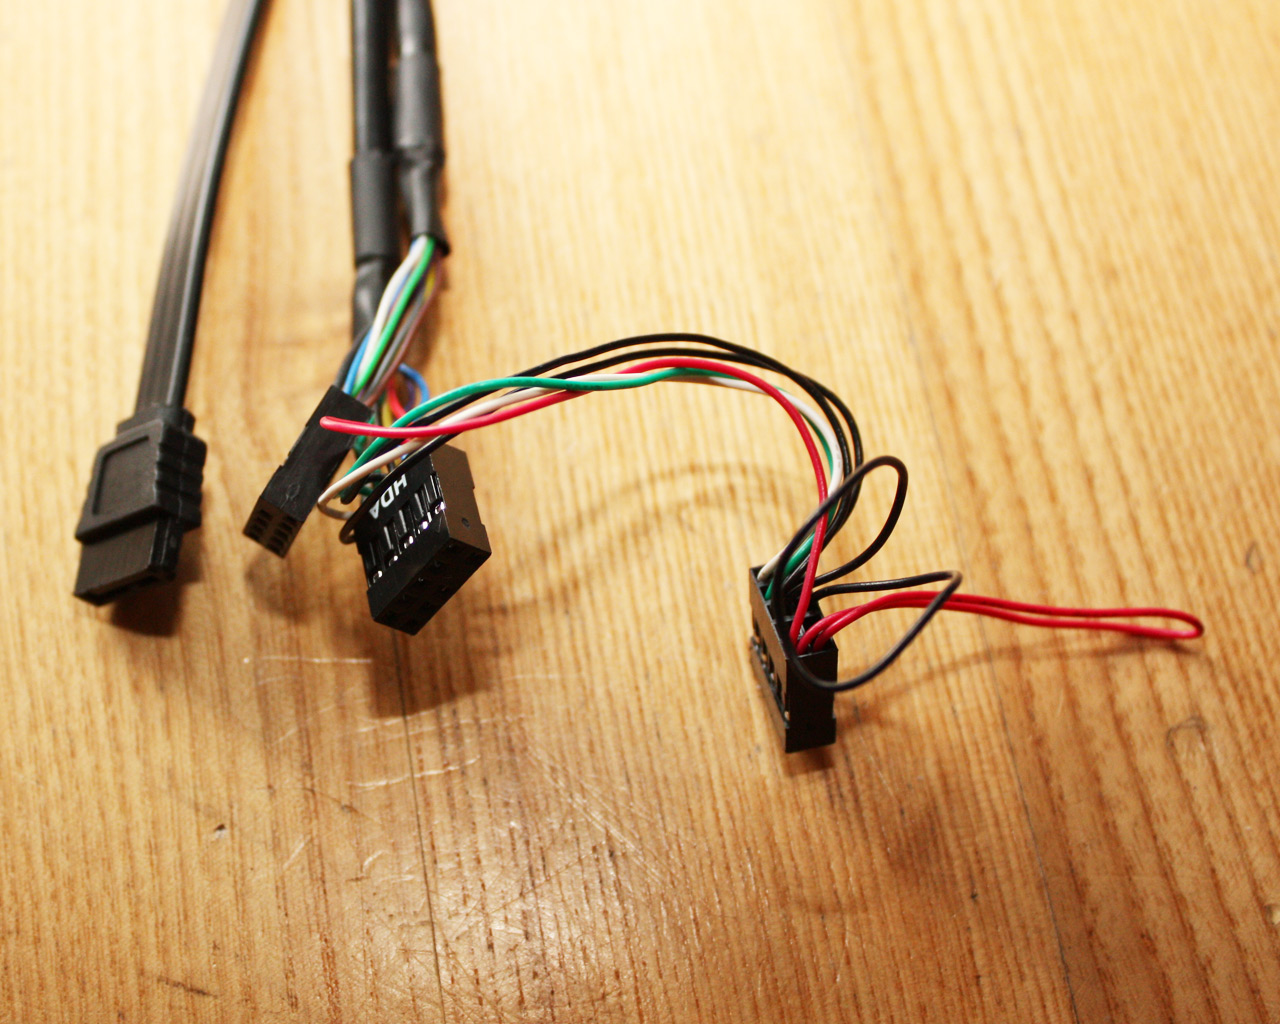
Taking a quick look at the connectors for the front I/O and the mainboard, only one negative aspect pops out. The power LED connector requires three pins, with the middle one being empty. Most of today's boards only have two pins right next to each other, so you will need to rip this connector apart. It would have been good if Chieftec could have supplied seperate plugs for each cable, to grant complete compatibility.
Jul 15th, 2025 16:28 CDT
change timezone
Latest GPU Drivers
New Forum Posts
- No offense, here are some things that bother me about your understanding of fans. (145)
- Stupid things one has done with hardware (65)
- RTX 5070 discussion (11)
- I would give anything for Valve's Steam to have an option to disable the Big Picture Mode button. How many times have I accidently clicked it, fml (52)
- Choosing the right motherboard (6)
- Solidigm NVMe Custom Modded Driver for All NVMe Brands SSDs & Any NVMe SSDs (229)
- Recommend me a decent budget card :) (33)
- What's your latest tech purchase? (24278)
- TOS 6 on Ugreen NAS (0)
- Folding Pie and Milestones!! (9620)
Popular Reviews
- MSI GeForce RTX 5060 Gaming OC Review
- Our Visit to the Hunter Super Computer
- Lexar NM1090 Pro 4 TB Review
- SilverStone SETA H2 Review
- NVIDIA GeForce RTX 5050 8 GB Review
- Fractal Design Epoch RGB TG Review
- Sapphire Radeon RX 9060 XT Pulse OC 16 GB Review - An Excellent Choice
- AMD Ryzen 7 9800X3D Review - The Best Gaming Processor
- Upcoming Hardware Launches 2025 (Updated May 2025)
- Corsair FRAME 5000D RS Review
TPU on YouTube
Controversial News Posts
- Intel's Core Ultra 7 265K and 265KF CPUs Dip Below $250 (288)
- Some Intel Nova Lake CPUs Rumored to Challenge AMD's 3D V-Cache in Desktop Gaming (140)
- AMD Radeon RX 9070 XT Gains 9% Performance at 1440p with Latest Driver, Beats RTX 5070 Ti (131)
- NVIDIA Launches GeForce RTX 5050 for Desktops and Laptops, Starts at $249 (122)
- NVIDIA GeForce RTX 5080 SUPER Could Feature 24 GB Memory, Increased Power Limits (115)
- Microsoft Partners with AMD for Next-gen Xbox Hardware (105)
- Intel "Nova Lake‑S" Series: Seven SKUs, Up to 52 Cores and 150 W TDP (100)
- NVIDIA DLSS Transformer Cuts VRAM Usage by 20% (99)