 10
10
Cooler Master NR200P Review
Cooler Master MasterFan SF120M ARGB »A Closer Look - Inside
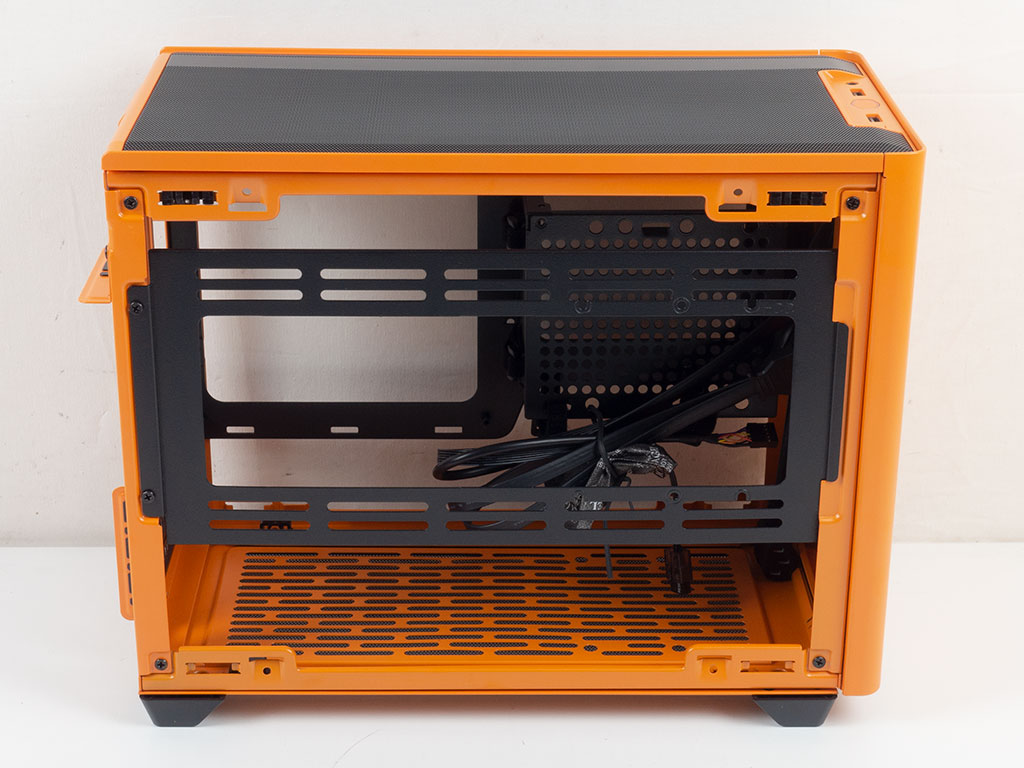

To access the interior, start by removing the side panels. While you can go much further than that, we will keep it as is for a look at the interior, as it makes for a good up/down reference. The main side of the chassis comes with a frame on which you may install two 120 or 140 mm fans. Alternatively, it may hold a 240 or 280 mm AIO as well. Towards the front are little notches which will allow you to install a 3.5" drive instead of these other elements. If you do opt for fans or an AIO on this frame, you will have to install your GPU into the horizontal slots because the vertical ones will be blocked.
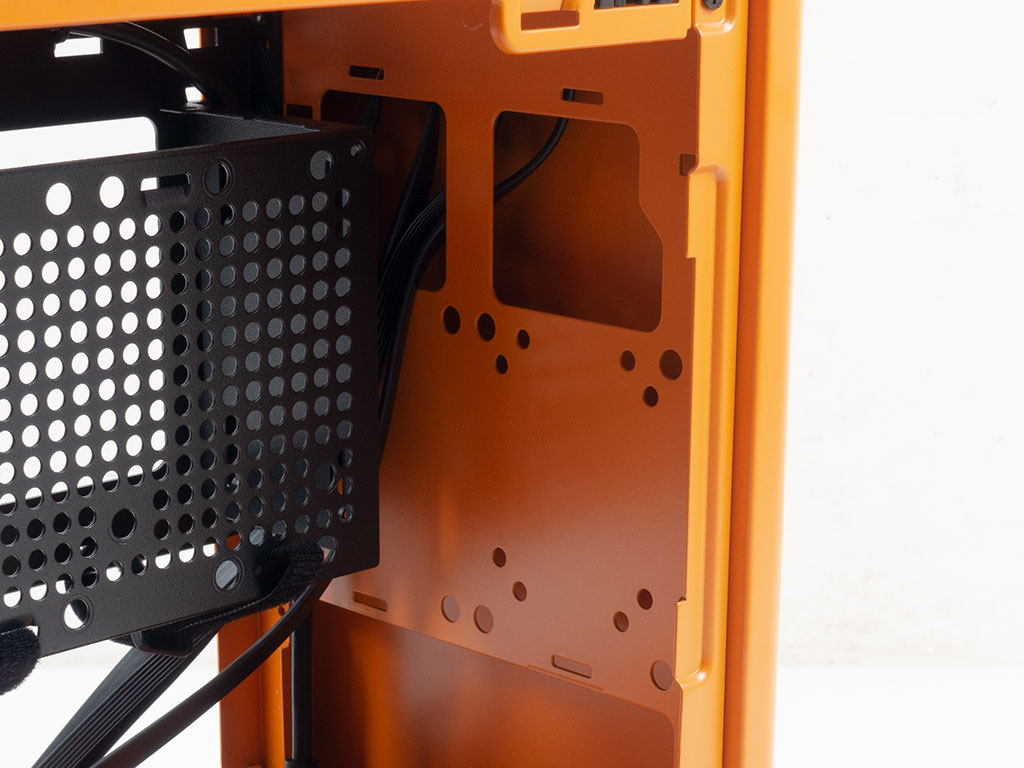
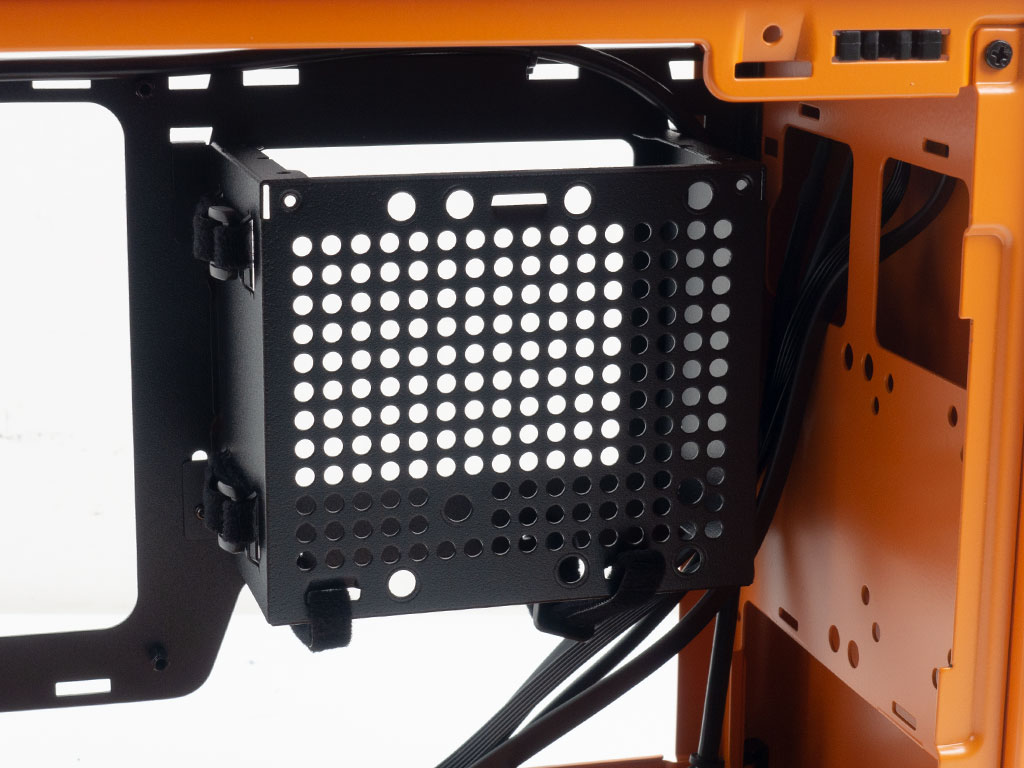
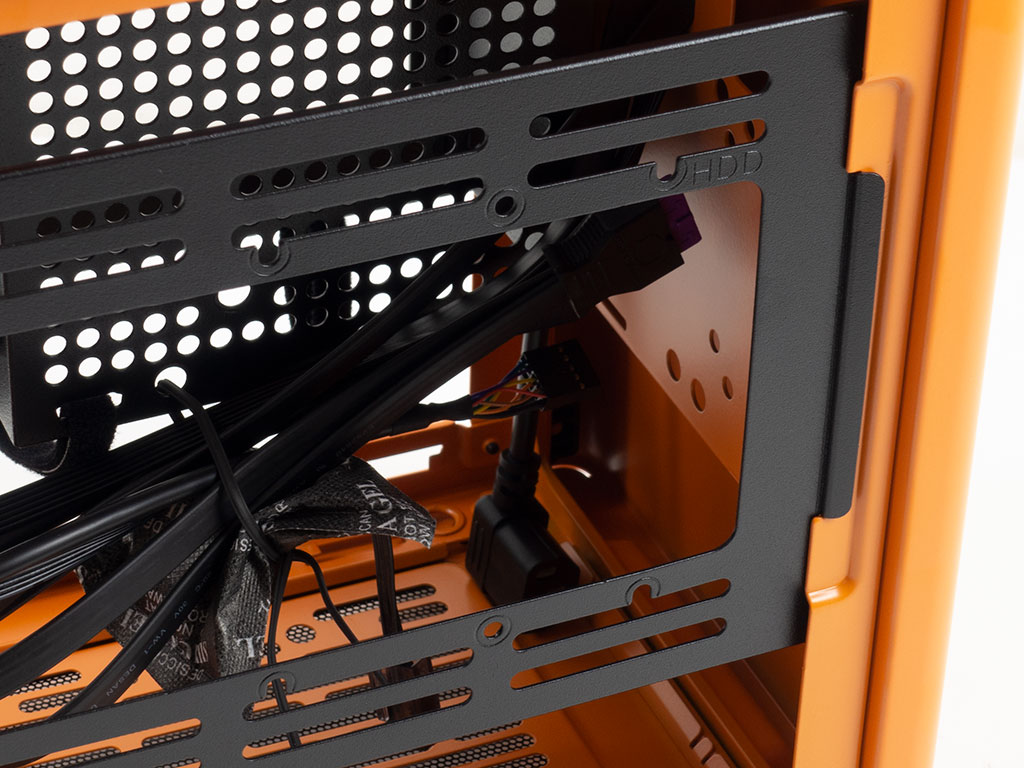
Looking towards the front of the interior, you can see the mounts for the SSDs that would sit on the outside of this frame, sandwiched by the front cover. The mount for the pump is right next to the SFX/SFX-L PSU cage. Alternatively, you may move that cage to this location of the case, which will maximize the room for your horizontal GPU placement if using an SFX-L power supply. You may install a 2.5" or 3.5" hard drive here as well. If you do install a 3.5" drive, it may get in the way of a long, vertical GPU, but still leave enough room for a side-mounted AIO. Look closely and you can see four Velcro ties positioned around the PSU bracket to keep things tidy internally.
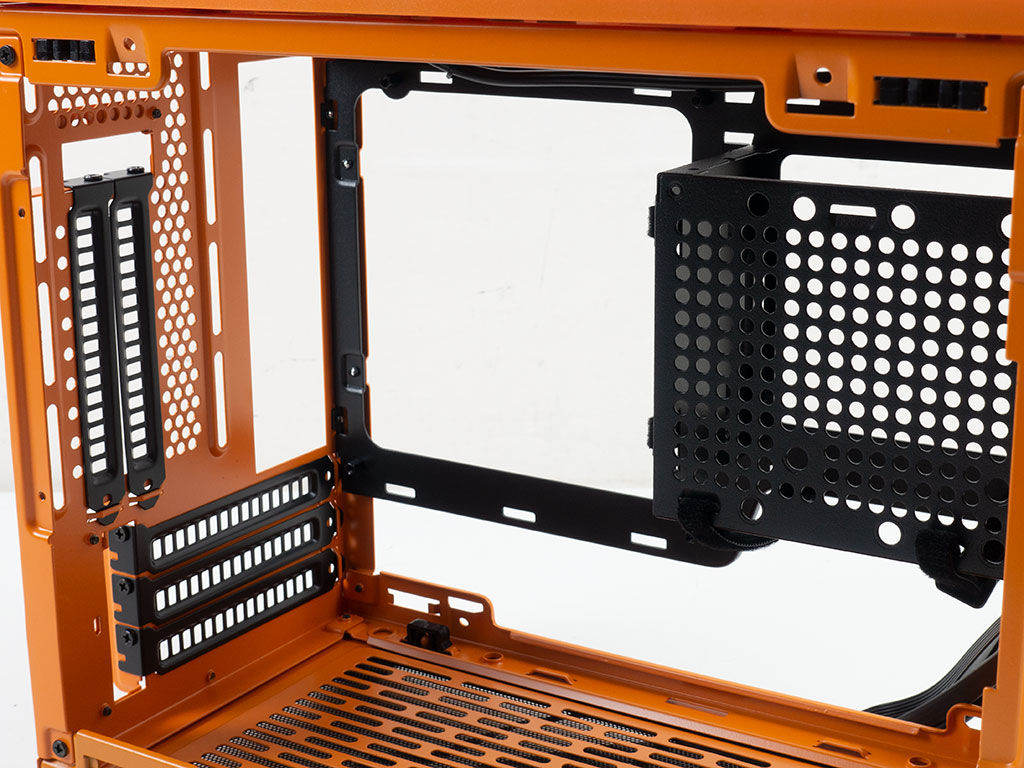

The motherboard tray is essentially one big hole with further holes to apply zip ties or Velcro strips to the edges. The vertical mounting area for a GPU comes with elongated cutouts to install a 92 mm fan here. Squeezing a reservoir in is possible as well, I am sure.
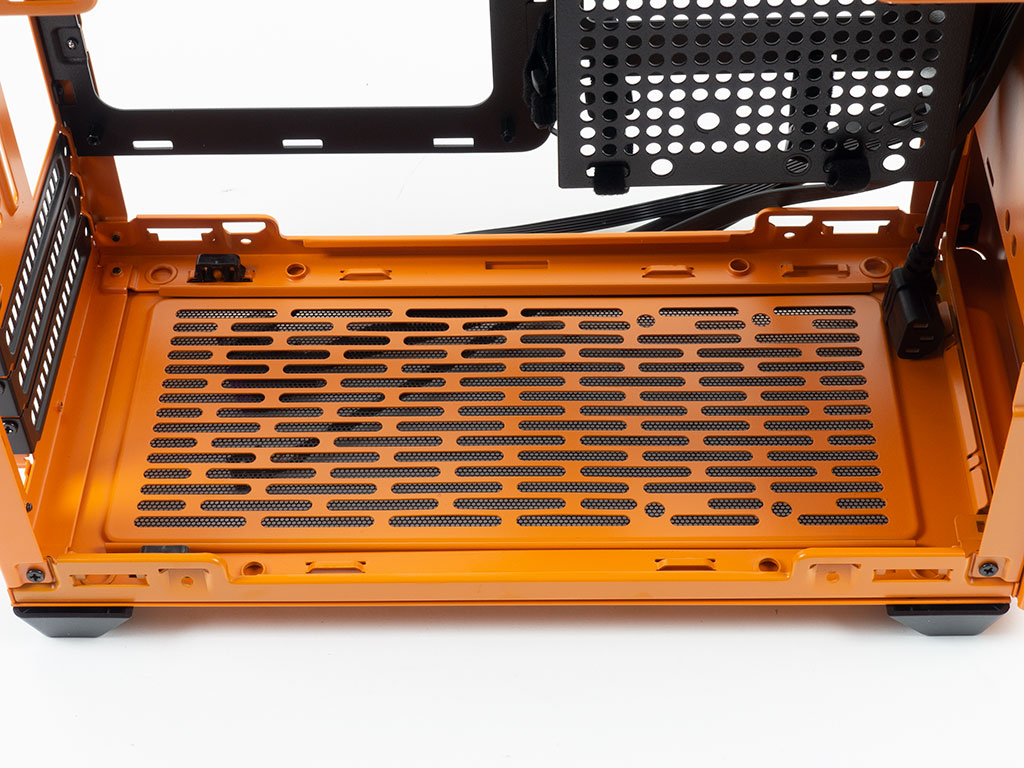
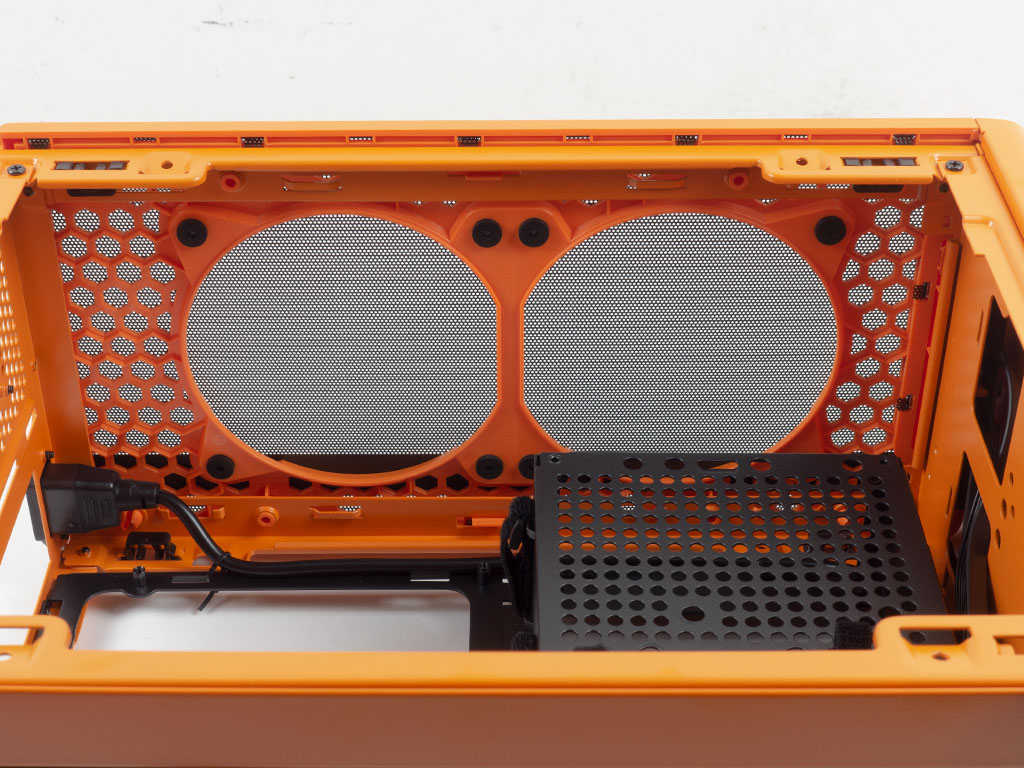
The floor of the NR200P is one big air vent with mounting holes for two 120 mm fans. Looking closely, there are holes for a 3.5" drive, which is interesting since Cooler Master only advertises a maximum of two such storage units for this chassis. Taking a peek at the ceiling, you can see where the 120 mm fans are to be placed in relation to the PSU bay. While the NR200P can take an SFX-L power supply, you need to be aware of the fact that you either have to move the cage up, giving up the ability to install one of the 120 mm fans, or leave the cage in its lower position.
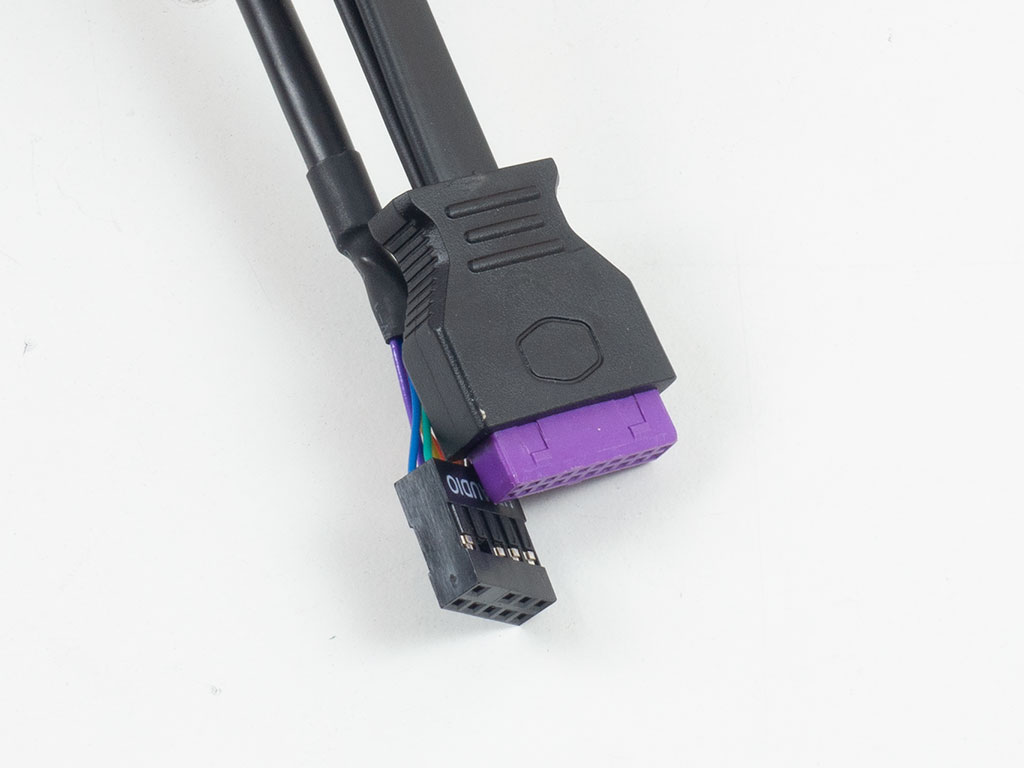
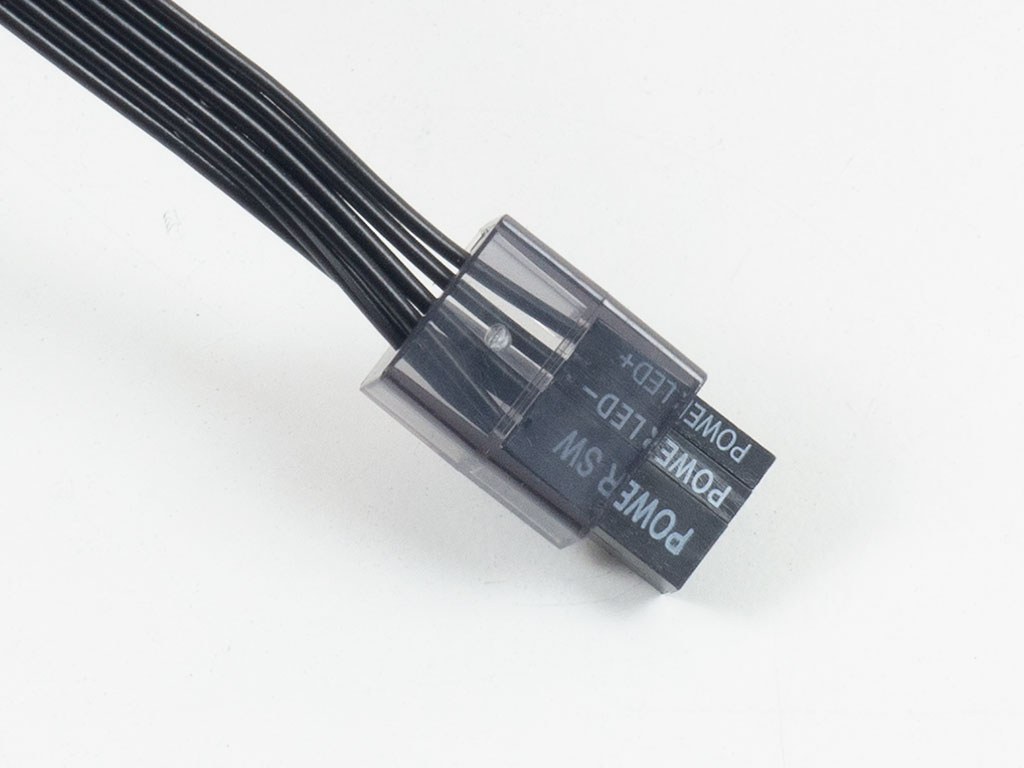
All the cables within the case are essentially "classic." However, Cooler Master added a touch of their own corporate color to the USB 3.0 connector and placed the separate pins of the case leads in a plastic frame so that you may easily plug them all in at once.
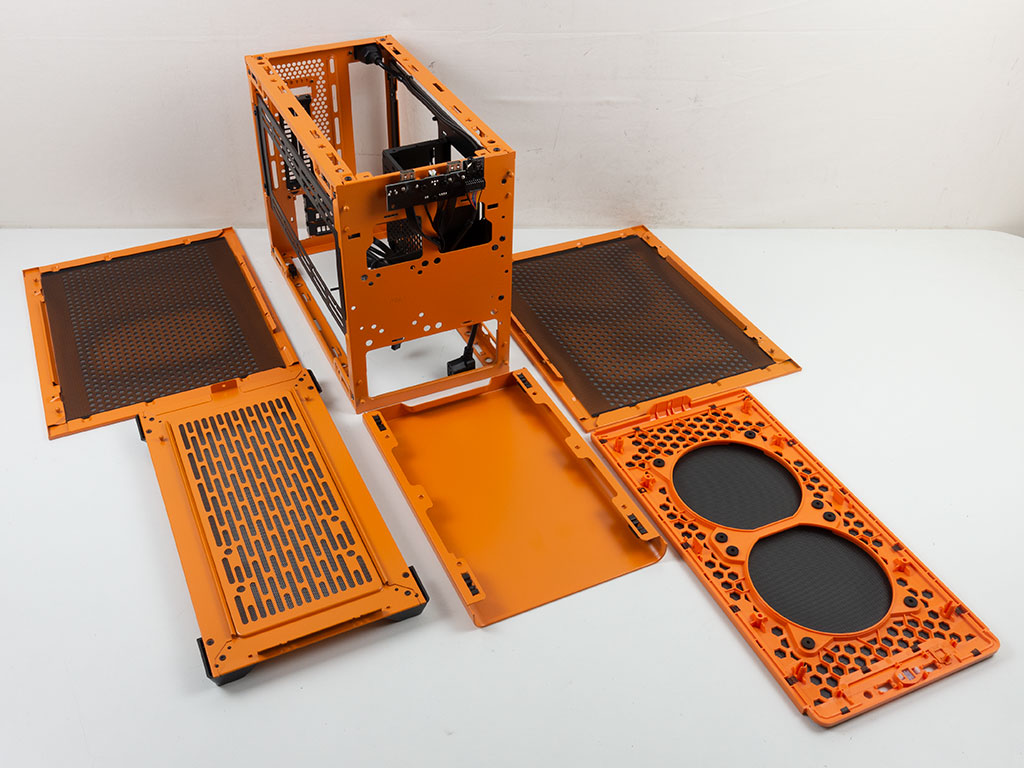
As hinted at the beginning of this page, you may remove more than the side panel. In fact, Cooler Master allows you to easily detach all panels of the NR200P, thus making the parts assembly process and cable management as easy as possible.
Jul 12th, 2025 03:34 CDT
change timezone
Latest GPU Drivers
New Forum Posts
- What's your latest tech purchase? (24237)
- What are you playing? (23921)
- Can you guess Which game it is? (226)
- Gigabyte graphic cards - TIM gel SLIPPAGE problem (144)
- [Intel AX1xx/AX2xx/AX4xx/AX16xx/BE2xx/BE17xx] Intel Modded Wi-Fi Driver with Intel® Killer™ Features (367)
- NVIDIA RTX PRO 6000 Workstation Runs Much Hotter Than 5090 FE (22)
- 3D Printer Club (539)
- Will you buy a RTX 5090? (644)
- [GPU-Z Test Build] New Kernel Driver, Everyone: Please Test (89)
- No offense, here are some things that bother me about your understanding of fans. (34)
Popular Reviews
- Fractal Design Epoch RGB TG Review
- Corsair FRAME 5000D RS Review
- Lexar NM1090 Pro 4 TB Review
- NVIDIA GeForce RTX 5050 8 GB Review
- NZXT N9 X870E Review
- Sapphire Radeon RX 9060 XT Pulse OC 16 GB Review - An Excellent Choice
- AMD Ryzen 7 9800X3D Review - The Best Gaming Processor
- Our Visit to the Hunter Super Computer
- Upcoming Hardware Launches 2025 (Updated May 2025)
- Chieftec Iceberg 360 Review
TPU on YouTube
Controversial News Posts
- Intel's Core Ultra 7 265K and 265KF CPUs Dip Below $250 (288)
- Some Intel Nova Lake CPUs Rumored to Challenge AMD's 3D V-Cache in Desktop Gaming (140)
- AMD Radeon RX 9070 XT Gains 9% Performance at 1440p with Latest Driver, Beats RTX 5070 Ti (131)
- NVIDIA Launches GeForce RTX 5050 for Desktops and Laptops, Starts at $249 (119)
- NVIDIA GeForce RTX 5080 SUPER Could Feature 24 GB Memory, Increased Power Limits (115)
- Microsoft Partners with AMD for Next-gen Xbox Hardware (105)
- Intel "Nova Lake‑S" Series: Seven SKUs, Up to 52 Cores and 150 W TDP (100)
- NVIDIA DLSS Transformer Cuts VRAM Usage by 20% (97)