 20
20
CORSAIR Hydro X Series XG7 RGB 10-SERIES GPU Water Block Review
Installation & Lighting »Closer Examination


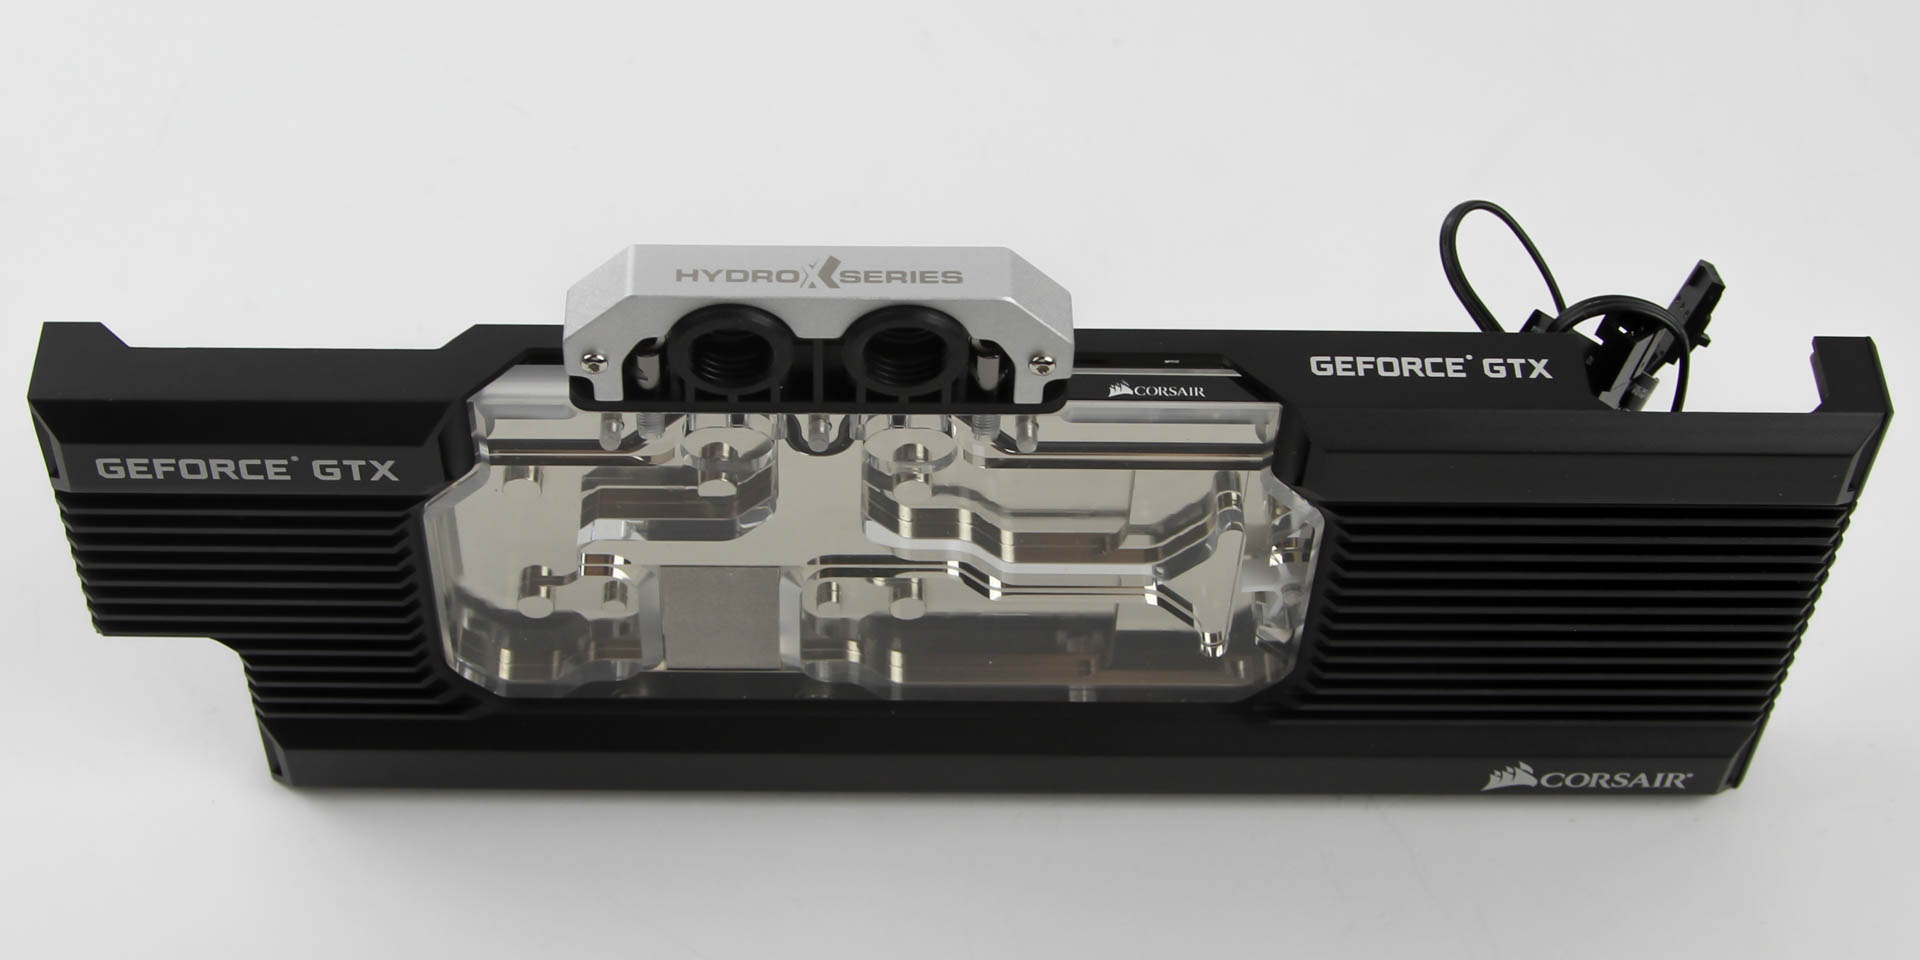

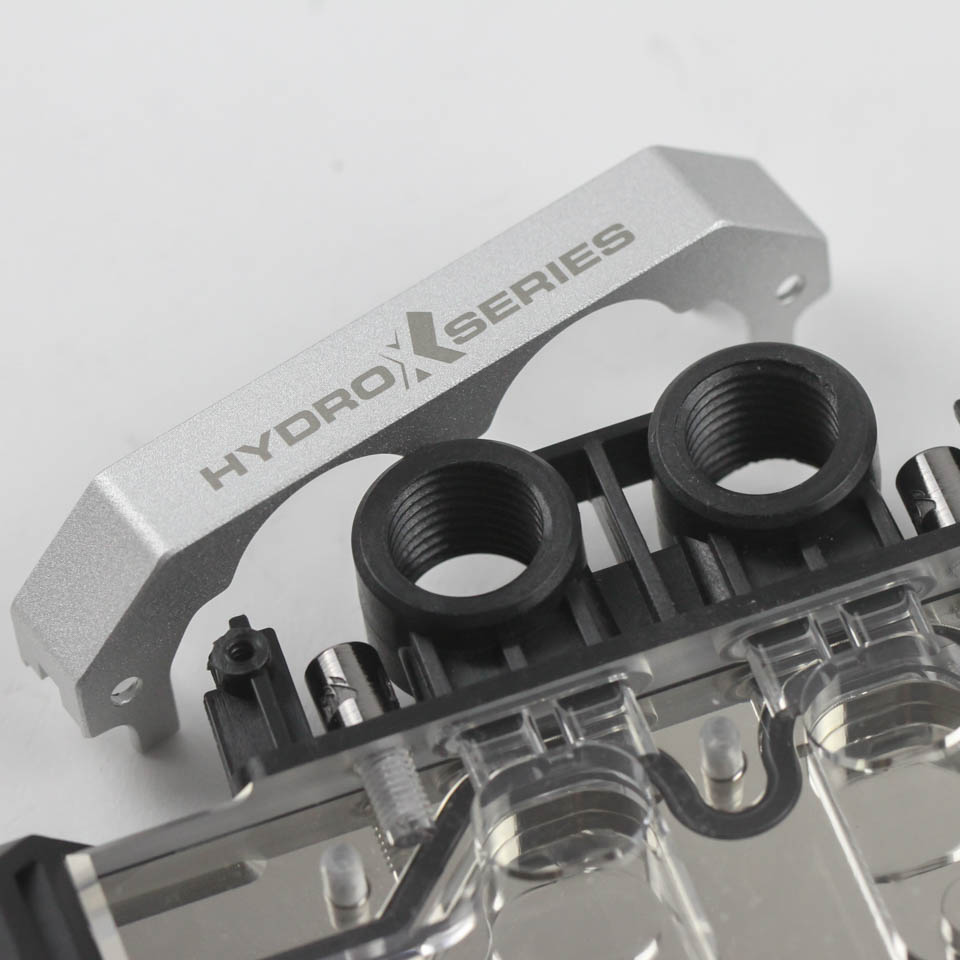
I first got a look at the CORSAIR Hydro X XG7 GPU blocks all the way back at Computex 2018 and could immediately tell that the design for these blocks was inspired by the CORSAIR Dominator Platinum memory sticks, at least before the new Capillex LED versions anyway. The I/O terminal in particular looks like a small stick of memory, with a matching shroud going over the four BSP G1/4" threaded ports, which also explains the provided two-stop plugs to cover the maximum of two ports not in use. The rest of the block looks different enough to the competition to carve out their own ID identity, with an aluminium heatsink-style side plate that is pretty much for form. Branding galore greets us here with CORSAIR and GeForce logos on the front and top, including on two screws holding the I/O terminal in place.
The actual top is polished acrylic, which gives us a good view of the cooling engine underneath. CORSAIR has gone with a serial flow route where the coolant ideally enters from the left and through the VRAM section before going through the microfins over the GPU core, rest of the VRAM, VRM section, a handily-placed flow indicator wheel, and up and out the other port on the I/O terminal. Nickel-plated copper for the cold plate makes this a nightmare to photograph straight on, but it does look neat. The added mass from the aluminium also makes this a hefty little thing, and it feels quite solid in the hands if I say so myself. The four G1/4" ports are threaded perfectly in the acetal terminal, and the provided stop plugs work just fine with the O-ring seal helping prevent any leaks.


Turning the block over, we see more of the cold plate and the side cover plate. The latter is inset on the side to allow for two cables to come out, both of which address the addressable RGB lighting integrated on the block. One of the cables plugs into a compatible LED header on a CORSAIR Lighting Node PRO or Commander PRO, and the other is a pass-through cable to allow another such product to be connected off the same header (official numbers are 96 LEDs per channel, so you can have a lot of blocks on the same header). CORSAIR wants to have people in their own ecosystem, which arguably is big and polished enough to merit consideration, but giving people the option to use it with a motherboard would be nice, especially since the CORSAIR solution is an additional purchase.
The cold plate section itself has pre-cut and pre-applied thermal pads on the relevant sections, which makes installation a real pleasure and breeze as we will see soon. The raised section in contact with the GPU core also has pre-applied thermal paste, which is protected during transit by a thin plastic cover. Note those screws around the section, though? This is where things get different relative to the typical GPU water block.
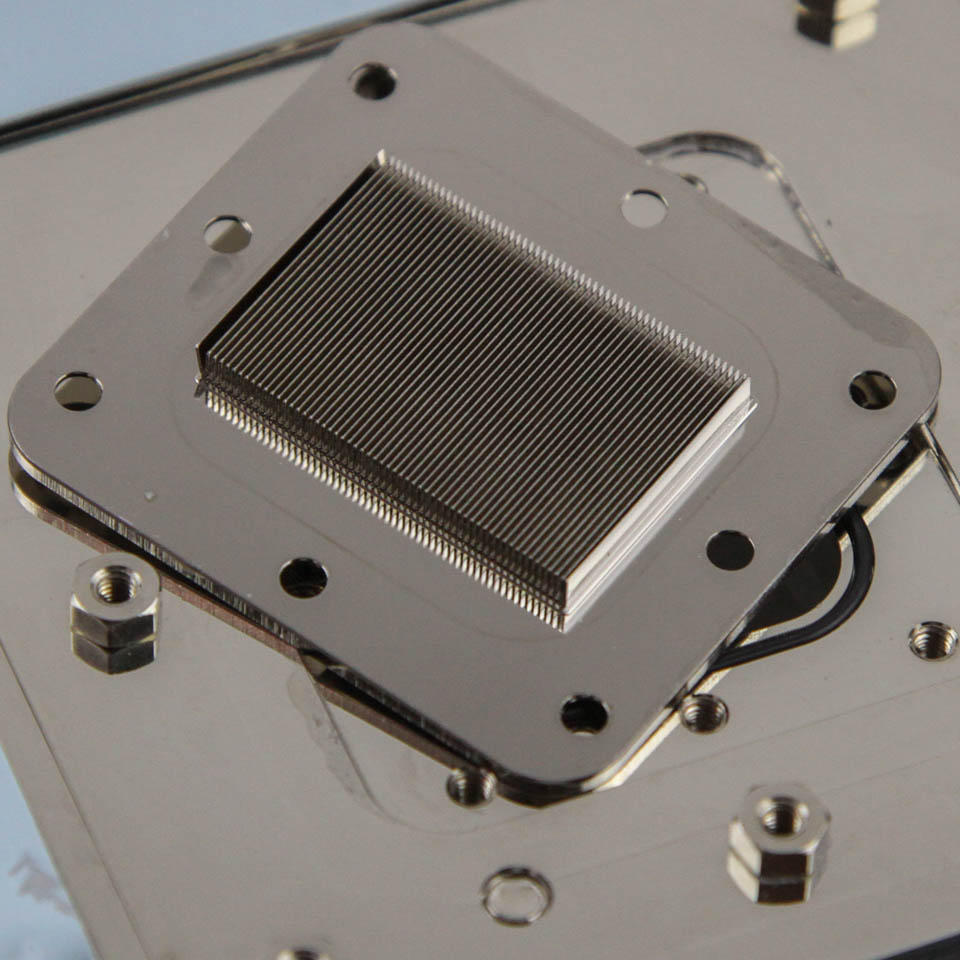
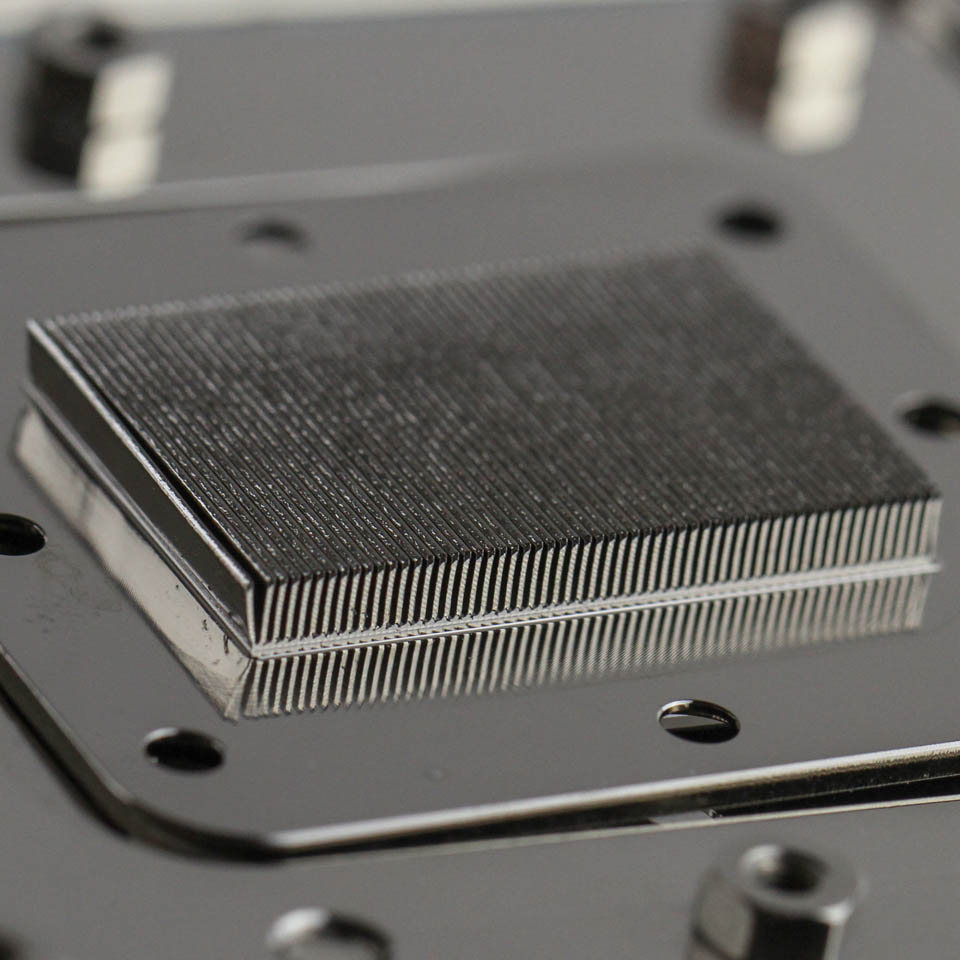

Disassembly was done after all testing is complete, and CORSAIR does not make life easy here, though for good reason since there is really nothing to gain from taking it apart unless you have to clean it up more than simply a flush would do. A combination of precision hex and Phillips head screwdrivers are needed, and the first thing I did was to take off the eight screws around the central core section to reveal a CNC-cut microfin piece that can be manufactured separately and then simply screwed in place in the block with an O-ring in between. This is not the most elegant of approaches, nor is it necessarily leading to the best-performing layout either, but it is a pretty good solution for the volumes of production CORSAIR deals in comparison to the average water-block manufacturer that uses a CNC machine to churn out fewer blocks in a unit of time. There are over 50 microfins here, and the overall area is larger than the actual die size on my GTX 1080 as well.
The Dominator Platinum memory inspired shroud over the I/O terminal is similarly held in place via four tiny screws, and can then be pulled upwards and away to reveal two more screws that keep the terminal in place. This has the typical oval-shaped O-rings inset into the acrylic top to ensure the coolant only flows through one way and does not leak out anywhere else.


Yet more screws keep the acrylic top/cold plate piece tied to the aluminium cover plate, some of which are located partly under the pre-applied thermal pads. There is not much to see here that we have not already, but now, we do get a better look at the rounded rectangular coolant path as well as the coolant flow indicator wheel, in addition to the 16 addressable dRGB LEDs on the flat PCB located at the bottom and shining upwards. The light from the LEDs is diffused through the acrylic, blocked and re-directed by the opaque aluminium cover plate, and illuminates the rest of the acrylic top to help users see the entire exposed section on the front.
Jul 15th, 2025 19:41 CDT
change timezone
Latest GPU Drivers
New Forum Posts
- TPU's Nostalgic Hardware Club (20514)
- What's your latest tech purchase? (24279)
- No offense, here are some things that bother me about your understanding of fans. (147)
- Is this dual channel or async? (0)
- Stupid things one has done with hardware (68)
- Game Informer magazine is back! (5)
- monitor stand became loose after making changes to setup (0)
- What is the latest game you finished or 100% (53)
- How about AMD instead of Intel? (43)
- Adding distilled water to ups batteries really work ? (15)
Popular Reviews
- MSI GeForce RTX 5060 Gaming OC Review
- Our Visit to the Hunter Super Computer
- SilverStone SETA H2 Review
- Lexar NM1090 Pro 4 TB Review
- NVIDIA GeForce RTX 5050 8 GB Review
- Fractal Design Epoch RGB TG Review
- Sapphire Radeon RX 9060 XT Pulse OC 16 GB Review - An Excellent Choice
- AMD Ryzen 7 9800X3D Review - The Best Gaming Processor
- Upcoming Hardware Launches 2025 (Updated May 2025)
- Corsair FRAME 5000D RS Review
TPU on YouTube
Controversial News Posts
- Intel's Core Ultra 7 265K and 265KF CPUs Dip Below $250 (288)
- Some Intel Nova Lake CPUs Rumored to Challenge AMD's 3D V-Cache in Desktop Gaming (140)
- AMD Radeon RX 9070 XT Gains 9% Performance at 1440p with Latest Driver, Beats RTX 5070 Ti (131)
- NVIDIA Launches GeForce RTX 5050 for Desktops and Laptops, Starts at $249 (122)
- NVIDIA GeForce RTX 5080 SUPER Could Feature 24 GB Memory, Increased Power Limits (115)
- Microsoft Partners with AMD for Next-gen Xbox Hardware (105)
- Intel "Nova Lake‑S" Series: Seven SKUs, Up to 52 Cores and 150 W TDP (100)
- NVIDIA DLSS Transformer Cuts VRAM Usage by 20% (99)