 23
23
In Win Allure Review
Assembly »A Closer Look - Inside
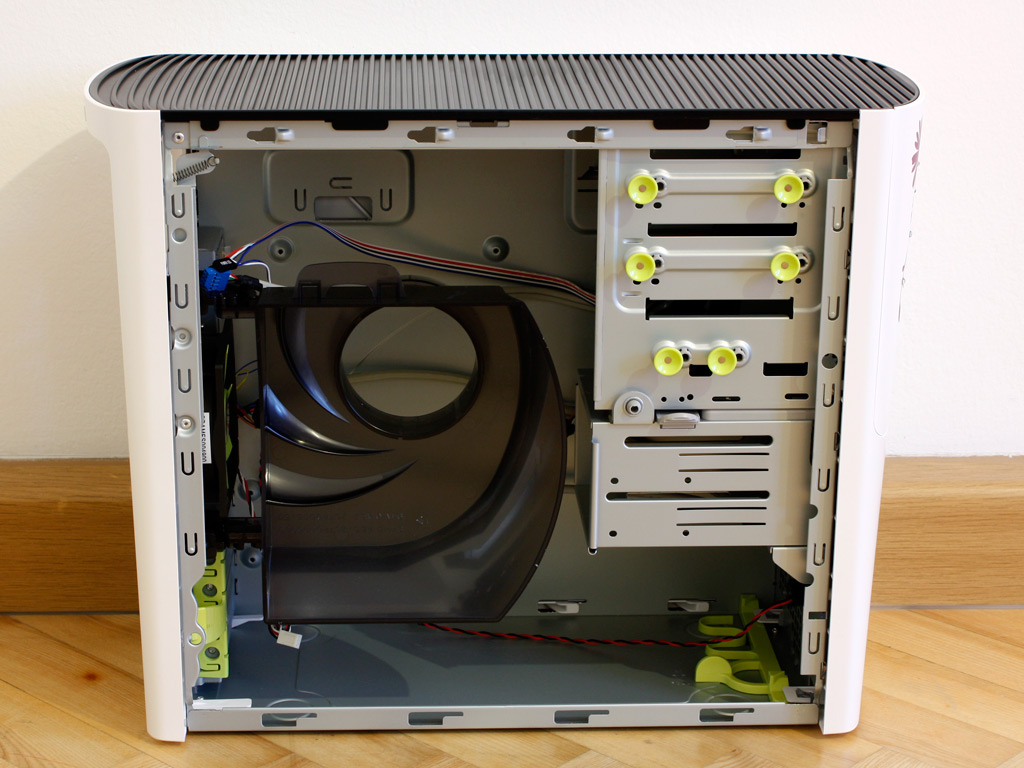
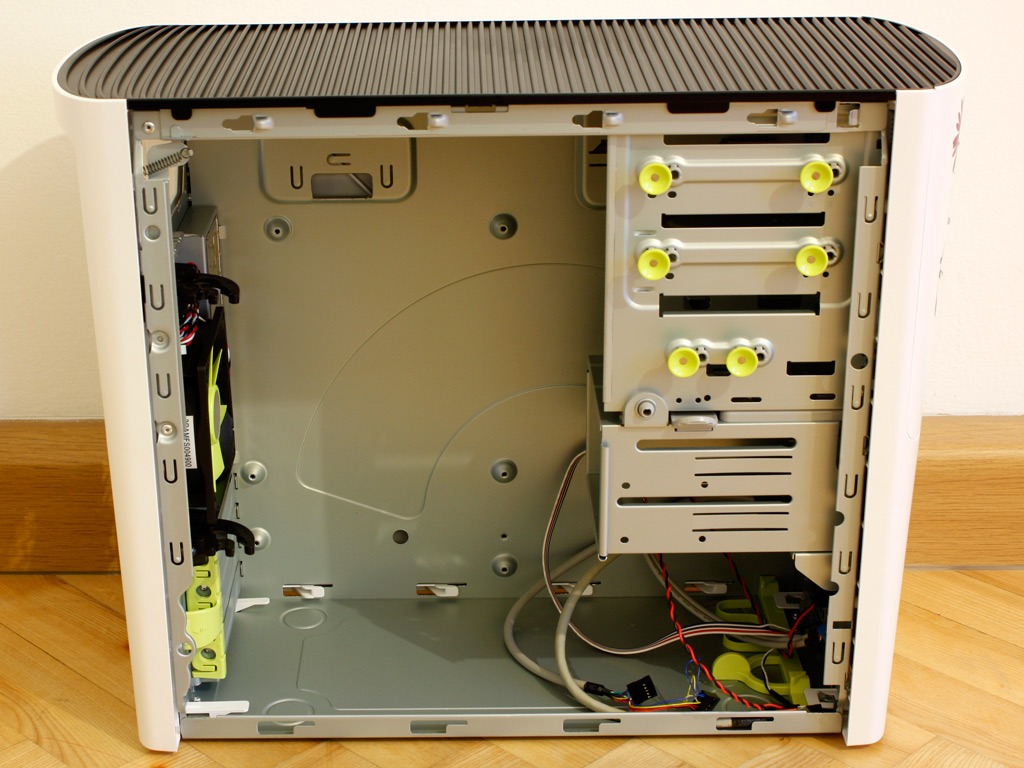
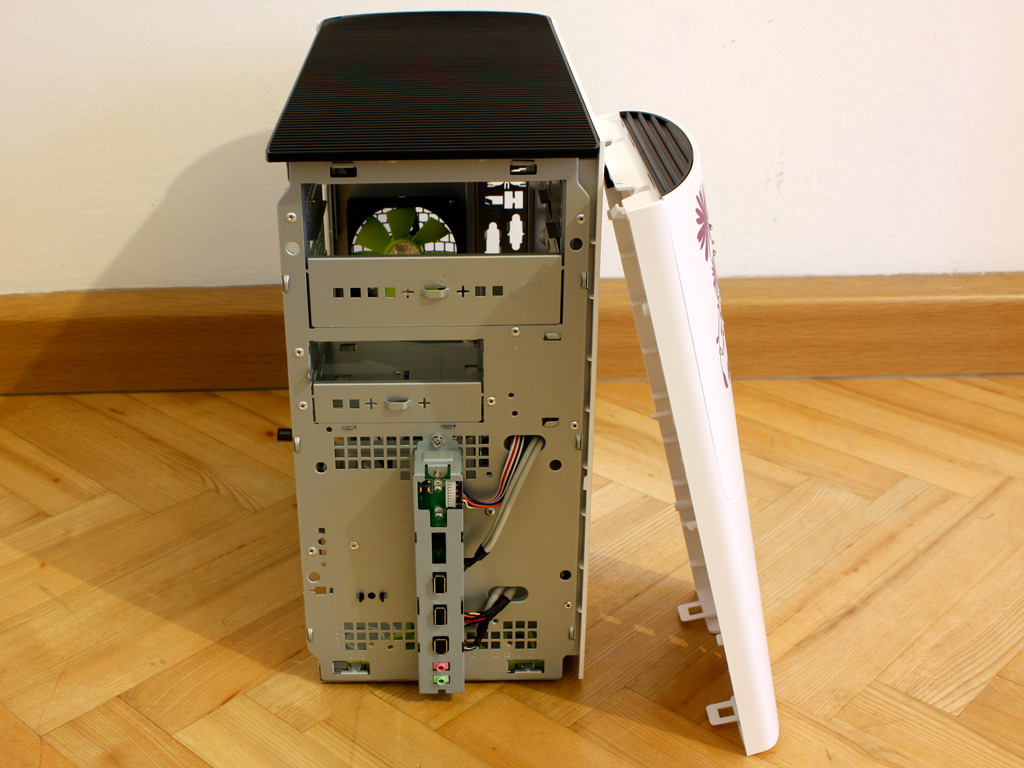
The insides of the Allure look nothing out of the ordinary, but there are a few highlights we will get into in a moment. First off, you are greeted by a fairly elaborate fan shroud, which is placed right above the CPU area, guiding cold air to the appropriate fan. You may either flip it outward or pull it off completely. I have done the latter to gain unobstructed access to the interior.
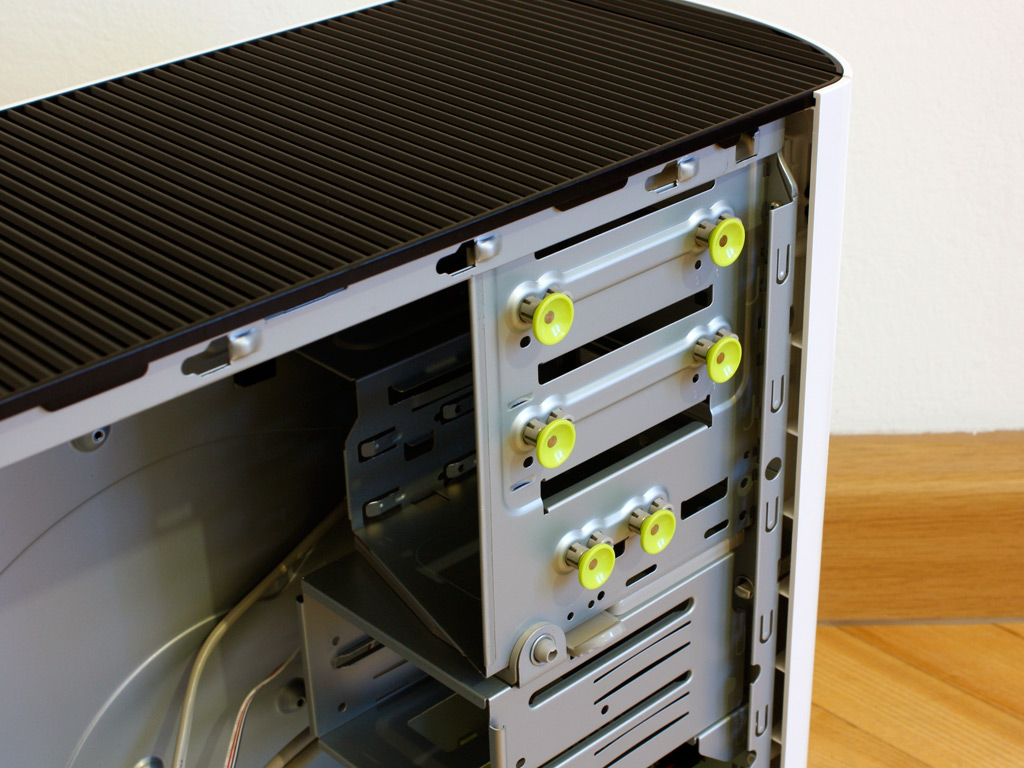
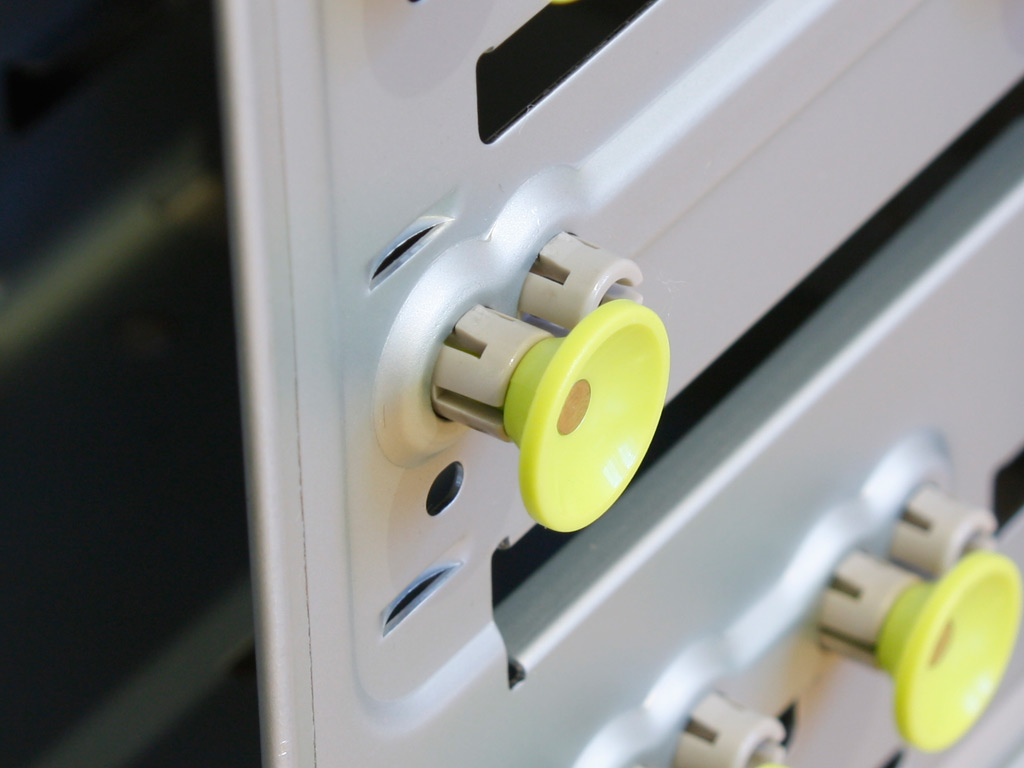

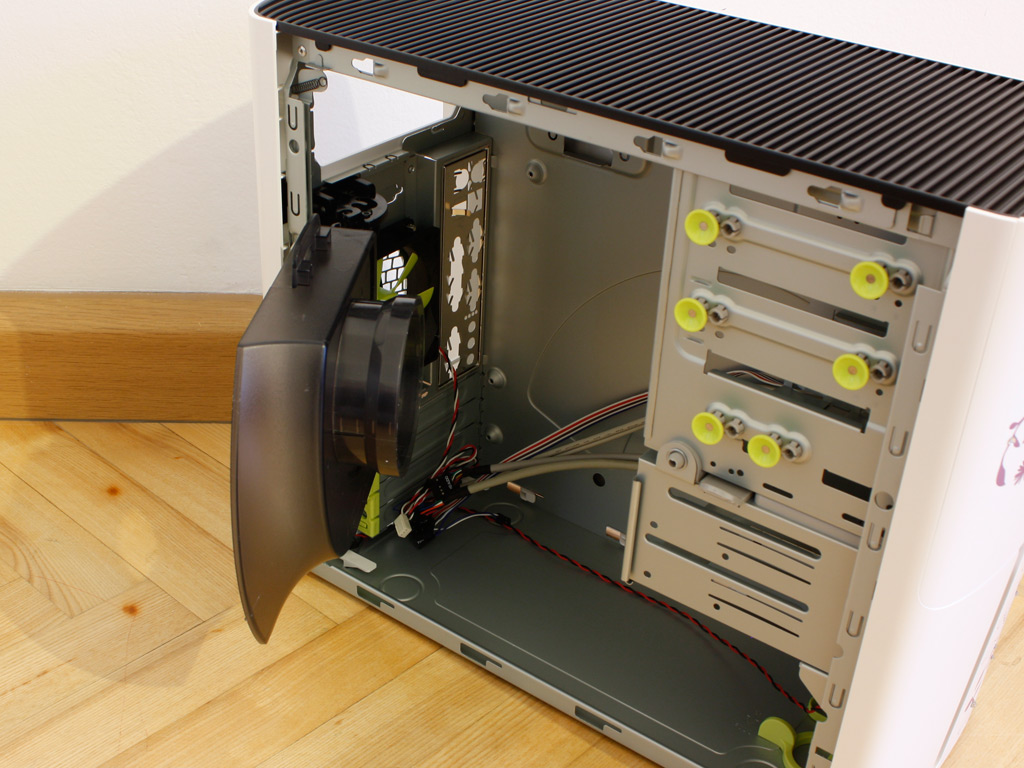
All the unique aspects of the chassis seem to be marked in a bright green, matching the fan blades of the rear cooling unit. There are very unique pull and push locks for the external drive bays in that color. To unlock the bay, simply pull them out and then push it down to lock the drive into place. Simple and possibly quite effective as each each screw hole is secured separately without any strain on the entire locking mechanism.
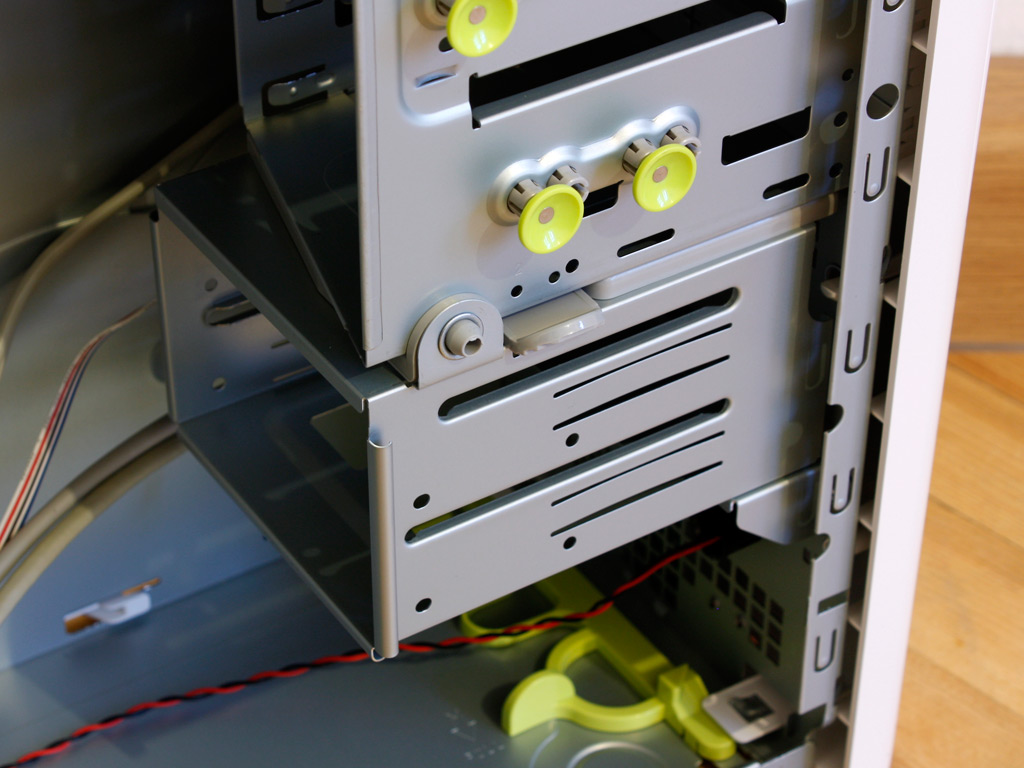
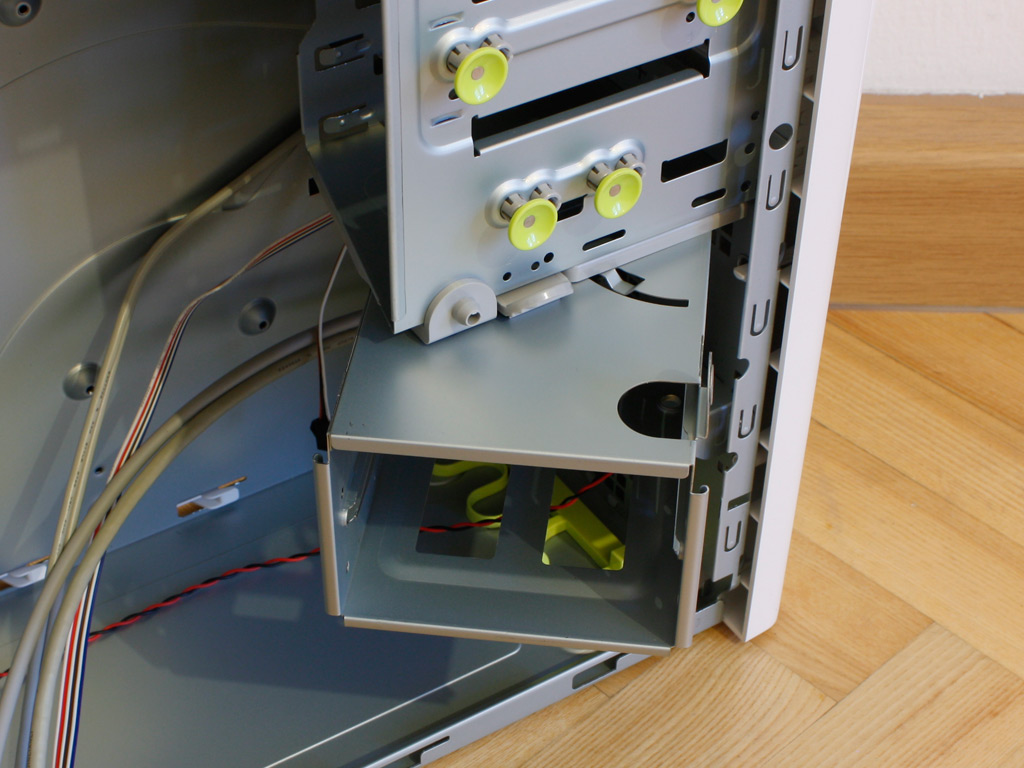
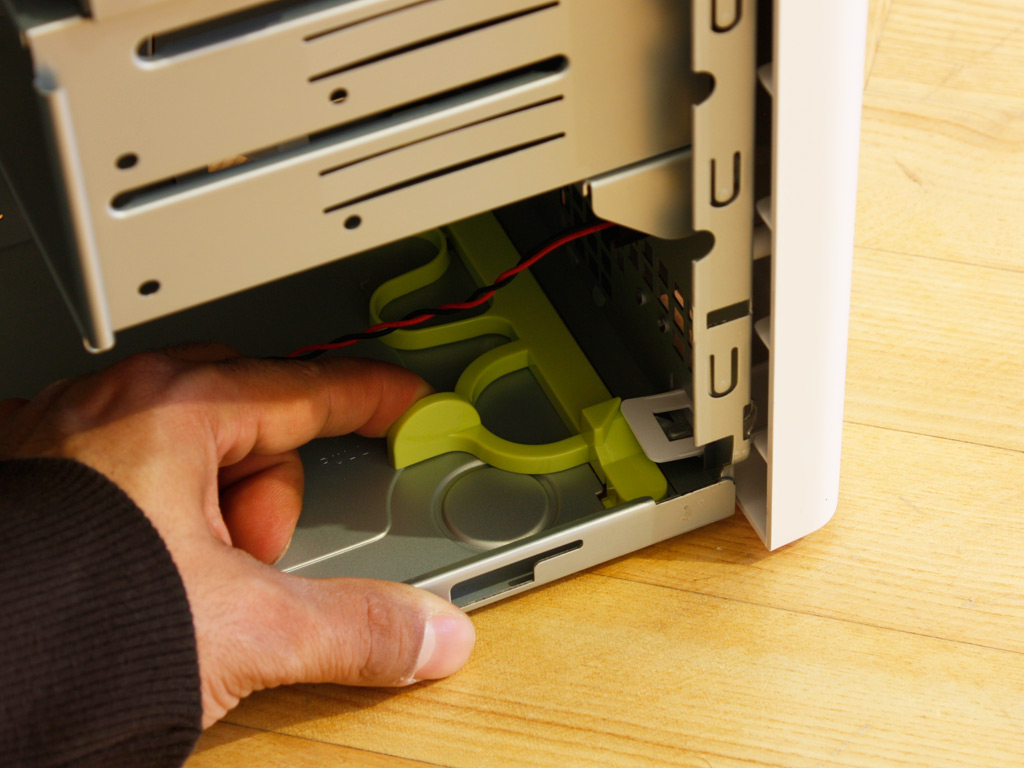
In Win has simplified the hard drive installation with a flip out bay. To do so, one has to pull the grey, spring loaded lock above the cage up and pull the entire contraption out. So simple but very helpful, as it allows you to secure the drives with screws on both sides.
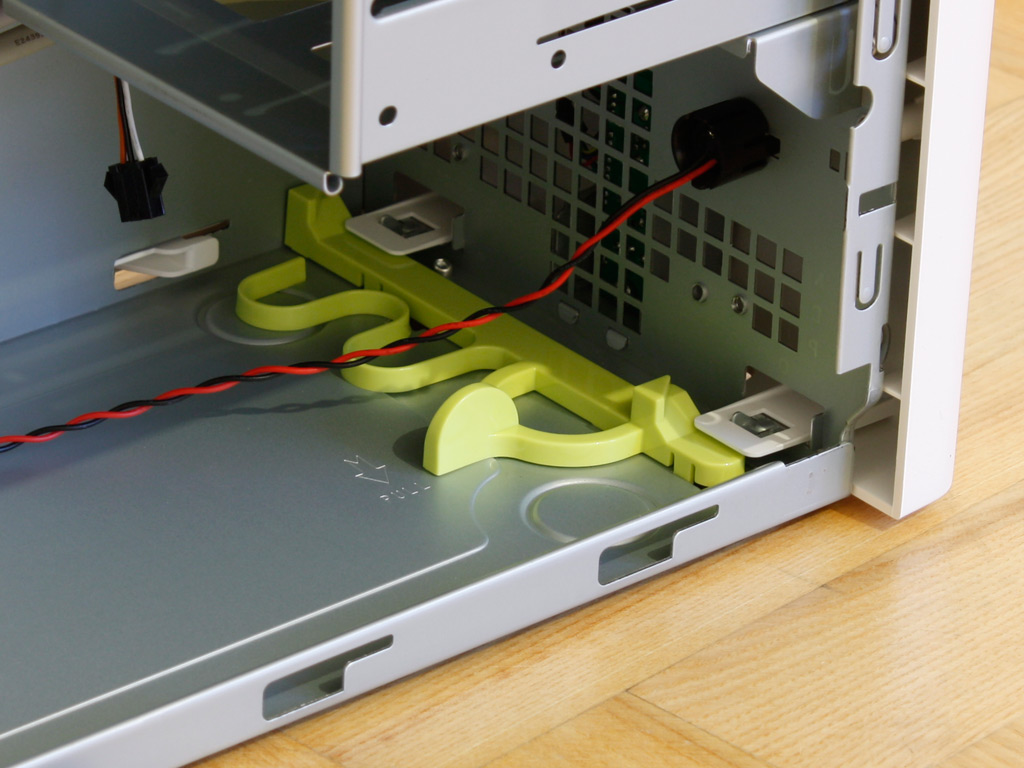
Then there is a snake shaped plastic bit on the very bottom of the front. At first I was unsure what this was intended for, but a quick look at the manual actually resulted in a small but significant "wow!" moment on my part. Having reviewed cases for years now, I always love to see small bits like this. To get to the point, this is a sliding, unlocking mechanism to pull off the entire front cover of the case. Simply slide it to the right, which then pops the cover out - done.
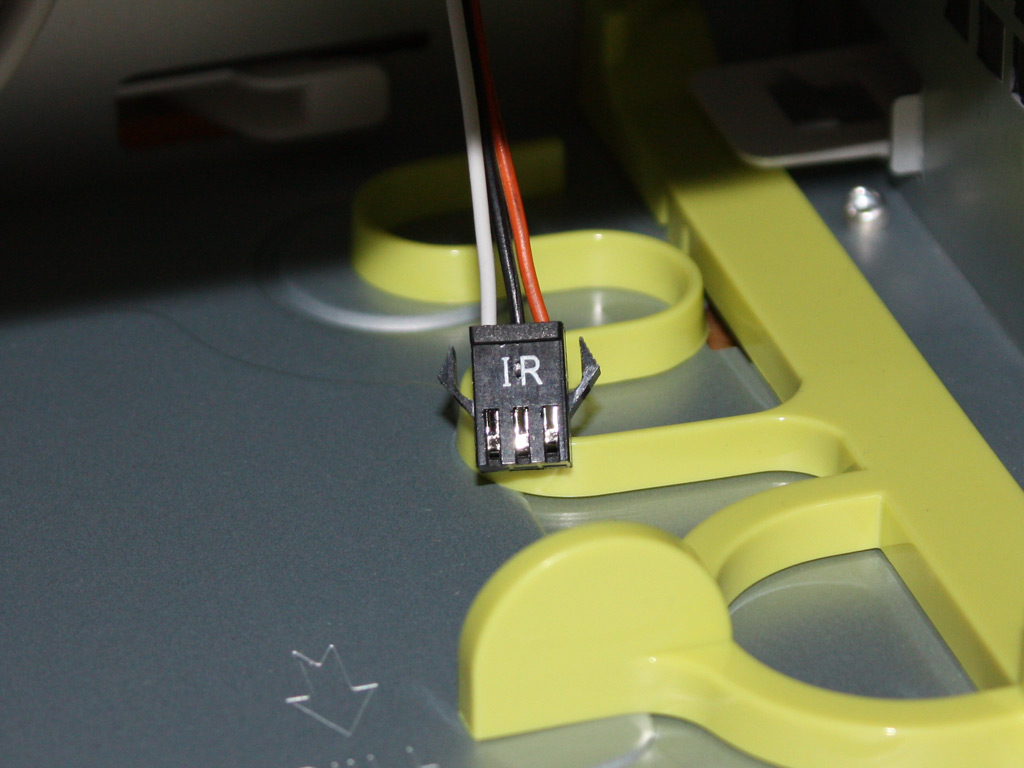
Doing so is required to remove the drive bay covers and additional EMI shielding of unused drive bays. At this point another small surprise revealed itself. In Win has included an IR receiver with the chassis. The appropriate cable to connect the unit to supporting hardware can be found upon closer inspection of the interior. This should allow you to use the Allure as an HTPC case - a scenario it would be well suited for due to its unique and rather stylish looks.
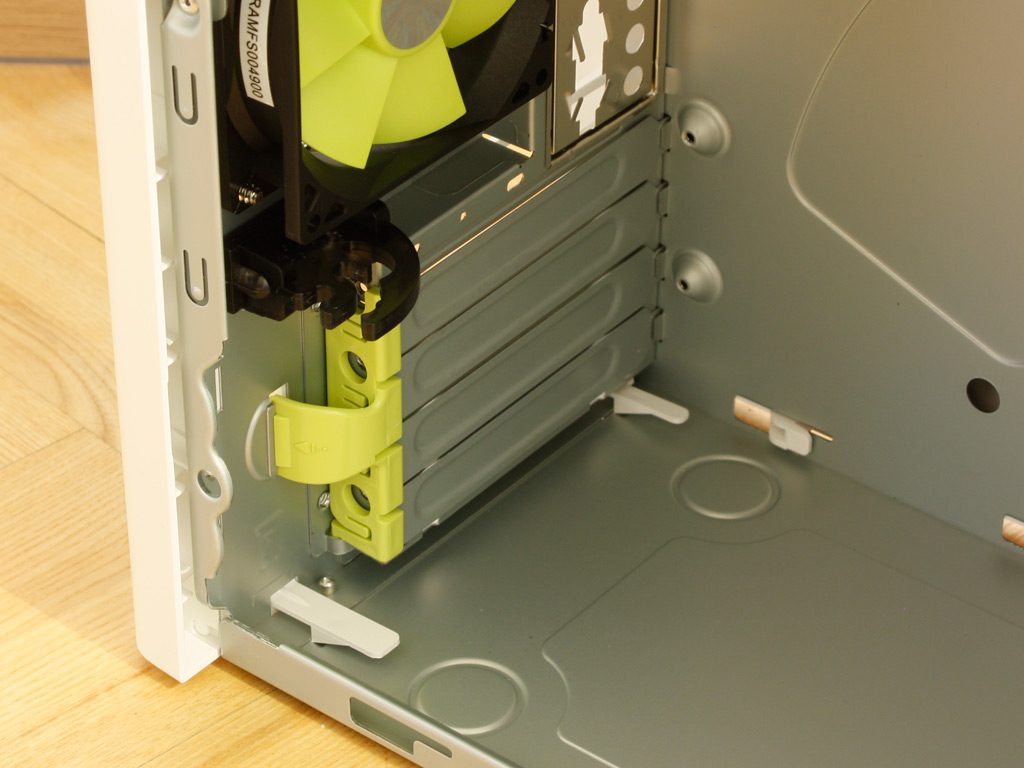
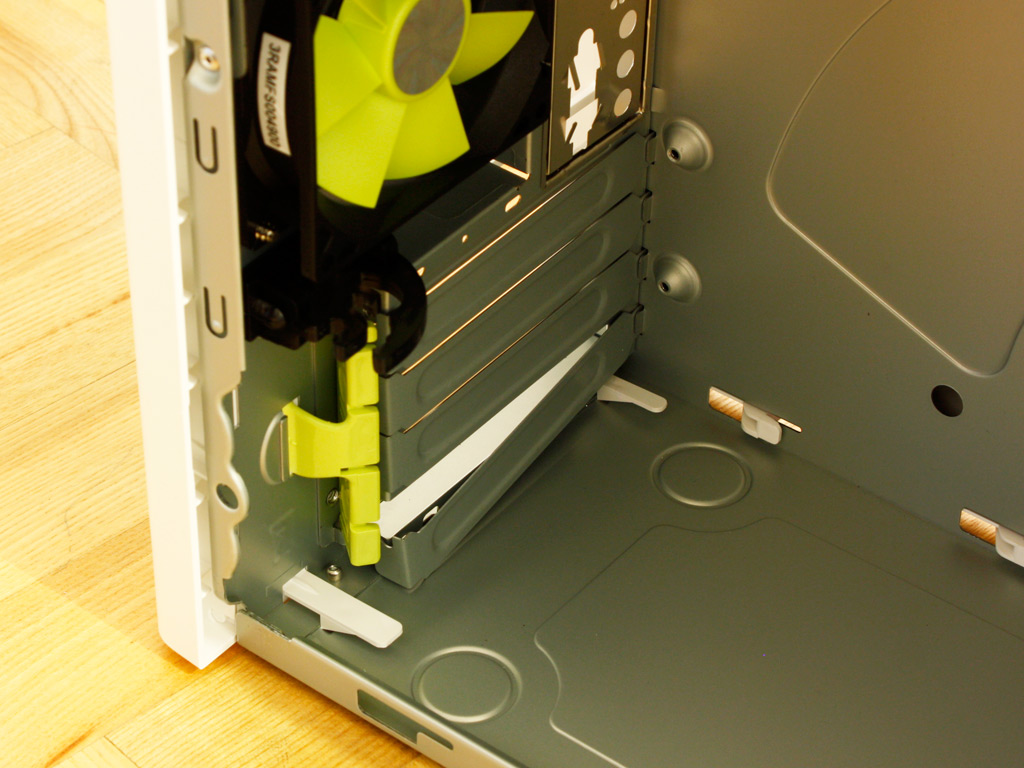
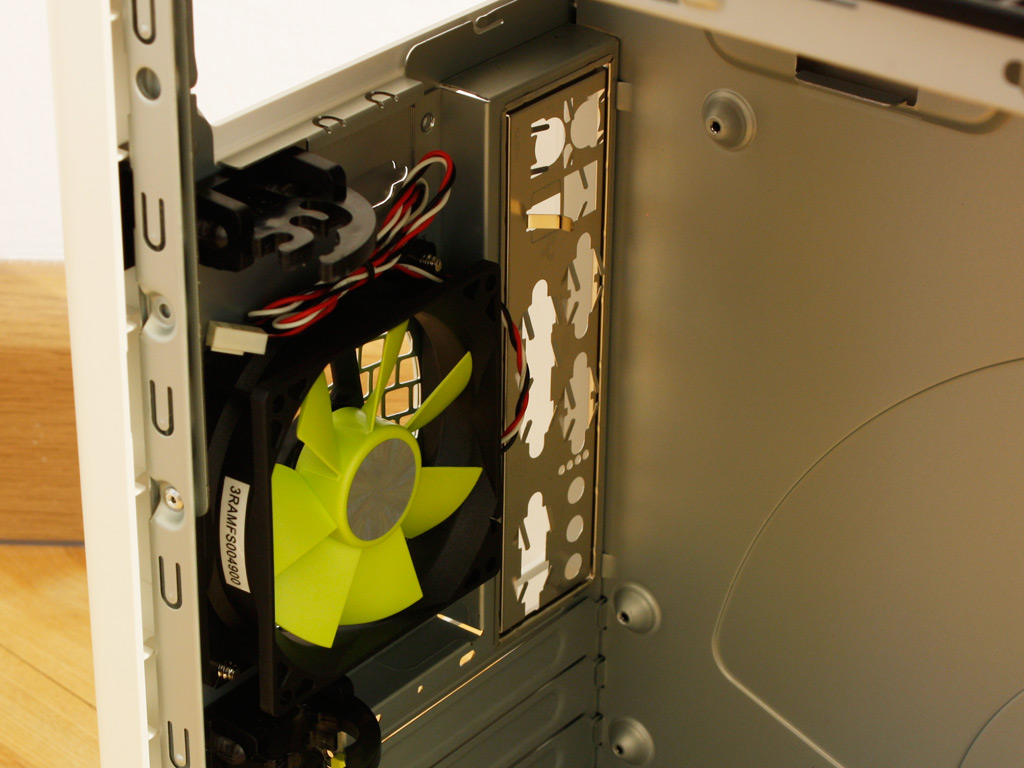
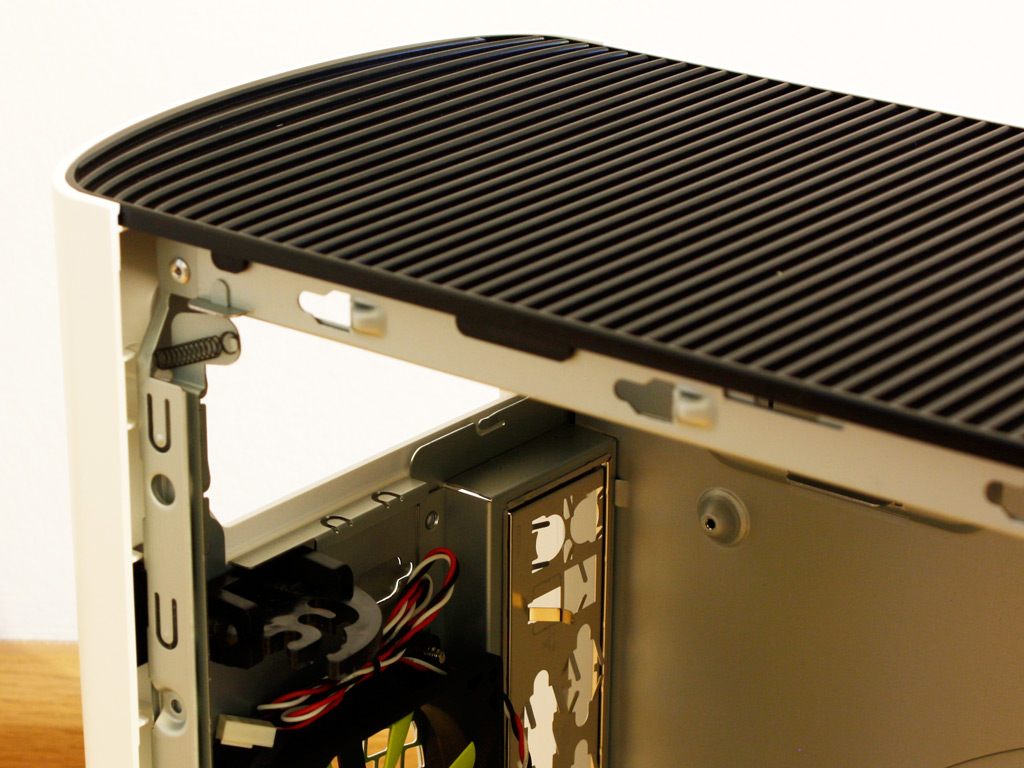
Turning to the rear of the interior, the four expansion slot covers are held in place with a plastic lock, which does seem adequate for small cards. If you are planning to stuff a high-end GPU in there - which is certainly possible as far as free space is concerned, you may want to use traditional screws instead. Another downside of the system is the fact that it unlocks all four covers at once, releasing all cards and covers installed. This could be quite the hassle if you only want to add or exchange a single expansion card. Above that is the 80 mm fan with the afore mentioned green blades. It blows air out the back. Last, but not least the PSU bay on the very top looks nothing out of the ordinary. You should still be able to install a large, high capacity unit if required. The space for such equipment is certainly there.
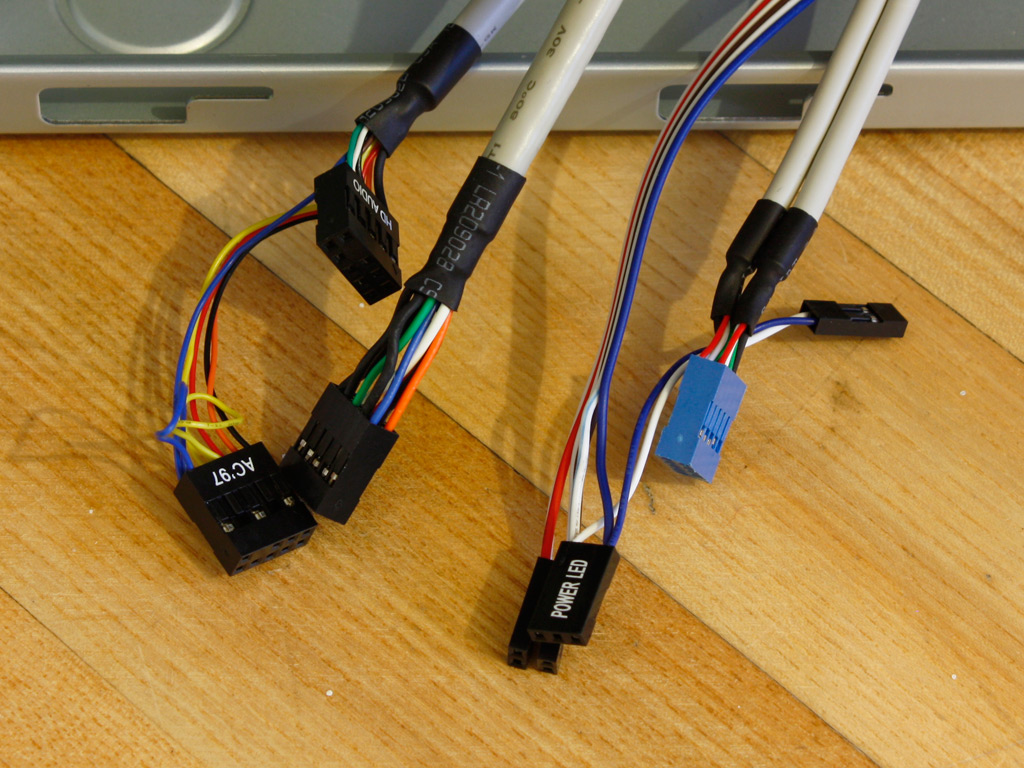
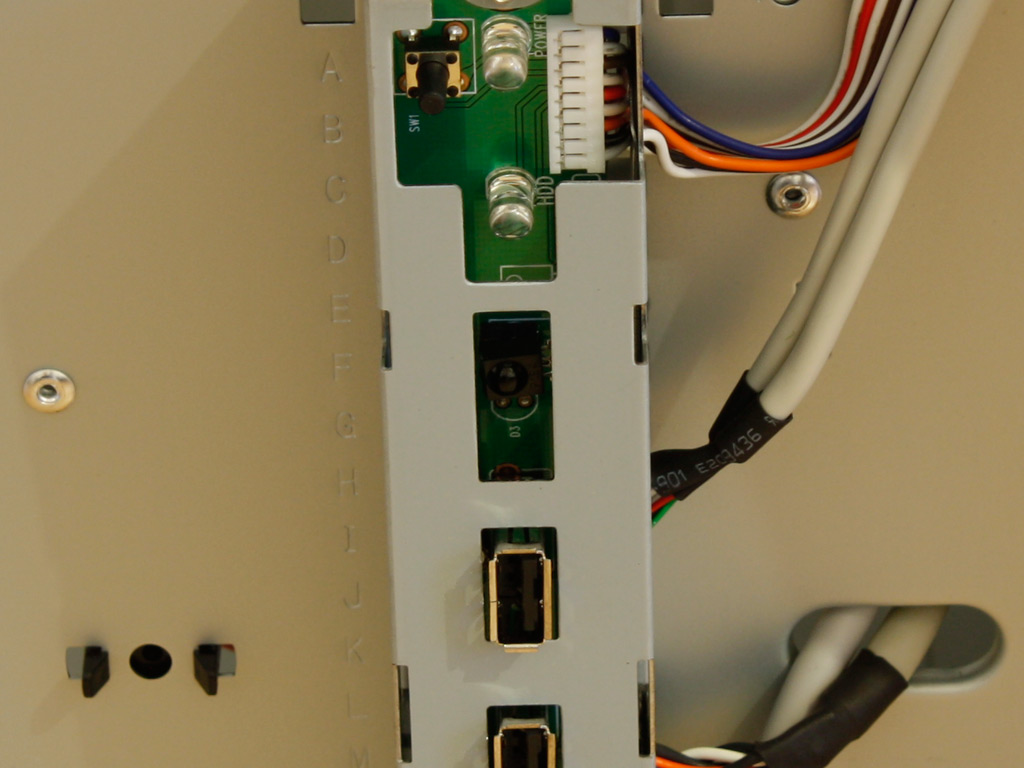
Before we dive into installation, let us take a quick look at the cables. The USB 2.0 header is clearly color coded, while the power LED connector comes in two variations to accomodate any mainboard connector and you will find two headers for HD and AC'97 audio respectively.
Feb 21st, 2025 23:55 EST
change timezone
Latest GPU Drivers
New Forum Posts
- PBO issues on ASRock B650 PG Lightning (6)
- Share your AIDA 64 cache and memory benchmark here (3015)
- Is AMD Fluid Motion Frames a scam ? (6)
- Sim Racing Hardware Setups (15)
- Modified drivers for X-Fi sound cards. (24)
- Nvidia's GPU market share hits 90% in Q4 2024 (gets closer to full monopoly) (451)
- My broken XFX 480 8GB ”Reference” (16)
- 572.42 Drivers, Screen Blacking Out? (8)
- [Feature request] NIS and rBAR (12)
- Should I make a thermal maintenance on my GPU? (74)
Popular Reviews
- MSI GeForce RTX 5070 Ti Ventus 3X OC Review
- Gigabyte GeForce RTX 5090 Gaming OC Review
- Galax GeForce RTX 5070 Ti 1-Click OC White Review
- ASUS GeForce RTX 5070 Ti TUF OC Review
- Ducky One X Inductive Keyboard Review
- MSI GeForce RTX 5070 Ti Vanguard SOC Review
- MSI GeForce RTX 5070 Ti Gaming Trio OC+ Review
- MSI MAG Z890 Tomahawk Wi-Fi Review
- AMD Ryzen 7 9800X3D Review - The Best Gaming Processor
- Palit GeForce RTX 5070 Ti GameRock OC Review
Controversial News Posts
- AMD Radeon 9070 XT Rumored to Outpace RTX 5070 Ti by Almost 15% (302)
- AMD Plans Aggressive Price Competition with Radeon RX 9000 Series (269)
- NVIDIA GeForce RTX 5090 Spotted with Missing ROPs, Performance Loss Confirmed, Multiple Vendors Affected (263)
- AMD is Taking Time with Radeon RX 9000 to Optimize Software and FSR 4 (256)
- AMD Radeon RX 9070 and 9070 XT Listed On Amazon - One Buyer Snags a Unit (247)
- Edward Snowden Lashes Out at NVIDIA Over GeForce RTX 50 Pricing And Value (241)
- AMD Denies Radeon RX 9070 XT $899 USD Starting Price Point Rumors (239)
- New Leak Reveals NVIDIA RTX 5080 Is Slower Than RTX 4090 (215)