 4
4
Lian Li PC-V600F Review
Value & Conclusion »Assembly

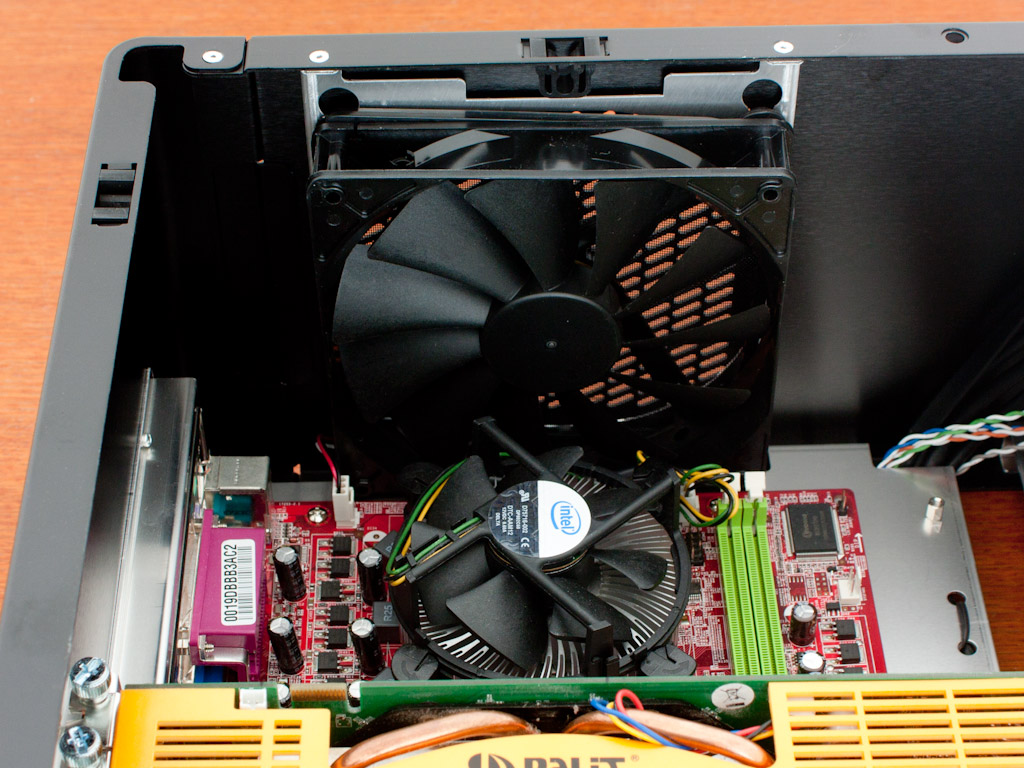
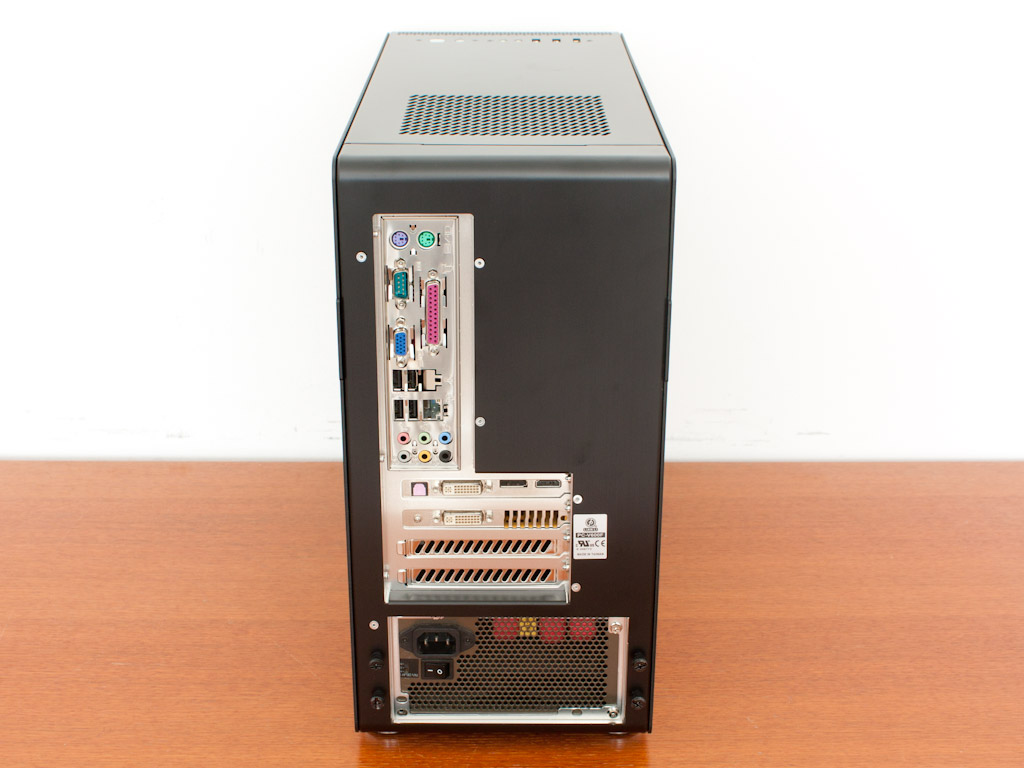
Installing the mainboard is an easy task and it fits where it is supposed to, but due to the top fan, which basically is right above the mainboard's upper edge, you will have problems installing larger CPU coolers here without being forced to remove the top cooling fan. Having the option to install a small fan in the rear would have been good in such a scenario.
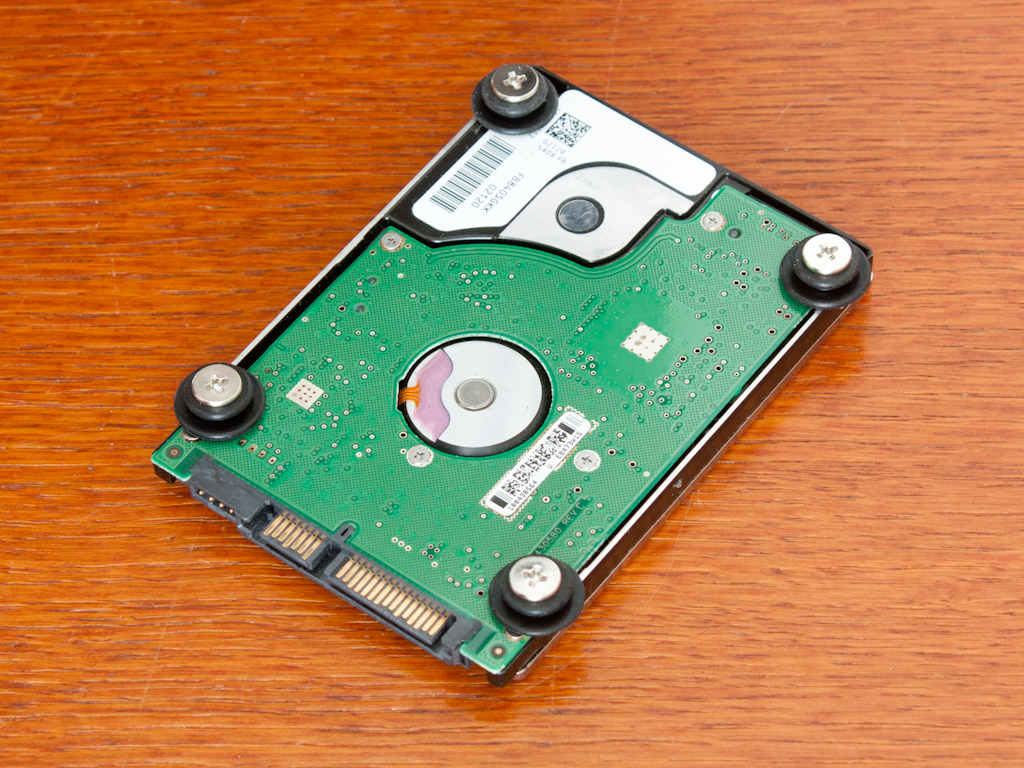
If you want to install a 2.5" drive within the PC-V600F, you have to do so before doing anything else, as you have to remove the top cage to gain access to both of the bays. Considering the fact, that most will use their SSDs as a system drive, this is only an issue for a small percentage of users. The drive is rubber mounted, so that you won't have to worry about vibrations from this one anyway.
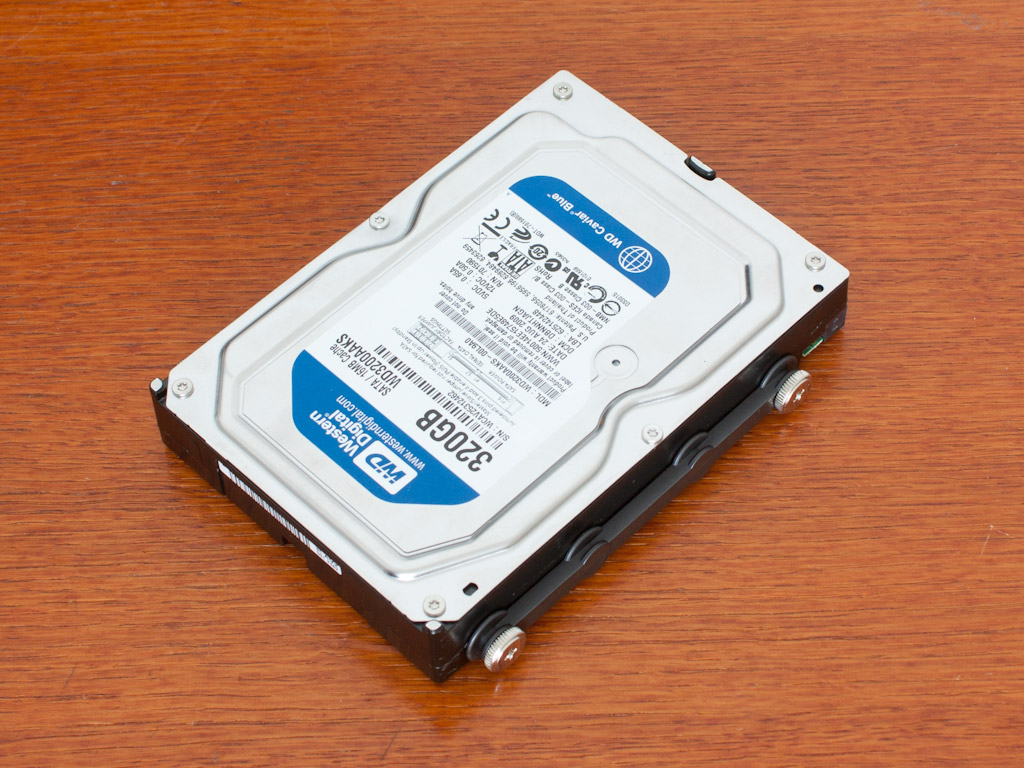
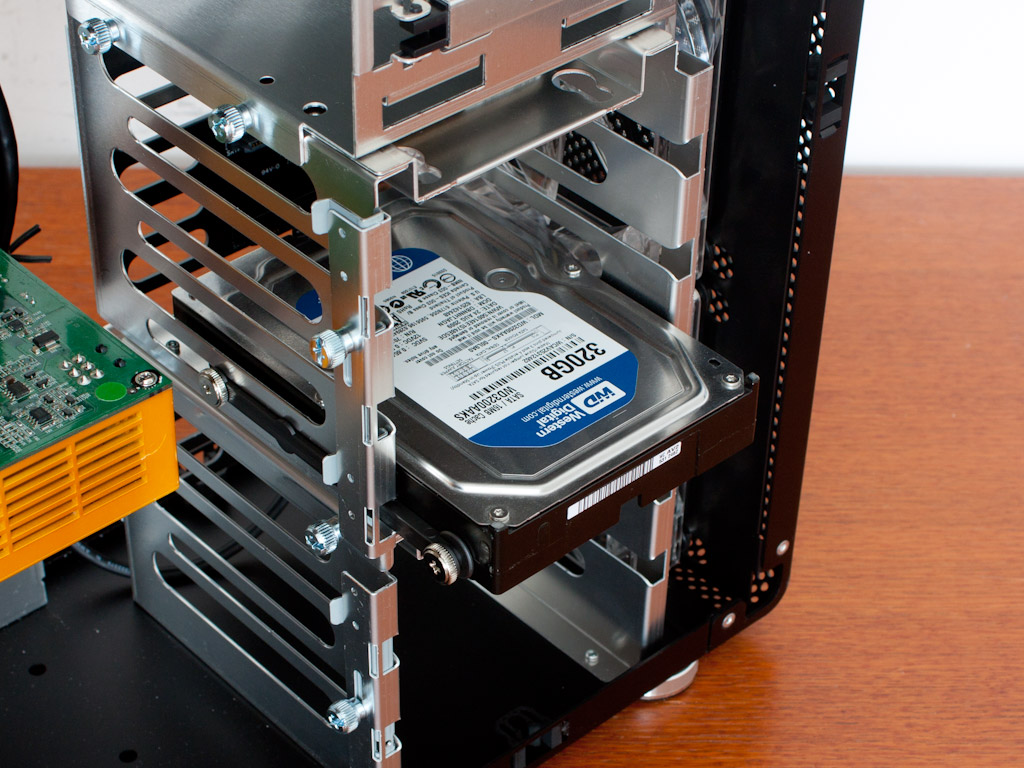
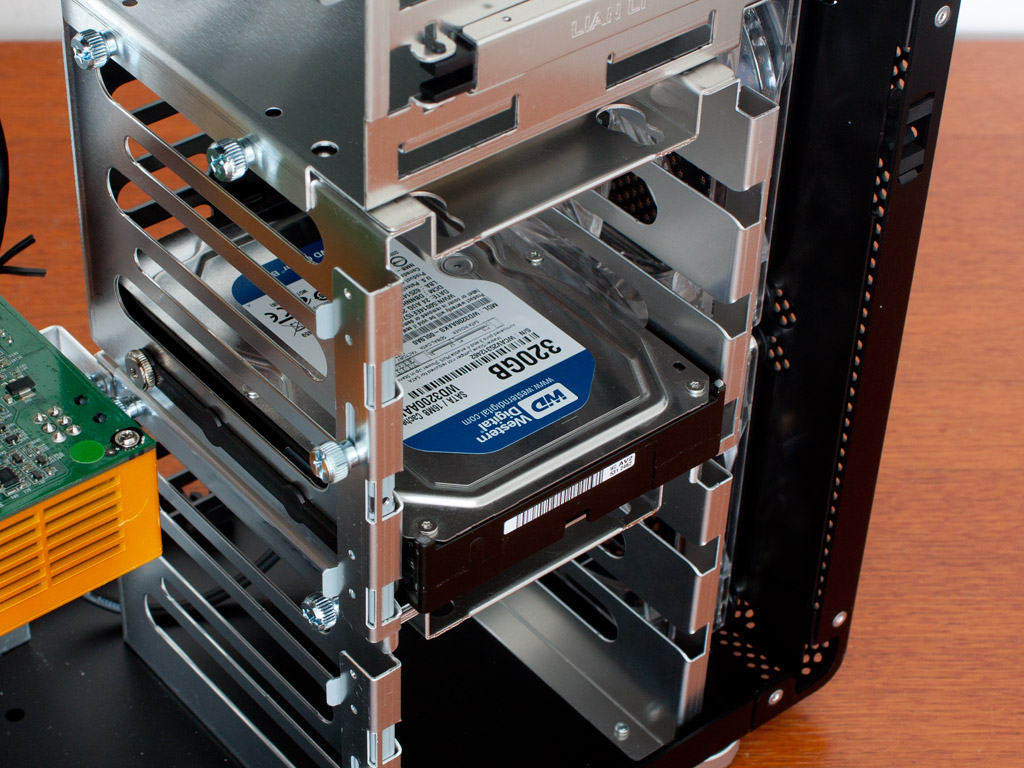
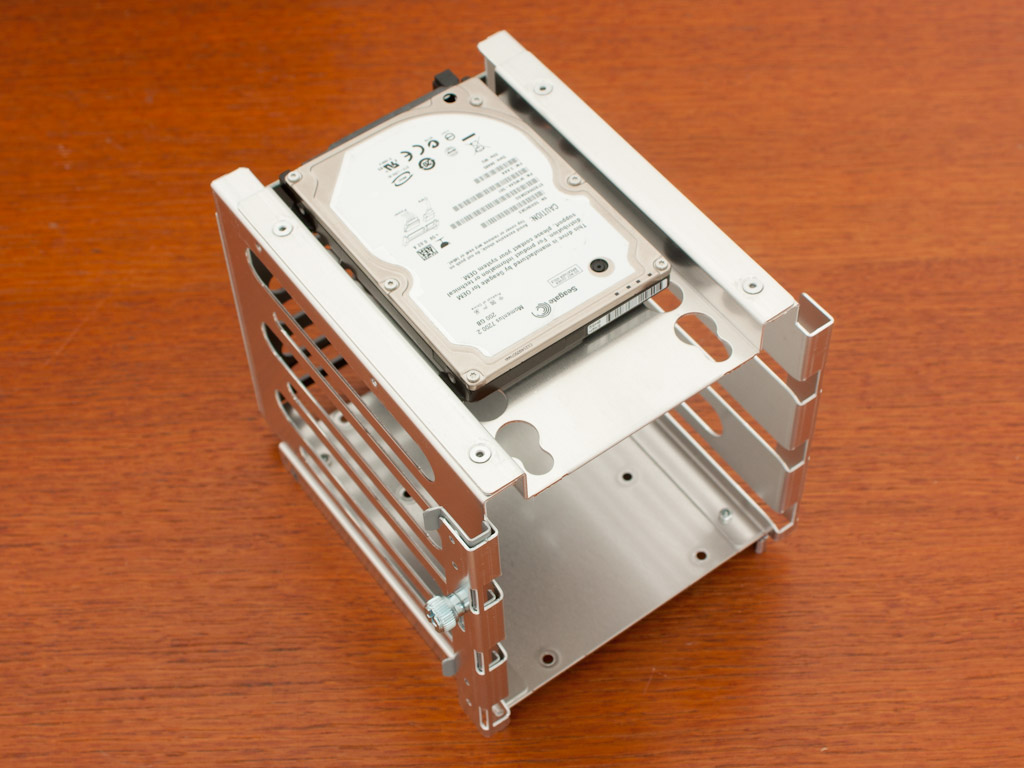
Another new aspect is the installation of the 3.5" hard drives. Instead of rubber lined screws, Lian Li has opted for plastic rails with no anti-vibration measures. This could be considered a step in the wrong direction, especially if more drives are installed, which in turn increases the chance of vibrations being passed on and amplified by the chassis frame. Once the rails are installed, simply slide the drive into the case until it connects with the hot-swap PCB. To secure the drive you may push down the sliding lock on the side of the hard drive cage.
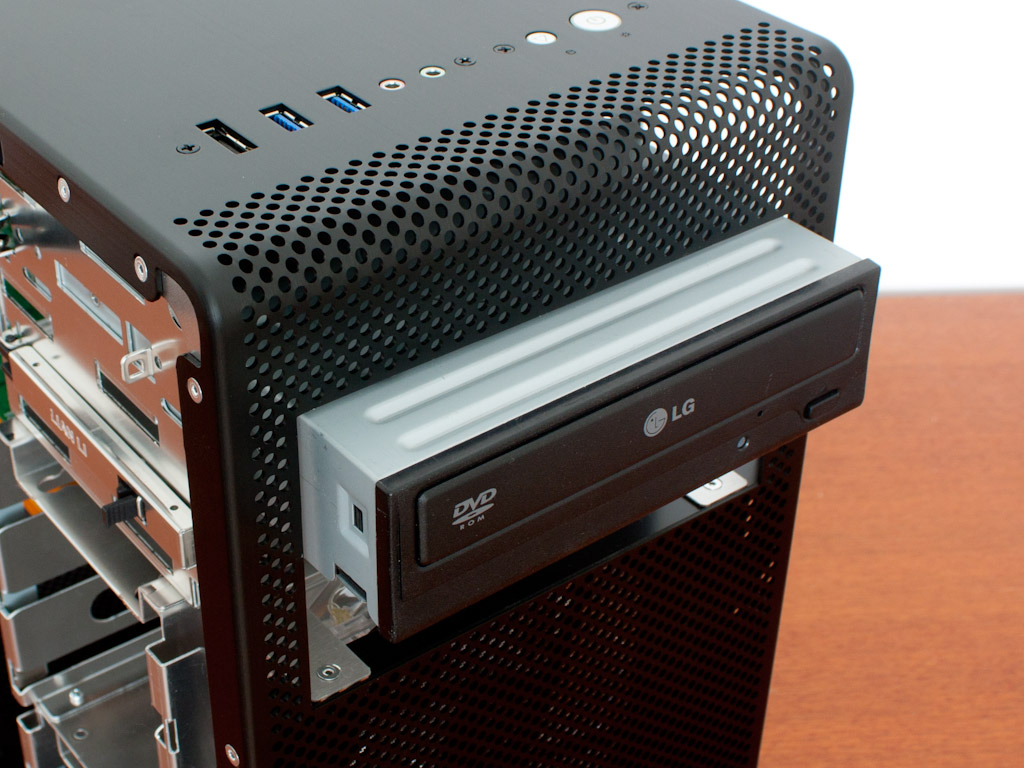
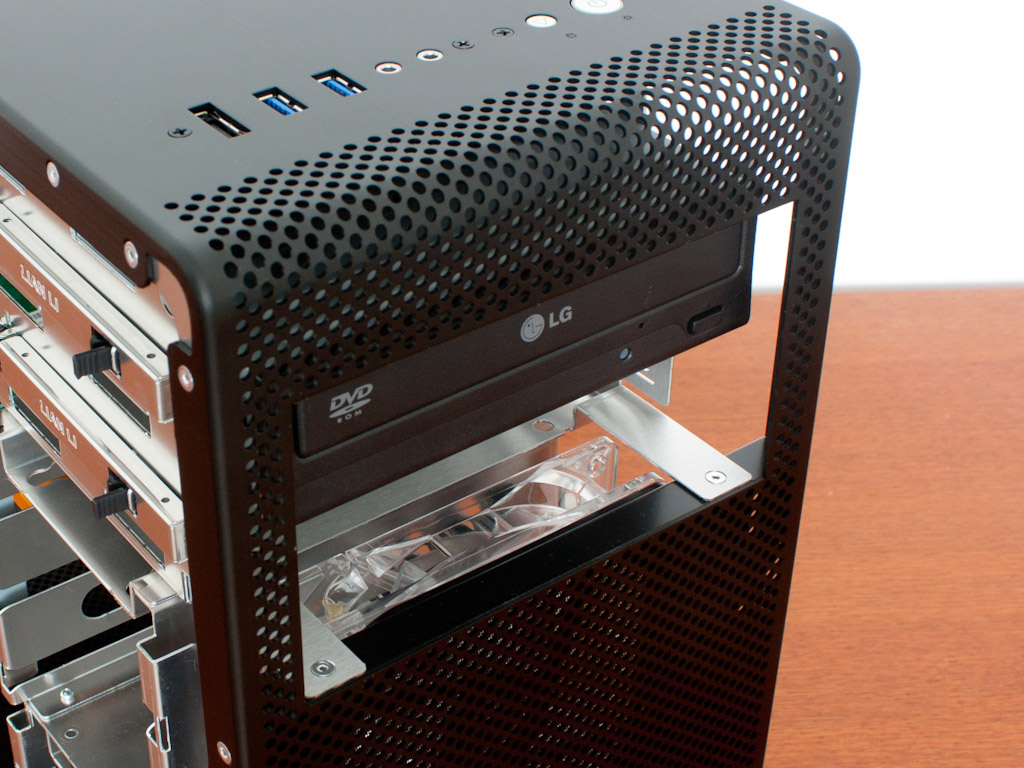
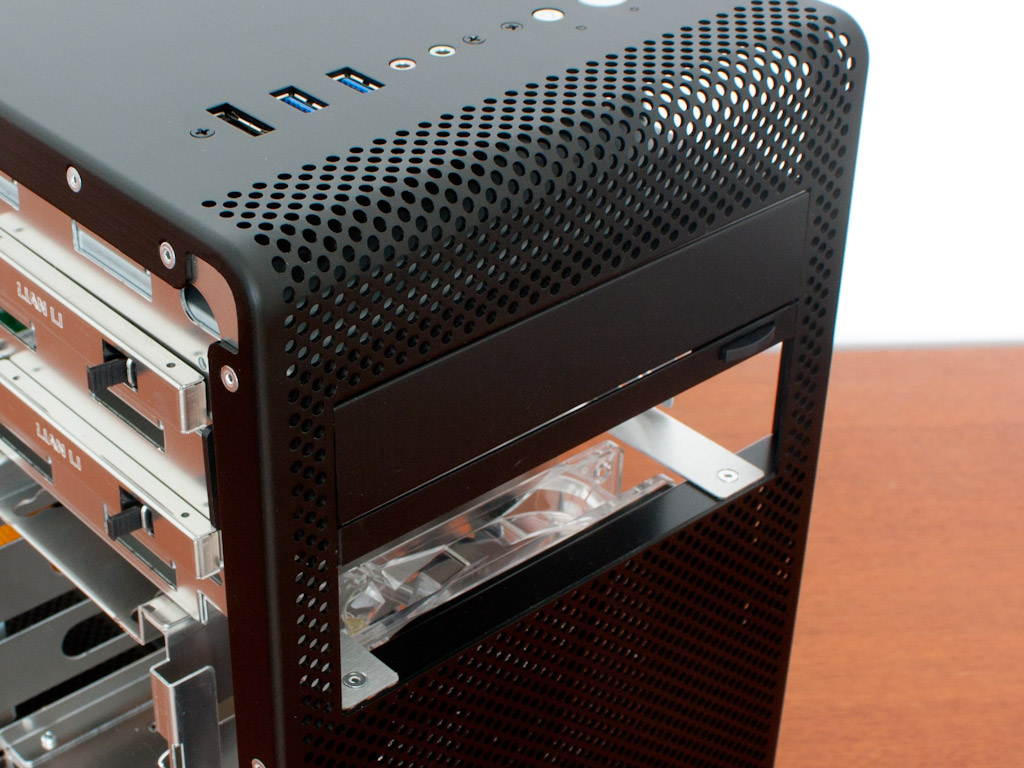
Installing the ODD is no different than other modern Lian Li cases and thus the results are identical. First remove the front of the bay, then slide the drive in too far, allowing you to replace the drop down door cover. The metal locking bar works quite well and you still have the option to use screws if you really feel the need for additional security.
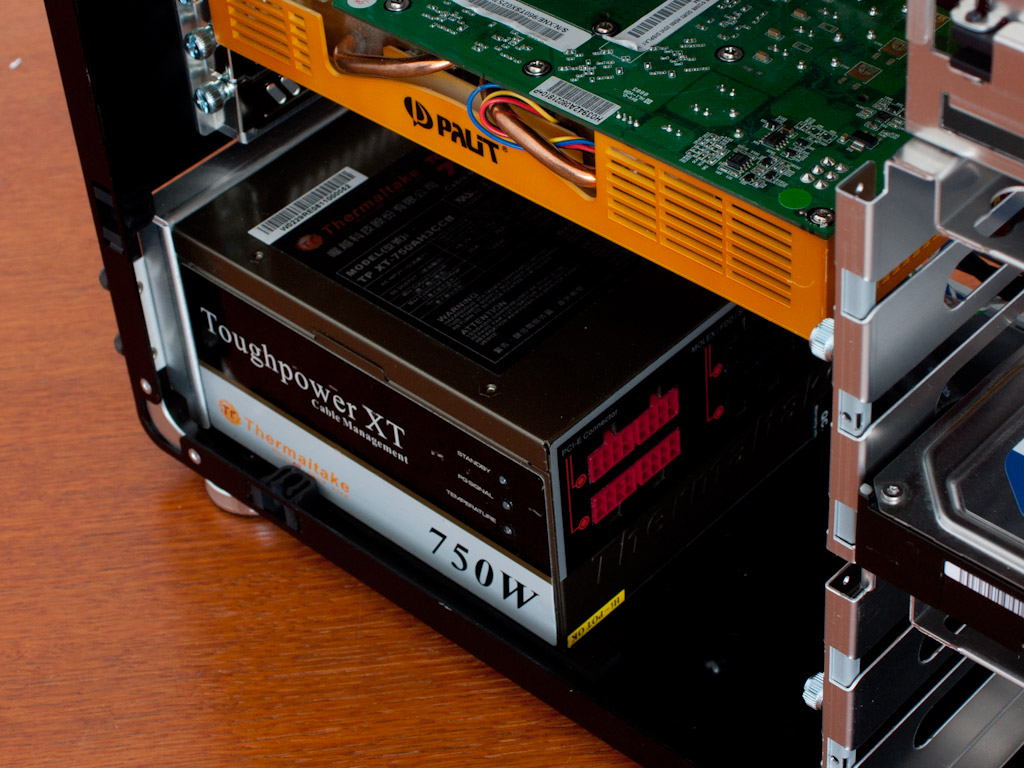
Even though you may remove the frame of the PSU bay, there is really no need to. Just place the supply in its intended spot and use the supplied screws to secure it properly.
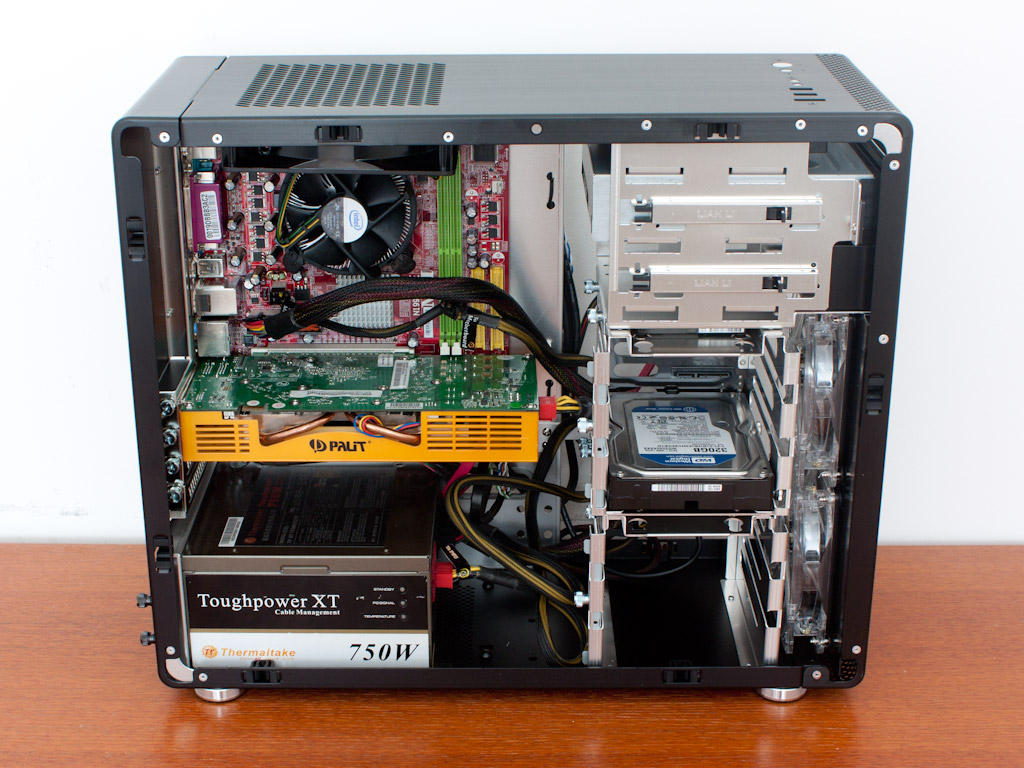
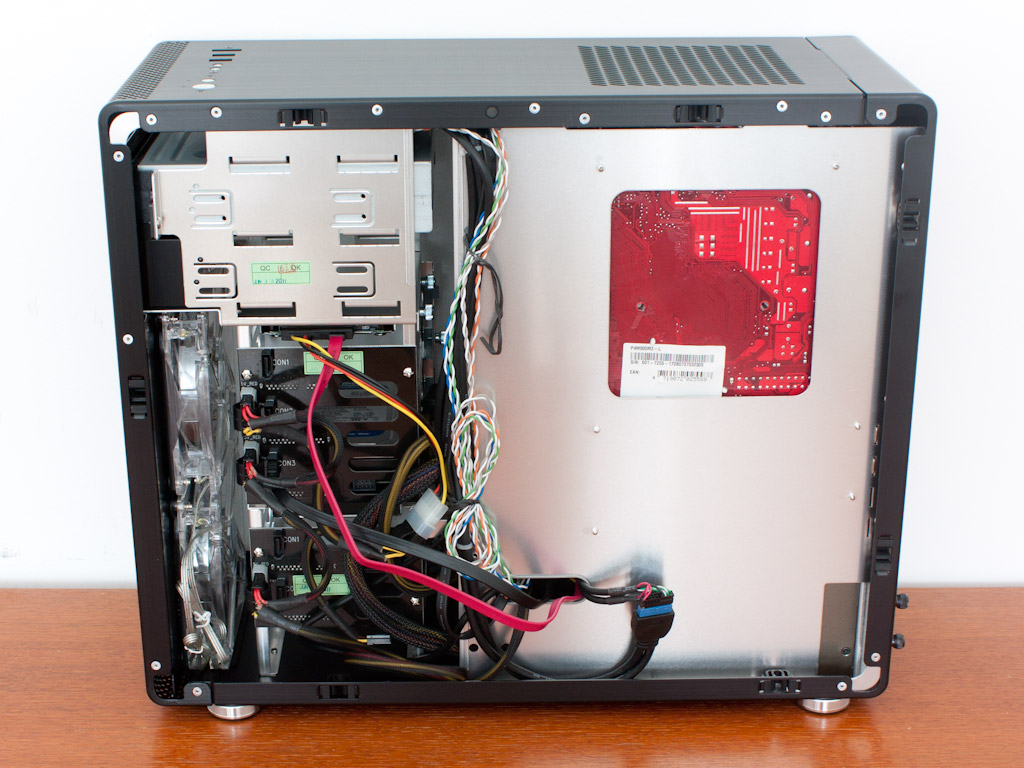
Once everything is done, you can see that the major cable mess is behind the hard drive bays. You can clean things up by using short SATA cables, along with a proper cable with three Molex connectors, but additional graphic cards on the other hand - especially those with two power cables - would in turn add to the cable mess. If you look closely I have pushed the USB 3.0 to 2.0 adapter as far into the connector as I could muster, which was still not all the way.
Finished Looks
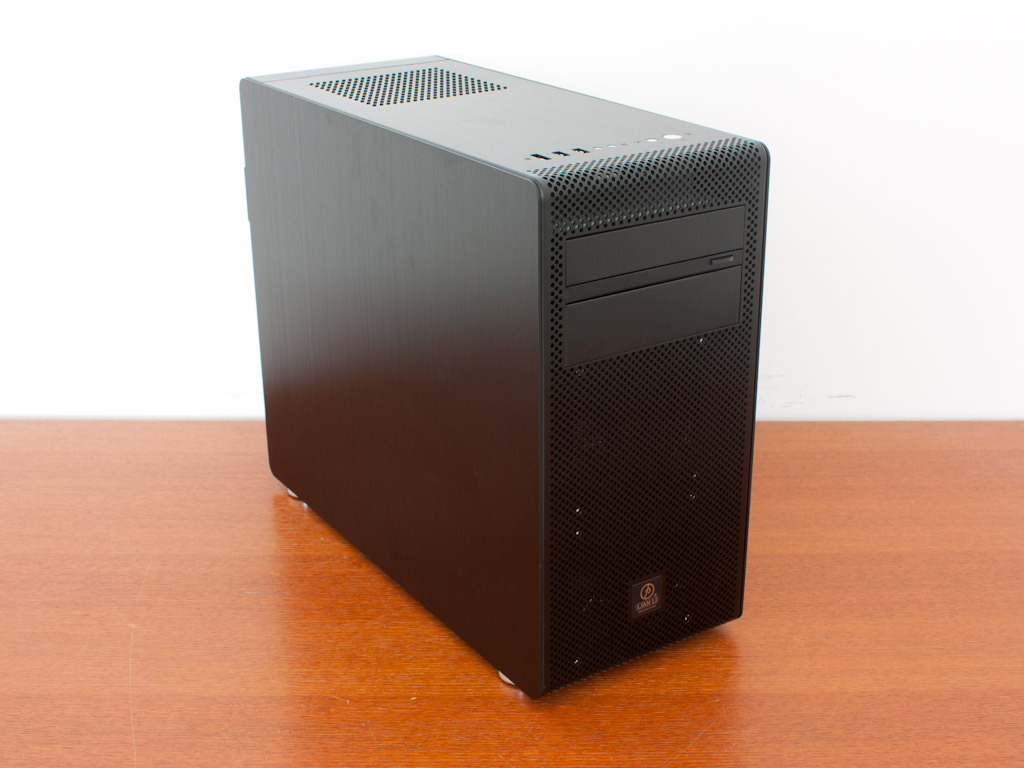
Once everything was wired properly, the side panels were placed back on the chassis. While the one behind the mainboard tray stayed on for the picture, it did pop off three times before it stayed in place. It would help if Lian Li adds the possibility to use zip ties on the mainboard tray to pin down lose cables. From the exterior the chassis makes an excellent impression, as the build quality is once again excellent.
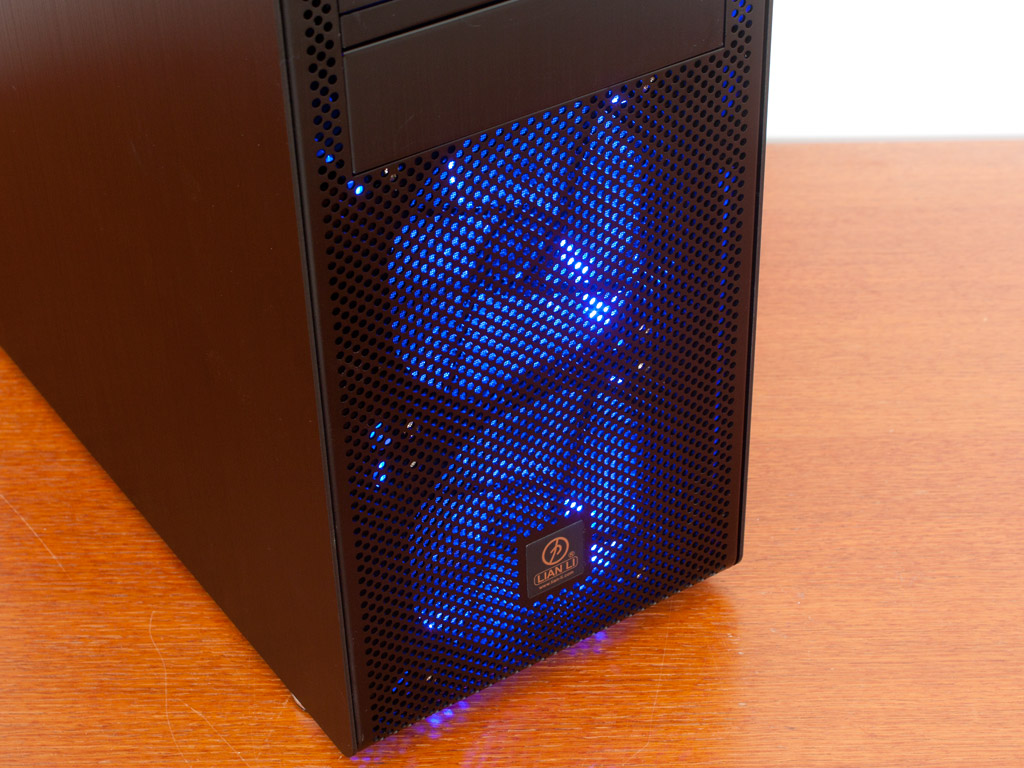
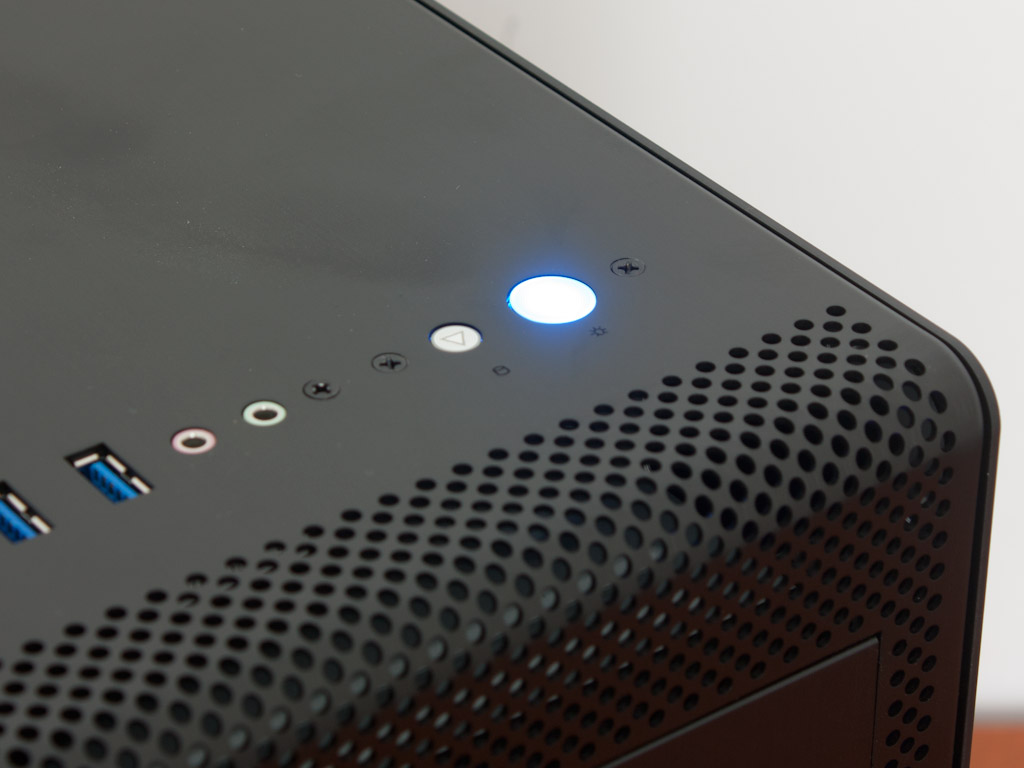
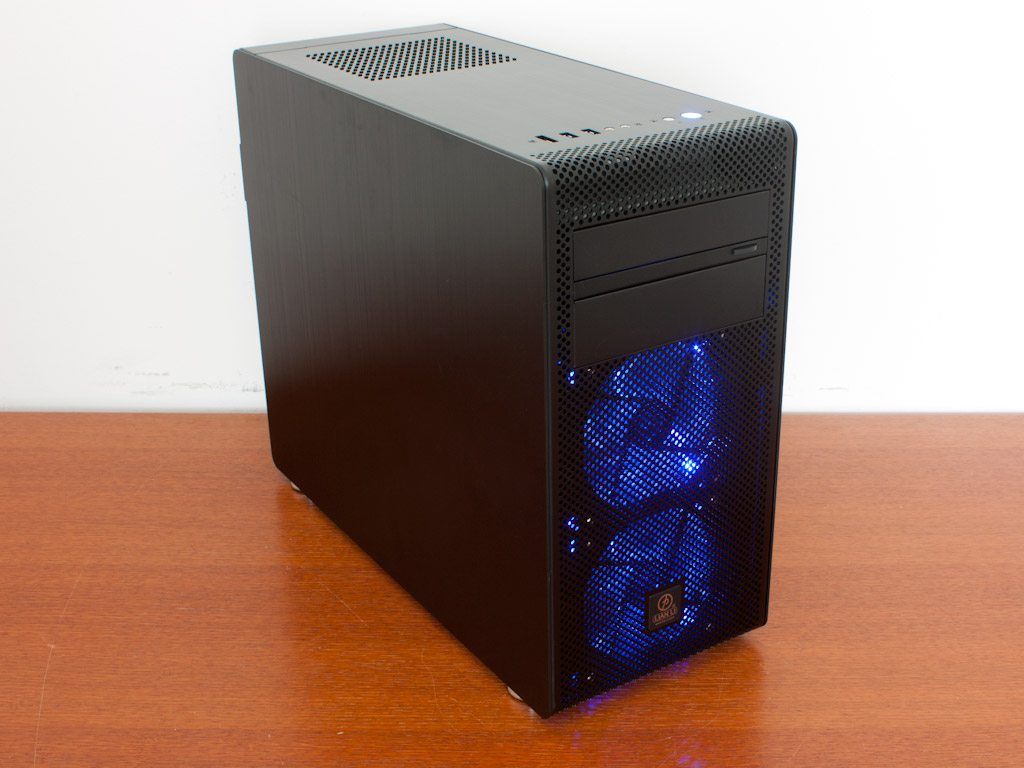
The blue LEDs in the fans are actually quite strong so you can clearly see them when the system is turned on. On top of that the power button lights up in blue as well.
Jul 12th, 2025 09:33 CDT
change timezone
Latest GPU Drivers
New Forum Posts
- Gigabyte graphic cards - TIM gel SLIPPAGE problem (151)
- No offense, here are some things that bother me about your understanding of fans. (36)
- Stupid buggy POS Realtek WiFi RTL8852BE (11)
- Swapping existing router w/ a replacement; any issues? (14)
- 'NVIDIA App' not usable offline? (13)
- Chrome has removed uBlock Origin 1.64.0 (remove google search suggestions) (12)
- Share your AIDA 64 cache and memory benchmark here (3097)
- The Official Linux/Unix Desktop Screenshots Megathread (778)
- [GPU-Z Test Build] New Kernel Driver, Everyone: Please Test (90)
- NVIDIA App (55)
Popular Reviews
- Fractal Design Epoch RGB TG Review
- Lexar NM1090 Pro 4 TB Review
- Corsair FRAME 5000D RS Review
- NVIDIA GeForce RTX 5050 8 GB Review
- NZXT N9 X870E Review
- Our Visit to the Hunter Super Computer
- Sapphire Radeon RX 9060 XT Pulse OC 16 GB Review - An Excellent Choice
- AMD Ryzen 7 9800X3D Review - The Best Gaming Processor
- Upcoming Hardware Launches 2025 (Updated May 2025)
- Chieftec Iceberg 360 Review
TPU on YouTube
Controversial News Posts
- Intel's Core Ultra 7 265K and 265KF CPUs Dip Below $250 (288)
- Some Intel Nova Lake CPUs Rumored to Challenge AMD's 3D V-Cache in Desktop Gaming (140)
- AMD Radeon RX 9070 XT Gains 9% Performance at 1440p with Latest Driver, Beats RTX 5070 Ti (131)
- NVIDIA Launches GeForce RTX 5050 for Desktops and Laptops, Starts at $249 (119)
- NVIDIA GeForce RTX 5080 SUPER Could Feature 24 GB Memory, Increased Power Limits (115)
- Microsoft Partners with AMD for Next-gen Xbox Hardware (105)
- Intel "Nova Lake‑S" Series: Seven SKUs, Up to 52 Cores and 150 W TDP (100)
- NVIDIA DLSS Transformer Cuts VRAM Usage by 20% (97)