 355
355
NVIDIA GeForce RTX 3080 Founders Edition Review - Must-Have for 4K Gamers
Circuit Board Analysis »Packaging


The Card
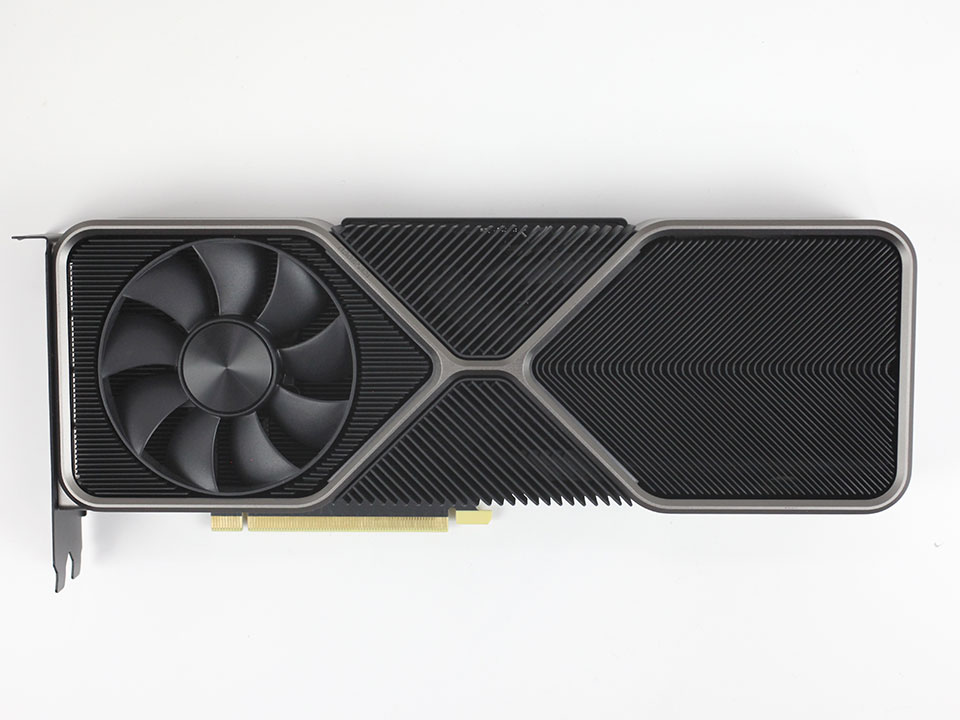
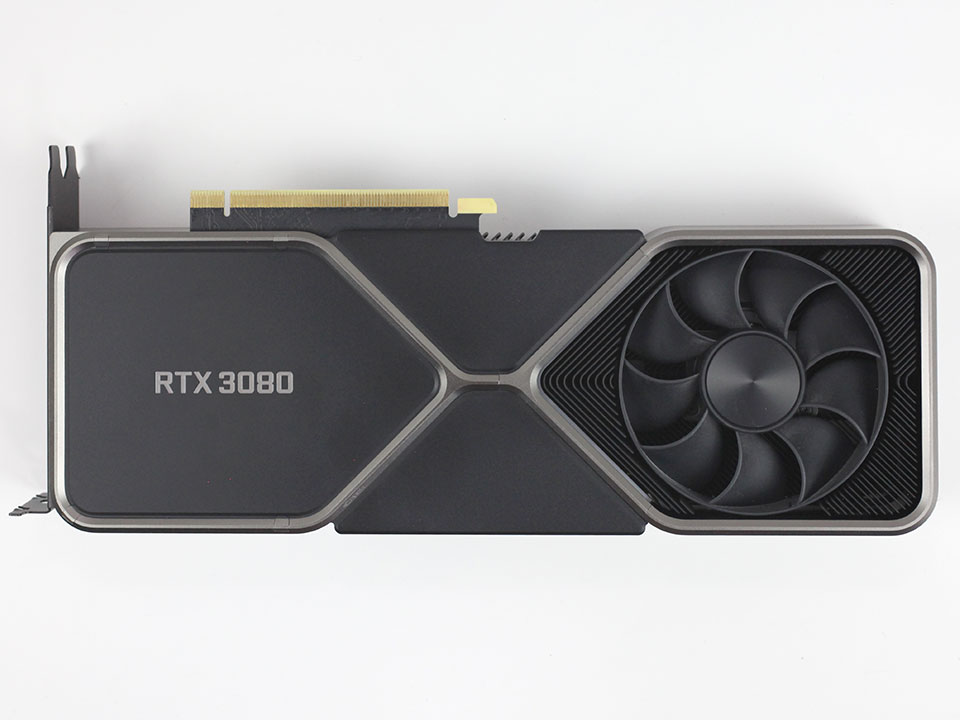
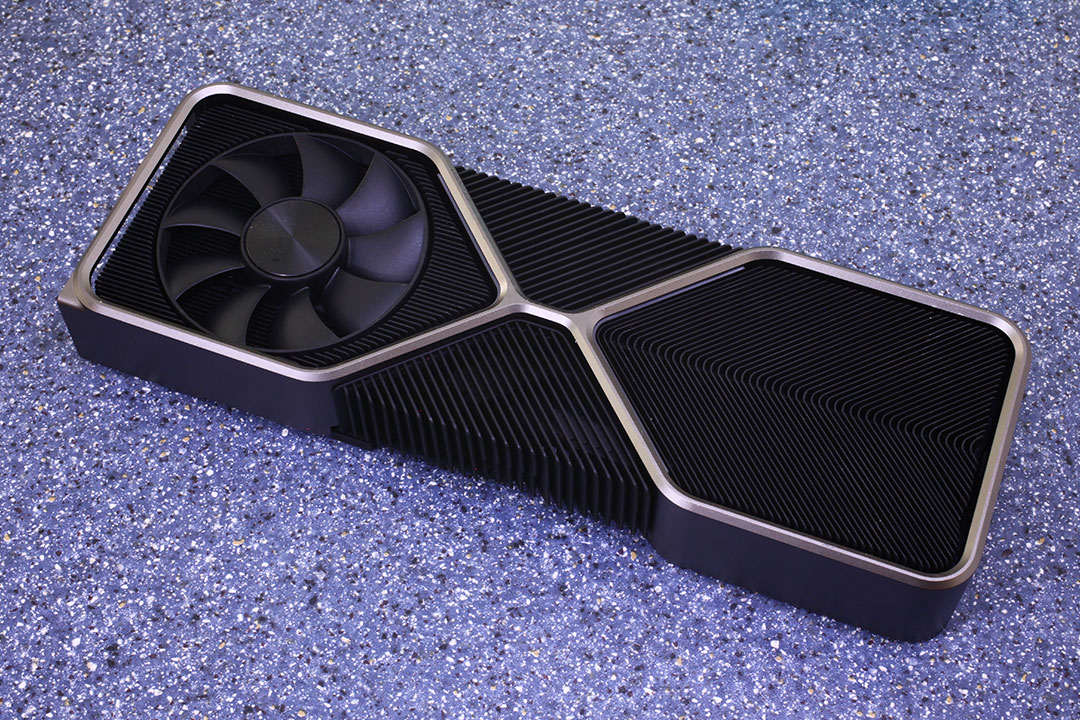
The GeForce RTX 3080 Founders Edition is a new kind of graphics card, both in terms of cooler engineering and design language. You now have one fan on each side of the card—no more backplate. The fan on the left sucks air in from the bottom of the case, routing and exhausting it through the slot-cover opening. The second fan sucks in air from below and pushes it out above the card—near the CPU cooler area, where a case fan is usually installed to exhaust the warm air. Visually, the card looks amazing, with an almost iPhone-like clean design with matte and shiny metal surfaces.
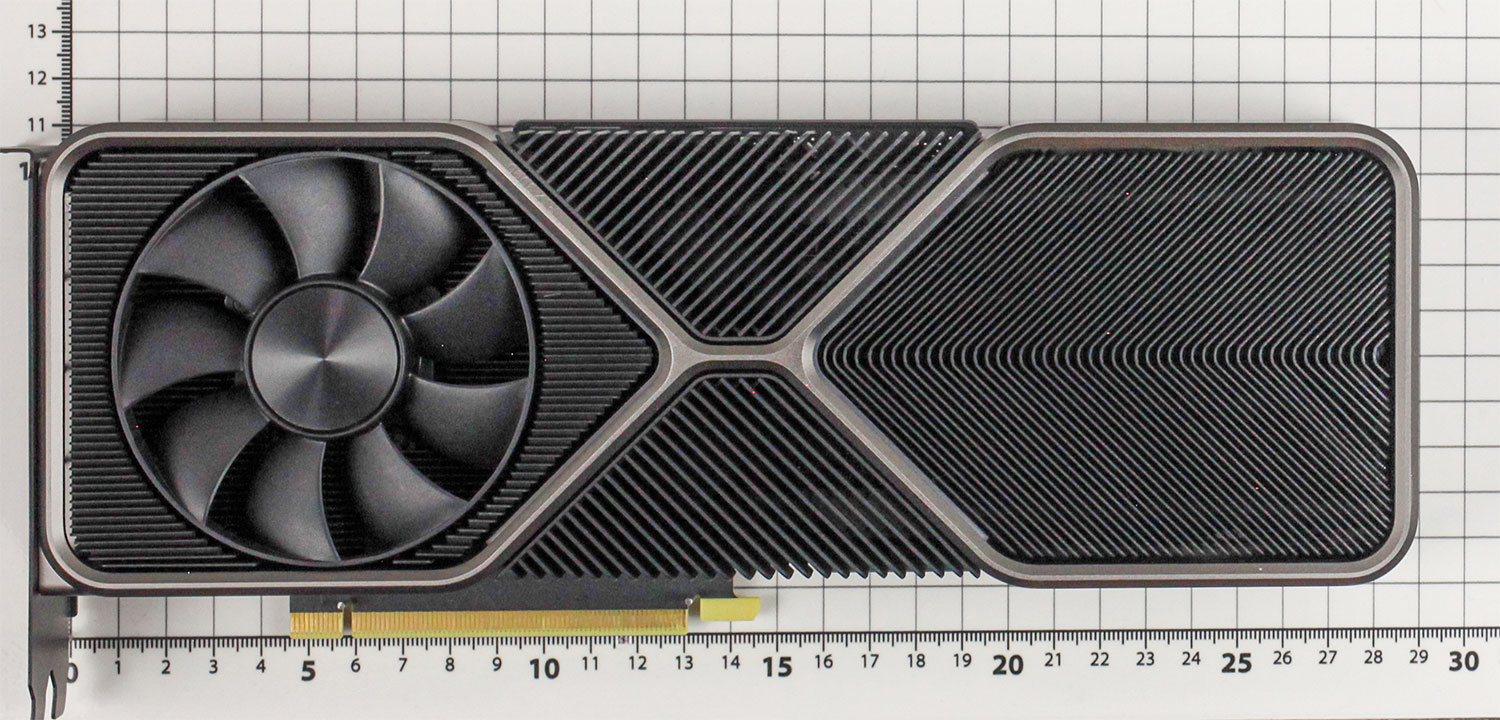
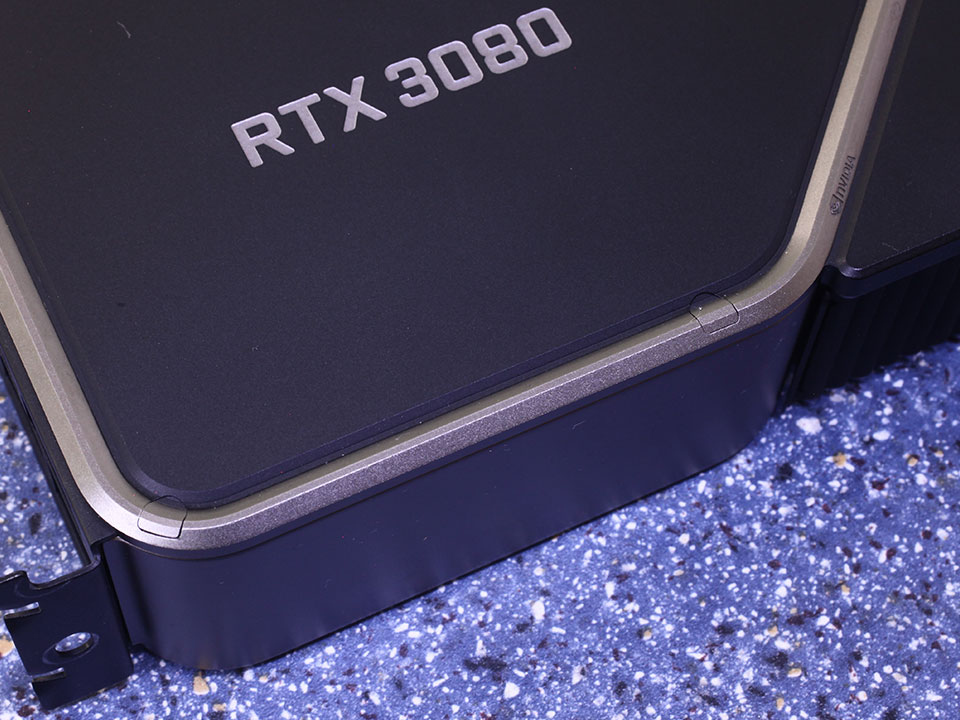
Dimensions of the card are 29 x 11 cm.
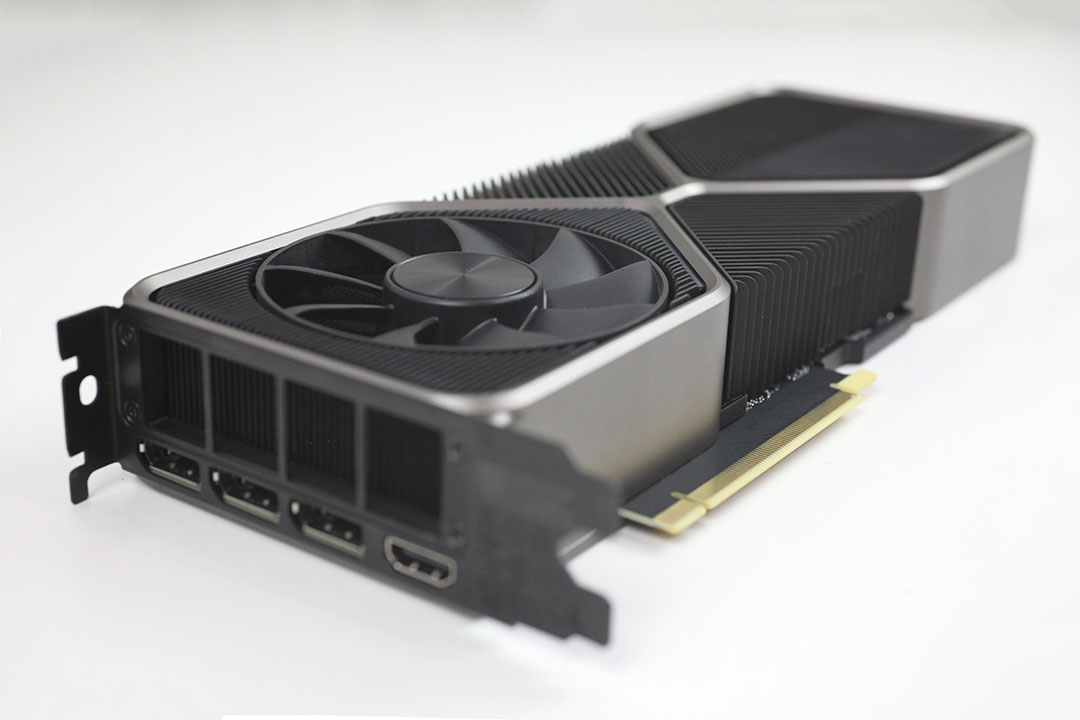

Installation requires two slots in your system.
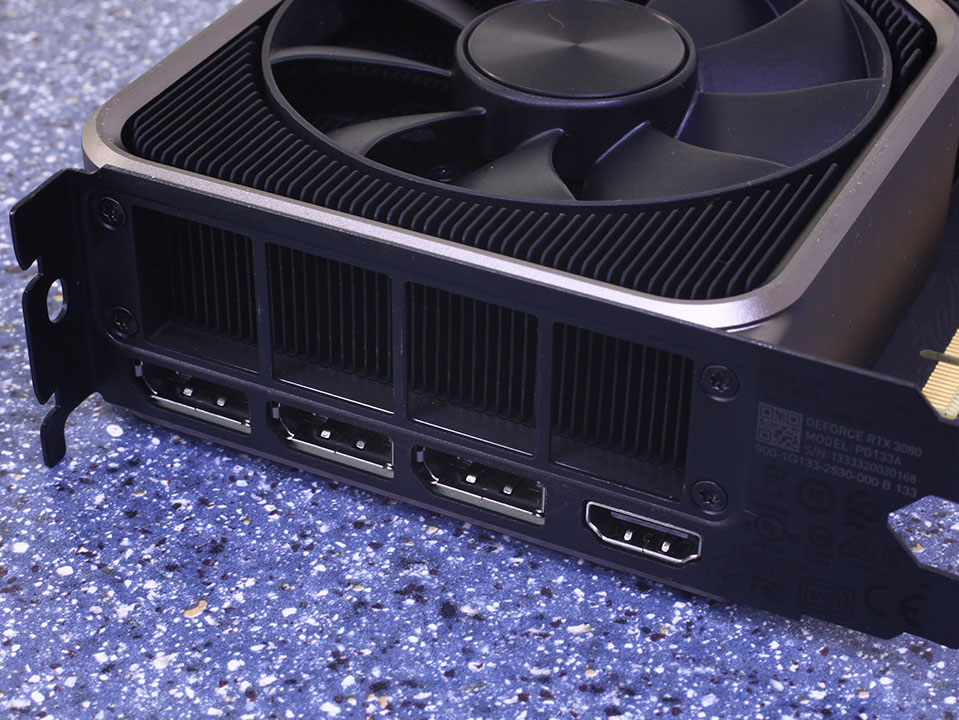
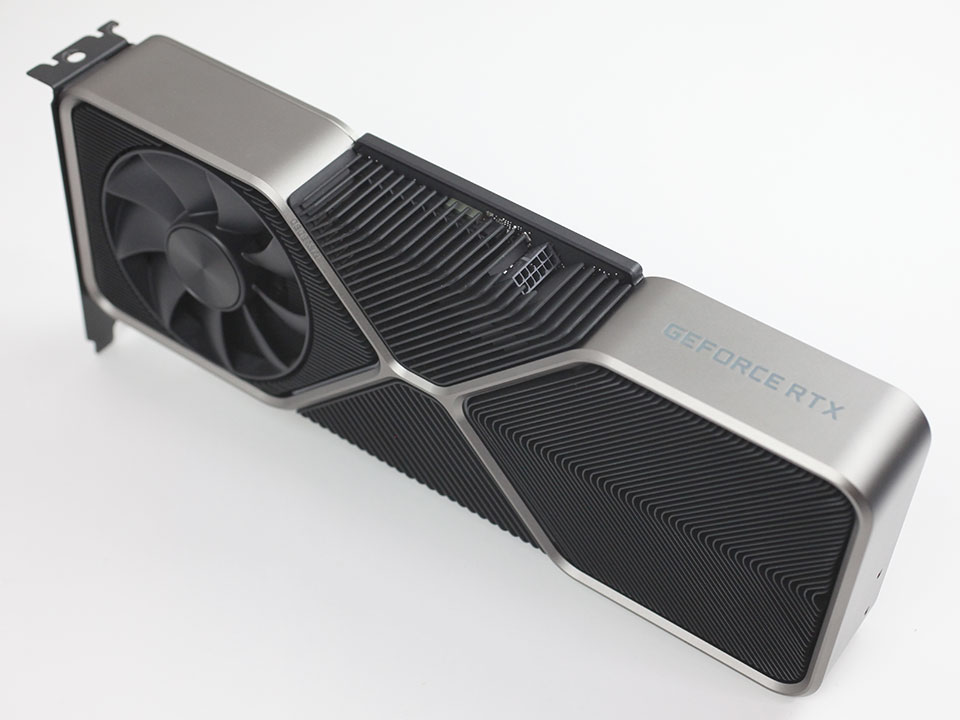
Display connectivity options include three standard DisplayPort 1.4a and one HDMI 2.1. Interestingly, the USB-C port for VR headsets, which NVIDIA introduced on Turing Founders Editions, has been removed—guess it didn't take off as planned.
The DisplayPort 1.4a outputs support Display Stream Compression (DSC) 1.2a, which lets you connect 4K displays at 120 Hz, and 8K displays at 60 Hz. Ampere can drive two 8K displays at 60 Hz with just one cable per display.
Ampere is the first GPU to support HDMI 2.1, which increases bandwidth to 48 Gbps, to support higher resolutions, like 4K144 and 8K30, with a single cable. With DSC, this goes up to 4K240 and 8K120.
NVIDIA's new NVENC/NVDEC video engine is optimized to handle video tasks with minimal CPU load. The highlight here is added support for AV1 decode. Just like on Turing, you may also decode MPEG-2, VC1, VP8, VP9, H.264 and H.265 natively, at up to 8K@12-bit.
The encoder is identical to Turing, it supports H.264, H.265 and lossless at up to 8K@10-bit.
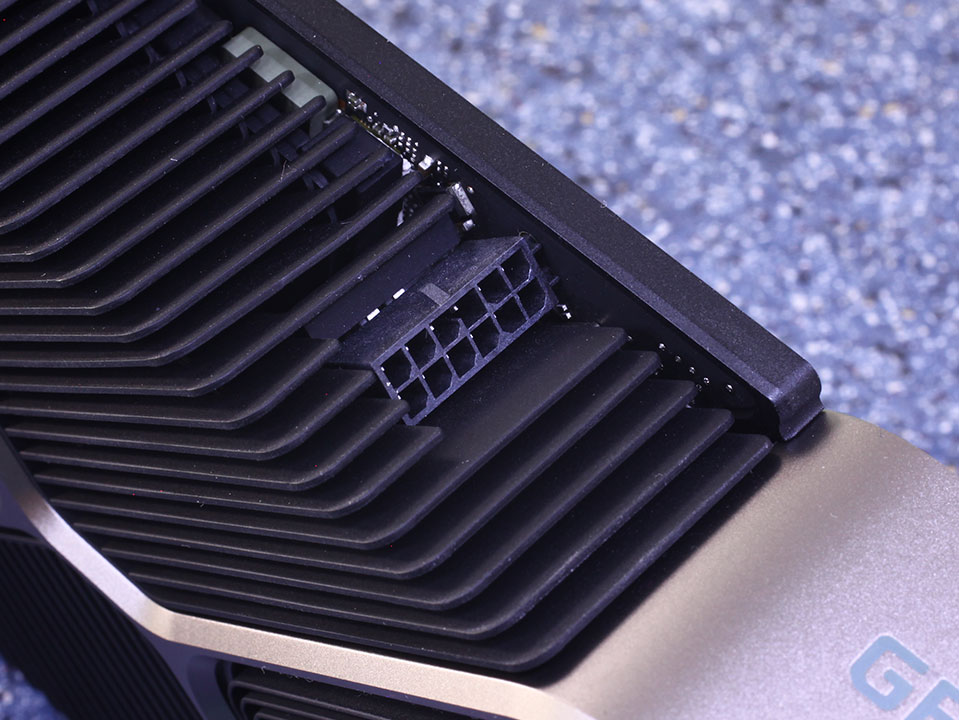
The RTX 3080 Founders Edition introduces a new 12-pin power connector. This connector has been talked about a lot recently, it's basically a much more compact solution to provide a lot of power for the card. The 12-pin carries up to 300 W of power, the equivalent of two 8-pin PCIe power cables. Total available power is 375 W (300 W from the 12-pin + 75 W from the PCIe slot). With every Founders Edition, NVIDIA includes a 2x 8-pin to 12-pin adapter cable, so you're good to go and don't need any special adapters.
The GeForce RTX 3080 does not support SLI. Its bigger brother, the RTX 3090, has SLI support. As both are based on the GA102 GPU, it's purely a segmentation choice. Multi-GPU really isn't supported widely anymore, so it's no big deal.
Teardown
If you've taken a closer look at our photos, you might have noticed that the RTX 3080 Founders Edition has no visible screws! Looks like NVIDIA took inspiration from Apple. This of course complicates the disassembly process, I'll go through it with you, step by step.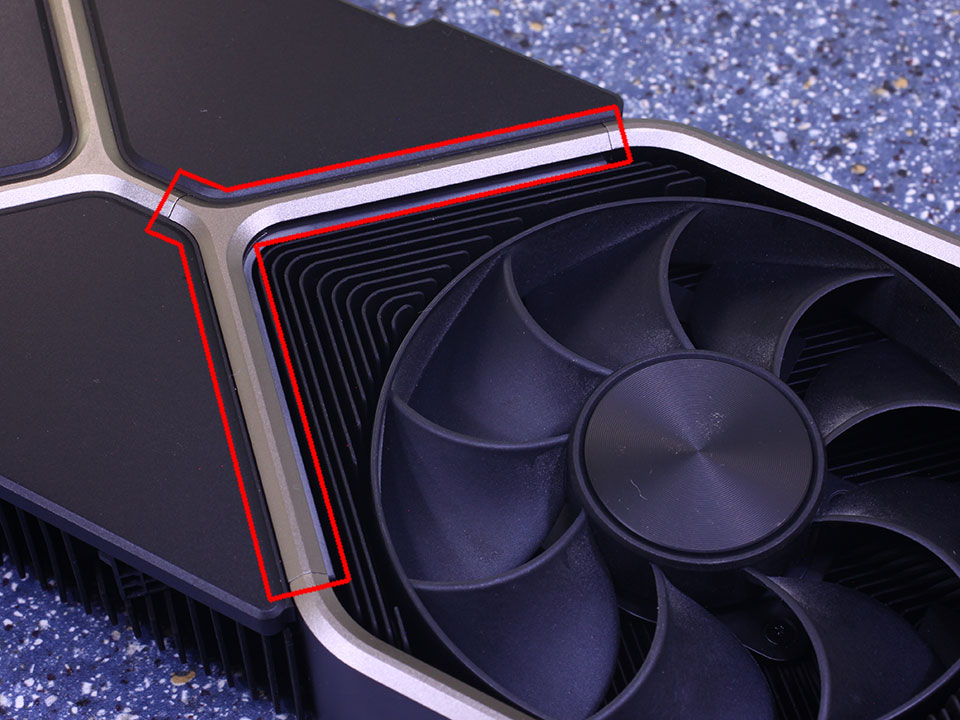
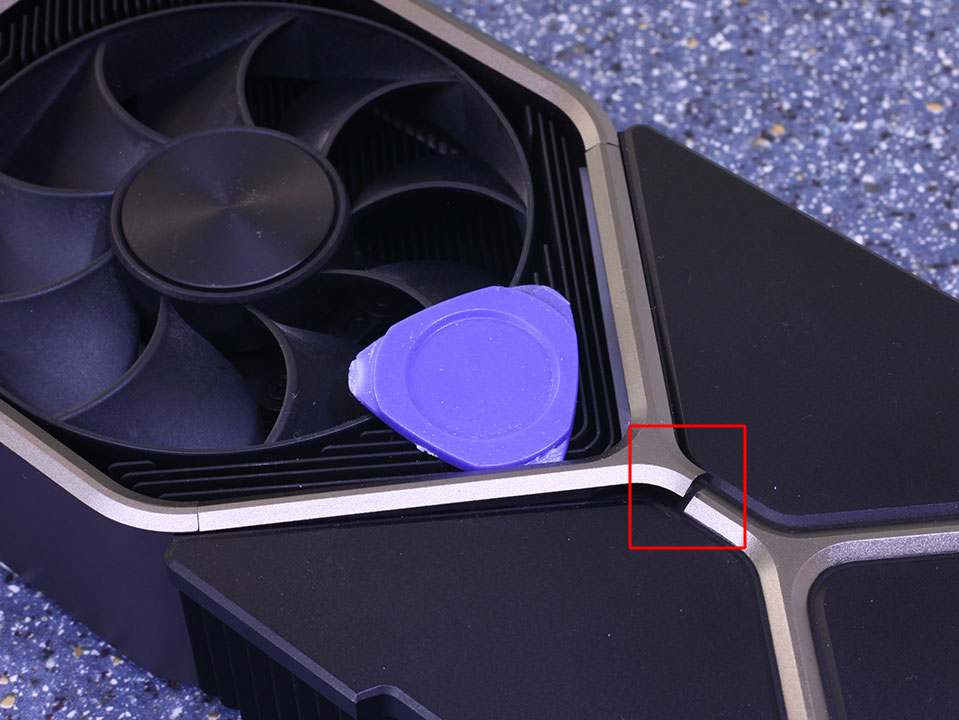

First, we have to remove this triangular cover. At the bottom of the V (left side of the first photo), slide your finger underneath the cover and gently lift it up. Do not use any metal tools or you will scratch it. With that done, carefully work your way from one side to the other until the cover comes off. You'll find four screws underneath—remove those.
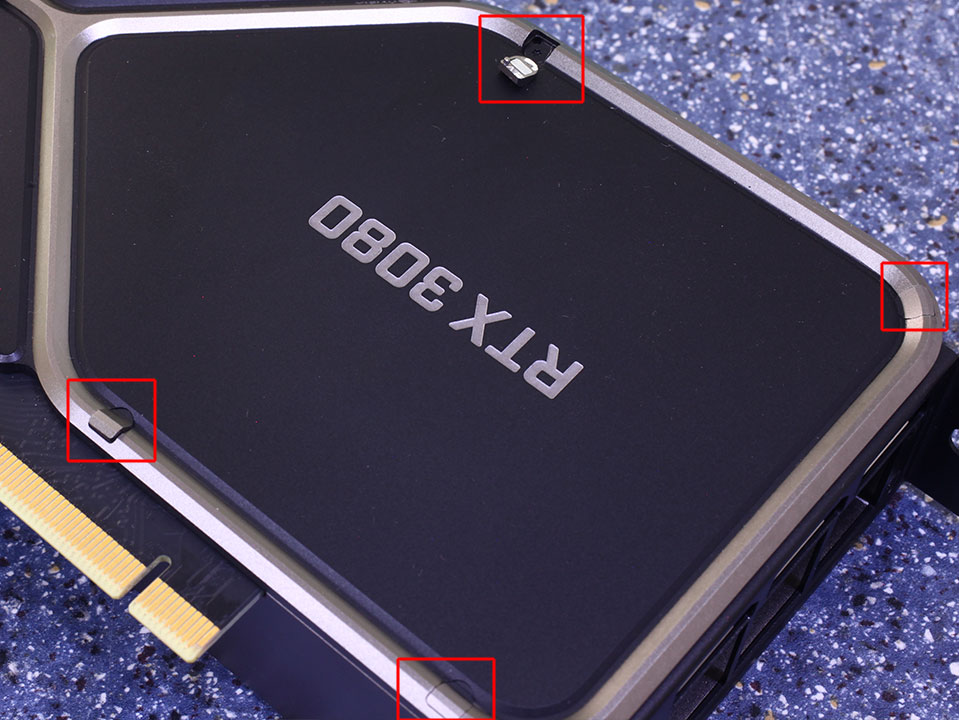
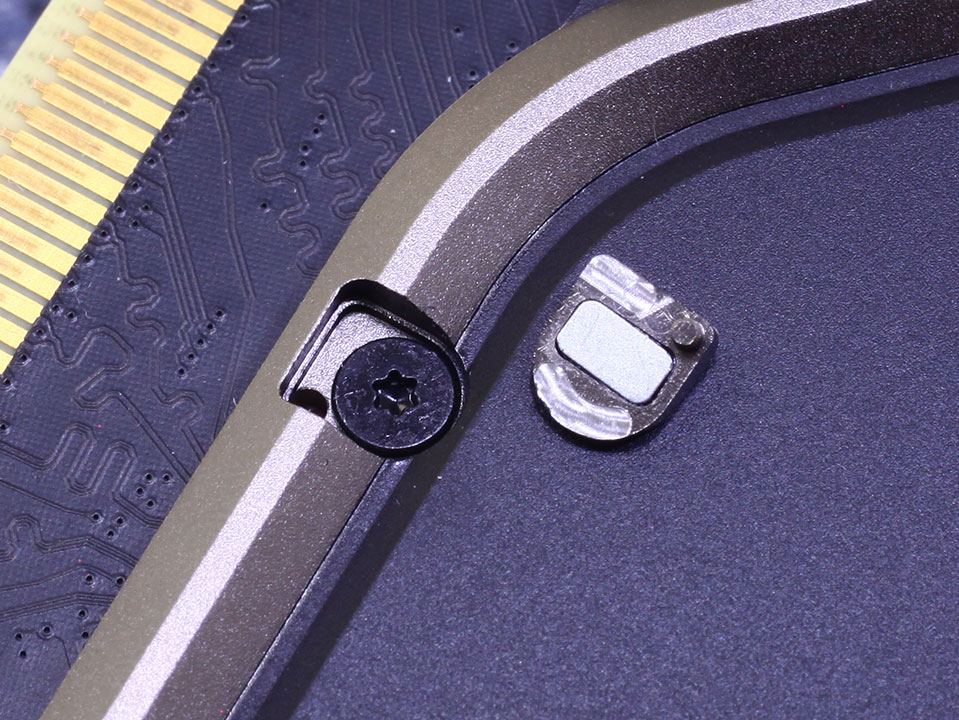
The four little tabs I've marked are magnetic—what a genius idea, much better than using glue. You can either use sticky tape to pull them up or fine pliers to lift them a bit. I found lifting them from the outside of the card quite easy. Remove the screws underneath.
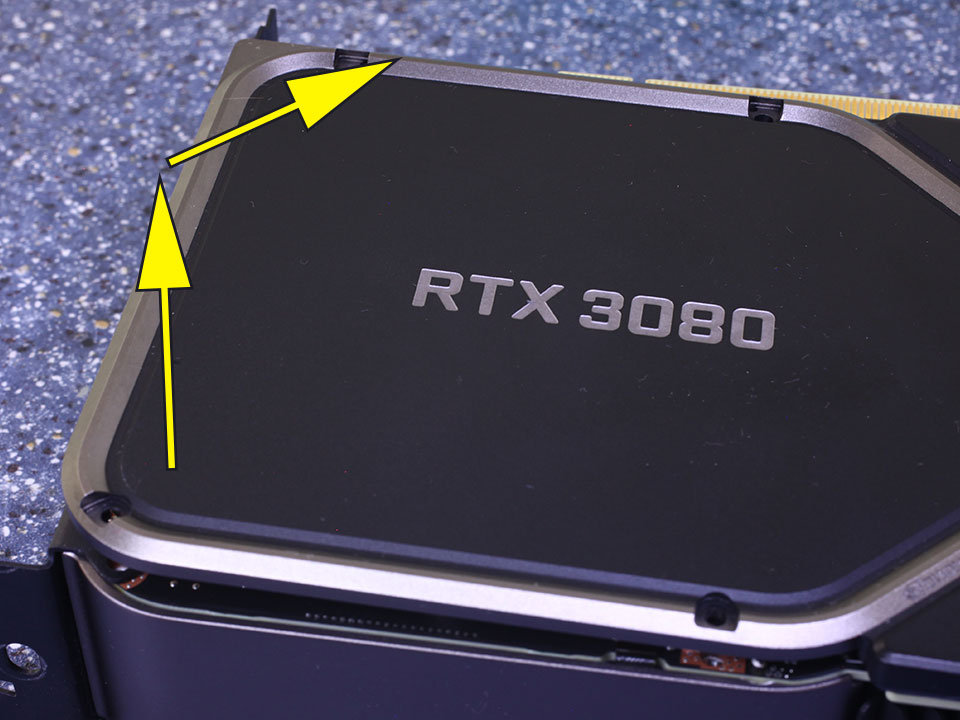

You can now carefully lift up the cover plate. Take note of the "RTX 3080" text—that's the piece you have to move. Start at the far side, lift it up a bit and tilt it a bit towards the center. There are some thermal pads underneath, so a little bit of wiggling helps to get those off.
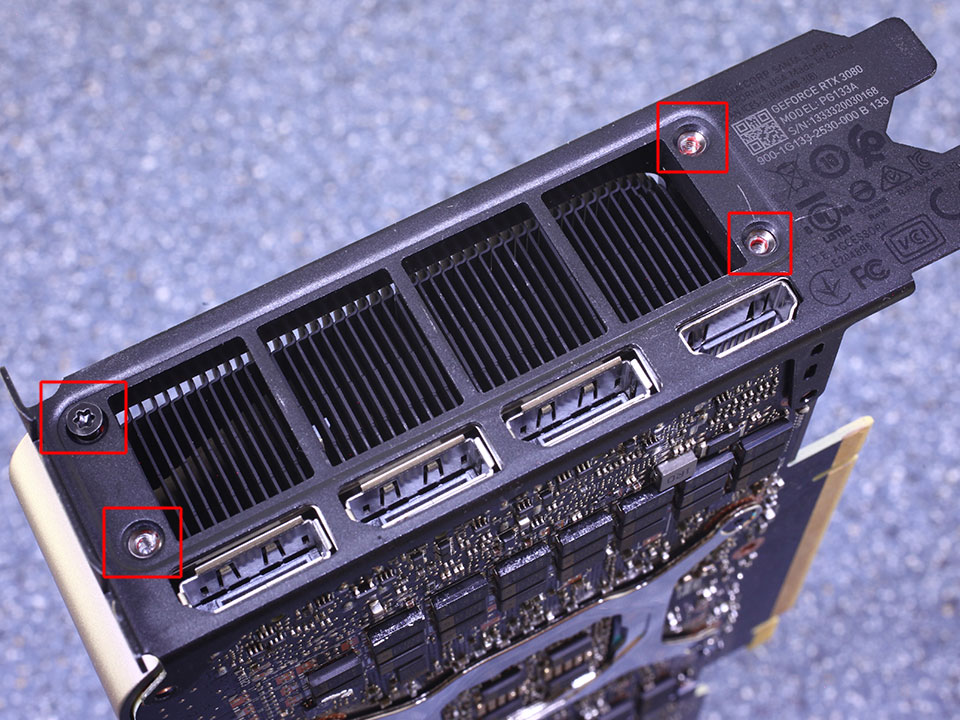
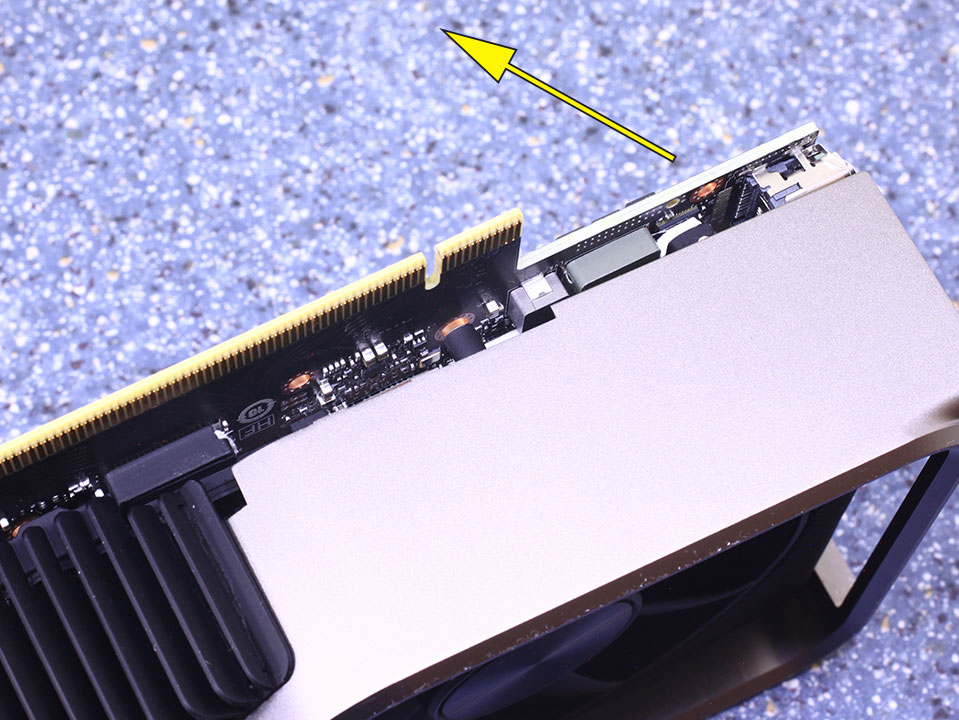
Next, remove four screws on the slot cover.
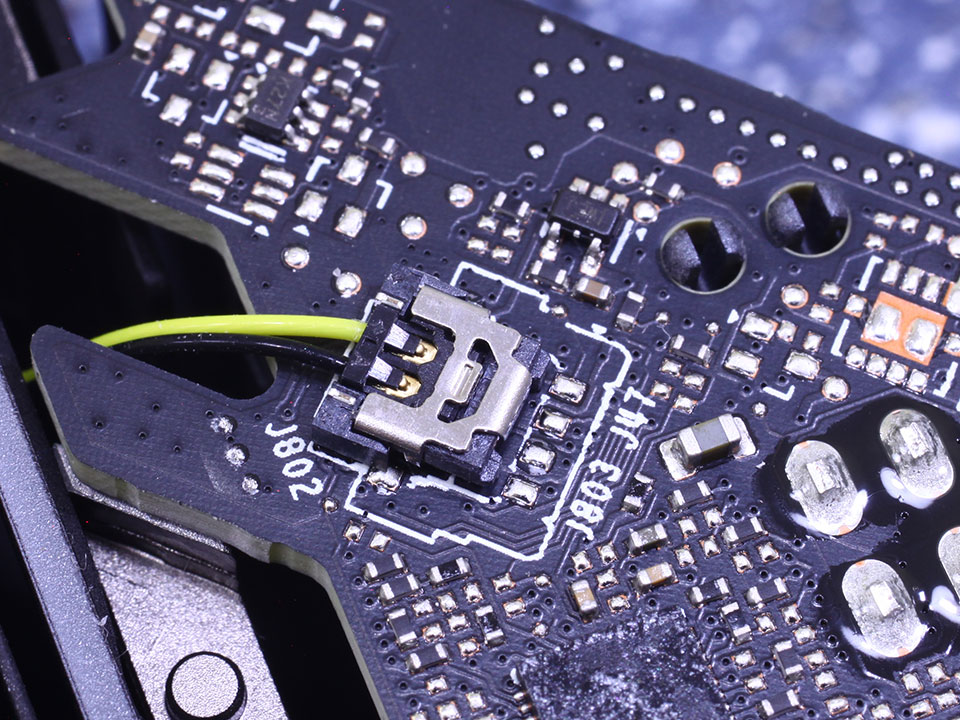
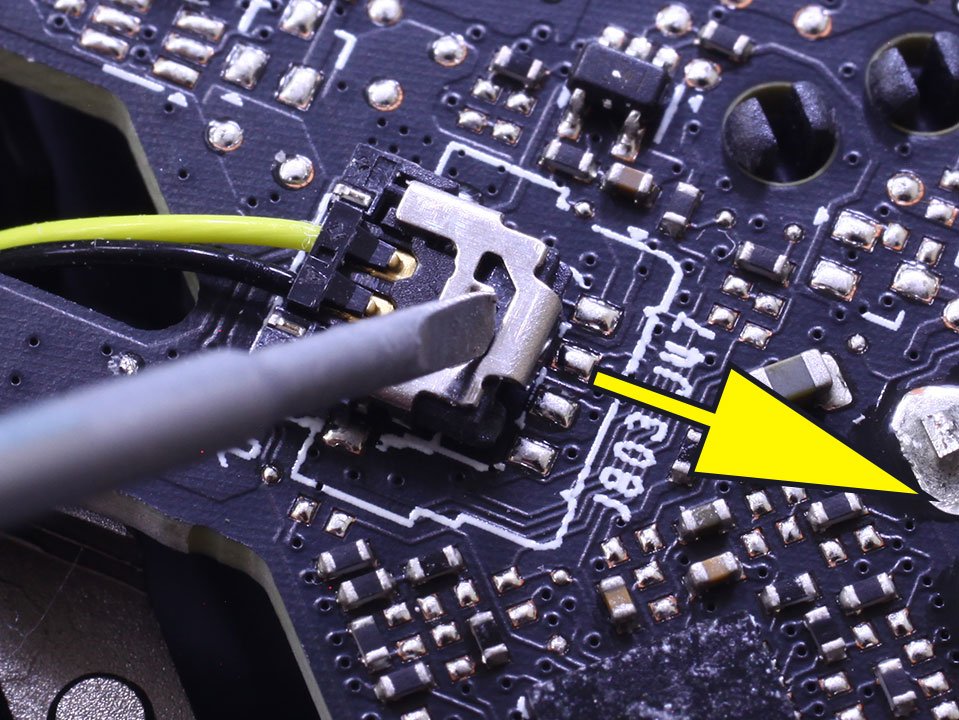
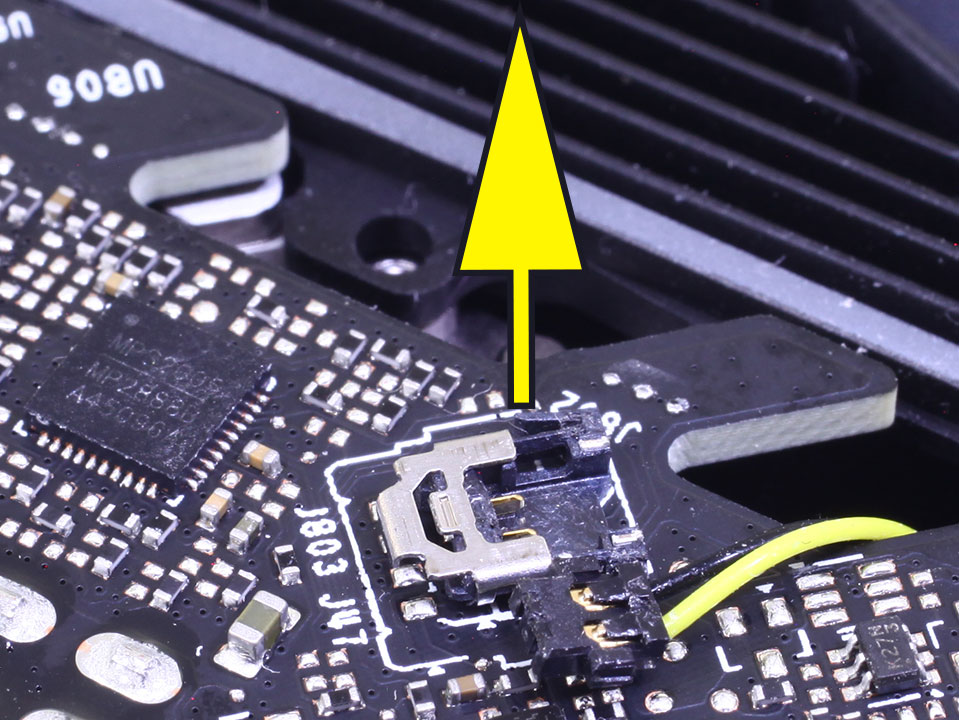
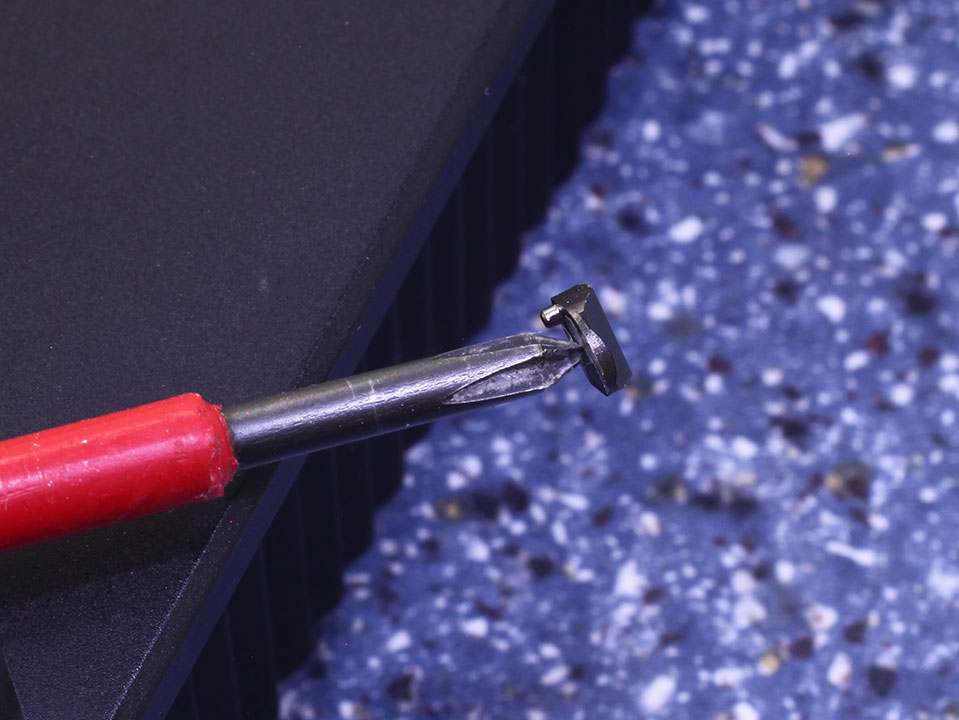
There are still three cables running between the fan assembly and PCB. The first one, J802, uses a slide-lock mechanism. Use a fine screwdriver to push the silvery metal cover away from the cable. Now, lift the black plastic connector upwards, out of the connector housing. On my first attempt, I tried to push it out sideways—this will not work, you have to lift it.
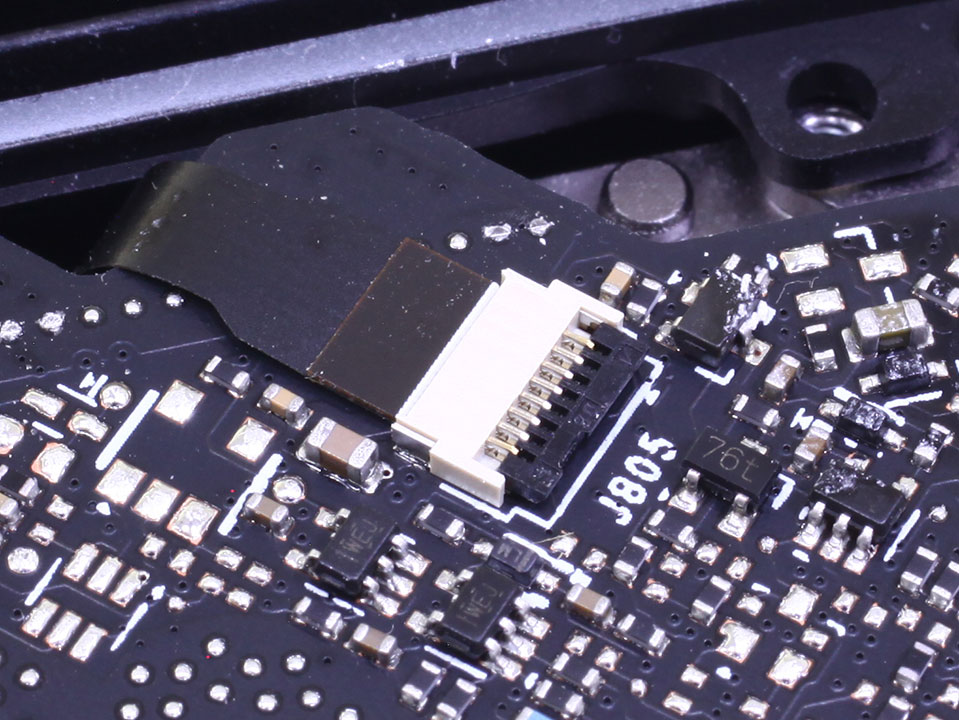
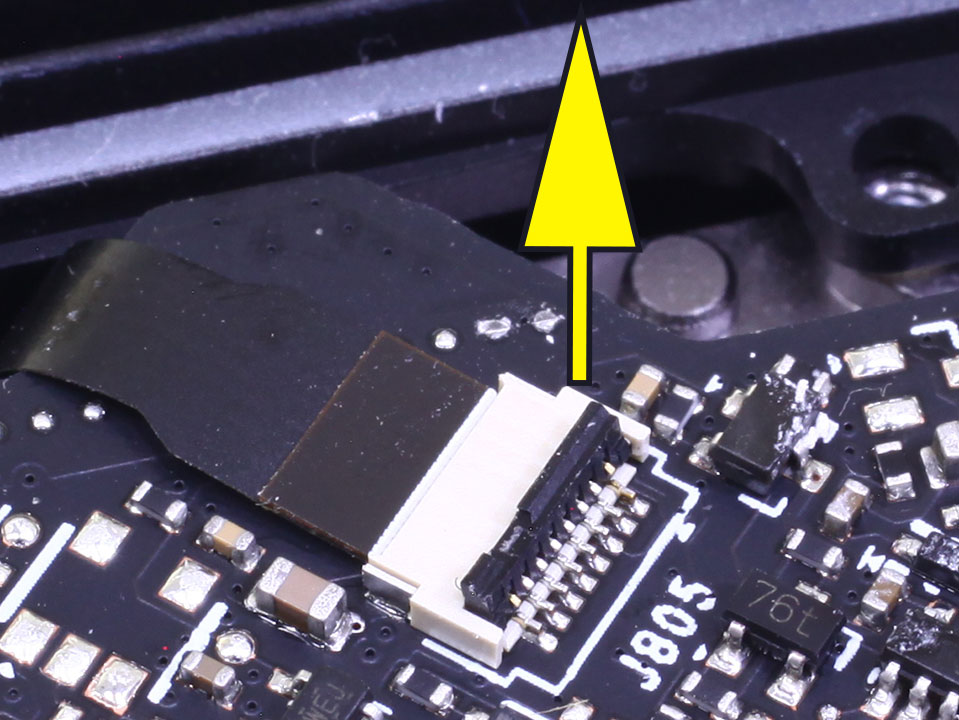
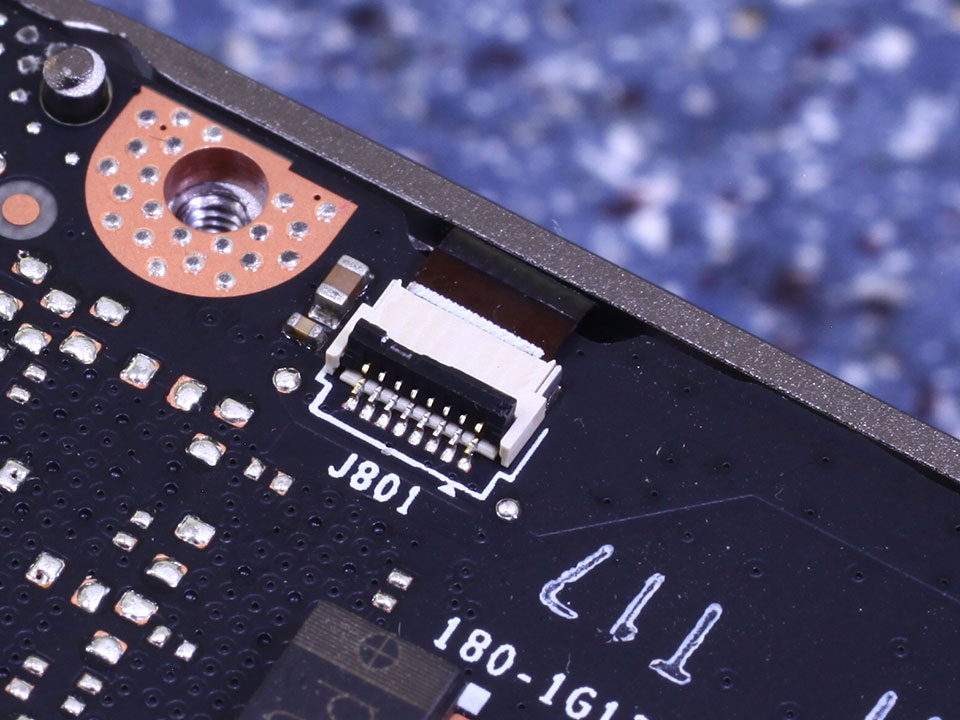
Connectors J804 and J801 use a flat-ribbon cable, which is VERY delicate. Be careful in working with tools in that area. The locking mechanism is also different. Note the black piece of plastic; it folds upward. While you can operate it with tools, I found flipping it upwards with a finger much easier. Very carefully remove both ribbon cables now.
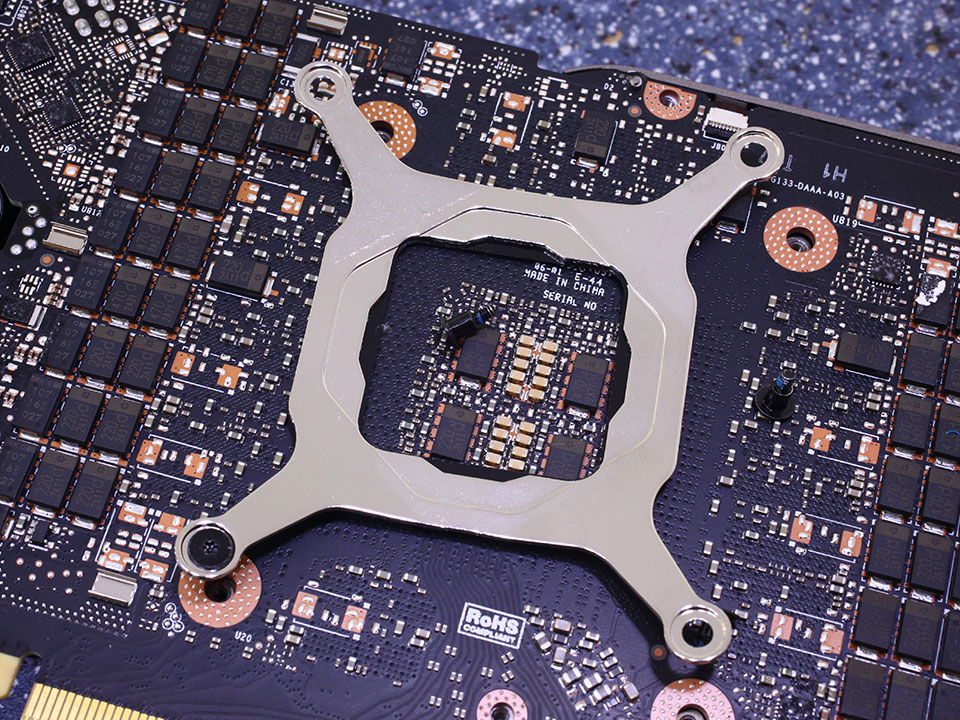
Remove these four screws holding the PCB in place.
Lift the main PCB upwards at a slight angle. You have to overcome the suction force of the GPU and memory TIM, wiggling helps.

Mission accomplished!

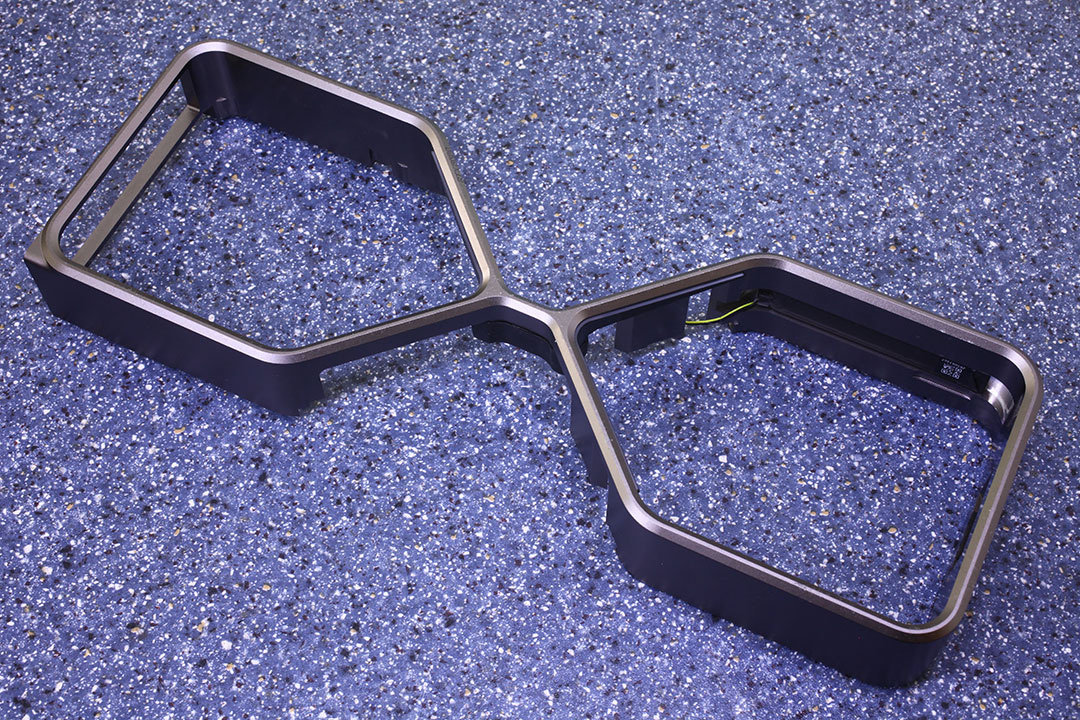
NVIDIA's cooler uses a large vapor chamber base paired with four heatpipes. A 85 mm fan is installed on each side.
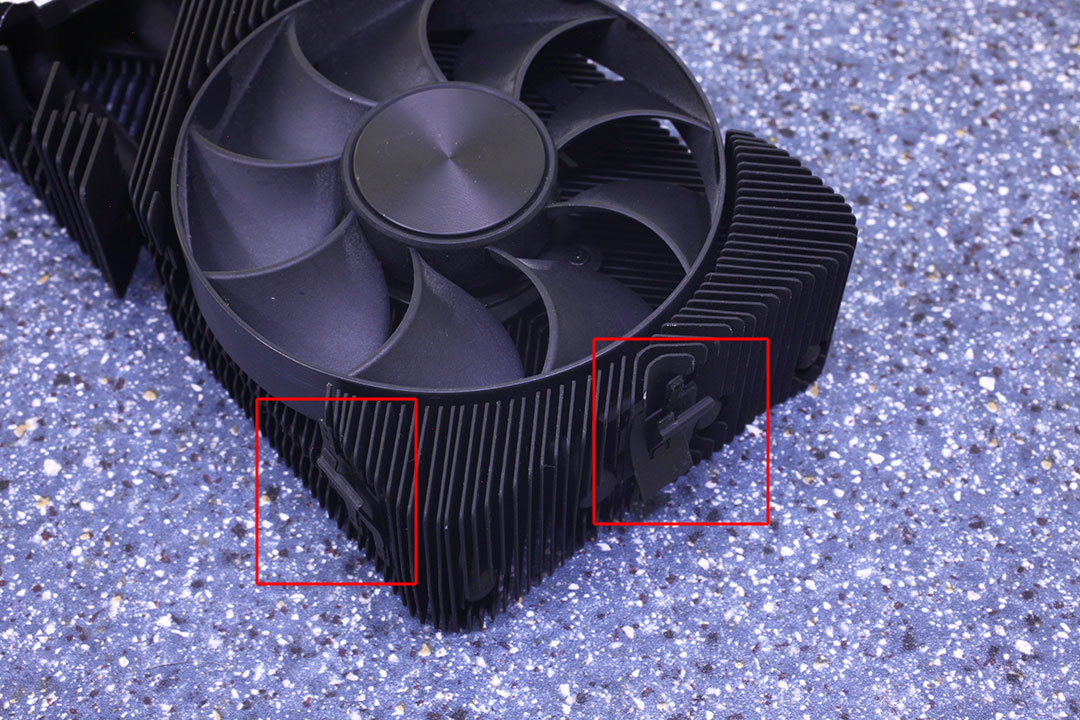
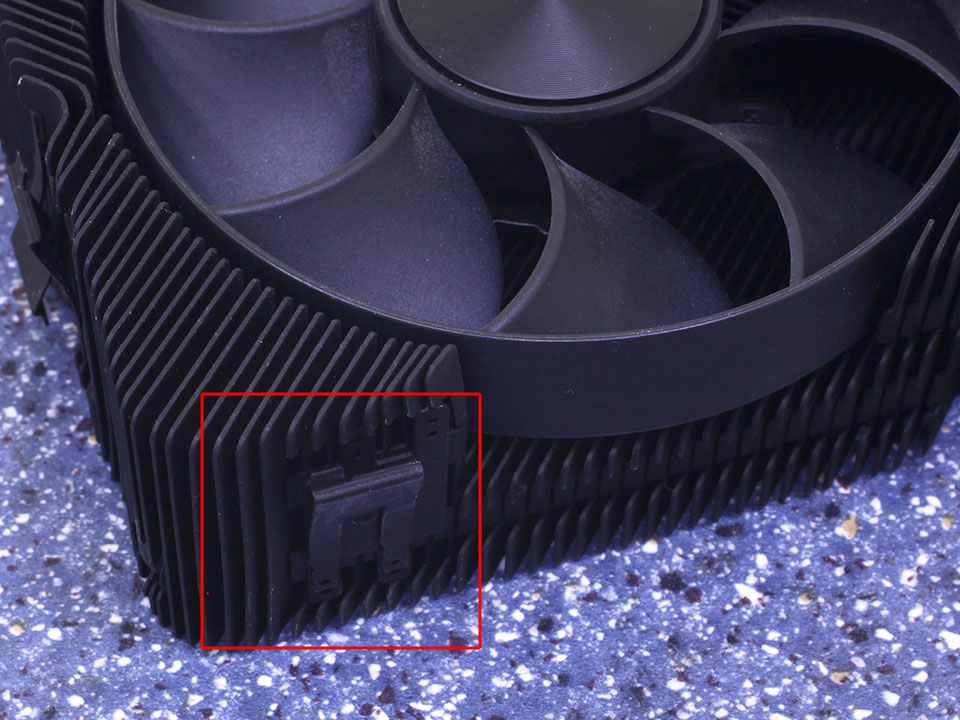
To further take apart the heatsink assembly, you have to push these three pins towards the inside. A fine screwdriver or piece of plastic works well.
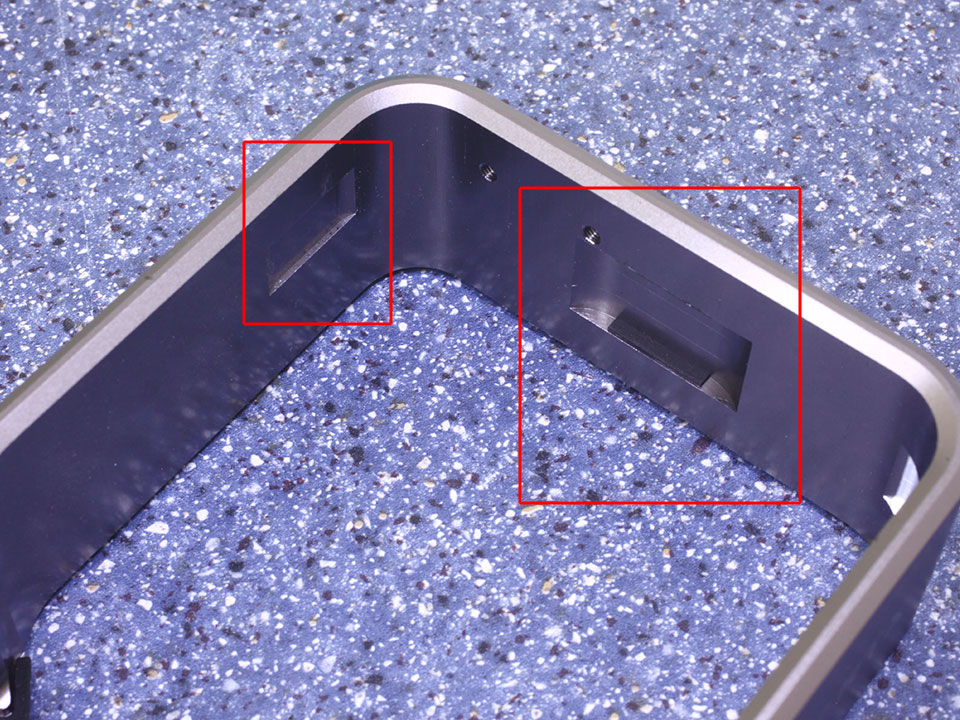
The pins lock into these grooves that have been cut into the heatsink frame.
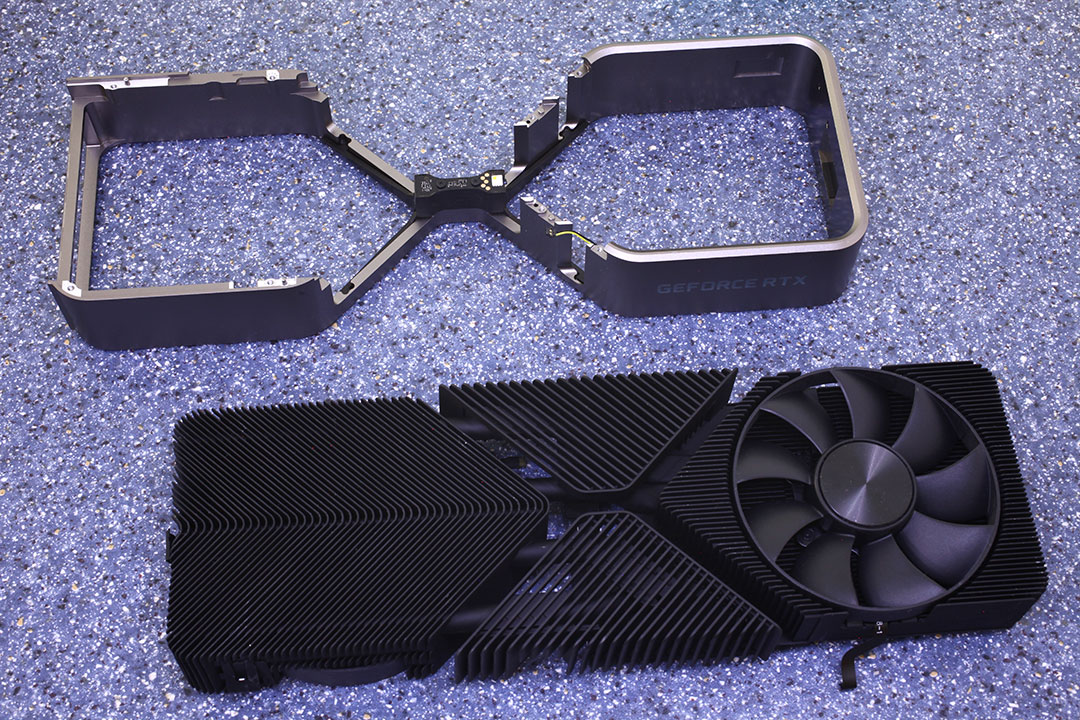
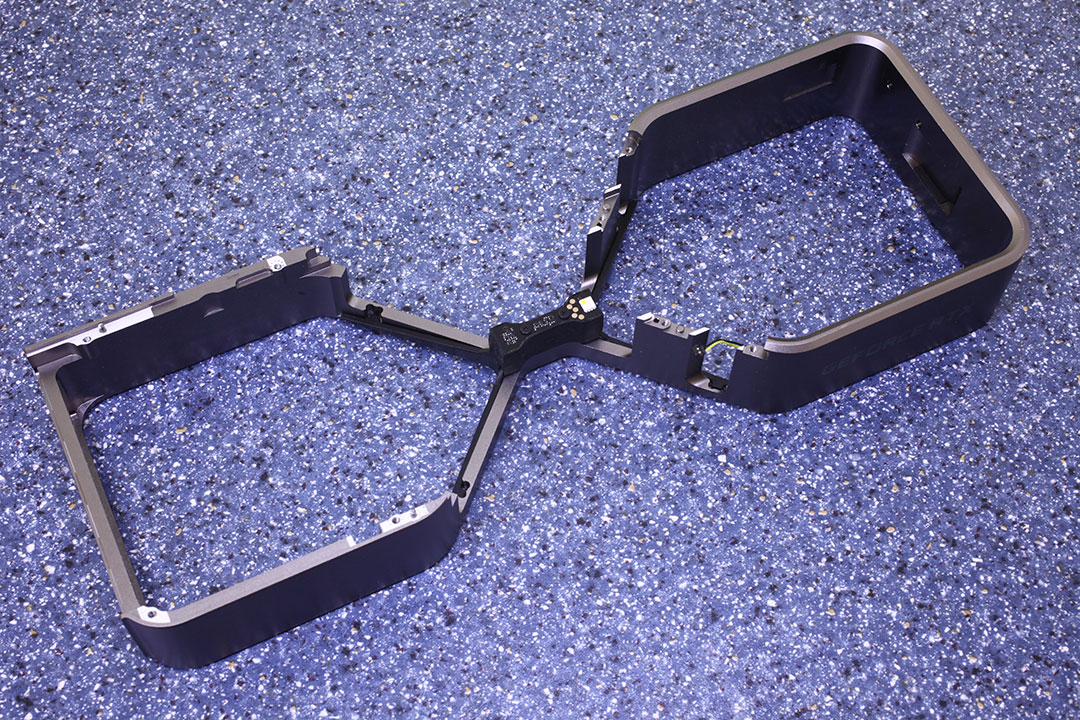
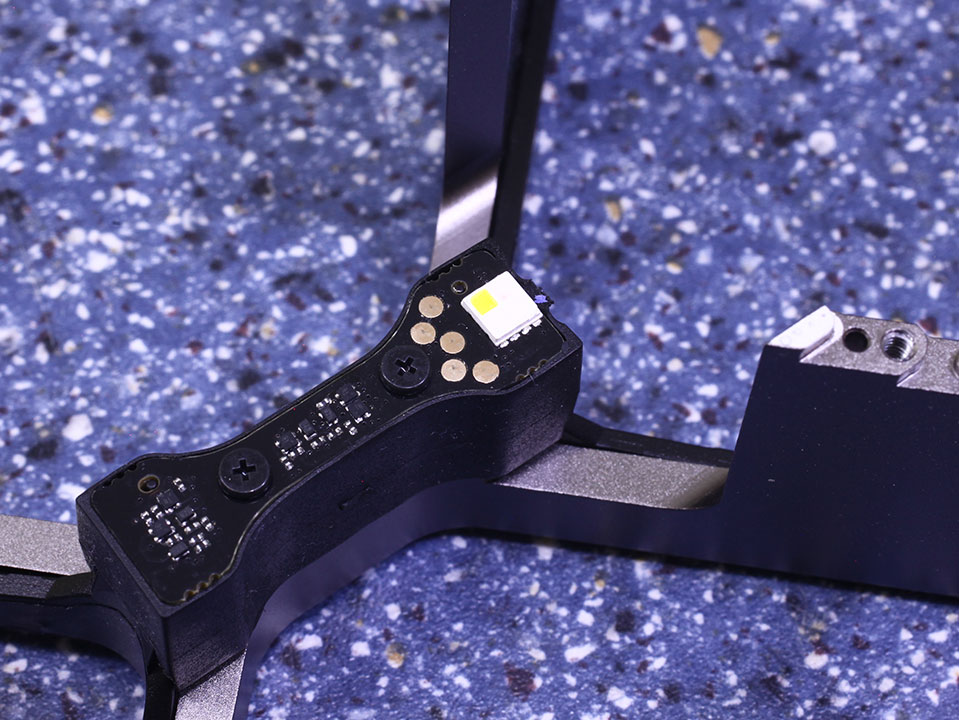
On the frame, you will find an LED for the center lighting, and another one that illuminates the GeForce logo. Very impressive, another engineering masterpiece.
Jul 3rd, 2025 21:57 CDT
change timezone
Latest GPU Drivers
New Forum Posts
- [GPU-Z Test Build] New Kernel Driver, Everyone: Please Test (35)
- GPU-Z Display Bug via DP 2.1? (4)
- What Windows is overall the best to you and why? (269)
- How do you view TPU & the internet in general? (With poll) (58)
- HP Zbook 15 G2 GPU Upgrade (12)
- Will you buy a RTX 5090? (610)
- What phone you use as your daily driver? And, a discussion of them. (1756)
- What would you buy? (51)
- A Final Fantasy IX Reminiscence - My love letter and homage to one of the best stories ever told (90)
- GravityMark v1.89 GPU Benchmark (309)
Popular Reviews
- ASUS ROG Crosshair X870E Extreme Review
- Crucial T710 2 TB Review - Record-Breaking Gen 5
- Fractal Design Scape Review - Debut Done Right
- PowerColor ALPHYN AM10 Review
- Sapphire Radeon RX 9060 XT Pulse OC 16 GB Review - An Excellent Choice
- Upcoming Hardware Launches 2025 (Updated May 2025)
- AMD Ryzen 7 9800X3D Review - The Best Gaming Processor
- Sapphire Radeon RX 9070 XT Nitro+ Review - Beating NVIDIA
- SCHENKER KEY 18 Pro (E25) Review - Top-Tier Contender
- AVerMedia CamStream 4K Review
TPU on YouTube
Controversial News Posts
- Intel's Core Ultra 7 265K and 265KF CPUs Dip Below $250 (288)
- NVIDIA Grabs Market Share, AMD Loses Ground, and Intel Disappears in Latest dGPU Update (212)
- Some Intel Nova Lake CPUs Rumored to Challenge AMD's 3D V-Cache in Desktop Gaming (140)
- NVIDIA GeForce RTX 5080 SUPER Could Feature 24 GB Memory, Increased Power Limits (115)
- Microsoft Partners with AMD for Next-gen Xbox Hardware (105)
- NVIDIA Launches GeForce RTX 5050 for Desktops and Laptops, Starts at $249 (105)
- Intel "Nova Lake‑S" Series: Seven SKUs, Up to 52 Cores and 150 W TDP (100)
- NVIDIA DLSS Transformer Cuts VRAM Usage by 20% (97)