 0
0
Phanteks Glacier R160 Reservoir Review
Installation »Closer Examination
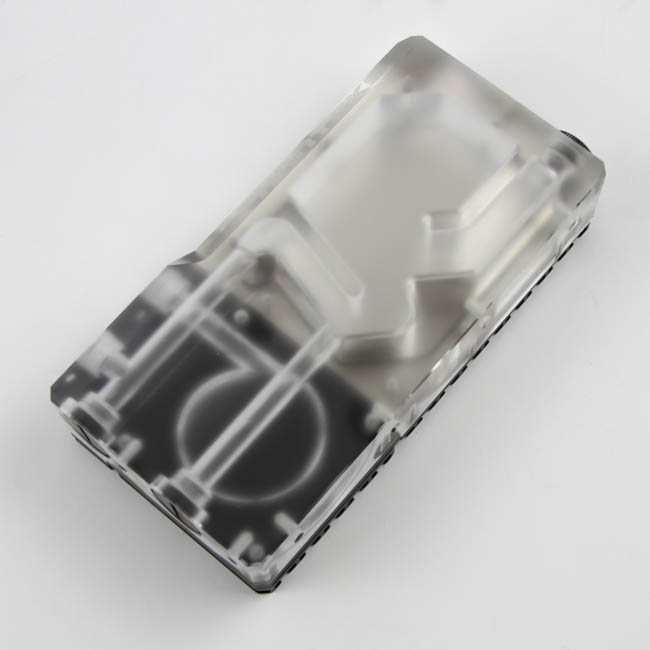


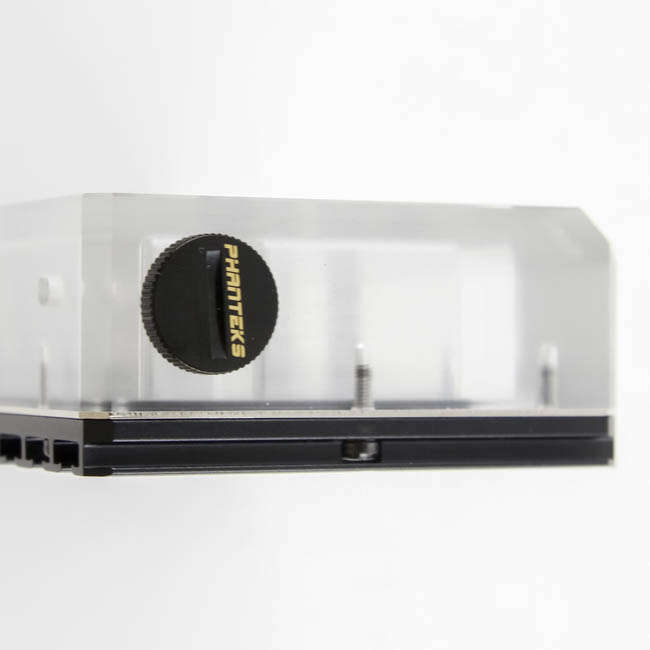
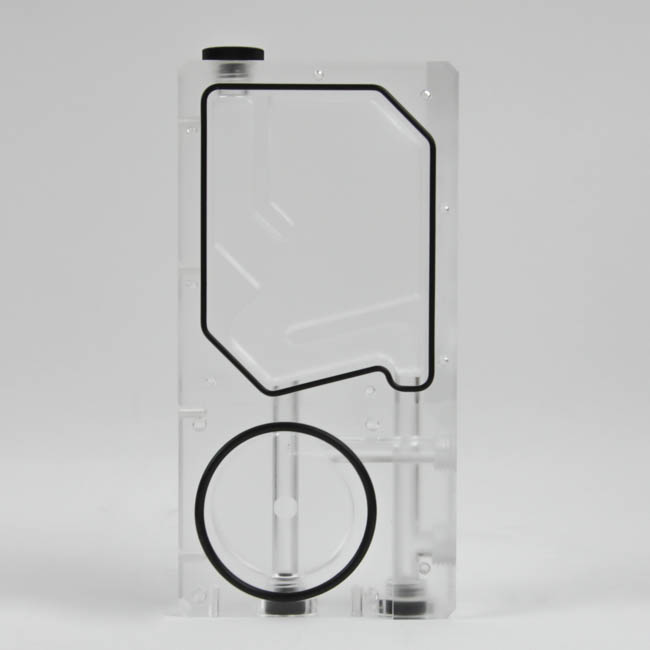
The first thing you will take note of with this reservoir in your hand is how thick it is compared to the longest dimension, and the second thing is the frosted finish to the acrylic. A lack of polish is generally indicative of a lower amount of effort put into it by the company, but in this case, it has been deliberately left frosted evenly on all but a small beveled edge where the Phanteks logo has been put. This is effort as well, just in a different direction than the norm, which—combined with the different form factor—helps visually distinguish it from the rest of the market. Such form-factor reservoirs have usually been custom mods built to fit a specific case and build alike, so I do think Phanteks has something on their hands here that will draw more attention than if they were to go with another cylindrical tube reservoir. There are three stop plugs to be seen on three BSP G1/4" threaded ports, out of a total of five, with the two on one side being countersunk and working as optional inlet/outlet ports and the one port jutting out the other end being a fill/drain port. The latter has to be easier to remove, which has it use a non-countersunk design with enough grip for manual removal and installation.

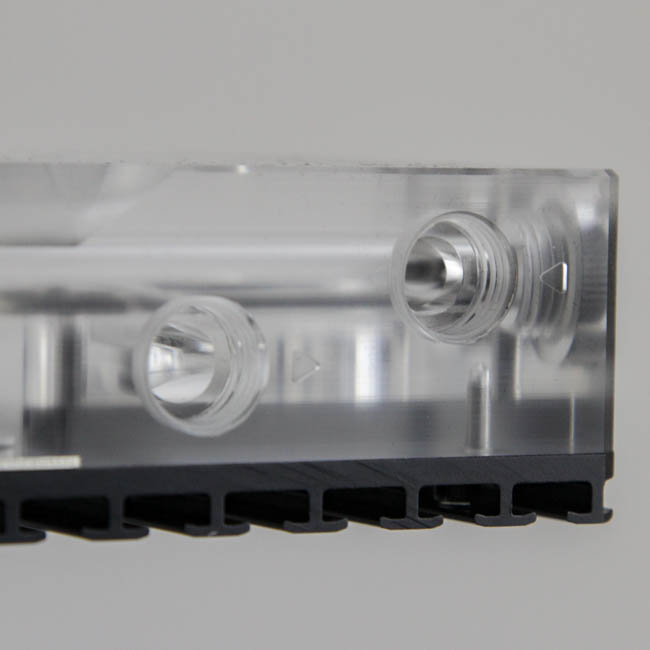
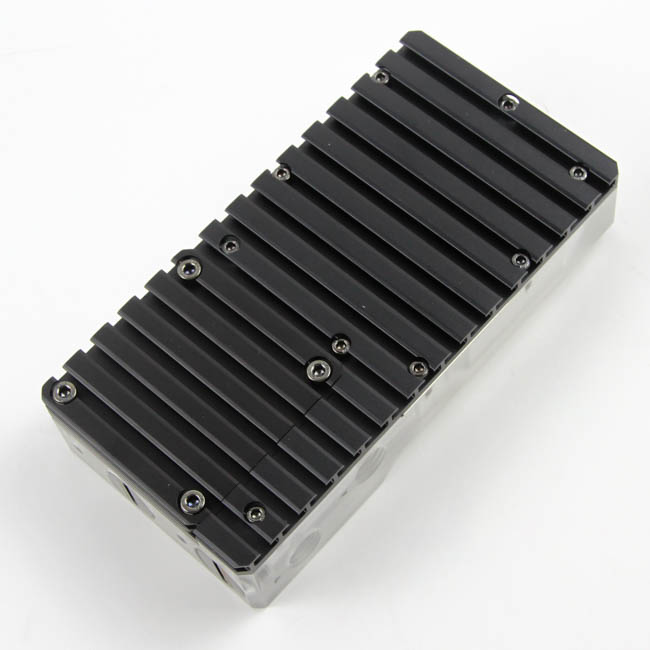

The stop plugs look to be brass with a black finish and a Phanteks logo in a light golden/yellow color above a flat slot to be used with a flat head screwdriver if countersunk. There are 5+ turns available to allow for a secure catch with the threaded ports, and Phanteks continues to use a Viton rubber O-ring here, which is nice, but ultimately offers nothing over the usual suspects for PC DIY watercooling. There are two ports that come without stop plugs, and these have arrows alongside to indicate the inlet or outlet nature of the port. As such, there are two options each for the inlet and outlet ports you can use depending on the best tubing layout for your specific build. Turning the reservoir around, we see the massive chunk of sandblasted black aluminum, which is further cut into 1.5 mm thick fins separated by 3.5 mm, with a total height of 7.5 mm.

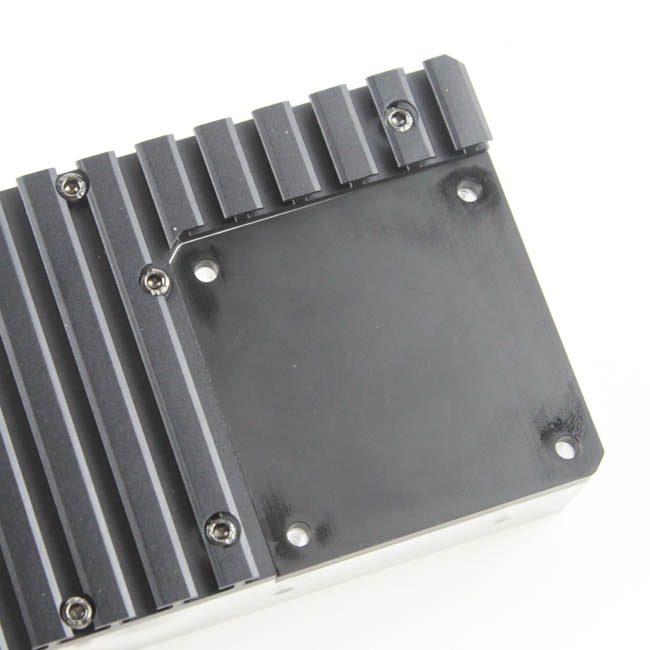

The reservoir as it arrives can be used as a standalone reservoir. However, you would be doing it injustice by not using the integrated pump top for a Laing DDC. Phanteks provides an Allen key to remove the four hex head screws on the smaller aluminum piece on the back, the removal of which reveals another piece of aluminum that is a spacer for when you do not have a pump. The spacer has a cutout for an O-ring you will use when installing a pump, and we can get a better look at the pump top and volute here. One thing I noted here is that no thermal pad is provided, which other manufacturers and retailers selling the Laing DDC tend to provide so long as they pair it with a metal heatsink. For those wondering why a heatsink is even used here—the Laing DDC, unlike the D5, is not actively cooled by the coolant going through, and the electronics tend to get pretty warm. A non-PWM motor in particular, owing to lower efficiency, gets all the warmer and has been the source of many a dead pump when placed in a location with minimal airflow.


As always, full disassembly was done post-testing. The provided Allen key does not fit the other nine screws on the larger part of the heatsink. A H2.5 mm driver helps here, and removing these helps get the heatsink off a nickel-plated copper base. This is another part where Phanteks went with a different material since others use either a stainless steel plate or nothing at all in between, and there is a large O-ring here to keep the coolant in place. The nickel-plated copper base and larger heatsink may help dissipate some of the heat from the reservoir, but we are talking about an insignificant amount here. There is some scope for further heat dissipation from the heatsink over the DDC pump area via conduction, but the lack of a thermal pad does, again, deter heat transfer from being as good as it could have been.
When re-assembling, just remember to put the O-rings back into place if they got dislodged before reversing these steps accordingly. As always, TechPowerUp is not liable for any issues that arise from your disassembly of the product.
Jul 12th, 2025 09:34 CDT
change timezone
Latest GPU Drivers
New Forum Posts
- Gigabyte graphic cards - TIM gel SLIPPAGE problem (151)
- No offense, here are some things that bother me about your understanding of fans. (36)
- Stupid buggy POS Realtek WiFi RTL8852BE (11)
- Swapping existing router w/ a replacement; any issues? (14)
- 'NVIDIA App' not usable offline? (13)
- Chrome has removed uBlock Origin 1.64.0 (remove google search suggestions) (12)
- Share your AIDA 64 cache and memory benchmark here (3097)
- The Official Linux/Unix Desktop Screenshots Megathread (778)
- [GPU-Z Test Build] New Kernel Driver, Everyone: Please Test (90)
- NVIDIA App (55)
Popular Reviews
- Fractal Design Epoch RGB TG Review
- Lexar NM1090 Pro 4 TB Review
- Corsair FRAME 5000D RS Review
- NVIDIA GeForce RTX 5050 8 GB Review
- NZXT N9 X870E Review
- Our Visit to the Hunter Super Computer
- Sapphire Radeon RX 9060 XT Pulse OC 16 GB Review - An Excellent Choice
- AMD Ryzen 7 9800X3D Review - The Best Gaming Processor
- Upcoming Hardware Launches 2025 (Updated May 2025)
- Chieftec Iceberg 360 Review
TPU on YouTube
Controversial News Posts
- Intel's Core Ultra 7 265K and 265KF CPUs Dip Below $250 (288)
- Some Intel Nova Lake CPUs Rumored to Challenge AMD's 3D V-Cache in Desktop Gaming (140)
- AMD Radeon RX 9070 XT Gains 9% Performance at 1440p with Latest Driver, Beats RTX 5070 Ti (131)
- NVIDIA Launches GeForce RTX 5050 for Desktops and Laptops, Starts at $249 (119)
- NVIDIA GeForce RTX 5080 SUPER Could Feature 24 GB Memory, Increased Power Limits (115)
- Microsoft Partners with AMD for Next-gen Xbox Hardware (105)
- Intel "Nova Lake‑S" Series: Seven SKUs, Up to 52 Cores and 150 W TDP (100)
- NVIDIA DLSS Transformer Cuts VRAM Usage by 20% (97)