 11
11
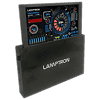
Quick Look: Lamptron HM070 Lift
(11 Comments) »Lamptron HM070 Lift
I would like to thank Lamptron for supplying the review sample.

Lamptron makes a variety of displays for real-time monitoring of PC hardware. Some of those units are meant to be installed into drive bays, while others come in their own housing for external use. The HM070 Lift goes a step further, providing a motorized housing which raises the screen with the press of a button.
Packaging and Contents

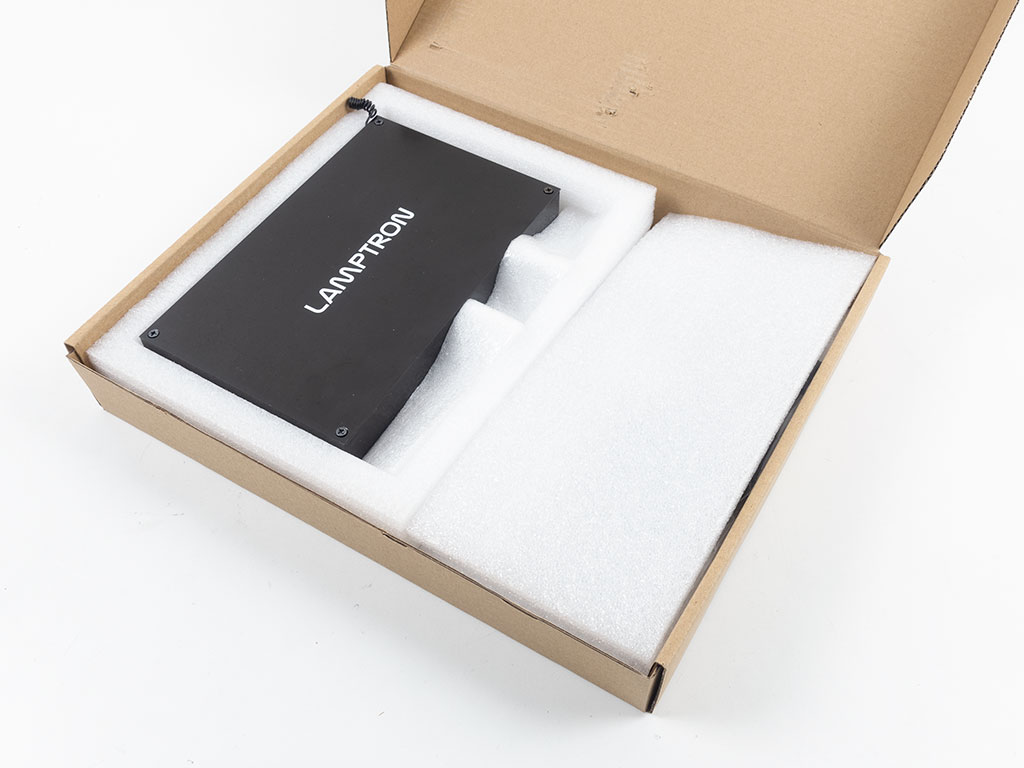
The unit ships in a plain brown cardboard box with a sticker of what is within. Lamptron isn't really well known for creating interesting marketing materials, so all you will see is a picture of the screen, brand and model, and mandatory UPC code. Within are foam spacers to securely hold the screen in place, so you won't have to worry about it getting damaged during shipping.


Alongside the unit itself, you will receive an HDMI cable, USB lead for power, and Lamptron-branded Kingston USB 2.0 drive which contains the monitoring software and documentation for the screen. In addition to this, there are two remotes with which you may raise or lower the screen out of its housing.
A Closer Look


Taking a closer look at the HM070 Lift, the metal housing and flush screws make a solid impression, though it feels a bit simple. The company logo is on the front, while the rear just holds a sticker with the model name, UPC code, and unique serial number for the included AIDA64 Business Edition. As that software is sold at $199.90 for ten nodes, you can consider this addition to the screen roughly a $20 value.


Looking at the top, you can see the silver spine on which the screen will be pushed up when raised. There is a small antenna wire on the right edge of the display. It works fine, but the wiring has been squeezed between the metal housing and display frame, which feels like it could damage the wire over time. Instead, Lamptron could have simply drilled a hole into the housing up top and routed that cable through it instead. On the side, you will find the full-size HDMI port along with the Micro-USB power port. Lastly, there is also an audio out to pipe the HDMI audio through a set of speakers or headset.


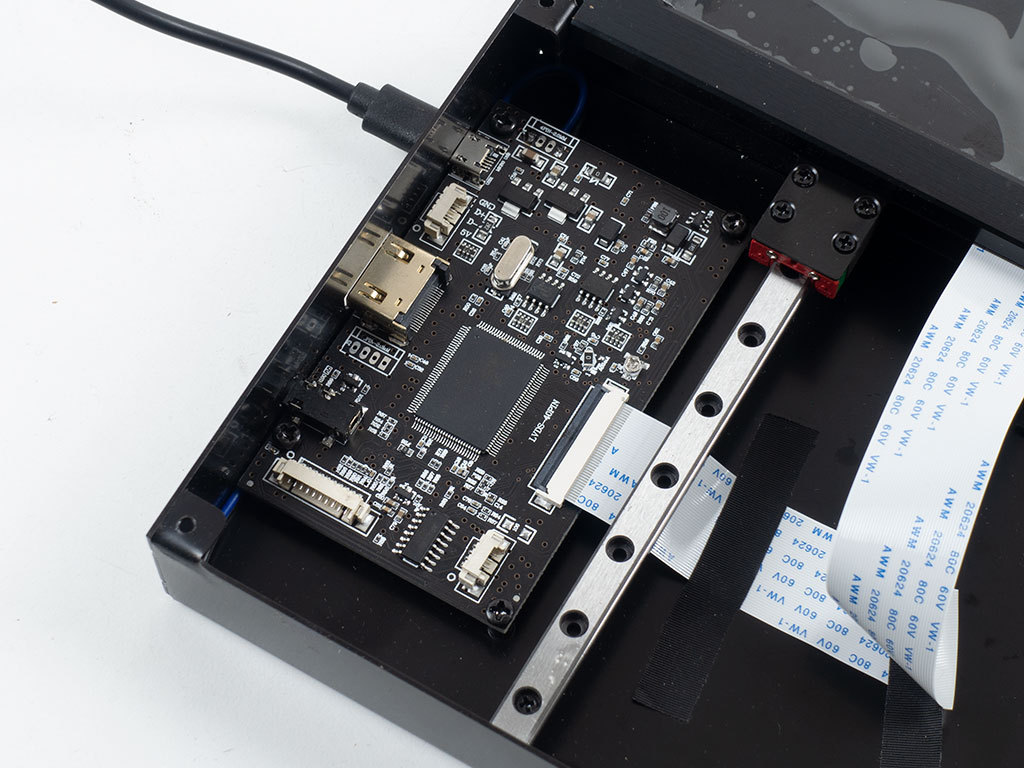
There is no need for you to open up your unit, but out of sheer curiosity, we went ahead and removed the front panel which is held in place by four classic screws. The first thing you will notice is the two rails on which the screen will move up and down on. On the left is the usual PCB we have also seen in the HX070. This controller board provides all the aforementioned I/O and interfaces with the screen through a single flat-band cable. From here, two wires run across to the right side of the interior to charge the included battery. The charging PCB has four red LEDs that indicate the battery charge level. The battery is mainly needed to lower the screen automatically once a loss of USB power is detected. In other words, when you shut down your host PC, the screen will use the battery as a power source to automatically lower itself into the housing. If you look closely, you will see two switches here as well. The one on the bottom is triggered when the screen lowers, which cuts power to the motors. The top switch cuts power to them as soon as the display is fully raised; otherwise, the screen may jump out of the housing. This dual-switch mechanism is simple but effective.
Display in Use
With a press of the remote, the screen will move up or down. The wireless setup has plenty of range and while you can hear the mechanics, they don't sound anything out of the ordinary. One small thing to note is the fact that the motor struggles a little bit in pushing the screen up, which means that this process is slightly slower than lowering the display back into the housing. In the video above, you can also hear the tangible click of the button on the remote itself.
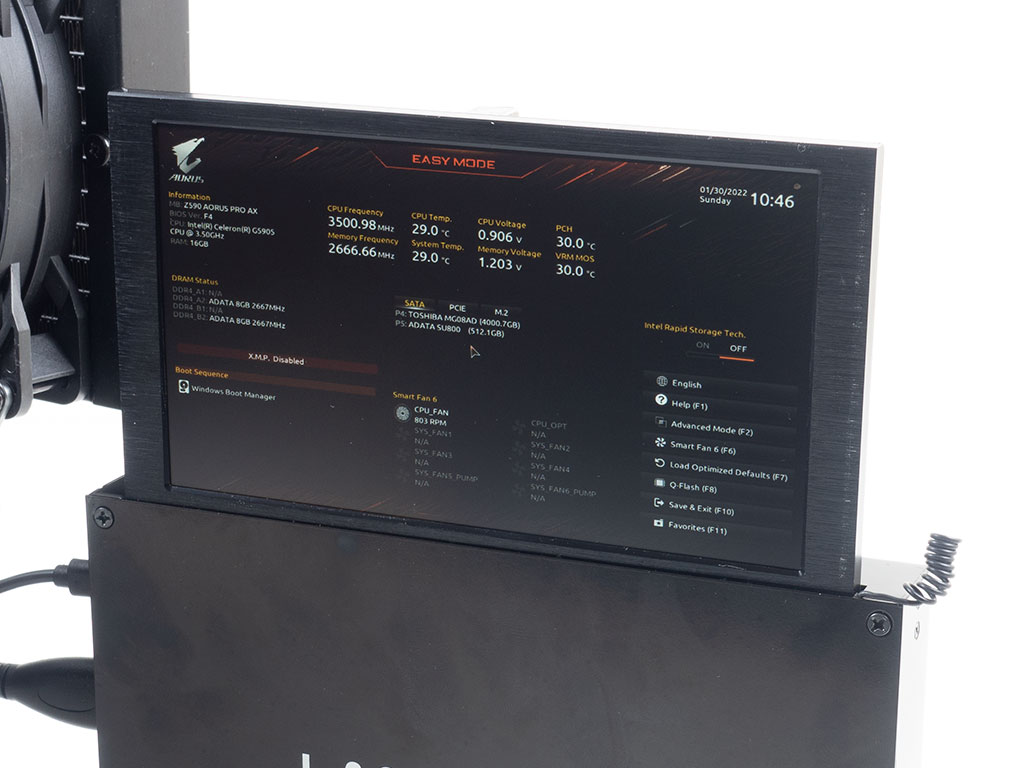


As the Lamptron HM070 Lift is at its core a 7" display, it will immediately work as soon as you connect HDMI and power. As such, even accessing the BIOS is no problem. In Windows, it will show the classic desktop, and you may even use it to surf the internet, and do anything you would with a classic screen. Its brightness isn't that great, but that should not really be an issue if used for real-time hardware monitoring and secondary screen real-estate.

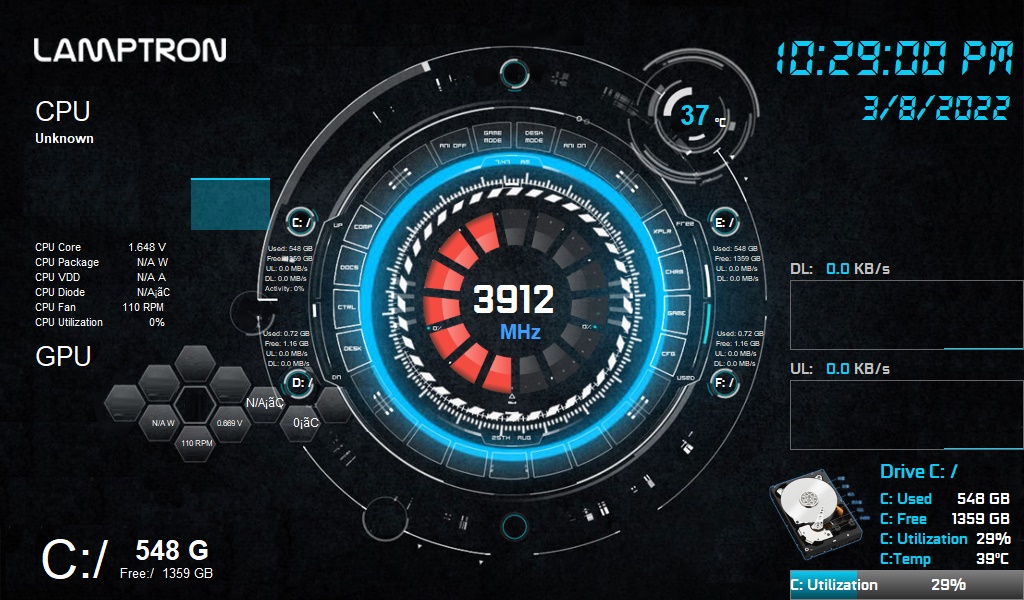
In this case still using a sensor panel of the HX070 as that was the software that had been installed on our testing rig for a previous article, you can clearly see how the HM070 is meant to be used. This sensor panel is not specific to the HX070, but simply labeled for it by default. One could just edit the template and rename that part of the panel to read "HM070."
Software

That brings us to the software. Just as Lamptron isn't really big on cohesive marketing, their software bundle is a bit fragmented. On the stick, you will find several folders, of which some are more relevant than others. There is also a manual that goes into good detail about the preparation, which sheds some light on the need of these folders. But funnily enough, the manual is incomplete as the most important step is missing—namely, how to set up the sensor panel within AIDA64. Even the AIDA64 folder contains a RAR, ZIP, and unzipped folder for the exact same software package. All of that is a bit confusing to use and set up.


Since this step is missing in the manual, let's cover it. Once AIDA64 is installed, there is a small icon in the Windows tray. Right-clicking it reveals the option to show the SensorPanel. By doing so, you are shown a default panel first. Right-clicking it and selecting the SensorPanel Manager, on the other hand, gives you access to all the various modules AIDA64 includes. Each of these is some form of monitoring for your various hardware components and can be customized in terms of labels, colors, units, and format. Lamptron has gone ahead and included many sensor panels with 1024x768 px resolution, and three with 1024x600 px resolution in a folder on the USB stick. These can be viewed below.
As you can see in the selection of screenshots below, the 1024x768 px background is simply stretched to fit in some cases, which is unfortunate. Another interesting element is an encoding problem in the labels—the Celsius unit did not show properly, which forces users to manually fix it. This could be because the Windows host creating these templates wasn't a classic English language setup. Lastly, some of the elements, like the time, had to be moved to be fully visible regardless of the selected template size. As the AIDA64 SensorPanel is meant to be fully customizable, none of these cosmetic issues are dealbreakers, but do require the user to figure out how to work it all.
SensorPanel - 1024x768


SensorPanel - 1024x600


Conclusion
The Lamptron HM070 Lift is a very unique 7" external display that really caters to a small niche of users. At around $320, it is certainly not cheap, even with the $20 value-add of AIDA64. In comparison, a 15.6" 1080P external screen from various brands sells for around $220–$250. With such options out there, if your need is just a secondary, portable screen, the HM070 Lift should not be your go to. With the HM070 Lift, you are paying a premium for that boutique, small display segment, and that it includes a motorized housing and remote controls.What you get for that money is ultimately exactly what you would expect if you are in the market for something like this. It is a compact, functional display that is backed by the well-known AIDA64 software bundled with it. And while not perfect, Lamptron does include a few templates to get you started. We would have liked to see more 1024x600 px templates, which are a bit cleaner, and a better, more automated setup experience, alongside functional documentation. But once you jump through these hoops, it works and does so well. This ultimately means the Lamptron HM070 is a a good fit for that niche of users who want something like the HX070, but with the fun of motorization.
Jul 15th, 2025 16:36 CDT
change timezone
Latest GPU Drivers
New Forum Posts
- Adding distilled water to ups batteries really work ? (0)
- Stupid things one has done with hardware (66)
- No offense, here are some things that bother me about your understanding of fans. (145)
- RTX 5070 discussion (11)
- I would give anything for Valve's Steam to have an option to disable the Big Picture Mode button. How many times have I accidently clicked it, fml (52)
- Choosing the right motherboard (6)
- Solidigm NVMe Custom Modded Driver for All NVMe Brands SSDs & Any NVMe SSDs (229)
- Recommend me a decent budget card :) (33)
- What's your latest tech purchase? (24278)
- TOS 6 on Ugreen NAS (0)
Popular Reviews
- MSI GeForce RTX 5060 Gaming OC Review
- Our Visit to the Hunter Super Computer
- Lexar NM1090 Pro 4 TB Review
- SilverStone SETA H2 Review
- NVIDIA GeForce RTX 5050 8 GB Review
- Fractal Design Epoch RGB TG Review
- Sapphire Radeon RX 9060 XT Pulse OC 16 GB Review - An Excellent Choice
- AMD Ryzen 7 9800X3D Review - The Best Gaming Processor
- Upcoming Hardware Launches 2025 (Updated May 2025)
- Corsair FRAME 5000D RS Review
TPU on YouTube
Controversial News Posts
- Intel's Core Ultra 7 265K and 265KF CPUs Dip Below $250 (288)
- Some Intel Nova Lake CPUs Rumored to Challenge AMD's 3D V-Cache in Desktop Gaming (140)
- AMD Radeon RX 9070 XT Gains 9% Performance at 1440p with Latest Driver, Beats RTX 5070 Ti (131)
- NVIDIA Launches GeForce RTX 5050 for Desktops and Laptops, Starts at $249 (122)
- NVIDIA GeForce RTX 5080 SUPER Could Feature 24 GB Memory, Increased Power Limits (115)
- Microsoft Partners with AMD for Next-gen Xbox Hardware (105)
- Intel "Nova Lake‑S" Series: Seven SKUs, Up to 52 Cores and 150 W TDP (100)
- NVIDIA DLSS Transformer Cuts VRAM Usage by 20% (99)