 8
8
Thermaltake Blue Orb II Review
Performance, Value & Conclusion »Installation
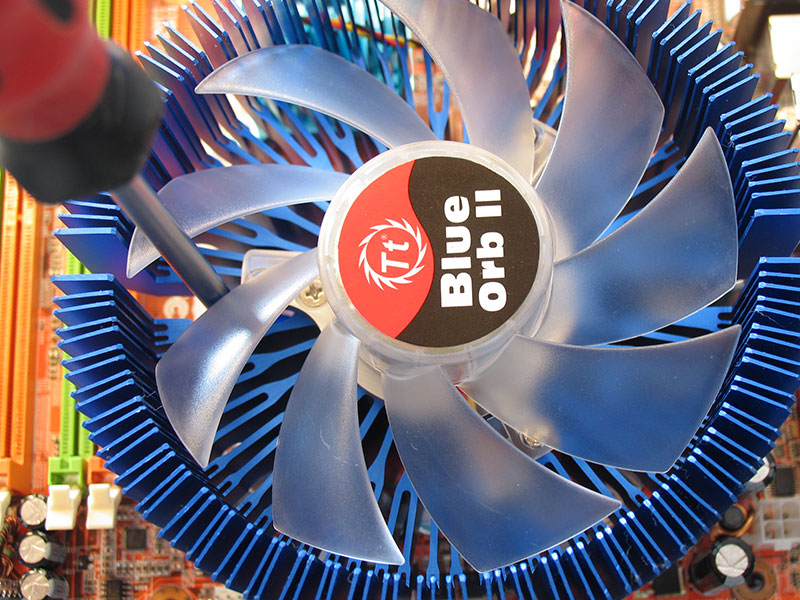
Installation is extremely easy and can be done in a few minutes, if you don't run into the space problem, as we did below. The easy understandable english manual covers installation for Socket 775 and two installation methods for Socket 939. On the Thermaltake Website you can also find a nice Flash animation which shows the installation process. Since the installation process is identical to that of the Golden Orb II, this time, we will show the installation on the Socket 775 ABIT AL8.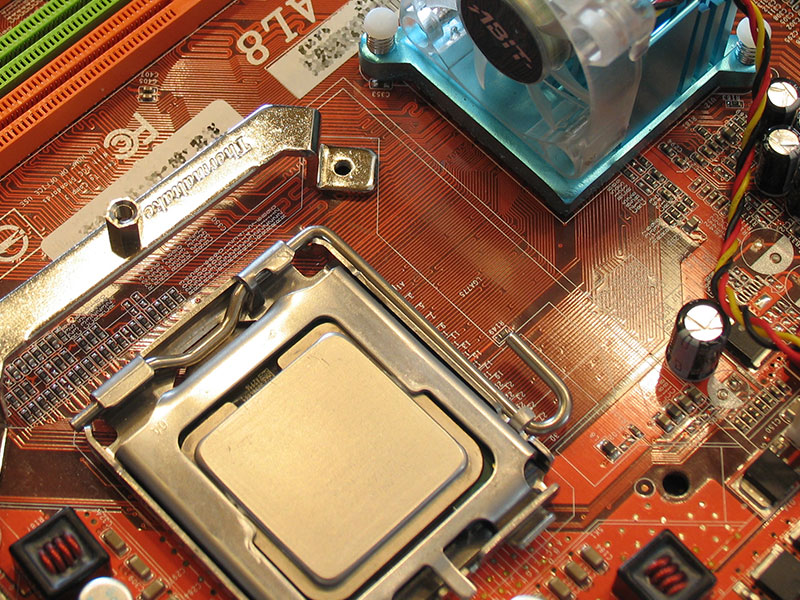
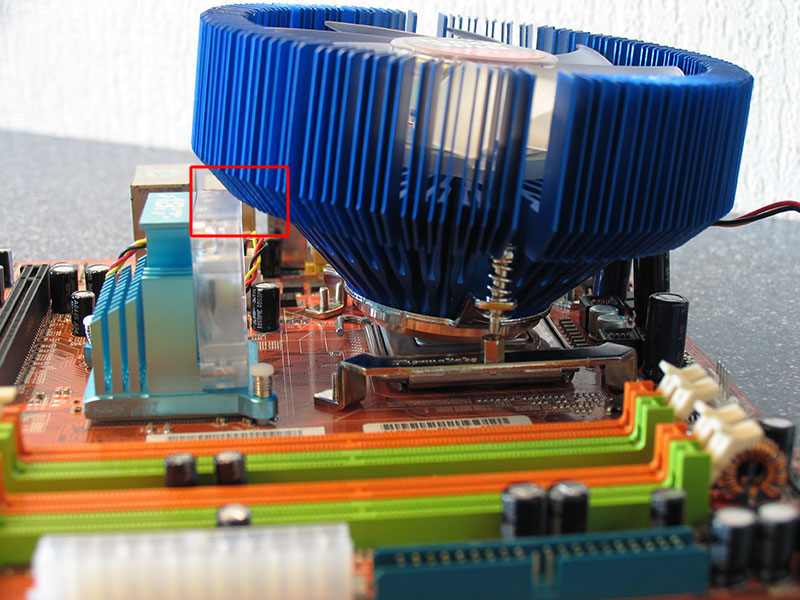
The Blue Orb II does not fit, because ABIT's chipset heatsink is blocking it. As Thermaltake support told us this can be easily fixed by rotating the chipset heatsink 180°.
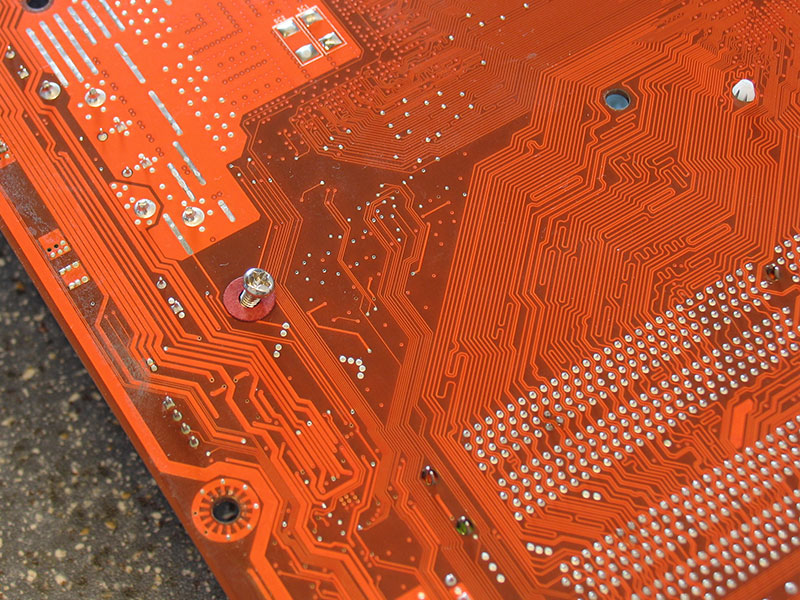
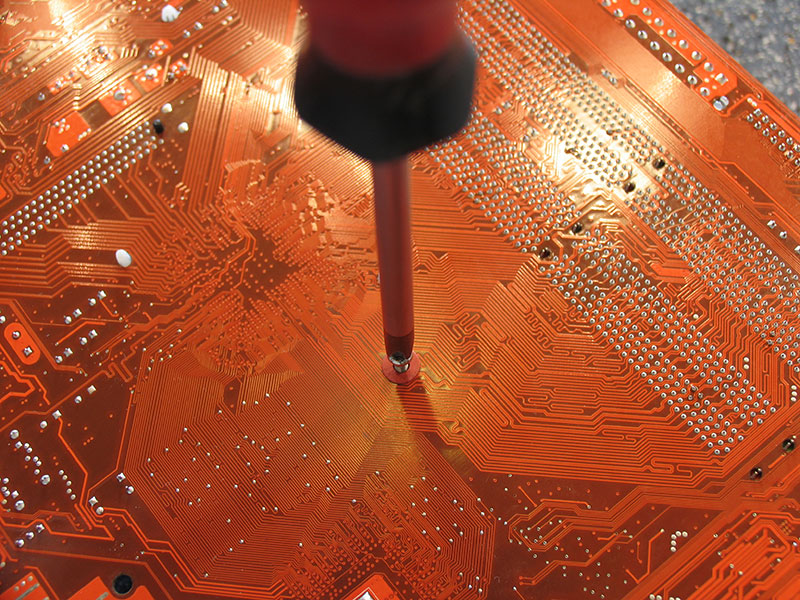
We remove the plastic pins which hold the ABIT heatsink by pushing them together and through the hole.
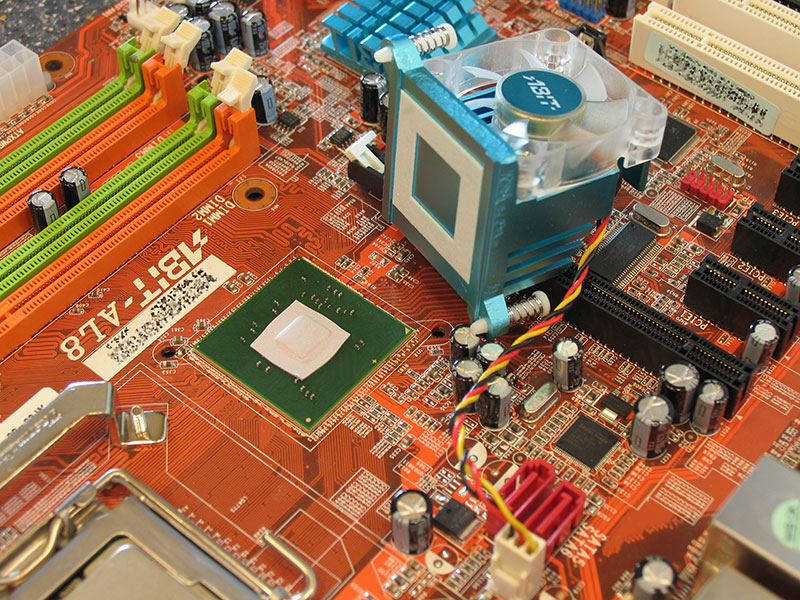
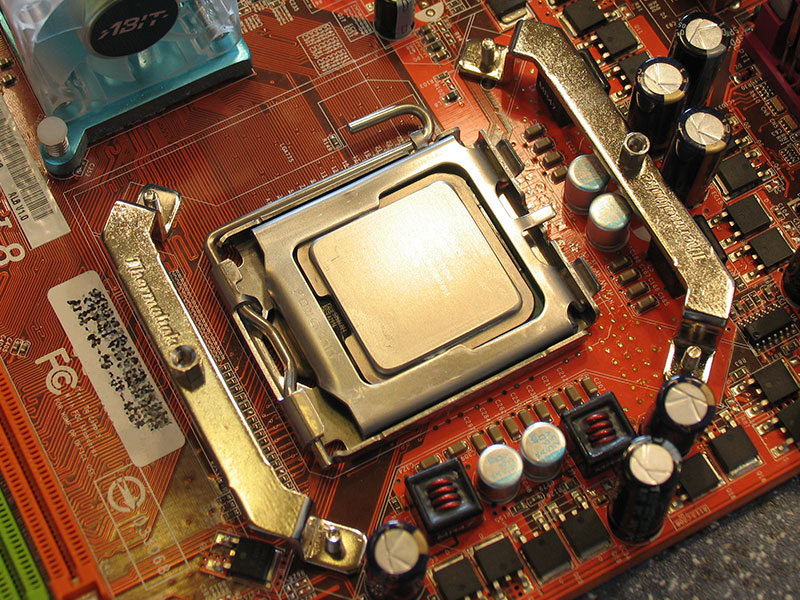
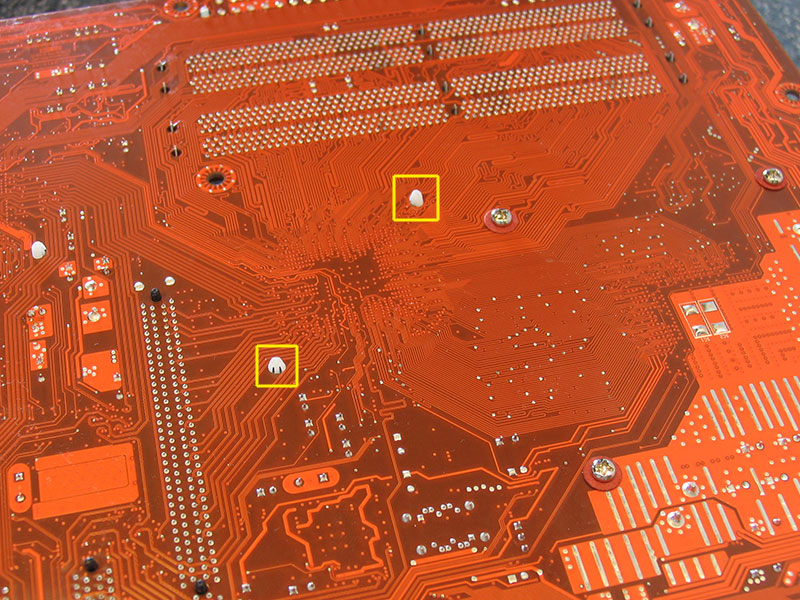
Now the heatsink comes off easily. As you can see the thermal pad on the core is intact - we reviewed this board here and took it through quite some overclocking. Just rotate the heatsink, put it back on, put the clips through the mounting holes.. done.

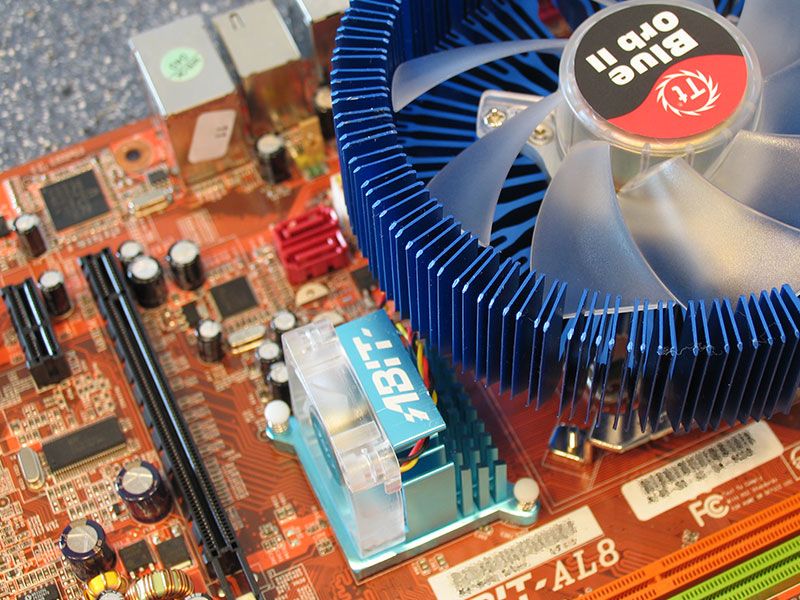
Now the cooler fits without problems and we can finish the installation by screwing down the cooler.
On the DFI LanParty NF4 the big cooler blocks access to two memory slots.
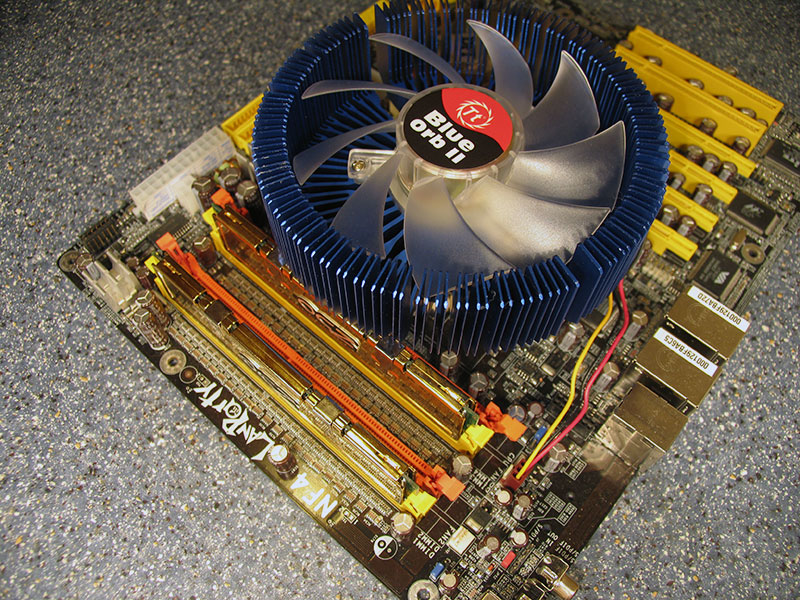
With the cooler installed, it is no longer possible to add or remove memory in slots 3 and 4. Make sure to install the memory before putting on the cooler. I tried fitting a few memory modules, and even with a heatspreader, there should be enough space left to install the cooler.
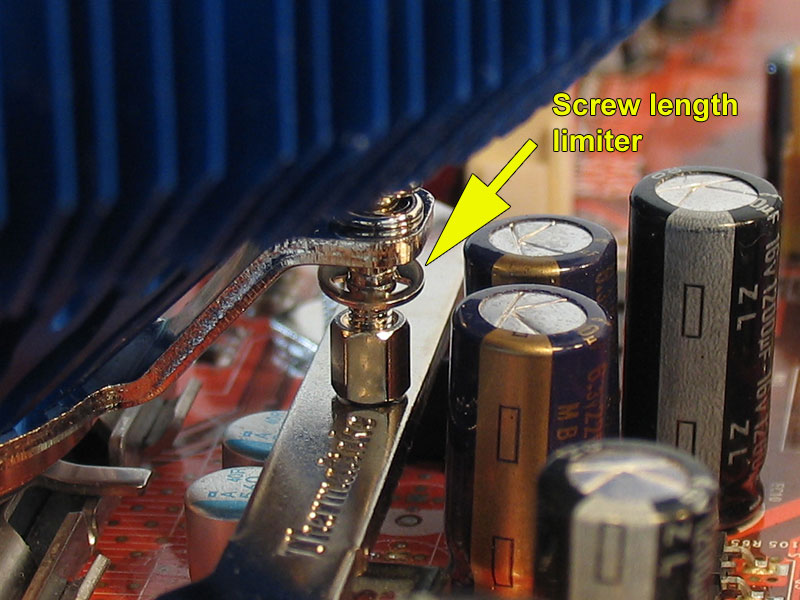
In order to make sure that mounting pressure on the CPU is not exceeded, Thermaltake has added limiters to the screws. You just screw it down till it stops, the springs help distribute the load on the CPU evenly.
Jul 12th, 2025 03:36 CDT
change timezone
Latest GPU Drivers
New Forum Posts
- What's your latest tech purchase? (24237)
- What are you playing? (23921)
- Can you guess Which game it is? (226)
- Gigabyte graphic cards - TIM gel SLIPPAGE problem (144)
- [Intel AX1xx/AX2xx/AX4xx/AX16xx/BE2xx/BE17xx] Intel Modded Wi-Fi Driver with Intel® Killer™ Features (367)
- NVIDIA RTX PRO 6000 Workstation Runs Much Hotter Than 5090 FE (22)
- 3D Printer Club (539)
- Will you buy a RTX 5090? (644)
- [GPU-Z Test Build] New Kernel Driver, Everyone: Please Test (89)
- No offense, here are some things that bother me about your understanding of fans. (34)
Popular Reviews
- Fractal Design Epoch RGB TG Review
- Corsair FRAME 5000D RS Review
- Lexar NM1090 Pro 4 TB Review
- NVIDIA GeForce RTX 5050 8 GB Review
- NZXT N9 X870E Review
- Sapphire Radeon RX 9060 XT Pulse OC 16 GB Review - An Excellent Choice
- AMD Ryzen 7 9800X3D Review - The Best Gaming Processor
- Our Visit to the Hunter Super Computer
- Upcoming Hardware Launches 2025 (Updated May 2025)
- Chieftec Iceberg 360 Review
TPU on YouTube
Controversial News Posts
- Intel's Core Ultra 7 265K and 265KF CPUs Dip Below $250 (288)
- Some Intel Nova Lake CPUs Rumored to Challenge AMD's 3D V-Cache in Desktop Gaming (140)
- AMD Radeon RX 9070 XT Gains 9% Performance at 1440p with Latest Driver, Beats RTX 5070 Ti (131)
- NVIDIA Launches GeForce RTX 5050 for Desktops and Laptops, Starts at $249 (119)
- NVIDIA GeForce RTX 5080 SUPER Could Feature 24 GB Memory, Increased Power Limits (115)
- Microsoft Partners with AMD for Next-gen Xbox Hardware (105)
- Intel "Nova Lake‑S" Series: Seven SKUs, Up to 52 Cores and 150 W TDP (100)
- NVIDIA DLSS Transformer Cuts VRAM Usage by 20% (97)