 6
6
Xigmatek Midgard II Review
Value & Conclusion »Assembly
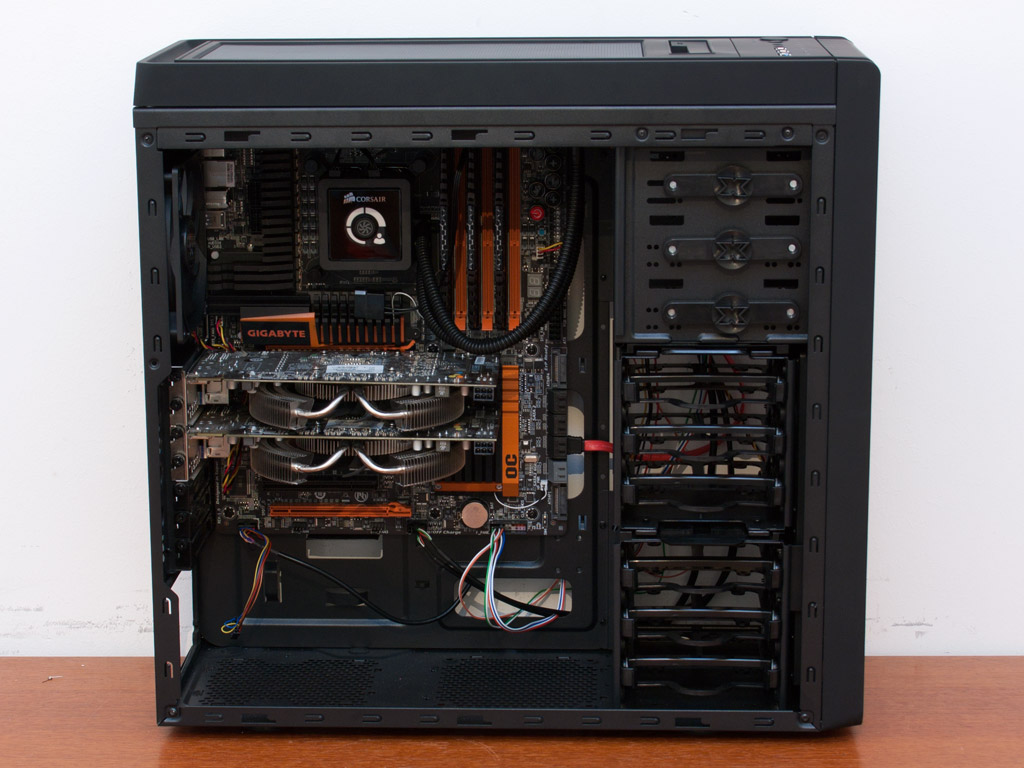
Installing the motherboard within the chassis is an easy task. Even using the Gigabyte X58-OC board, which is a bit wider than a standard ATX unit, does not cause any real problems. It covers some of the routing holes partially, but there is still enough free space to route all the cables through.
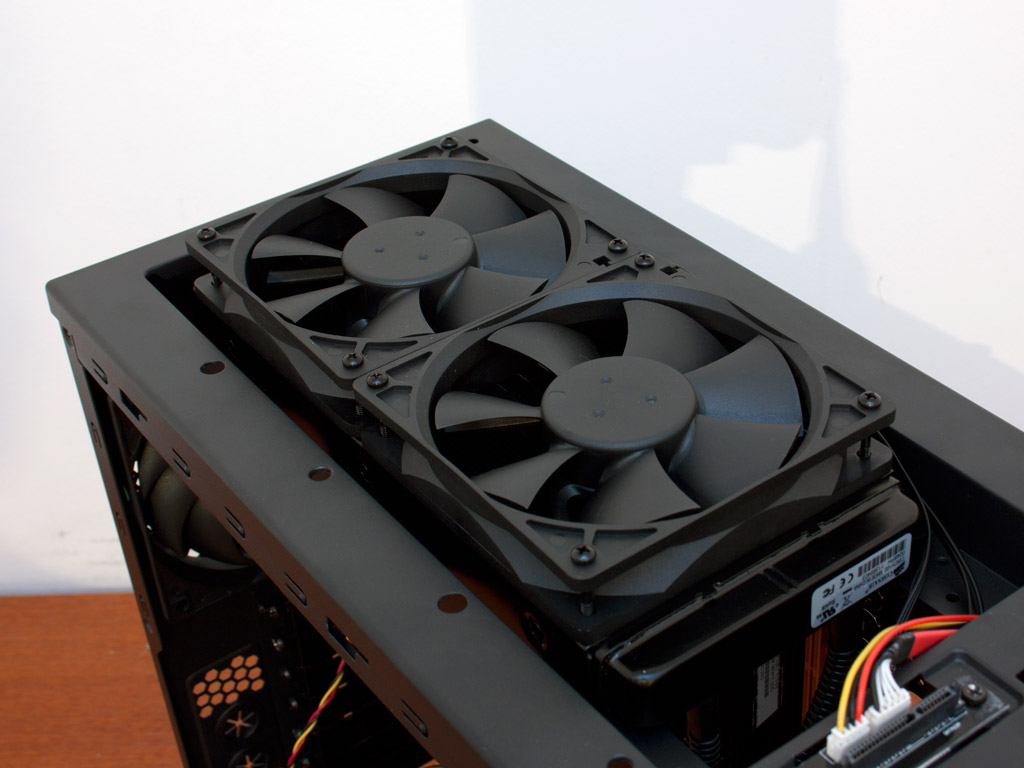

Xigmatek mentions the fact, that the chassis may hold a 240 or 280 mm radiator. So, I installed the Corsair H100, one of the more popular solutions currently on the market. While it fits easily unto the frame of the chassis, I had to use different screws, so that the cover closes properly. This lowers the overall height of the water-cooling setup by roughly 2 mm, which then allows for the top cover to be placed on the unit properly. You also have to make sure that the hooks holding the mesh cover in place do not get in the way. I pushed these to the outside at which point everything worked like a charm.
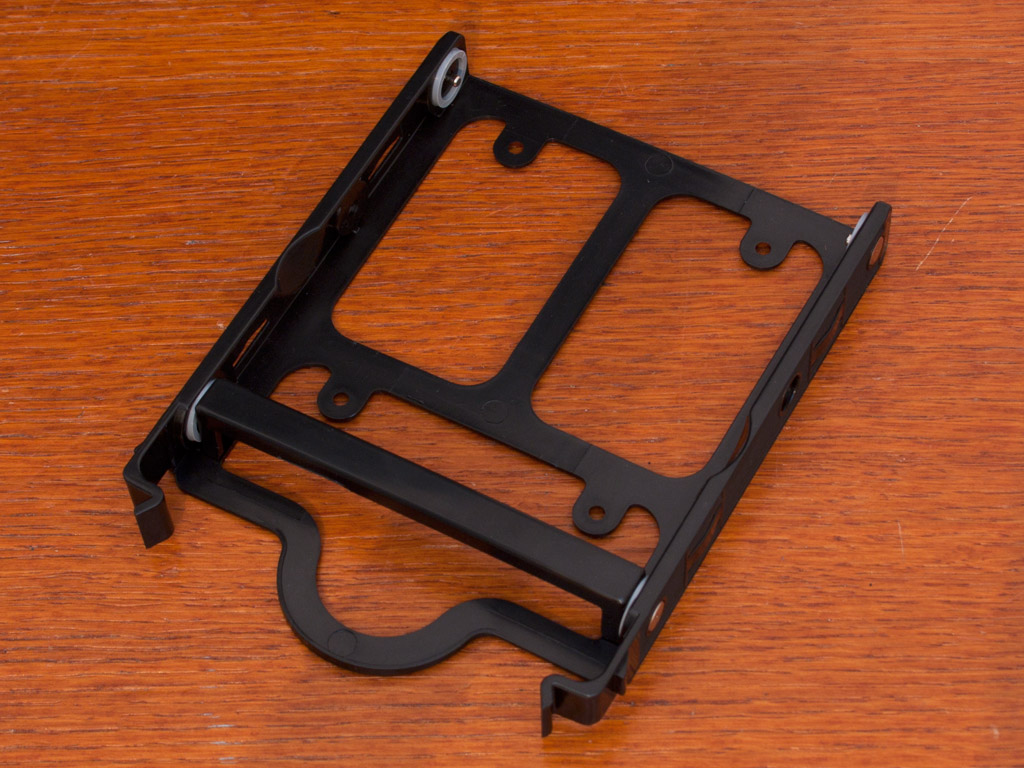
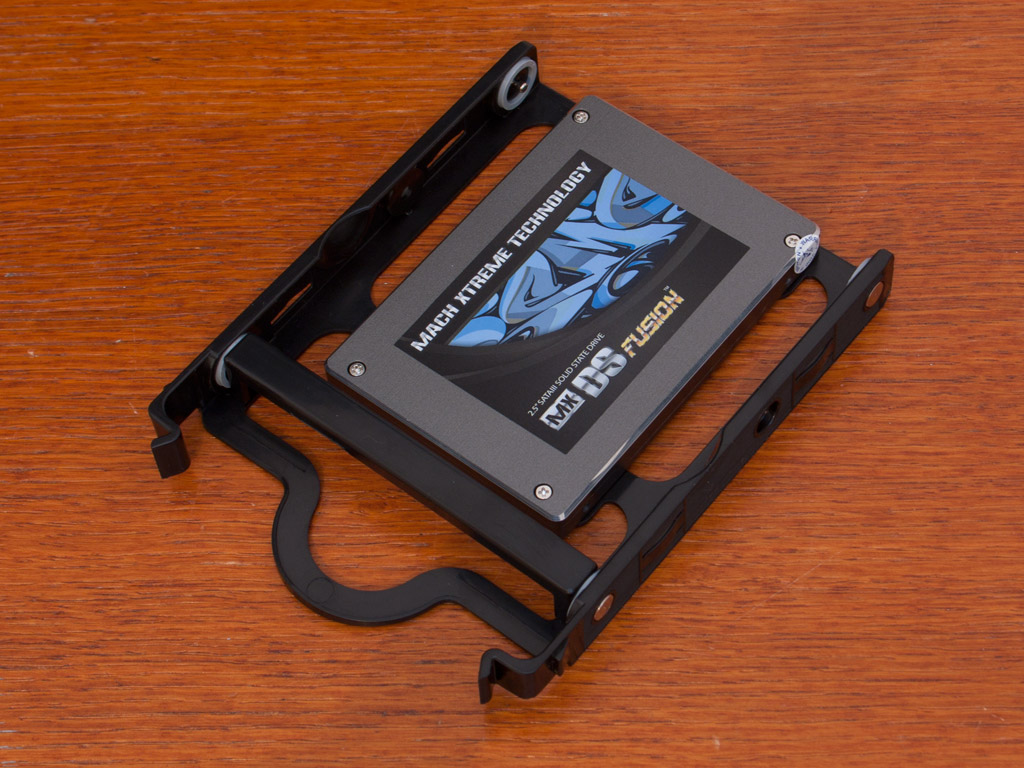
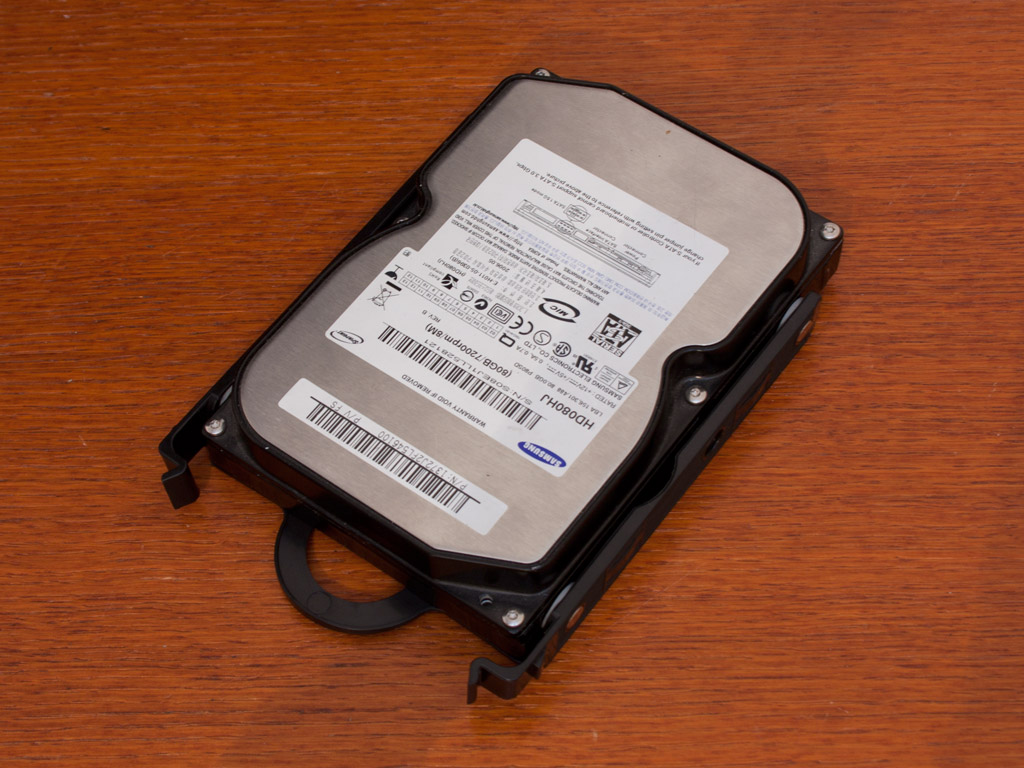
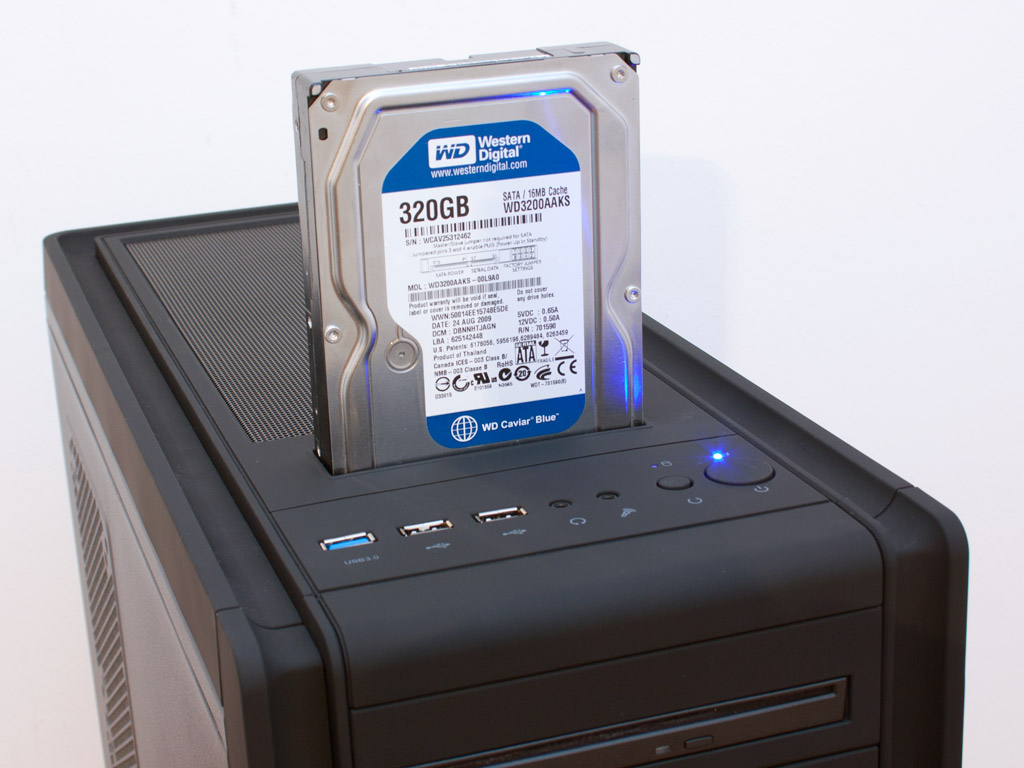
A support beam across each of the hard drive trays ensures that these hold in place properly when they are empty or when a 2.5 inch unit is used. Installing such a drive requires the use of the included screws, while a 3.5 inch version is held in place by the metal pins of the HDD tray.

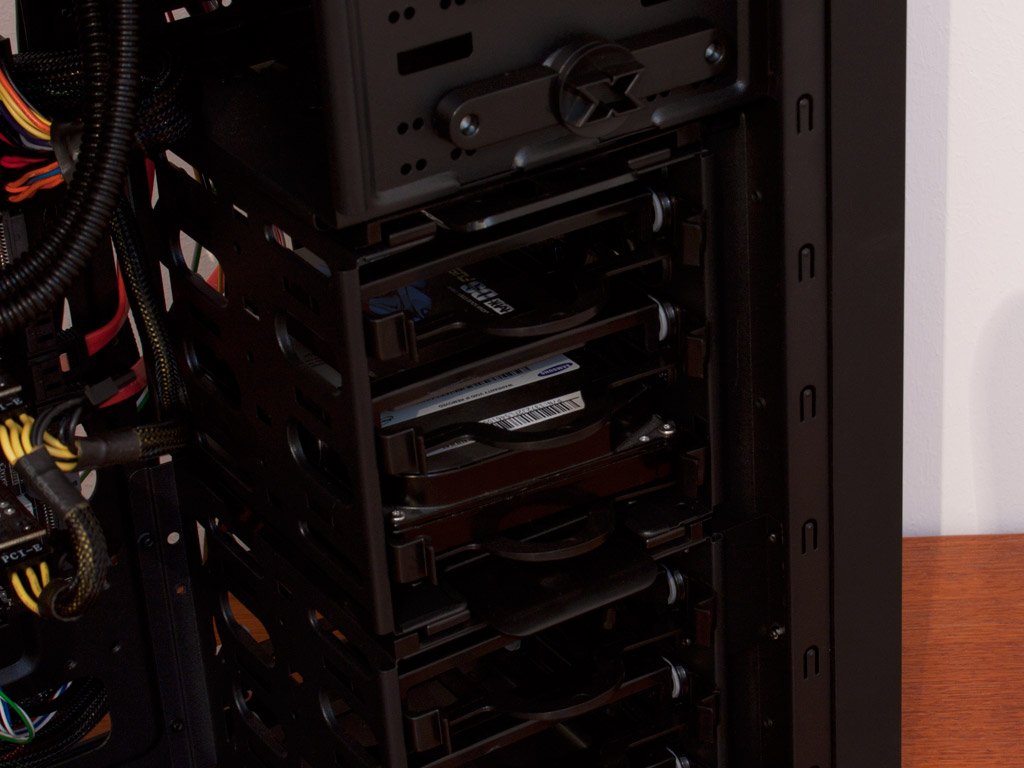
Once the trays are filled, simply slide them in place until they snap down. Xigmatek has included the possibility to screw each tray down, but the holes in the bay and the tray do not line up properly - making it impossible. This is something Xigmatek should and will fix.
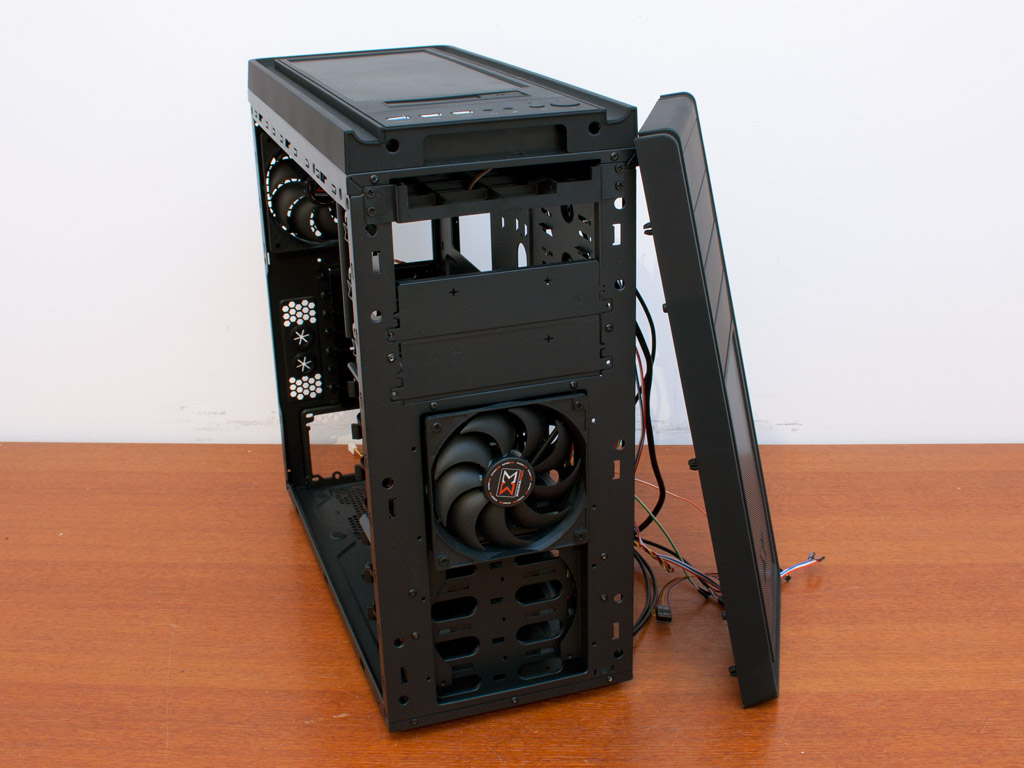

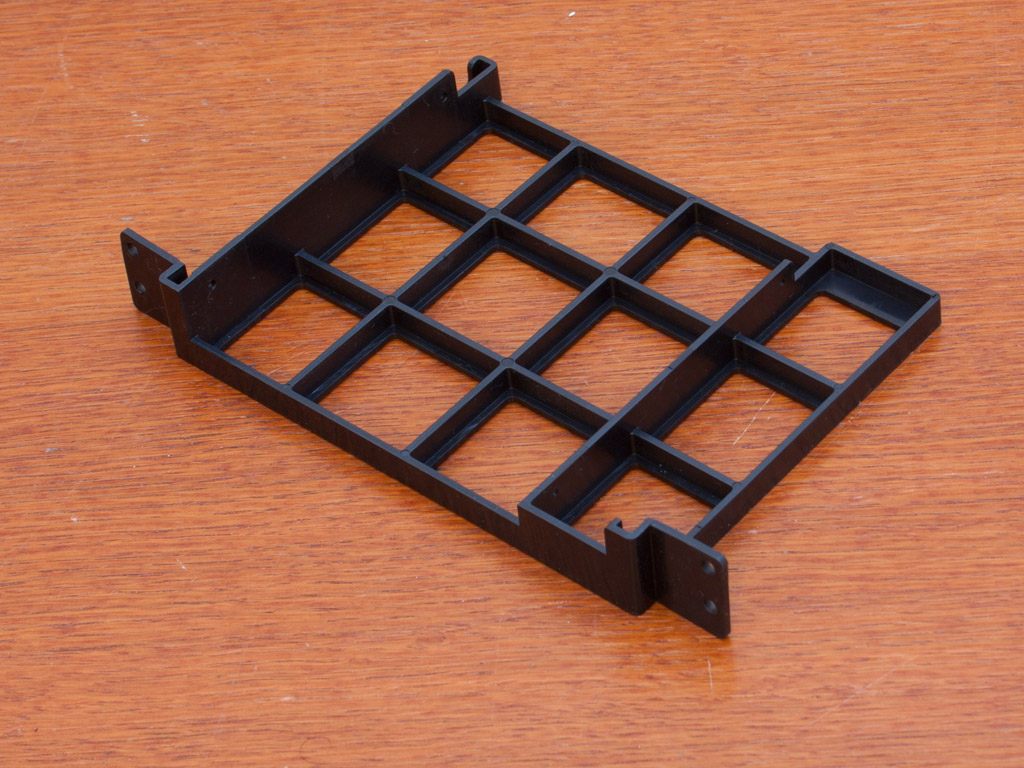
I will not bore you with the installation of a normal optical drive, as it is the same in so many different cases out there: free bay, slide in, lock down, done. Instead let me focus on the unique one in the Midgard 2 - the slimline drive. The frame for the unit is held in place by four screws and is hidden behind a solid drive bay cover.
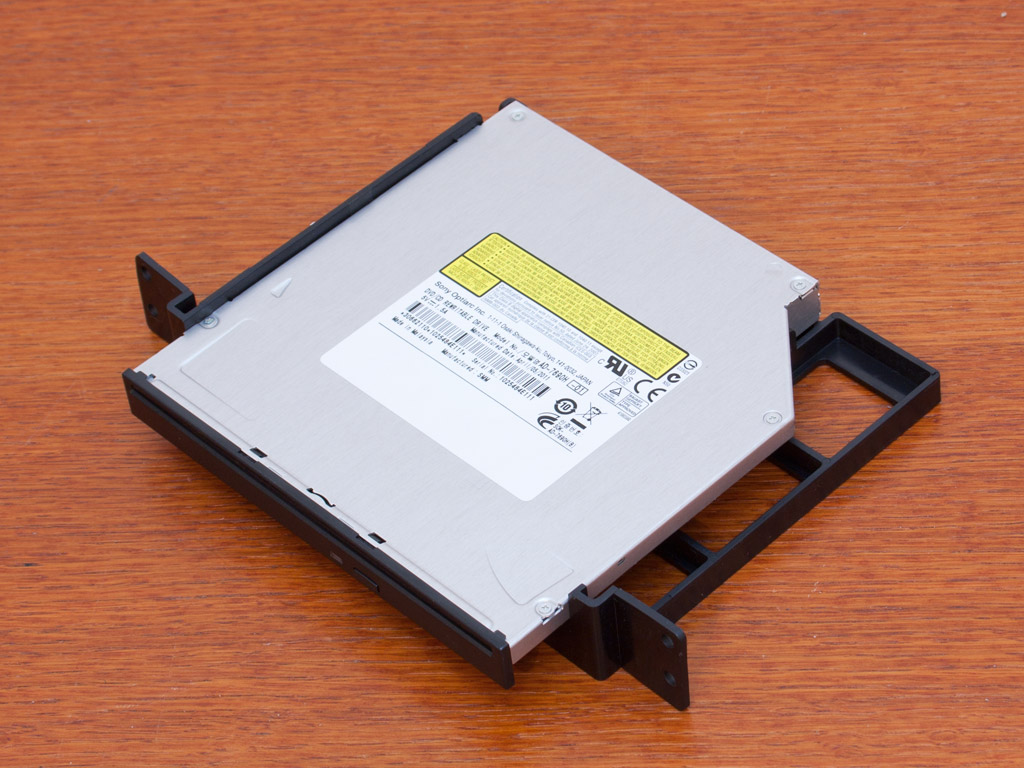
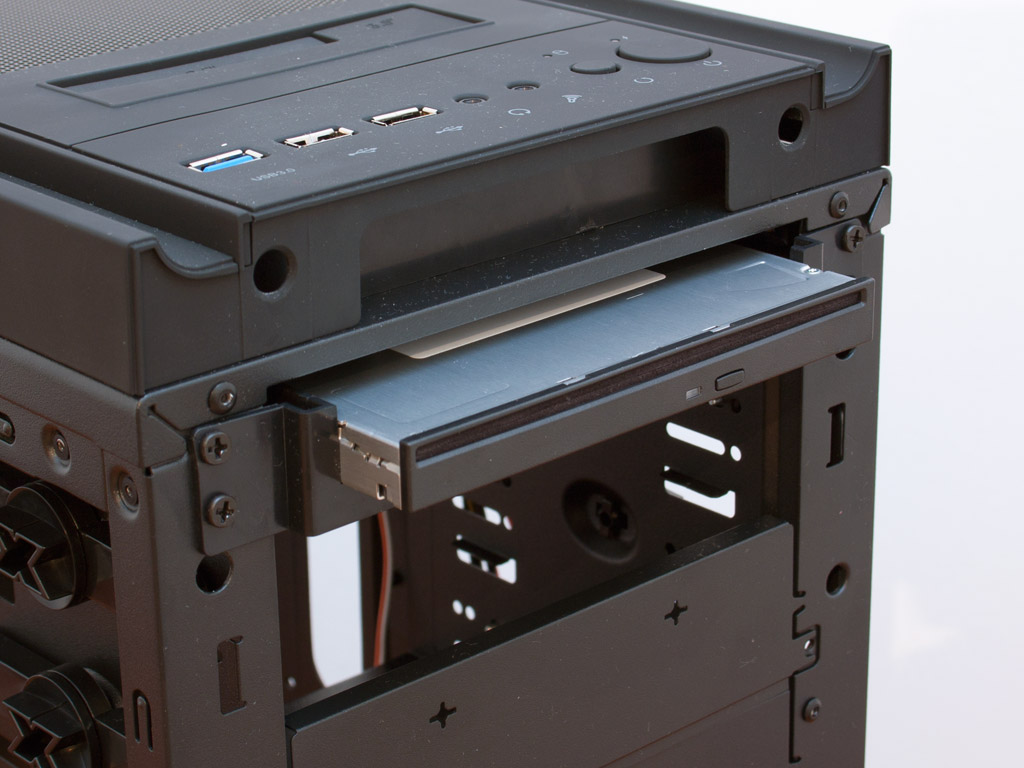
Once detached from the case, you may fill it with the drive of your choice. Xigmatek did not supply the review sample with the proper screws to hold the drive in place, but I am told that the retail version should include them. The drive makes a really cool impression. I used a slot-in mSATA DVD-RW, which reminded me of the old days when Pioneer still offered slot-in drives - oh good times!
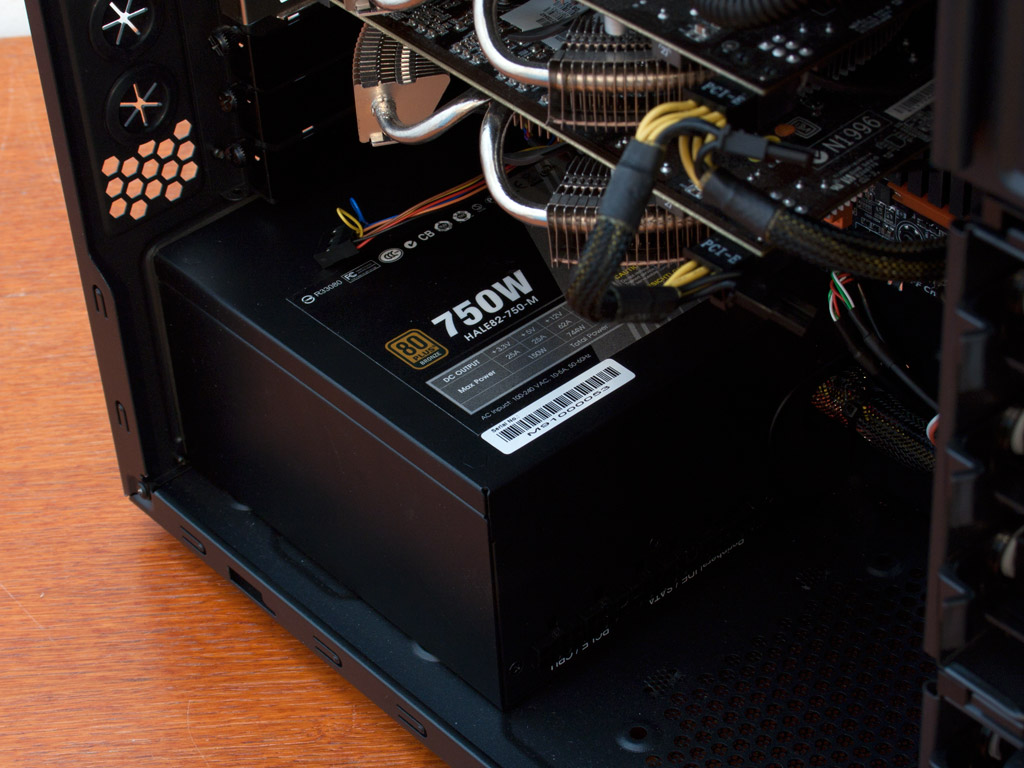
Installing the PSU is done by traditional means, simply place the unit inside the chassis and screw it down - that is it, move along people.
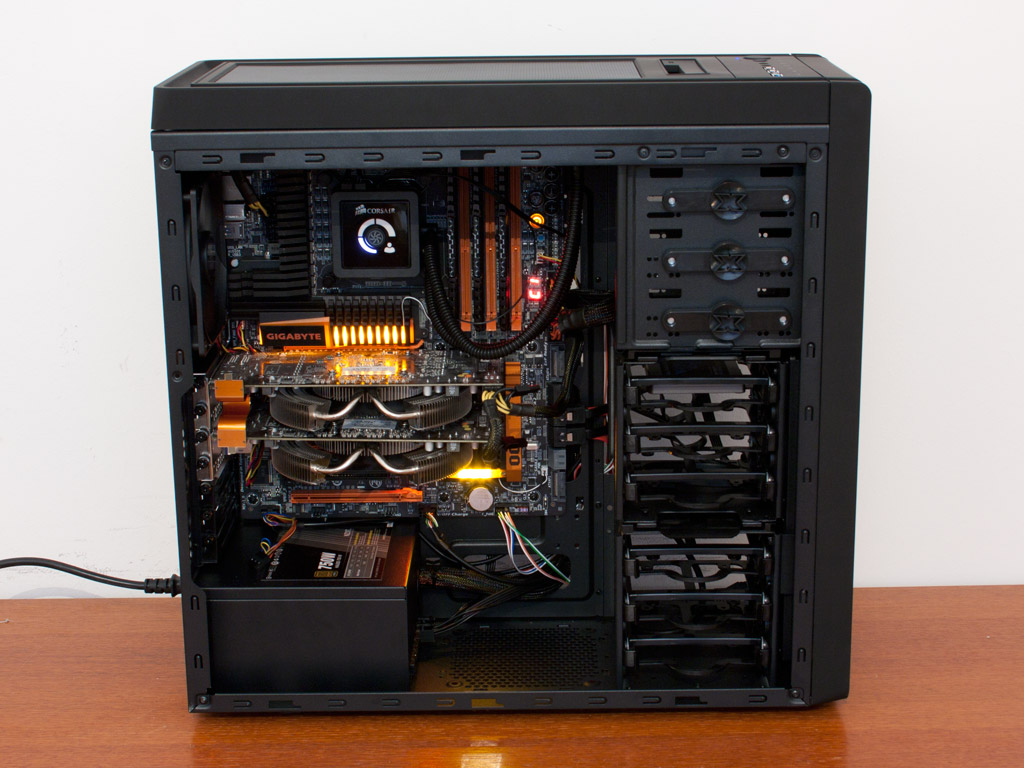
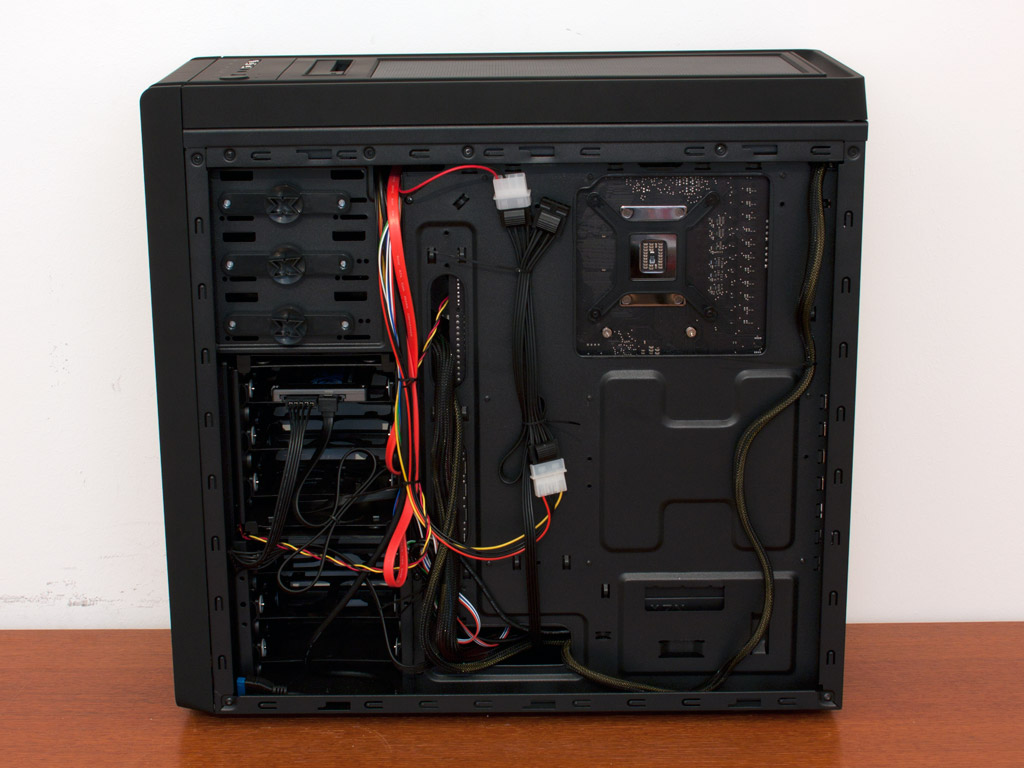
Once everything is attached to the proper plugs and cables, the Midgard 2 makes an excellent impression. Everything is nice and clean, just the colorful case cables are a slight sore to look at. I have used all the zip ties included within the chassis to make sure everything holds in place properly, but still had to push down quite hard on the side panel in the end.
Finished Looks

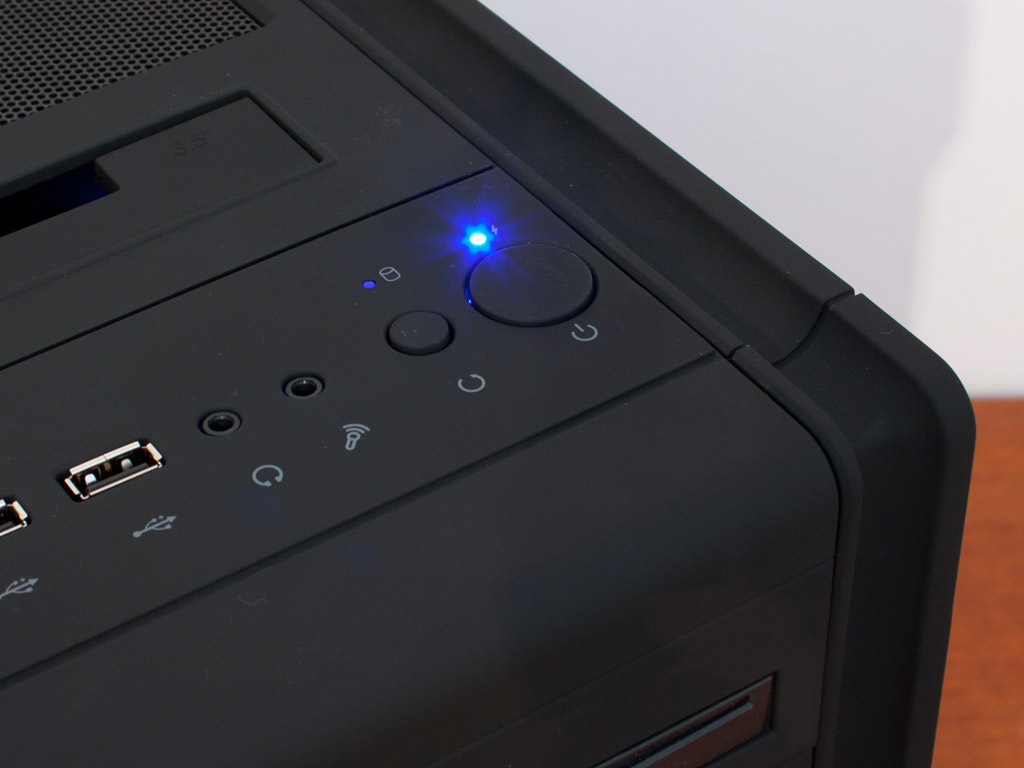
With the though love applied to the panel, it closed down easily and the chassis makes a really good impression. A blue power LED can be found in the top of the chassis, right next to the HDD activity LED.
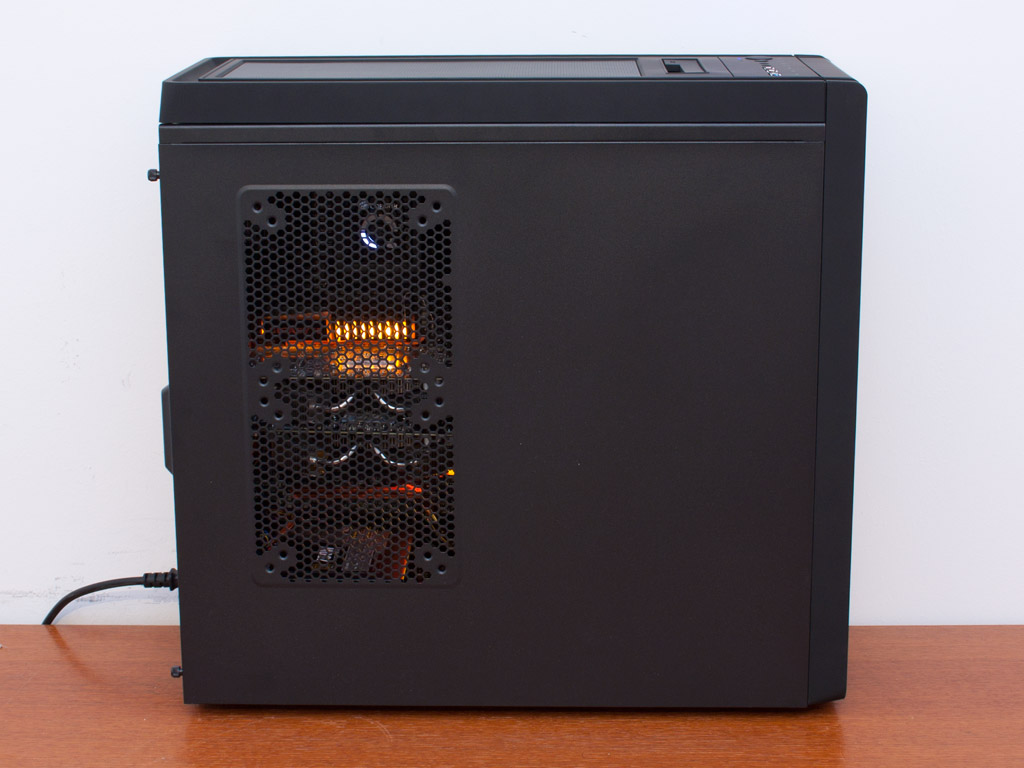
You can clearly see the lighting from the Gigabyte X58A-OC heatsinks glowing through the side of the chassis. These openings are well placed and should allow you to cool your graphics cards with additional cooling if you wish to do so.
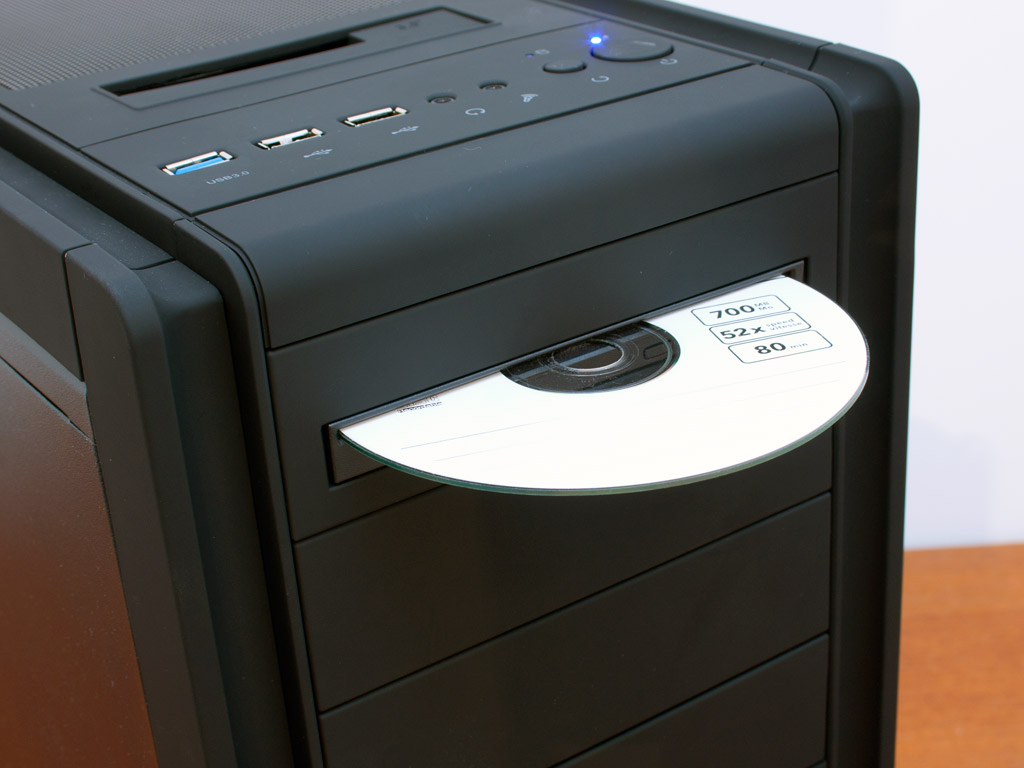
I must admit, the slot-in ODD drive simply looks great in the chassis. It is refreshing to have this option once more in a mid-tower chassis. The HDD dock may be a bit shallow, but the drive seems to hold well enough, so that you won't have to worry about it tipping over or straining the SATA connector of the bay too much.
Jul 12th, 2025 09:34 CDT
change timezone
Latest GPU Drivers
New Forum Posts
- Gigabyte graphic cards - TIM gel SLIPPAGE problem (151)
- No offense, here are some things that bother me about your understanding of fans. (36)
- Stupid buggy POS Realtek WiFi RTL8852BE (11)
- Swapping existing router w/ a replacement; any issues? (14)
- 'NVIDIA App' not usable offline? (13)
- Chrome has removed uBlock Origin 1.64.0 (remove google search suggestions) (12)
- Share your AIDA 64 cache and memory benchmark here (3097)
- The Official Linux/Unix Desktop Screenshots Megathread (778)
- [GPU-Z Test Build] New Kernel Driver, Everyone: Please Test (90)
- NVIDIA App (55)
Popular Reviews
- Fractal Design Epoch RGB TG Review
- Lexar NM1090 Pro 4 TB Review
- Corsair FRAME 5000D RS Review
- NVIDIA GeForce RTX 5050 8 GB Review
- NZXT N9 X870E Review
- Our Visit to the Hunter Super Computer
- Sapphire Radeon RX 9060 XT Pulse OC 16 GB Review - An Excellent Choice
- AMD Ryzen 7 9800X3D Review - The Best Gaming Processor
- Upcoming Hardware Launches 2025 (Updated May 2025)
- Chieftec Iceberg 360 Review
TPU on YouTube
Controversial News Posts
- Intel's Core Ultra 7 265K and 265KF CPUs Dip Below $250 (288)
- Some Intel Nova Lake CPUs Rumored to Challenge AMD's 3D V-Cache in Desktop Gaming (140)
- AMD Radeon RX 9070 XT Gains 9% Performance at 1440p with Latest Driver, Beats RTX 5070 Ti (131)
- NVIDIA Launches GeForce RTX 5050 for Desktops and Laptops, Starts at $249 (119)
- NVIDIA GeForce RTX 5080 SUPER Could Feature 24 GB Memory, Increased Power Limits (115)
- Microsoft Partners with AMD for Next-gen Xbox Hardware (105)
- Intel "Nova Lake‑S" Series: Seven SKUs, Up to 52 Cores and 150 W TDP (100)
- NVIDIA DLSS Transformer Cuts VRAM Usage by 20% (97)