 28
28
Cooler Master HAF 700 EVO Review
Assembly & Finished Looks »A Closer Look - Inside

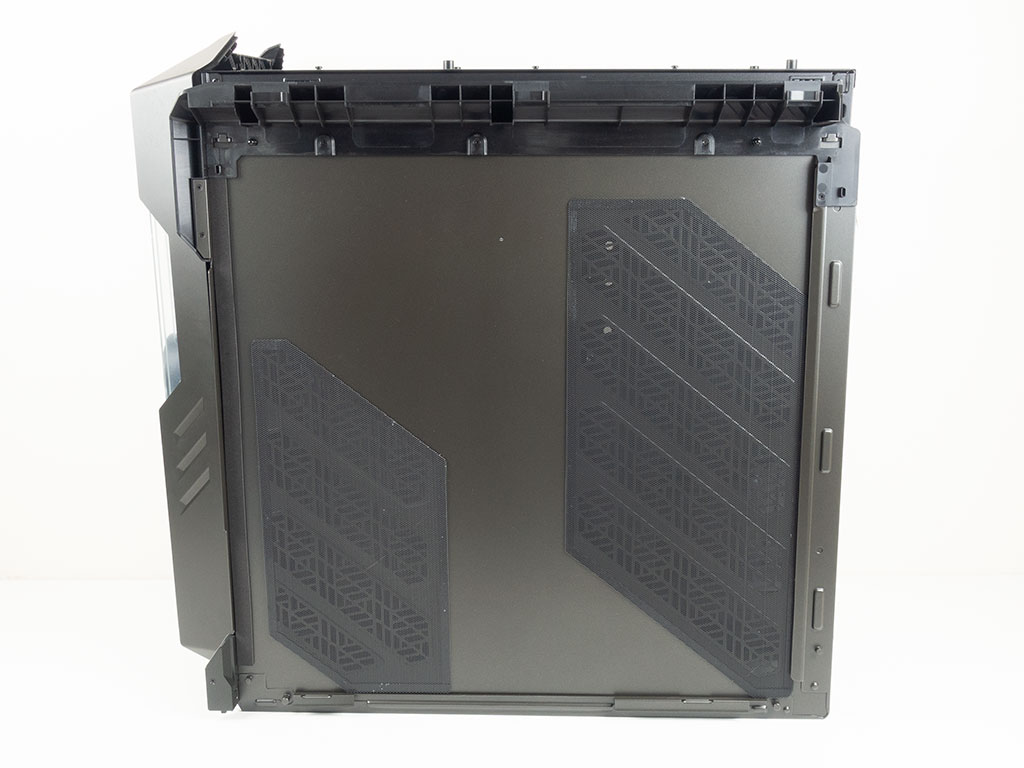
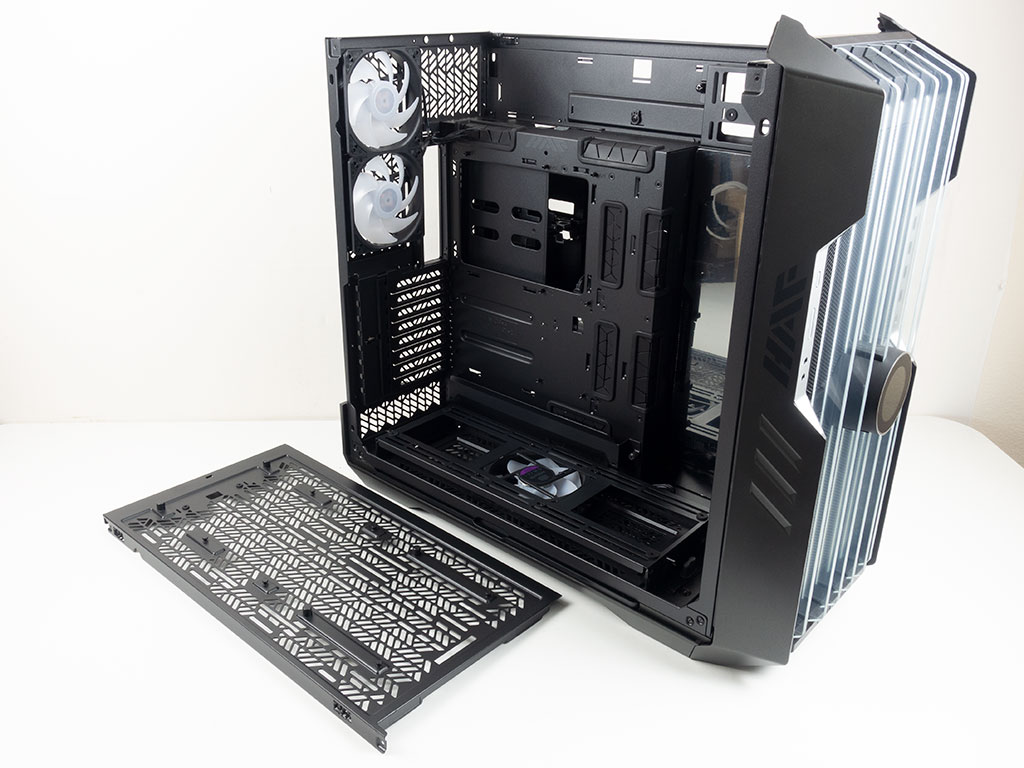
Accessing the interior takes no tools. Simply slide the top cover off before pulling each of the side panels off. The metal one with two uniquely shaped air vents also has the same shaped magnetic mesh covers.

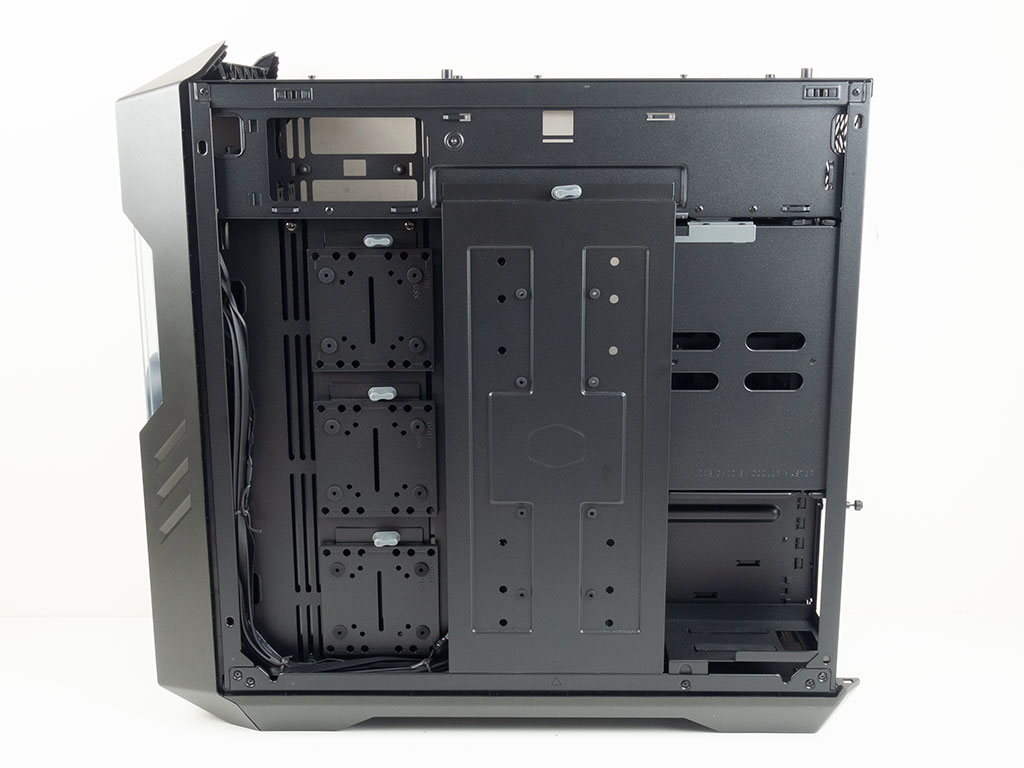
Upon first look, the internal layout of the Cooler Master HAF 700 EVO is pretty traditional for a sandwich chassis, while taking advantage of the sheer size of the enclosure. The motherboard is upright with cooling on the bottom, front, top, and side of the chassis. On the opposite side are a lot of the elements we have seen in other cases with the same type of layout as there is a central mounting plate that hides the cables, for example. Once again, its all there, just bigger.
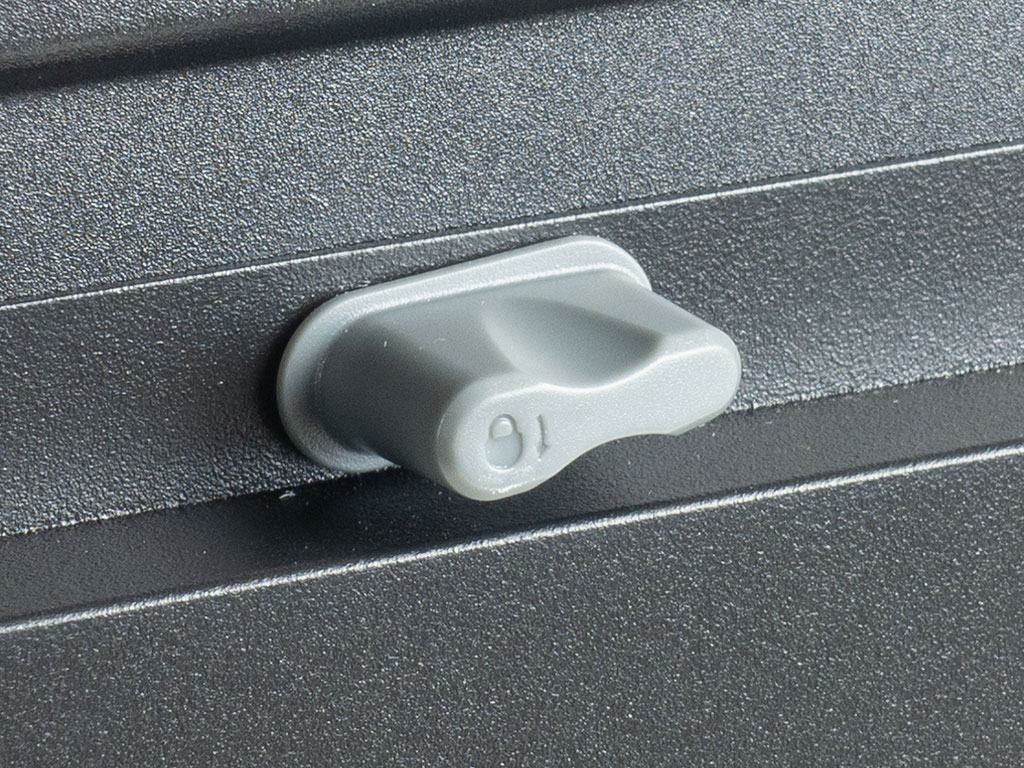
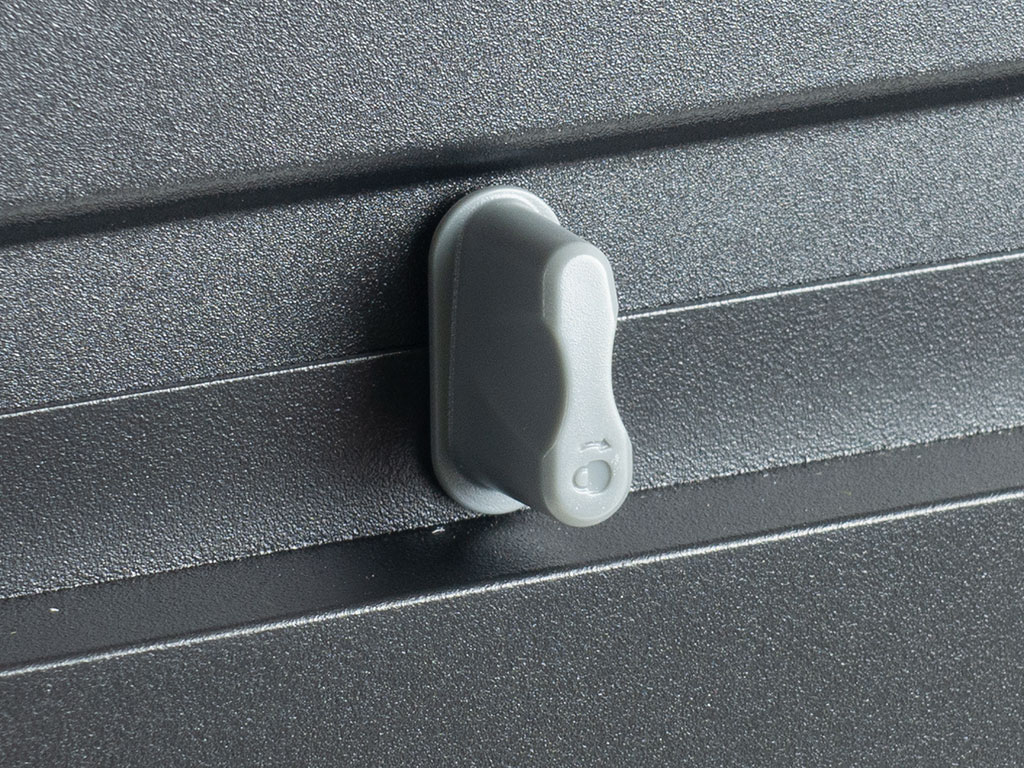
Cooler Master clearly spent some resources on exploring a few new details, including plastic locks that rotate 90° to keep case components securely in place. It would be no surprise if we end up seeing these in more mass-market oriented cases down the line.
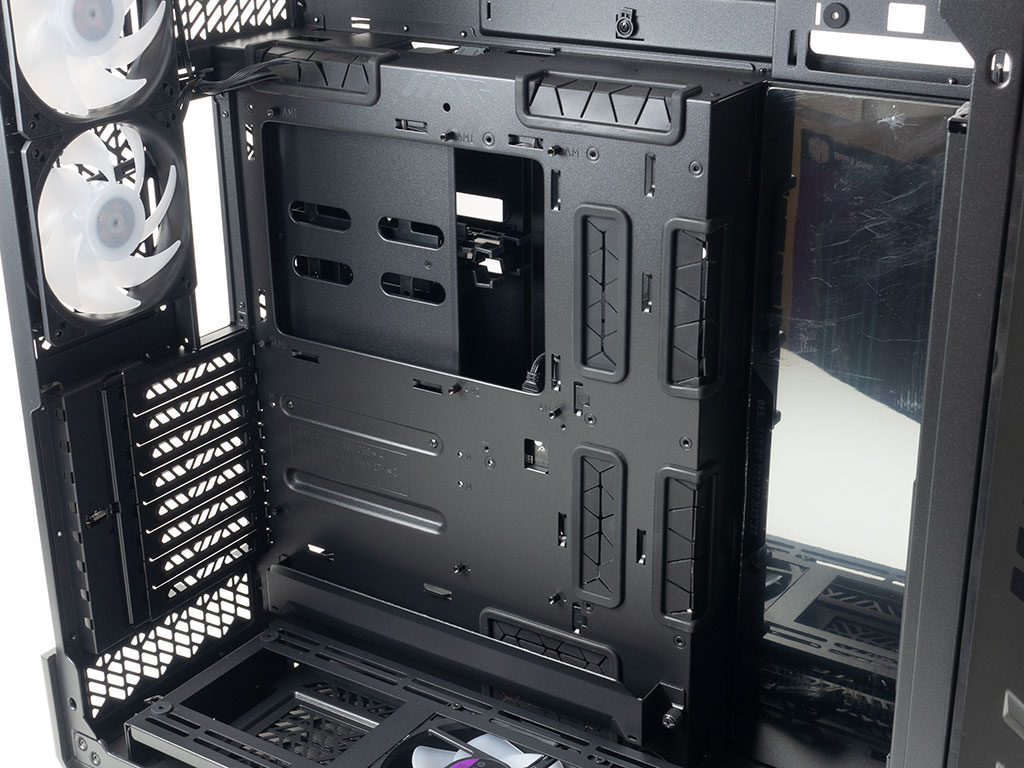
With a completely redesigned motherboard tray within the Cooler Master HAF 700 EVO, you get rubber-grommet-equipped routing holes on all three sides of the motherboard, with those at the edge actually wrapping around the metal. This is also something we may see in smaller, more affordable enclosures in the future if there is still a shroud and bottom mounted PSU, for example.
In the front of the HAF 700 EVO, Cooler Master has taken a multi-layered approach with three individual mounting plates that have the same unique new locking mechanism. Each of these can hold a variety of components from storage to liquid cooling. Once removed, you will find a fan/radiator mounting plate. You may also angle it slightly to show things off a bit.
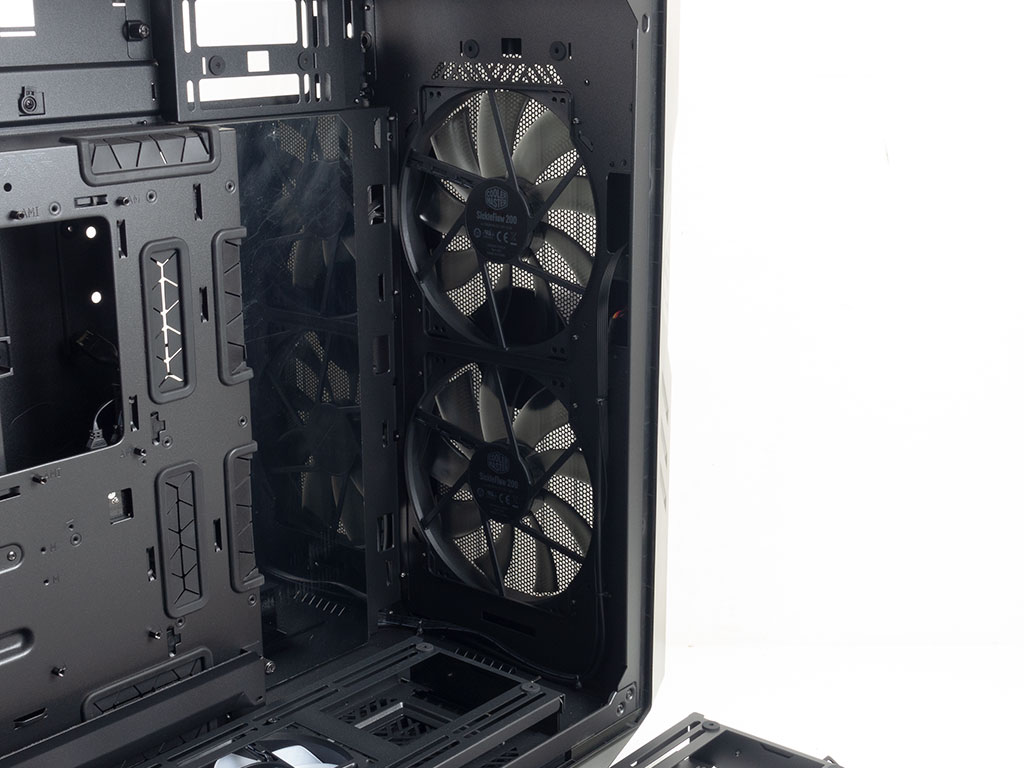

Lastly, you may remove that frame to show off the two pre-installed 200 mm SickleFlow intake fans inside the HAF 700 EVO. Next to this area is mirror on the side fan/radiator mount. If that space is unutilized, just leave it there as a nice visual gimmick to ensure airflow is channeled from the front to the back of the chassis. That mirror may also be attached to the front or placed on the bottom fan/radiator frame.
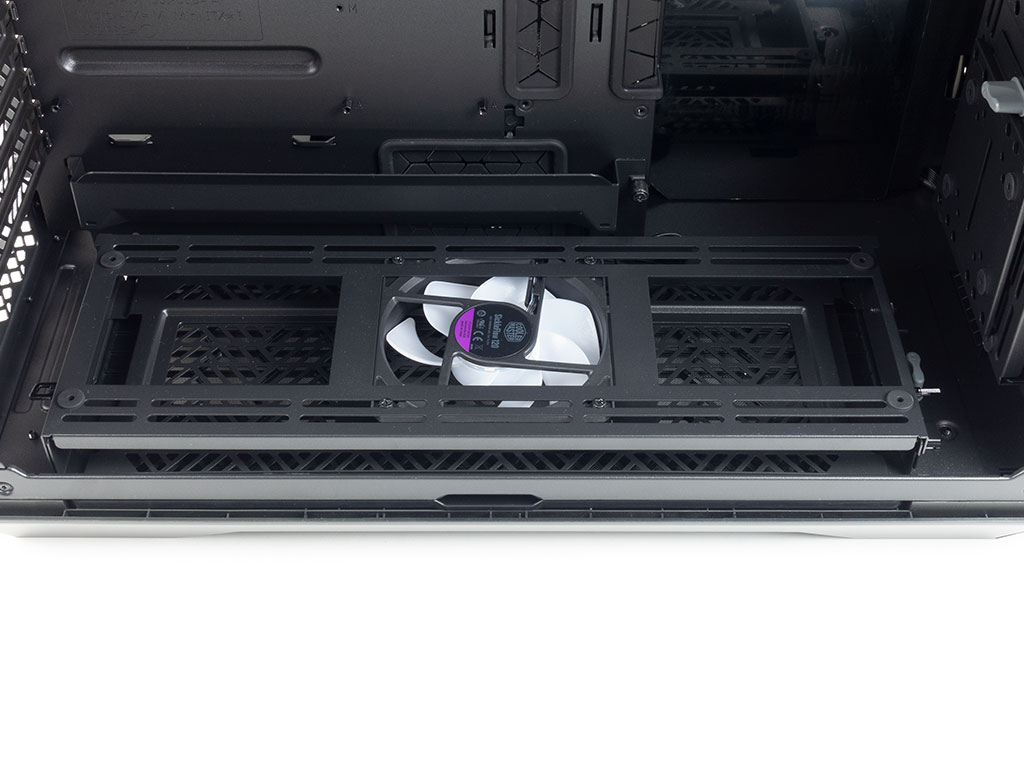
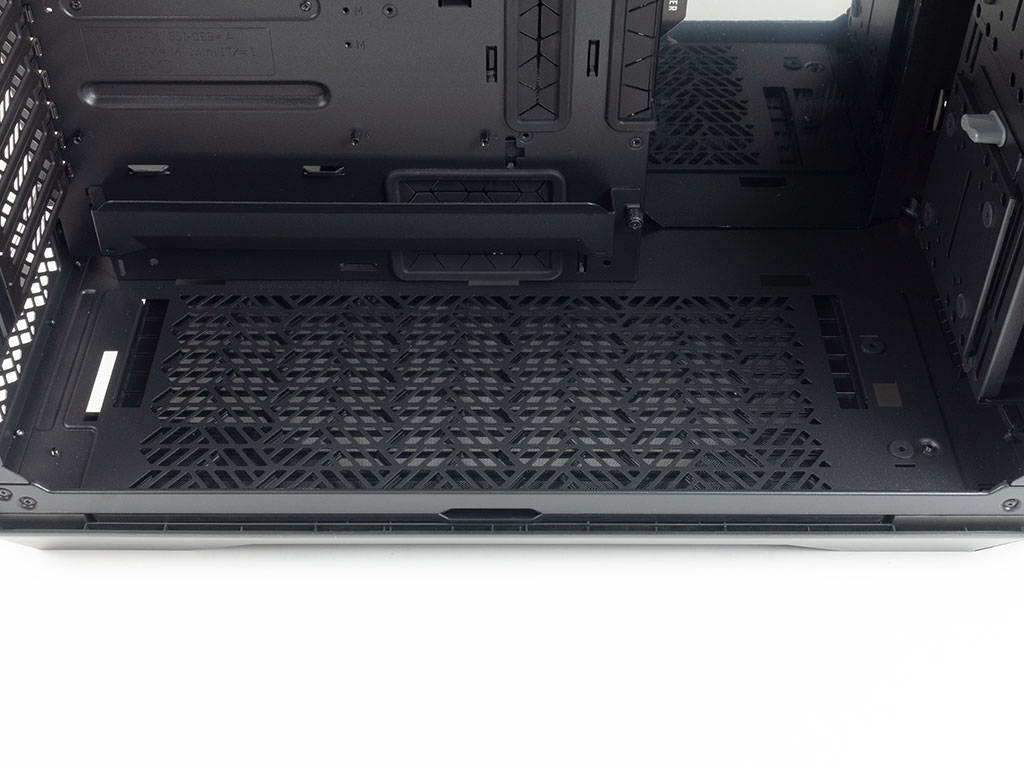
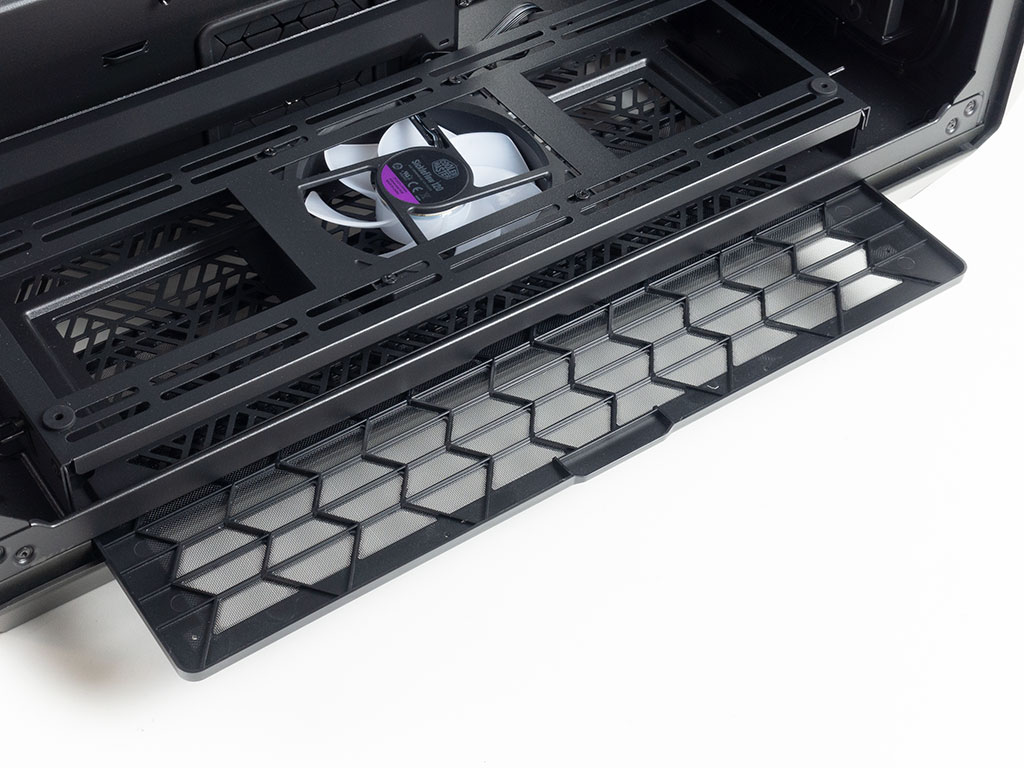
That bottom frame is the same as the one in the front of the chassis. As such, you may also angle it upwards. Coupled with the mirror, this would make for easy viewing of your GPU fans and ARGB as those generally point down in a traditional system setup. Alternatively, you may take the three multi-purpose mounting plates from the front and relocate them to the bottom for better airflow from the front to the back. However, you would have to find a better spot for that bottom fan. Speaking of which, it is another 120 mm SickleFlow fan. Having it is a nice touch, and while beneficial, one could do without it, too. With the side panel removed, you may also pull out the dust filter underneath the HAF 700 Evo with relative ease.
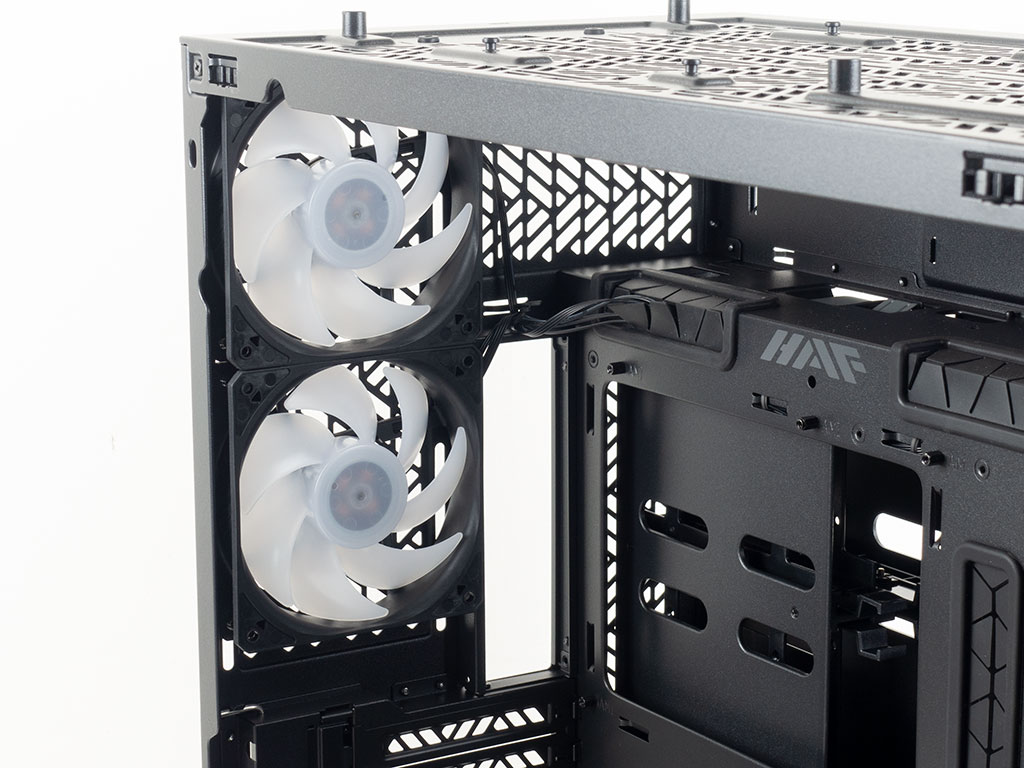
In the rear, the bottom with its eight expansion slots gives you all the room you need for your motherboard regardless of format. Thanks to the sheer size of the HAF 700 EVO, there is also room for bottom fans or radiator assemblies—they won't interfere with the board or any connectors. In the top are two 120 mm SickleFlow exhaust fans set to push hot air out the back. The vent next to these has no apparent function. Cooler Master could have incorporated an SSD, reservoir or pump mounting holes for even more build flexibility.
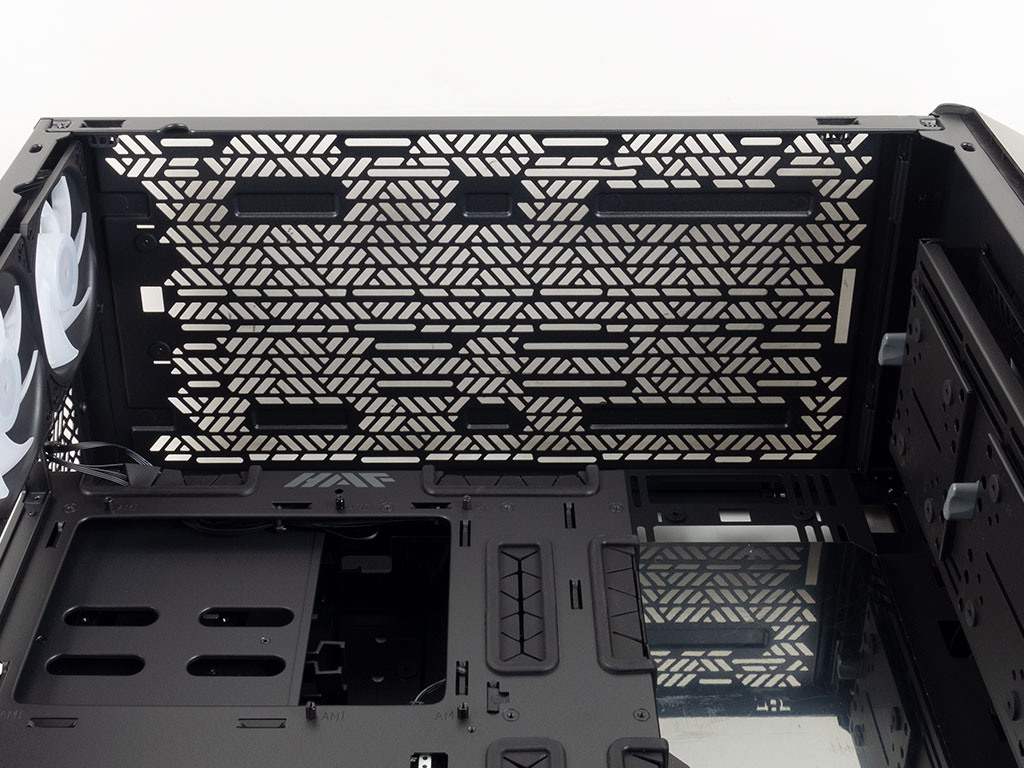
Looking at the ceiling of the HAF 700 EVO, there are numerous mounting locations for the wide variety of fans and radiator sizes. And just like other recently released Cooler Master cases, you may take off that top panel to simplify attaching any components to it while giving you better access into the case interior itself.
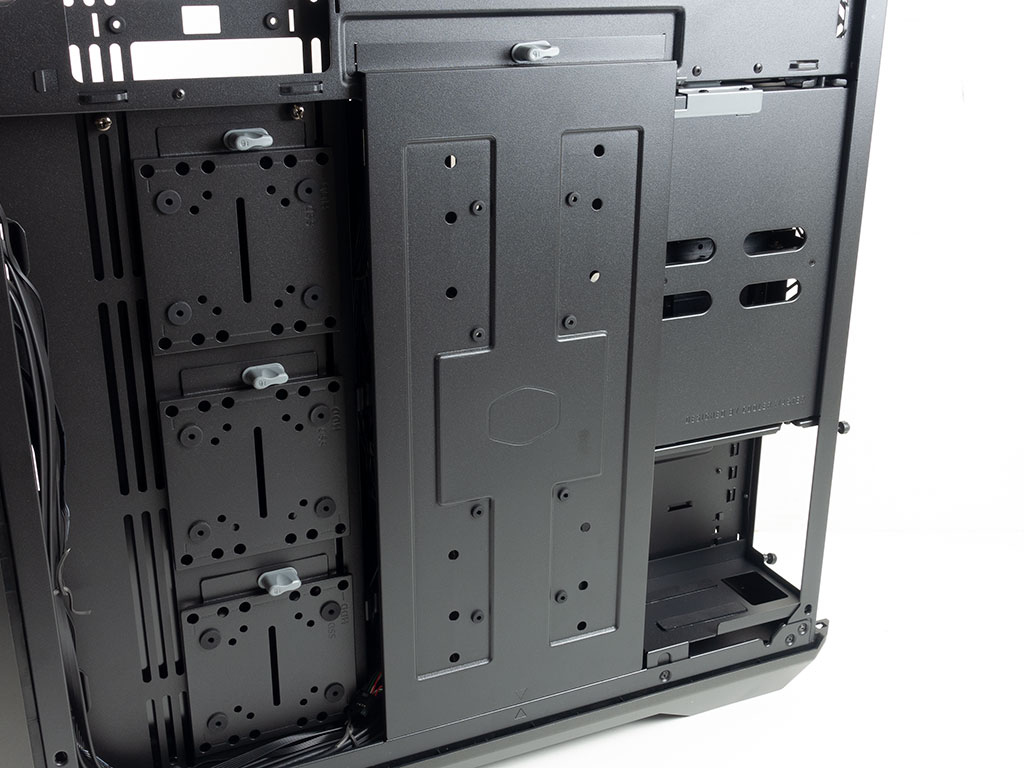
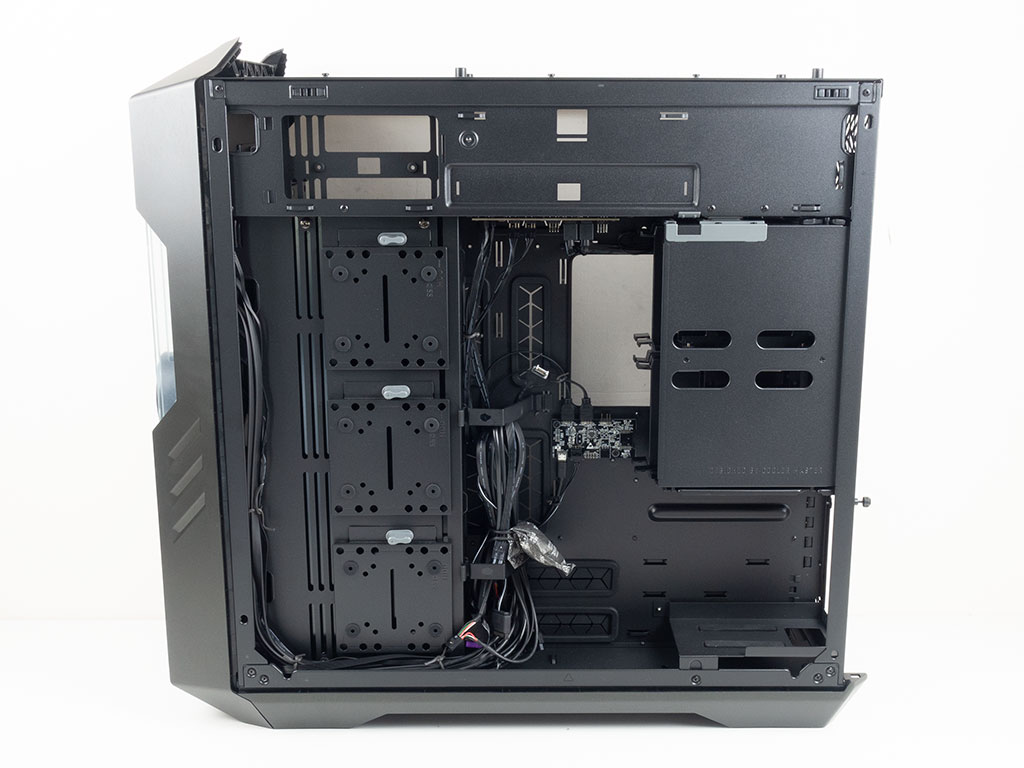
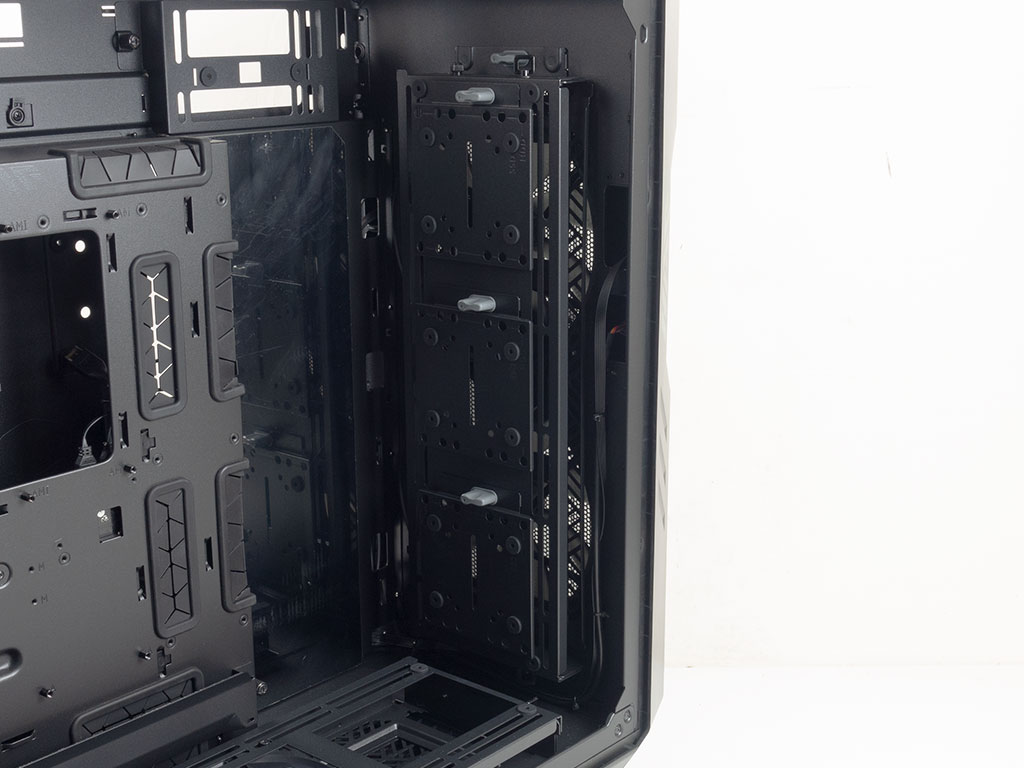
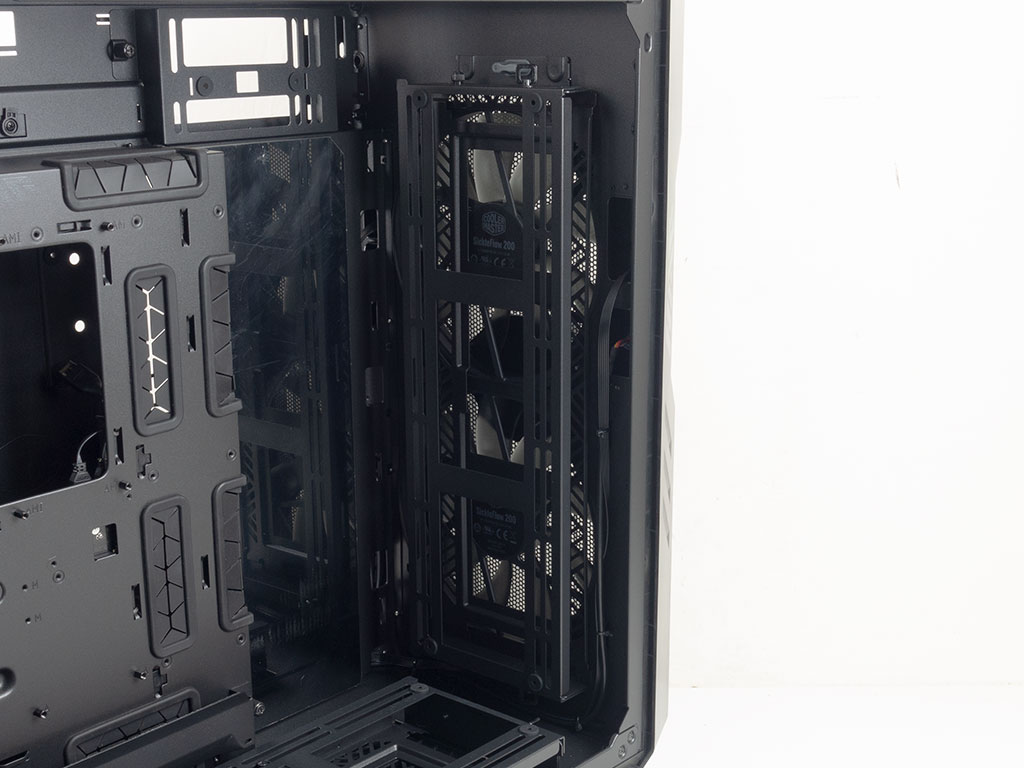
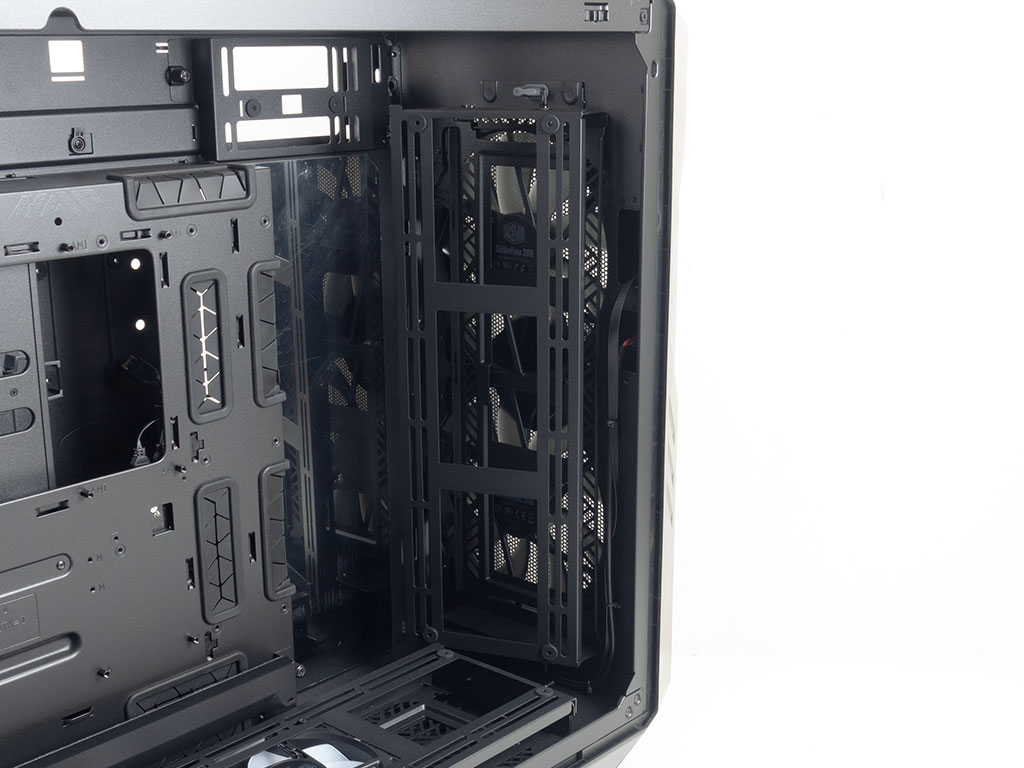
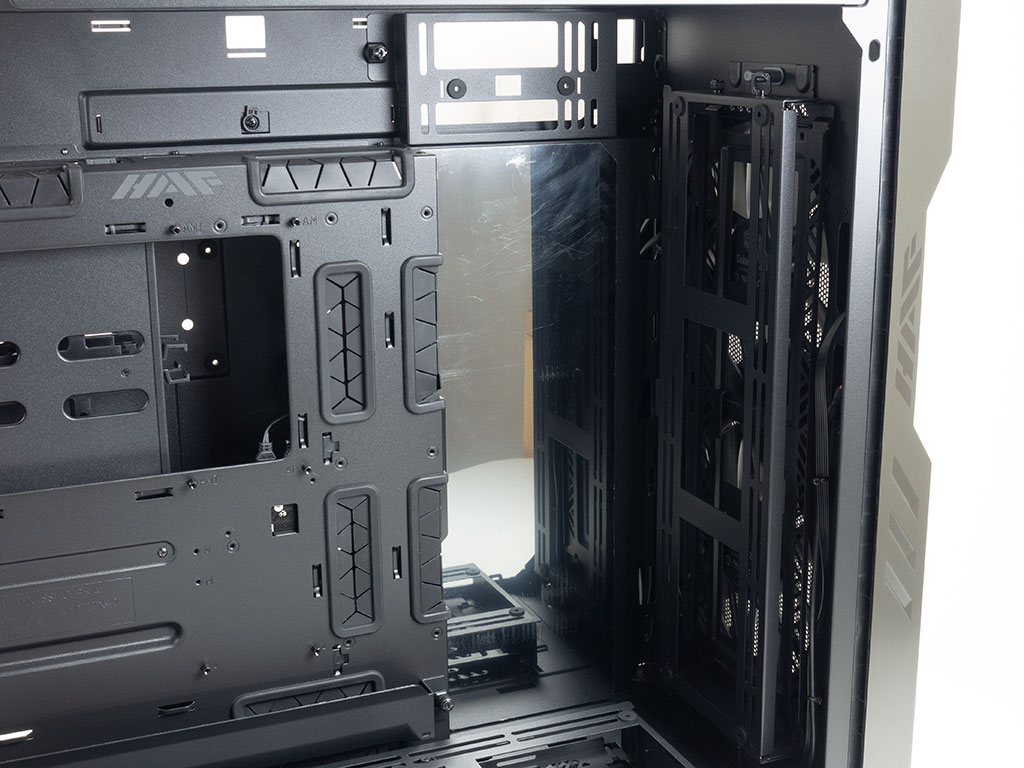
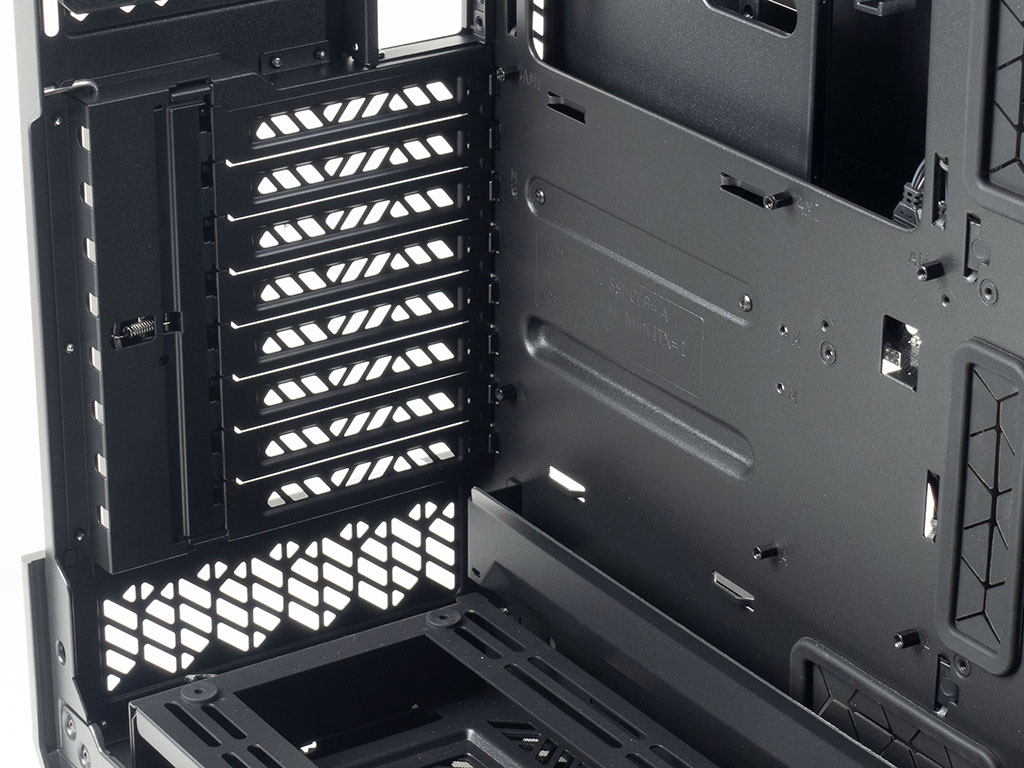
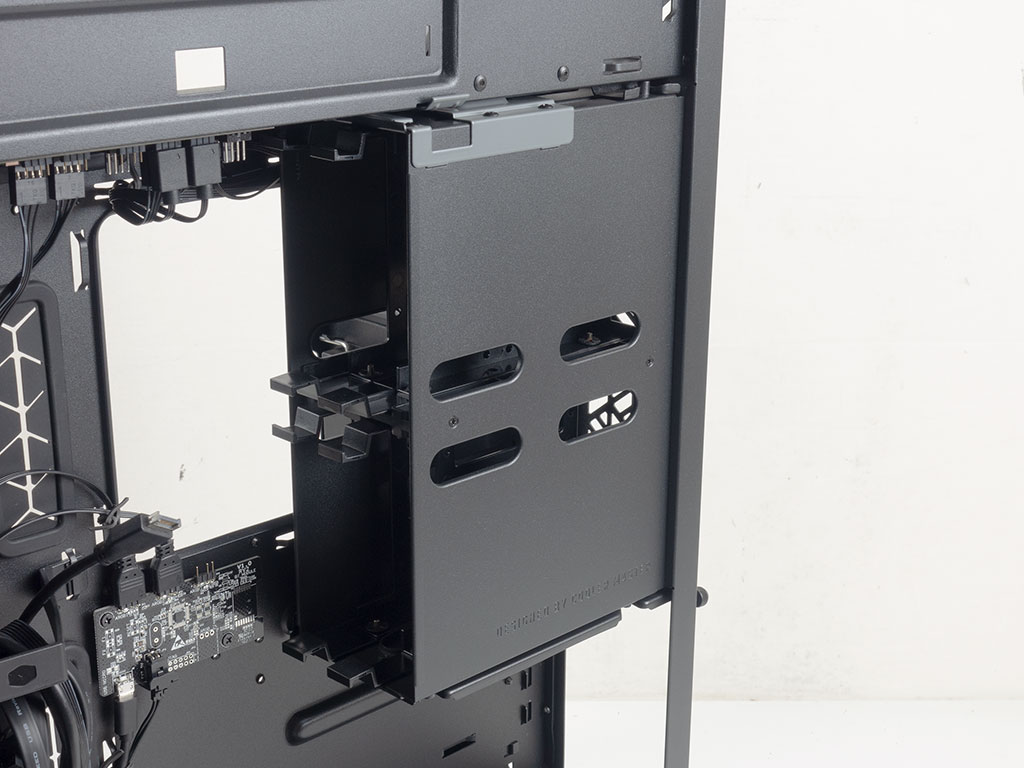
Turning our attention to the other side of the massive chassis, the central plate has mounting holes for two SSDs or two 3.5" hard drives if you run out of room inside the HAF 700 EVO, which is unlikely. It is easily removable thanks to the gray plastic locking mechanism and reveals a central area all the cables run through in a finished build.
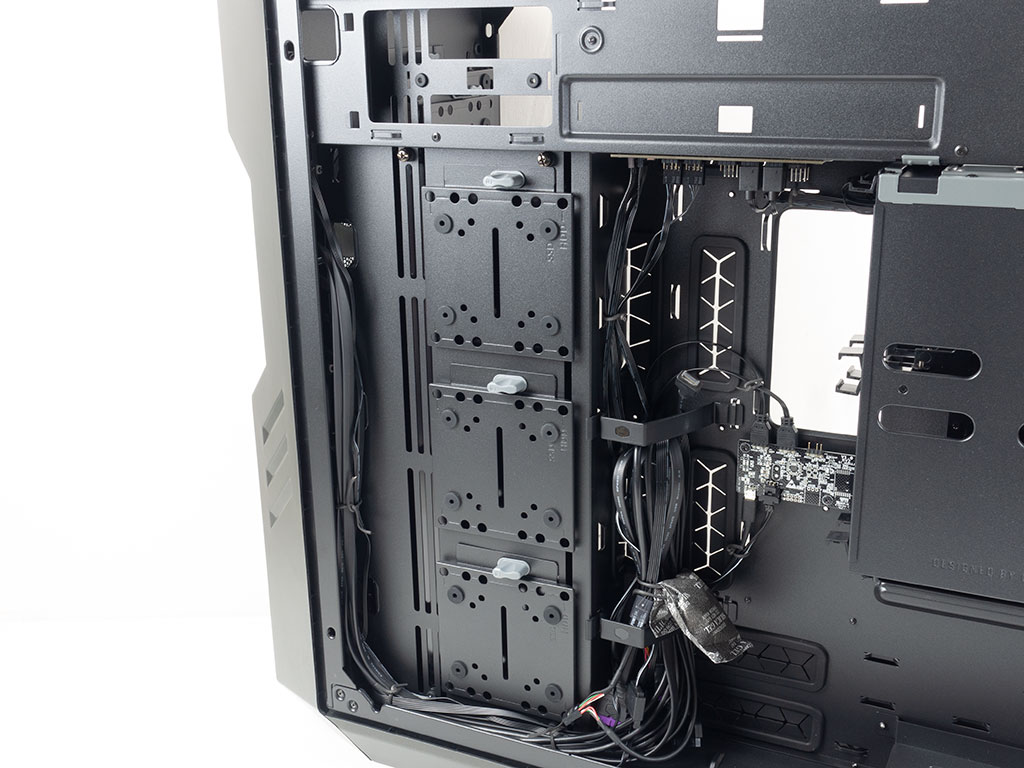
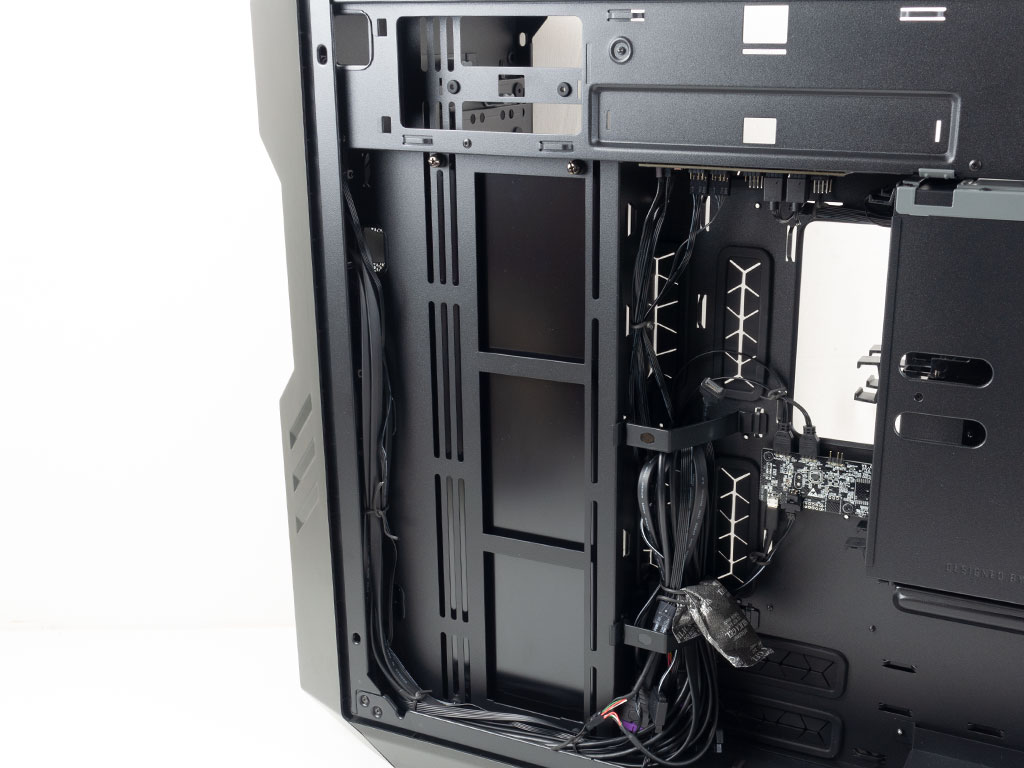
Towards the front of the case are three more individual mounting plates for 2.5" or 3.5" drives, which brings the total count of these to six. You may remove them, which reveals the mounting frame for fans or a radiator setup.
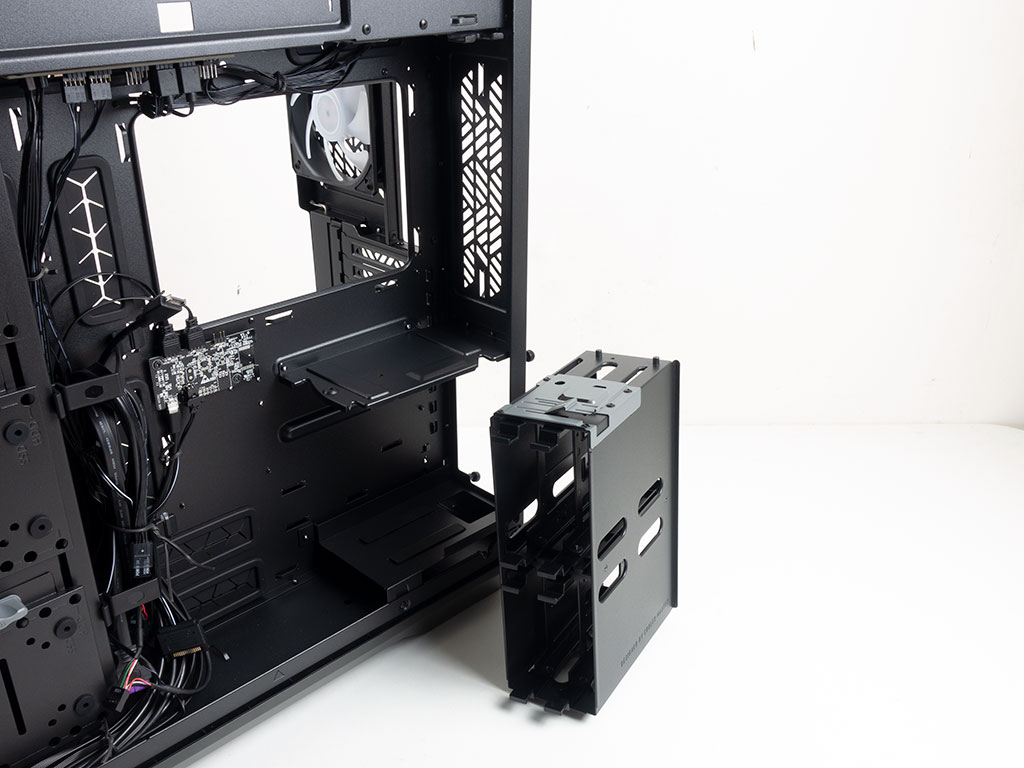
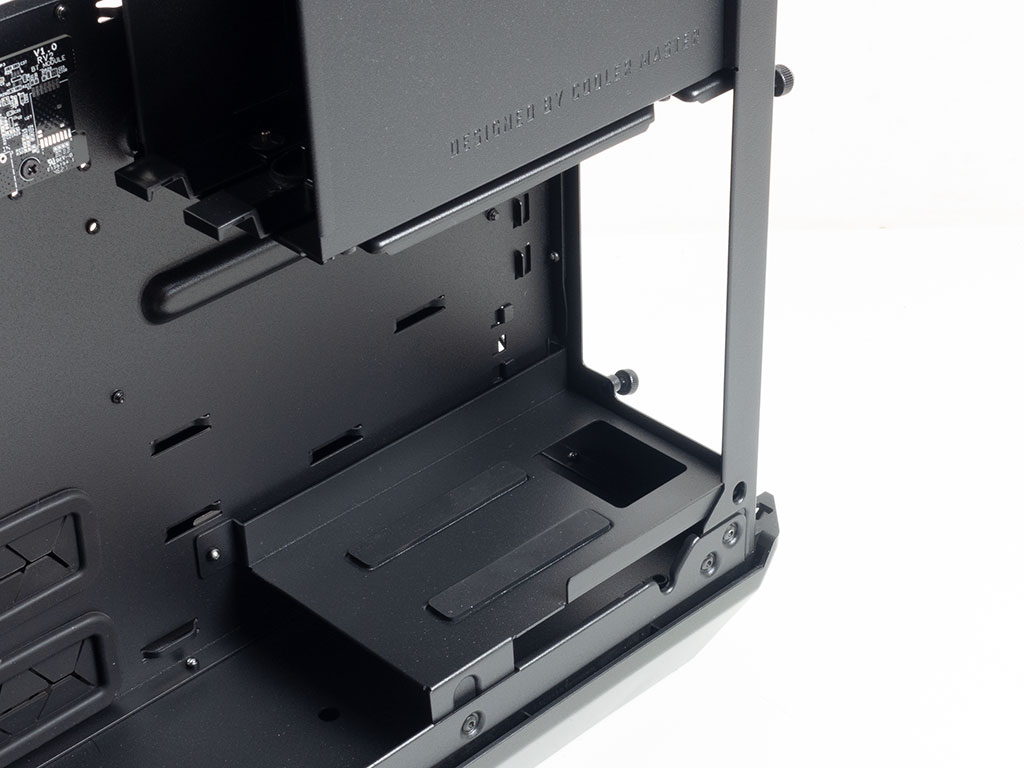
Even with six mounting plates and the additional two elements on the central plate for a total of eight hard drives, Cooler Master has included a cage for four additional drives. This means you could stuff the HAF 700 EVO full of a maximum of twelve drives of either size. The cage swings out to get to the trays, or could be taken out completely in the process. Underneath it is a single full-size ATX power supply bay with foam padding as an anti-vibration measure. Cooler Master also added a cutout to make it easier to route cables to the bottom corner of the motherboard. While one could argue that a second PSU bay could have fit inside the case, those filling the HAF 700 EVO to the rim will probably just end up going with a single 1-2 KW power supply anyway.
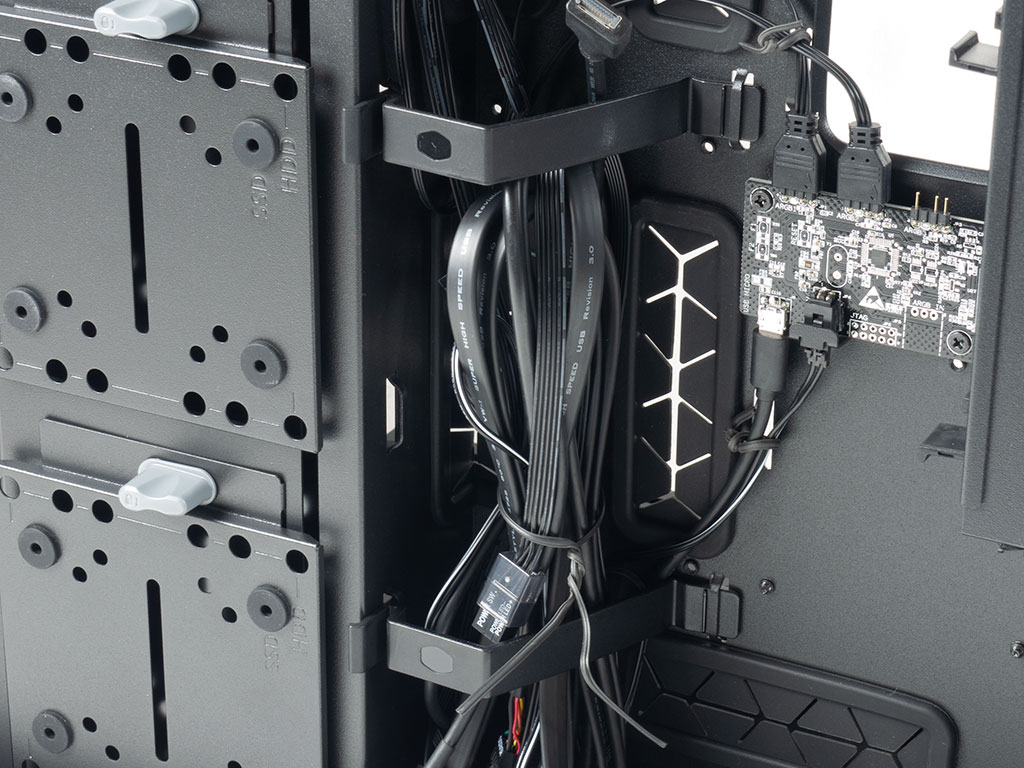

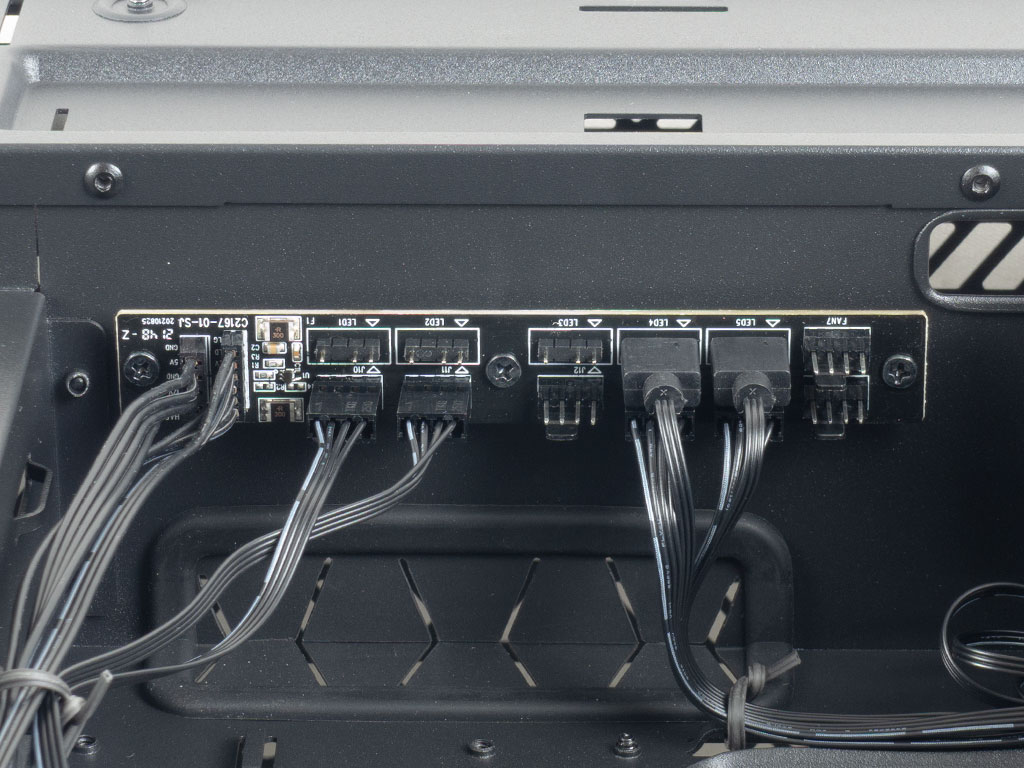
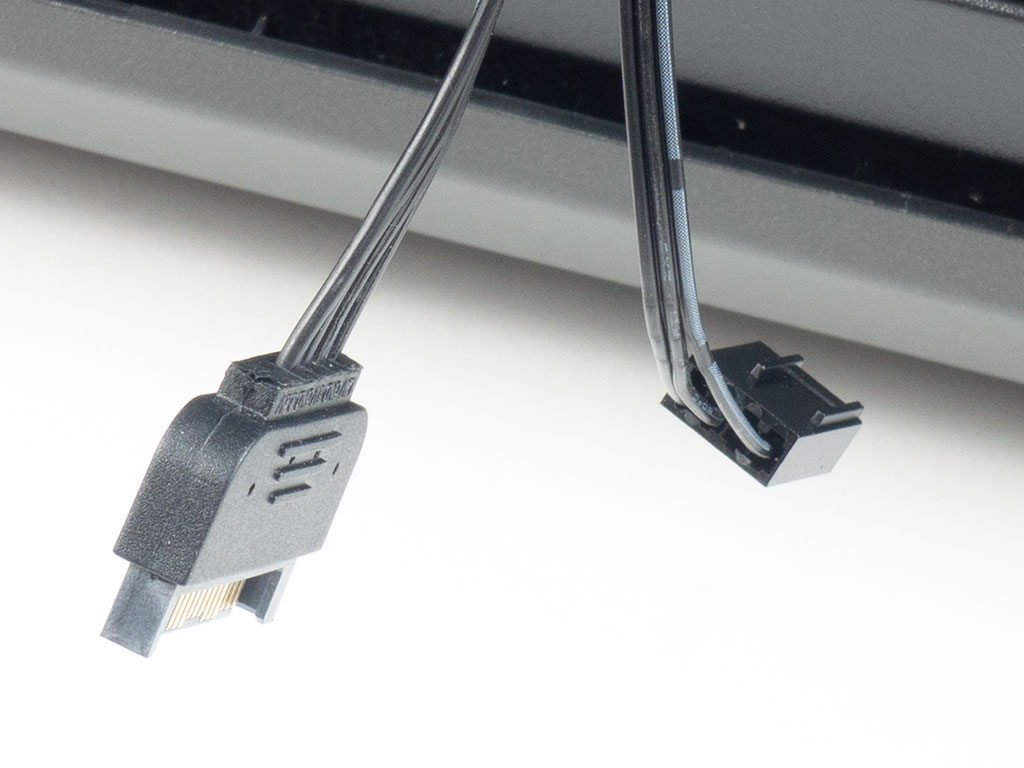
In the central area are two spacious plastic clips to hold wires in place. That is a nice touch, but the backside of the motherboard tray provides a large number of hooks for zip ties, so your cable routing should be just fine without these. There are two PCBs within the enclosure. The central one is for ARGB control via Cooler Master's own software while the other is for PWM fans, with their ARGB components unified into one output that is then routed to the dedicated ARGB controller PCB.
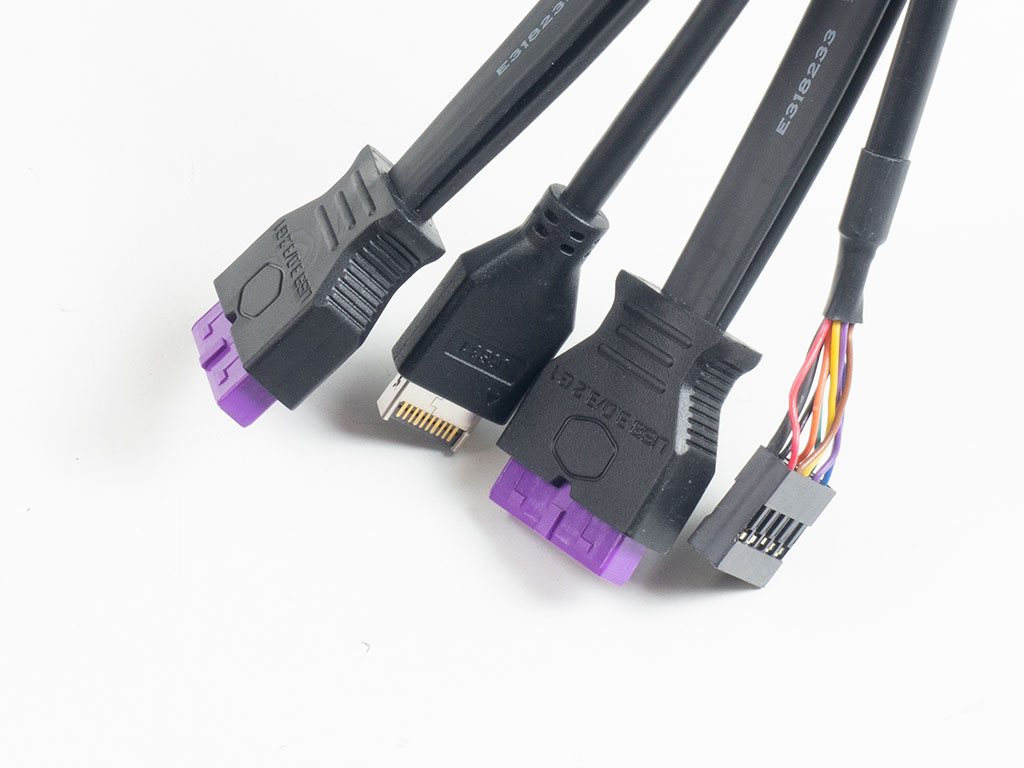
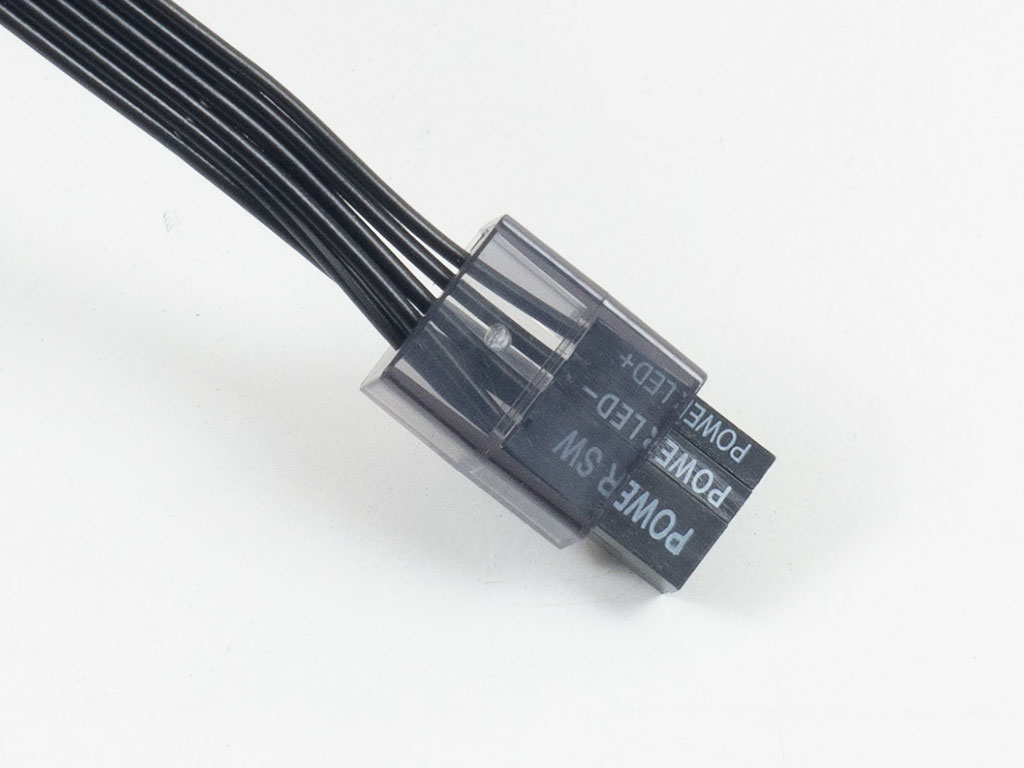
As the Cooler Master HAF 700 EVO has four USB 3.0 Type A ports, you will find two of the uniquely colored leads alongside a USB-C and the usual audio cable. On top of that, a plastic clip around the case connectors holds them together so that you may plug them in all at once.
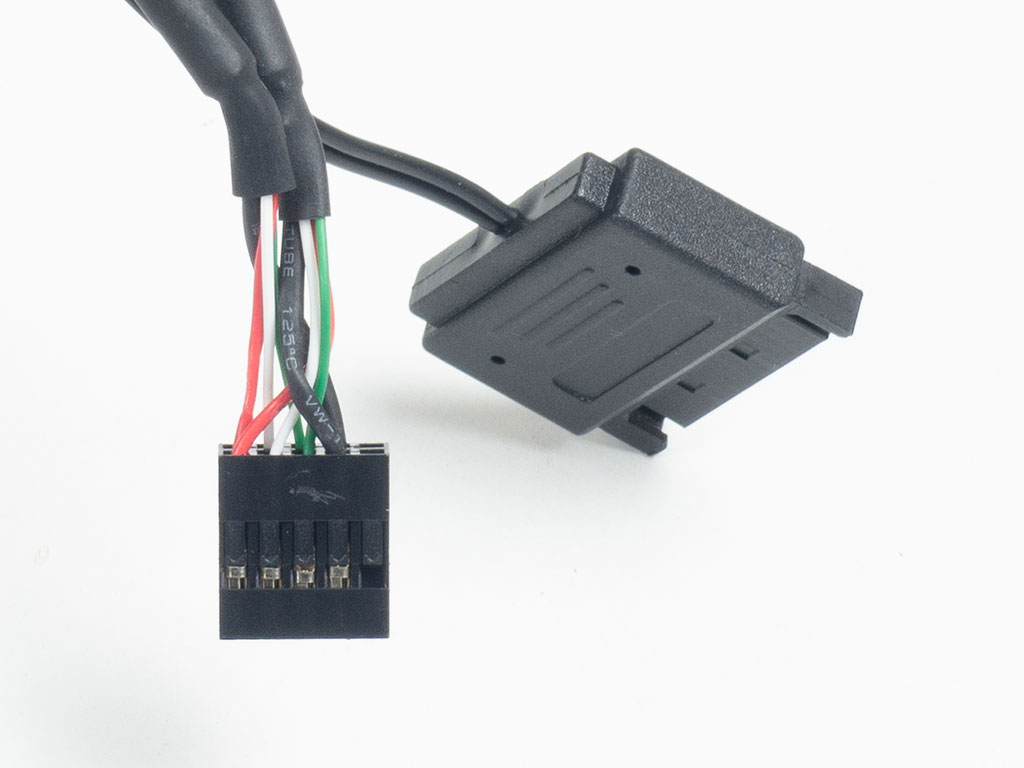
Both the PCB and display are connected via USB, which Cooler Master combined into a single header, and a SATA connector provides power. The fan hub has its own dedicated SATA power connector and is meant to pass the PWM signal from your motherboard to any connected fans.
Jul 16th, 2025 17:53 CDT
change timezone
Latest GPU Drivers
New Forum Posts
- What kills gpus? (61)
- Adding distilled water to ups batteries really work ? (30)
- [GPU-Z Test Build] New Kernel Driver, Everyone: Please Test (102)
- HDMI cable (5)
- 6400c30 vs 8000c36 Ryzen 9800X3D (31)
- Post your Speedometer 3.0 Score (129)
- Stupid things one has done with hardware (69)
- AI Job Losses: let's count the losses up, total losses to AI so far 94,000 and counting (19)
- Swapping existing router w/ a replacement; any issues? (28)
- The TPU UK Clubhouse (26552)
Popular Reviews
- MSI GeForce RTX 5060 Gaming OC Review
- SilverStone SETA H2 Review
- Our Visit to the Hunter Super Computer
- Lexar NM1090 Pro 4 TB Review
- Pulsar X2 Crazylight Review
- NVIDIA GeForce RTX 5050 8 GB Review
- Sapphire Radeon RX 9060 XT Pulse OC 16 GB Review - An Excellent Choice
- Fractal Design Epoch RGB TG Review
- AMD Ryzen 7 9800X3D Review - The Best Gaming Processor
- Upcoming Hardware Launches 2025 (Updated May 2025)
TPU on YouTube
Controversial News Posts
- Intel's Core Ultra 7 265K and 265KF CPUs Dip Below $250 (288)
- Some Intel Nova Lake CPUs Rumored to Challenge AMD's 3D V-Cache in Desktop Gaming (140)
- AMD Radeon RX 9070 XT Gains 9% Performance at 1440p with Latest Driver, Beats RTX 5070 Ti (131)
- NVIDIA Launches GeForce RTX 5050 for Desktops and Laptops, Starts at $249 (122)
- NVIDIA GeForce RTX 5080 SUPER Could Feature 24 GB Memory, Increased Power Limits (115)
- Microsoft Partners with AMD for Next-gen Xbox Hardware (105)
- NVIDIA DLSS Transformer Cuts VRAM Usage by 20% (99)
- AMD Sampling Next-Gen Ryzen Desktop "Medusa Ridge," Sees Incremental IPC Upgrade, New cIOD (97)