 15
15
NZXT H1 Review
Temperature & Noise Testing »Test System
| System Parts for Case Reviews | |
|---|---|
| Processor: | Intel Core i5-9600K |
| Motherboards: | ATX: MSI Z390 GAMING EDGE AC MATX: Z370M GAMING EDGE AC Mini-ITX: MSI Z370I GAMING EDGE AC Provided by: MSI |
| Graphics Card: | ATX/mATX: Palit GeForce RTX 2080 Gaming Pro OC ITX: EVGA GTX 1650 SC Ultra Black 4 GB |
| Memory: | 16 GB XPG GAMMIX D30 DDR4 2666 MHz CL16-18-18 1.20 V 16 GB XPG SPECTRIX D60G DDR4 3000 MHz CL16-18-18 1.35 V Provided by: ADATA |
| HDD: | Western Digital 320 GB 7200 RPM |
| SSD: | ITX: ADATA SX6000 Pro M.2 256 GB mATX: ADATA GAMMIX S11 Pro M.2 256 GB ATX: ADATA SPECTRIX S40G M.2 256 GB ADATA XPG SX850 256 GB ADATA Ultimate SU630 240 GB ADATA Ultimate SU750 256 GB Provided by: ADATA |
| Power Supply: | Fractal Design ION+ 750W 80 Plus Platinum |
| Cooling: | be quiet! Dark Rock 4 be quiet! Dark Rock Slim be quiet! Shadow Rock LP Provided by: be quiet! |
Assembly
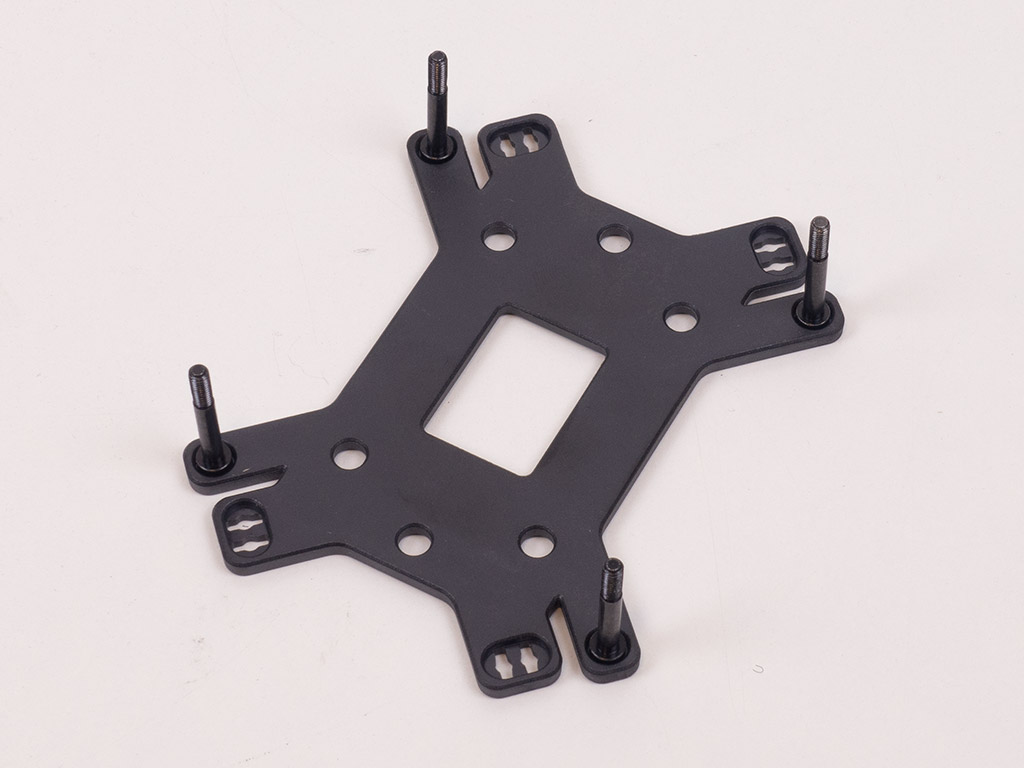
Before diving into actually assembling the system, mount the AIO CPU block back bracket. Once in place, you can insert your board and secure it with the four screws. As you can see, all the leads end up right where they are suppose to be, so all you have to do is plug them in—no wrestling through tight spaces and potentially cutting yourself in the process.
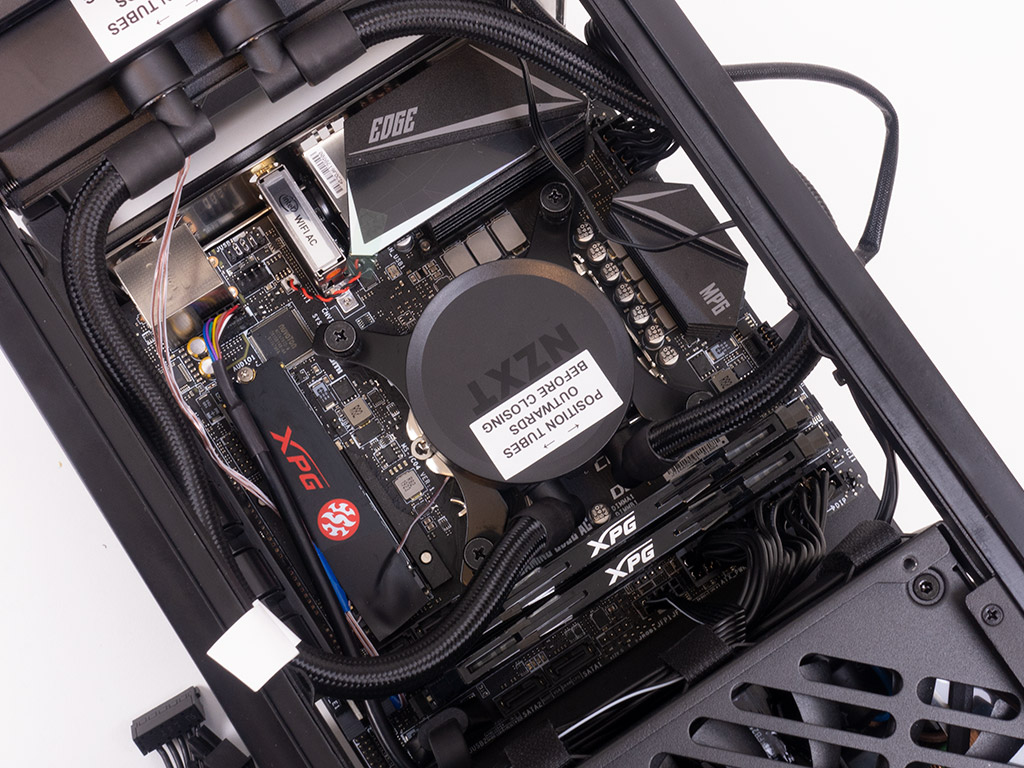

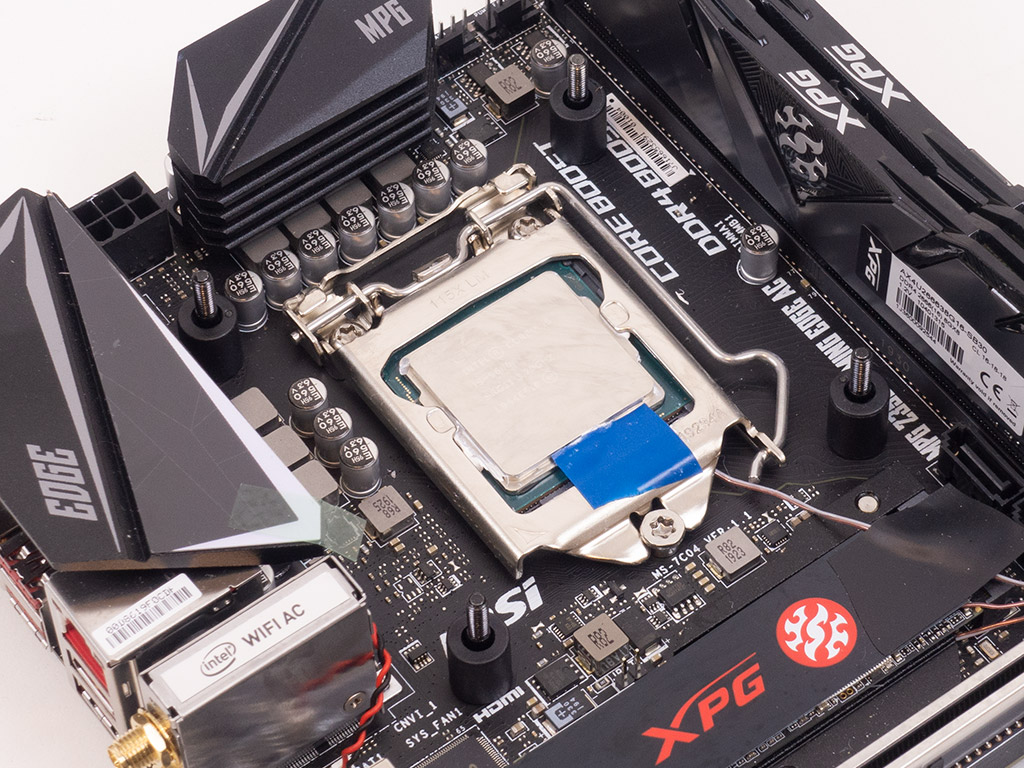
One connected, simply put the block in place and secure it with the four spring-loaded screws on top of washers and flip the whole liquid-cooling assembly back into place. With that done, screw it back onto the frame of the H1 chassis. The whole process of adding the motherboard requires a total of six screws and takes less time than in a traditional ATX case as all the cables are already pre-routed.
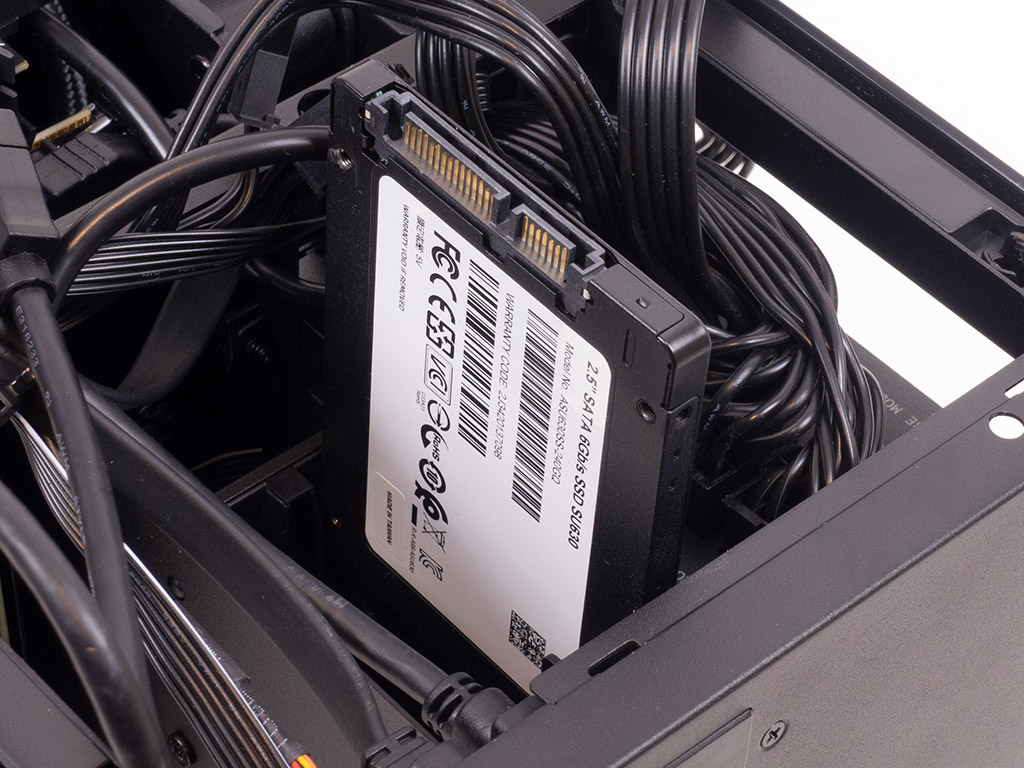
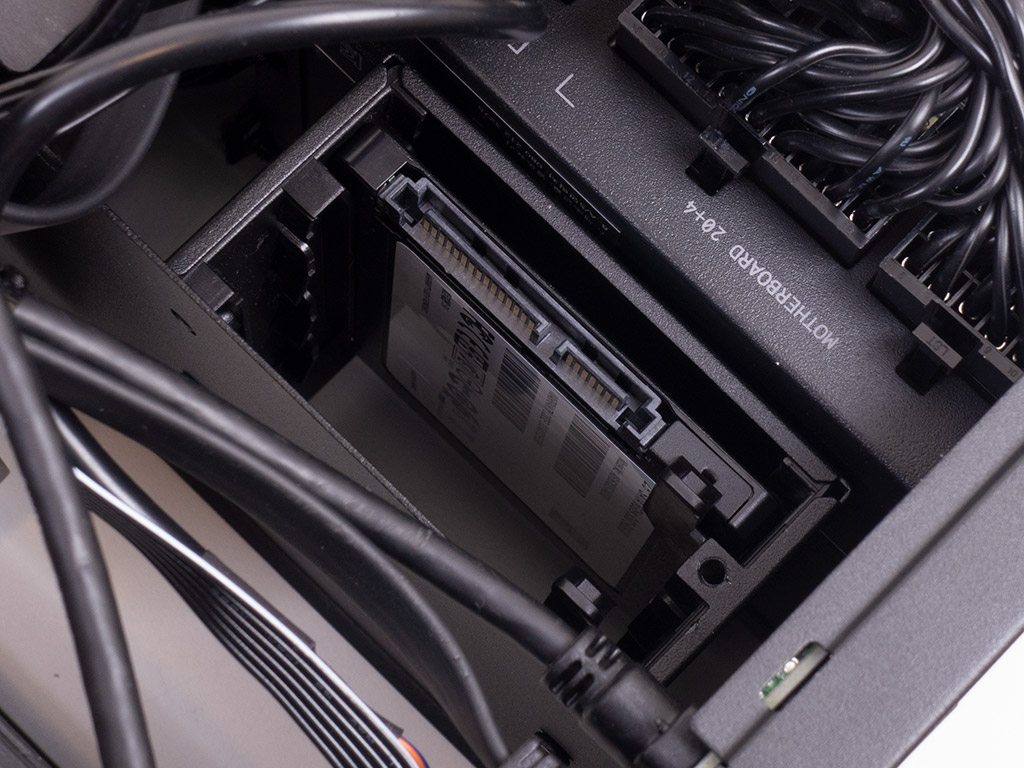

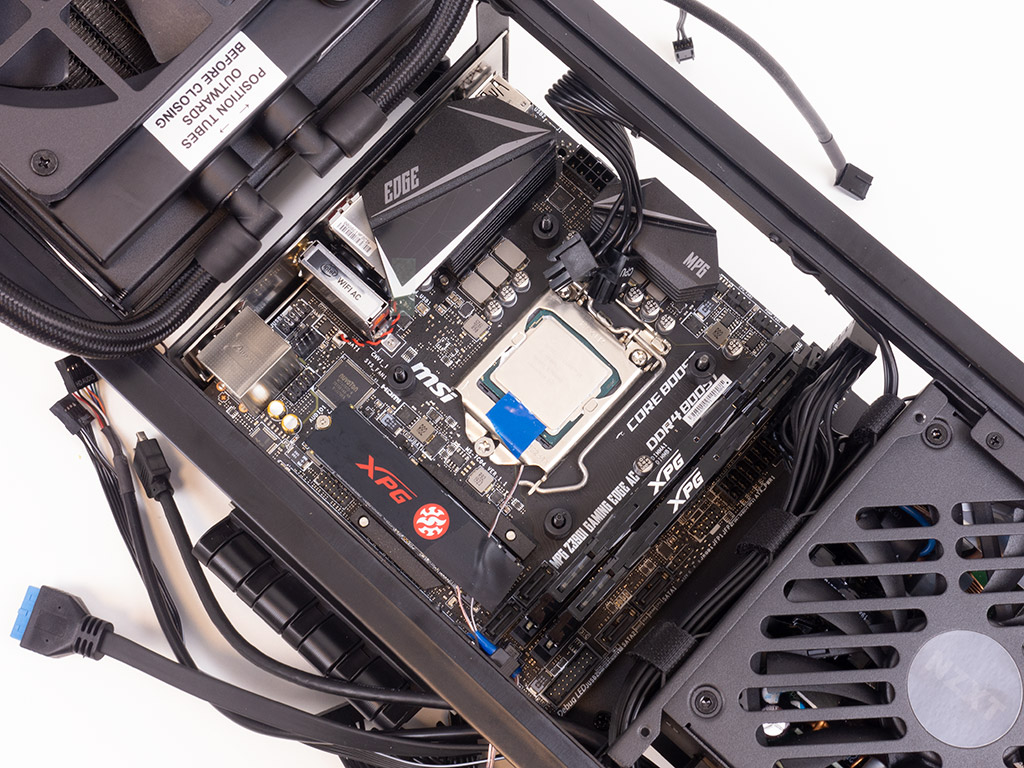
To add 2.5" storage, simply drop a drive into one of two slots, where it is held in place by a plastic clip. There is a bit of wiggle room for thin SSDs, but classic 2.5" spinning drives should fit just fine. Once in place and connected, put the metal cover back in its place, which requires no tools or screws either.

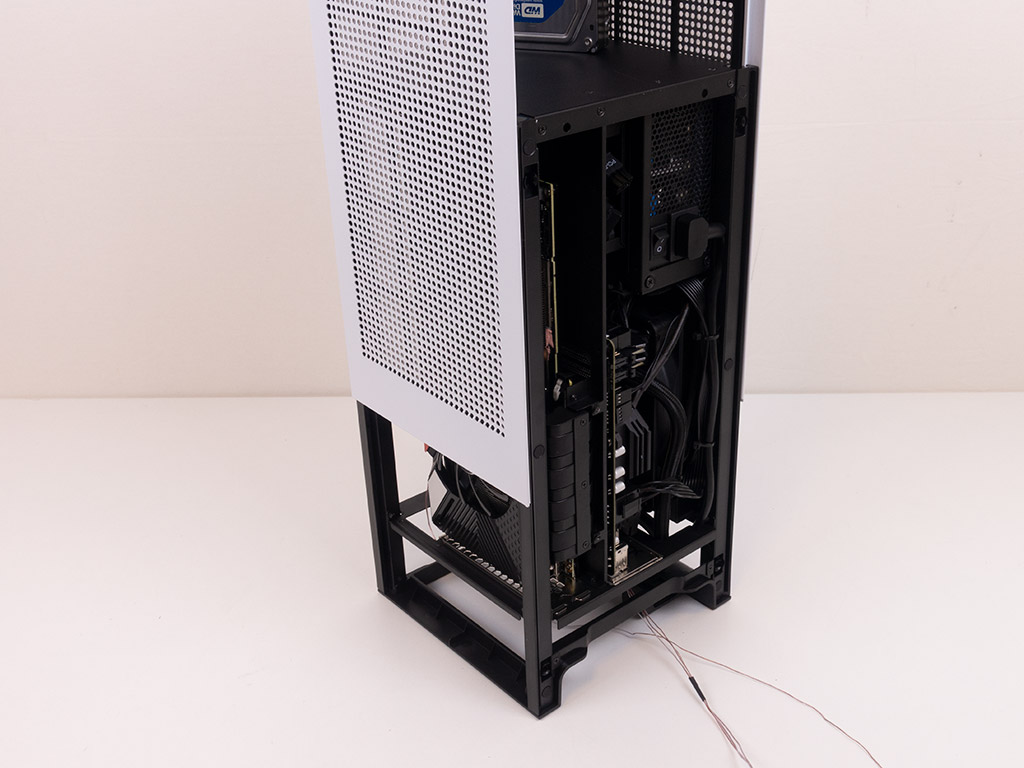
Last but not least, adding the GPU could not be any easier as the whole opposite side is dedicated to it. The Palit GeForce 2080 fits perfectly, and we were also able to fit a thicker and longer ASUS STRIX 2080 Super. However, it was too thick for the white panel to slide back into place. So that 2.5 slot limit in terms of GPU thickness mentioned by NZXT is definitely no joke.

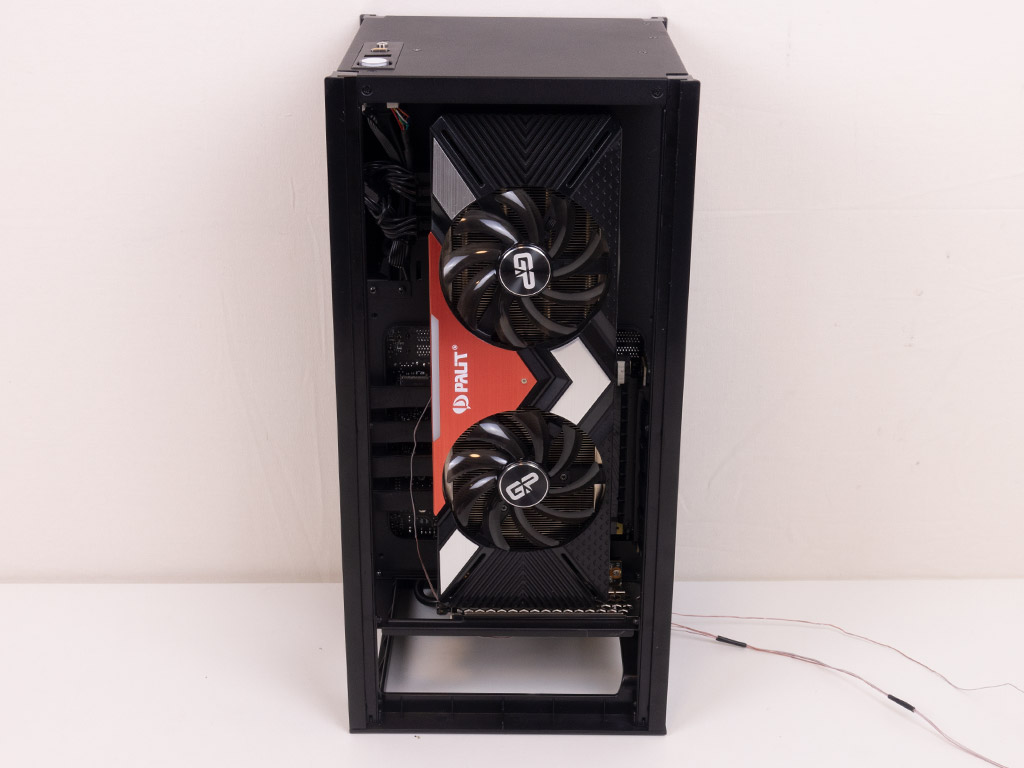
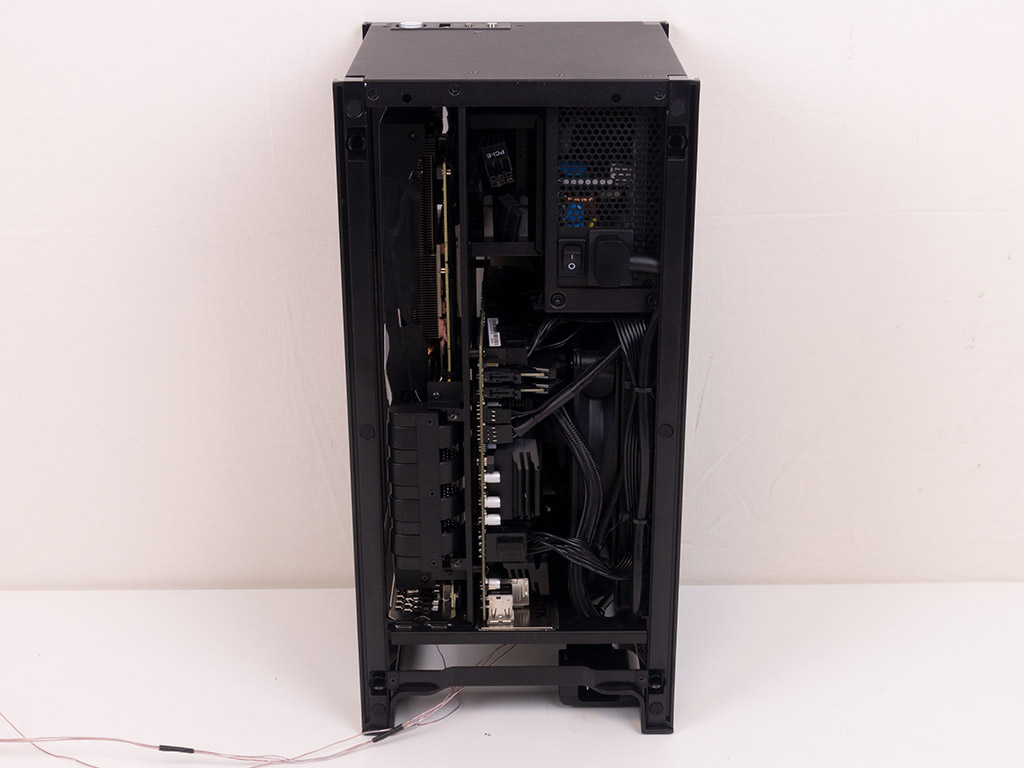
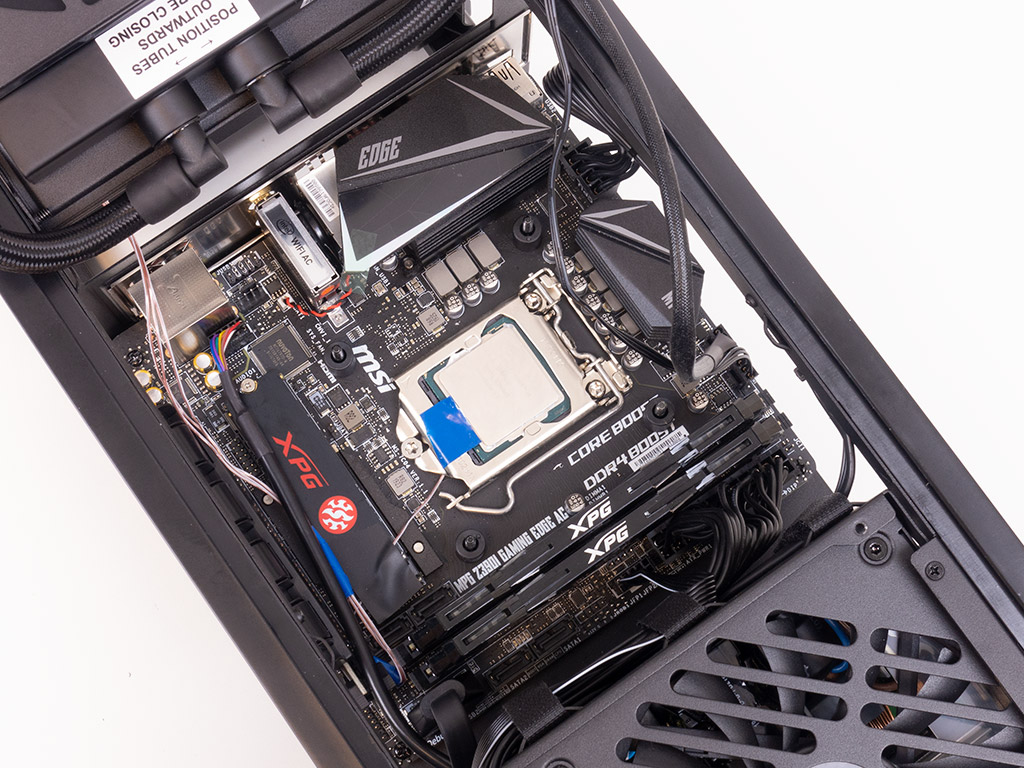
Once everything is in place, the NZXT H1 looks great, especially considering the density of components within. This is only possible because of the extremely well-thought-out layout and pre-routed cables. System Integrators will absolutely love the H1, I am sure!
Before you are able to put the side panels back into place, you have to simply slide the metal cover back into place by letting gravity do all the work.
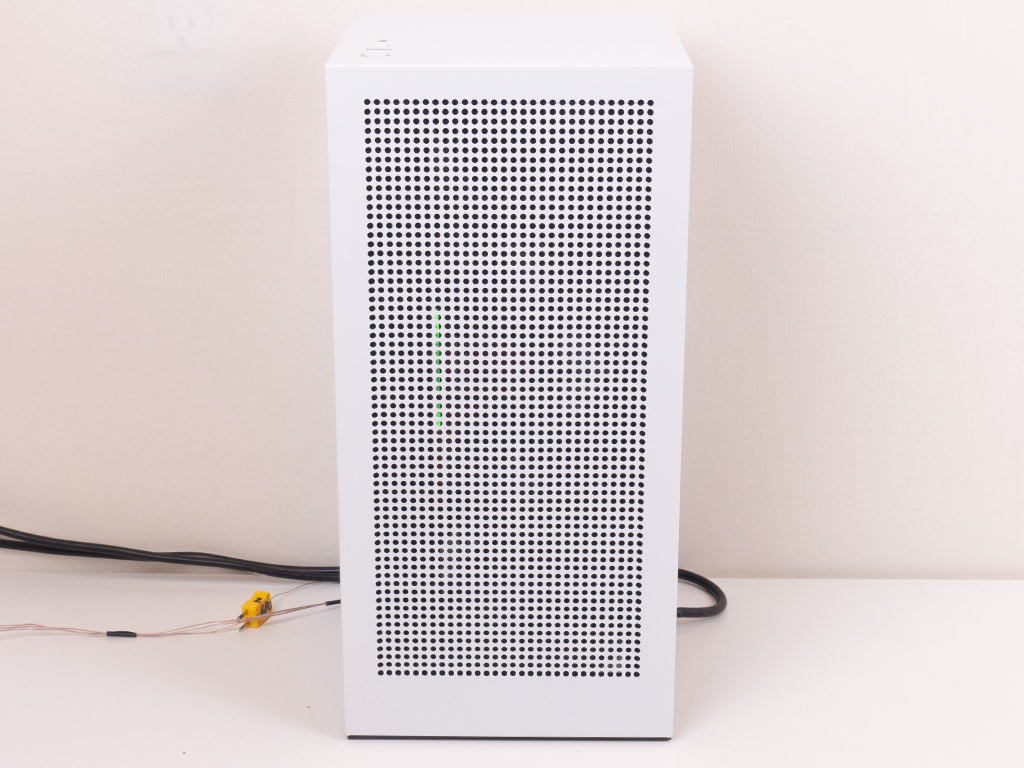
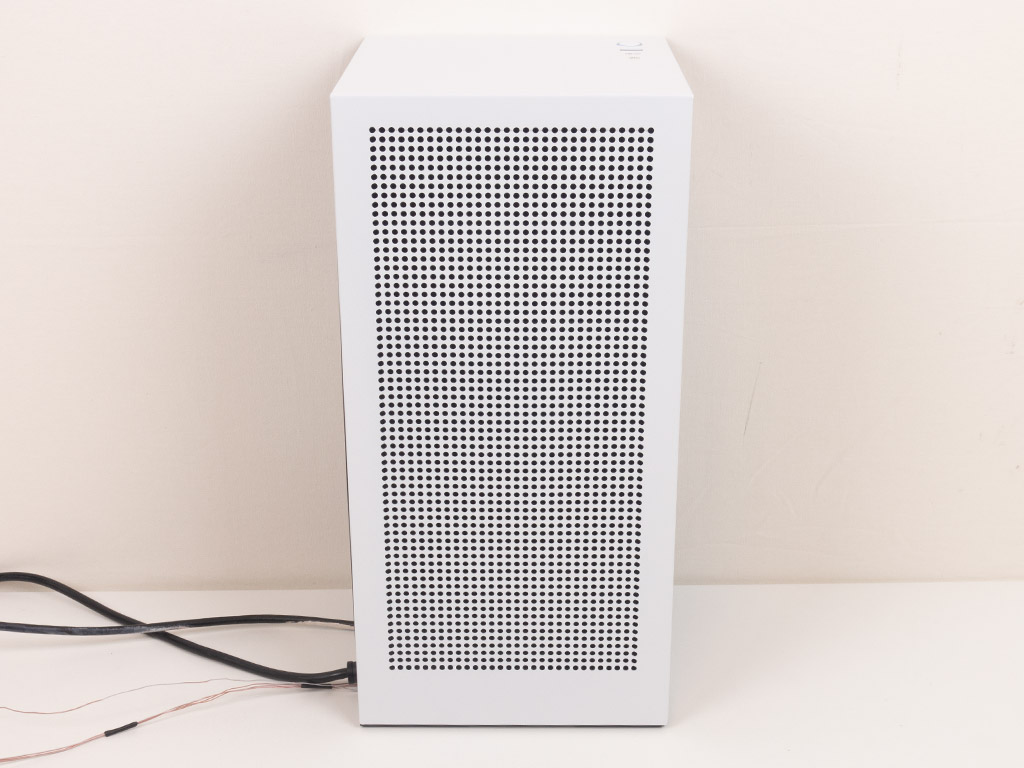
Finished Looks
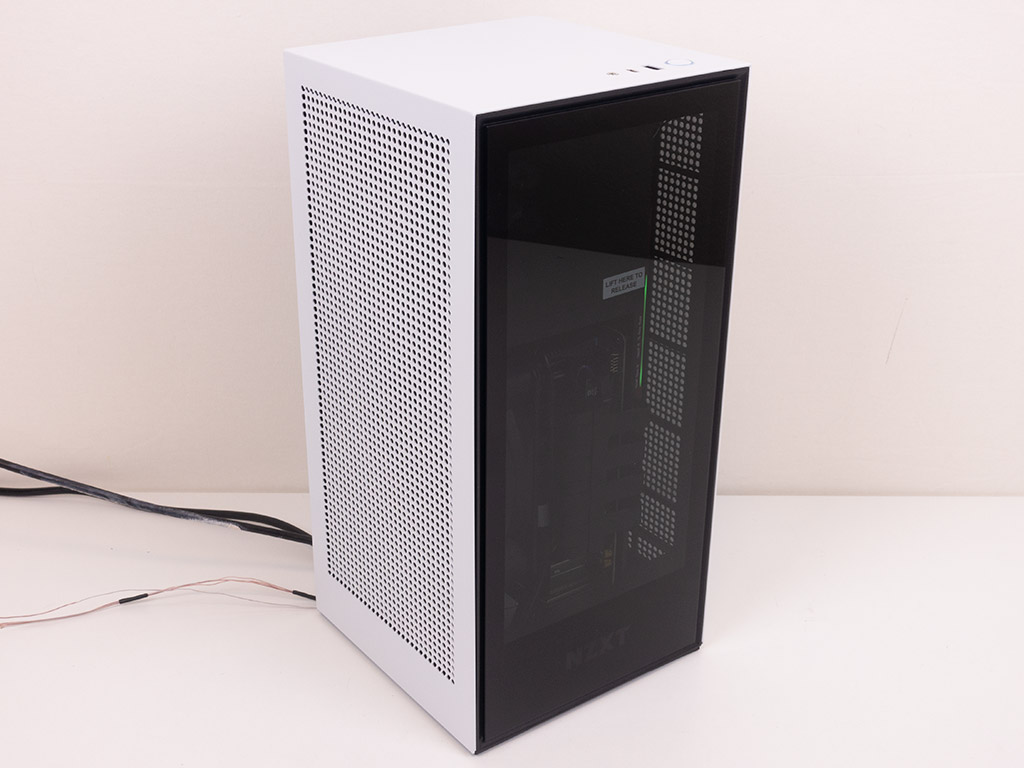
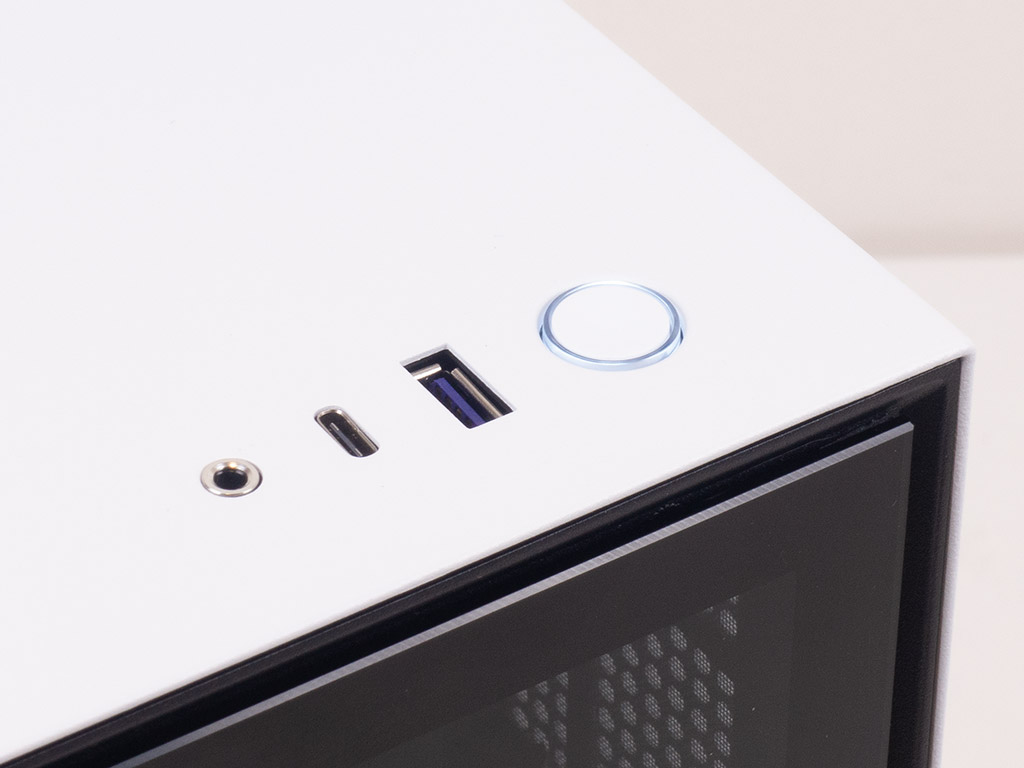
Once turned on, a white LED lights up around the power button to let you know the system is up and running.

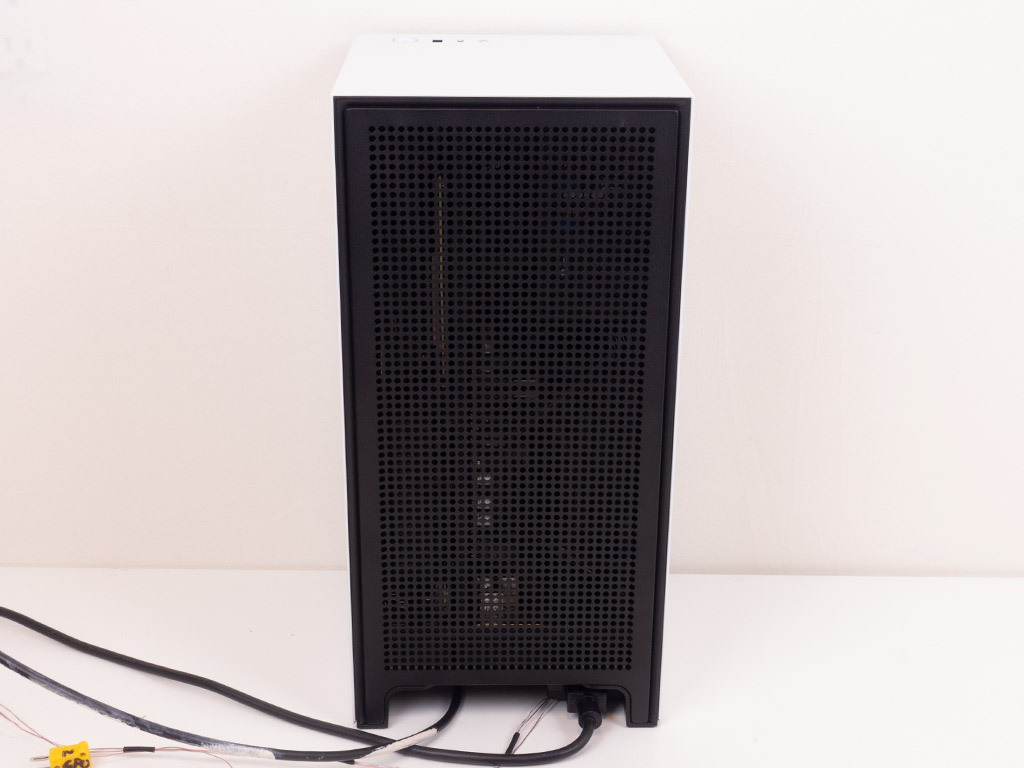
You can see the faint glow of the green LED strip on the GPU in these pictures, but because of the heavy tint none of the other parts are really visible. The little white stickers are a bit of an eye sore, so I can see most people removing them once the system is all configured and running well. All the leads come out the back at the bottom of the chassis. The power is pre-routed with a rear-facing plug for easy connectivity, while things like additional USB devices or display cables do force you to tip the H1 over.
Jul 13th, 2025 02:28 CDT
change timezone
Latest GPU Drivers
New Forum Posts
- 9070XT BIOS flash (what to use?) (6)
- New ToS of Take Two and 2K (12)
- Radeon RX 6700, 6700 XT & 6750 XT users club (1138)
- 6400c30 vs 8000c36 Ryzen 9800X3D (0)
- Best motherboards for XP gaming (116)
- 9800x3D - 6400 CL32 1:1 not stable (12)
- Is there a WIFI chip I should get? (1)
- What are you playing? (23945)
- 9060 XT 16GB or 6800 XT/6900XT? (30)
- ASUS ProArt GeForce RTX 4060 Ti OC Edition 16GB GDDR6 Gaming - nvflash64 VBIOS mismatch (5)
Popular Reviews
- Fractal Design Epoch RGB TG Review
- Lexar NM1090 Pro 4 TB Review
- Corsair FRAME 5000D RS Review
- Our Visit to the Hunter Super Computer
- NVIDIA GeForce RTX 5050 8 GB Review
- NZXT N9 X870E Review
- Sapphire Radeon RX 9060 XT Pulse OC 16 GB Review - An Excellent Choice
- AMD Ryzen 7 9800X3D Review - The Best Gaming Processor
- Upcoming Hardware Launches 2025 (Updated May 2025)
- Chieftec Iceberg 360 Review
TPU on YouTube
Controversial News Posts
- Intel's Core Ultra 7 265K and 265KF CPUs Dip Below $250 (288)
- Some Intel Nova Lake CPUs Rumored to Challenge AMD's 3D V-Cache in Desktop Gaming (140)
- AMD Radeon RX 9070 XT Gains 9% Performance at 1440p with Latest Driver, Beats RTX 5070 Ti (131)
- NVIDIA Launches GeForce RTX 5050 for Desktops and Laptops, Starts at $249 (120)
- NVIDIA GeForce RTX 5080 SUPER Could Feature 24 GB Memory, Increased Power Limits (115)
- Microsoft Partners with AMD for Next-gen Xbox Hardware (105)
- Intel "Nova Lake‑S" Series: Seven SKUs, Up to 52 Cores and 150 W TDP (100)
- NVIDIA DLSS Transformer Cuts VRAM Usage by 20% (97)