 21
21
Cooler Master MasterCase SL600M Review
Assembly & Finished Looks »A Closer Look - Inside

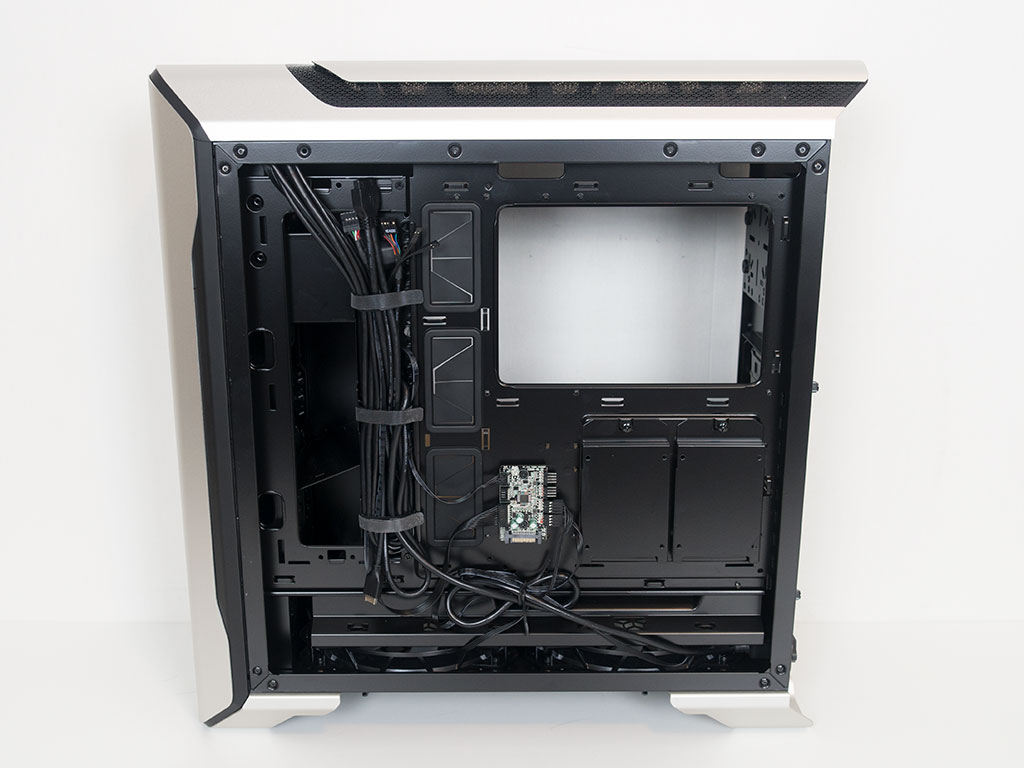

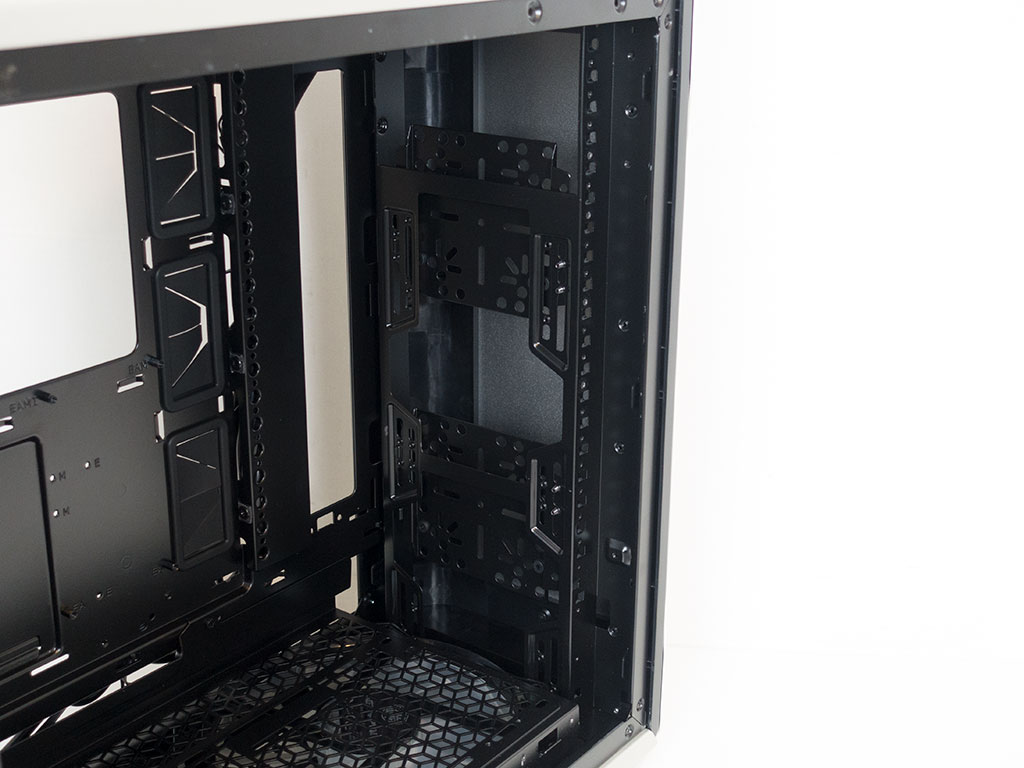
Looking at the inside of the enclosure, the SL600M doesn't look too unique aside from the fact that Cooler Master uses nothing but its own tooling. But don't let the initial impression fool you as things are actually quite thought out—but more on that in a second. On the opposing side, you will find a large opening to gain access to the CPU cooler's underside, with rubber-grommet-equipped holes for cable management. On the bottom, where you would usually find a shroud in most modern cases, Cooler Master has placed two 200 mm fans set to push air up through the floor of the SL600M. Their aim is to create a chimney effect as hot air tends to rise, which is something we have also seen done by other brands, like Silverstone.
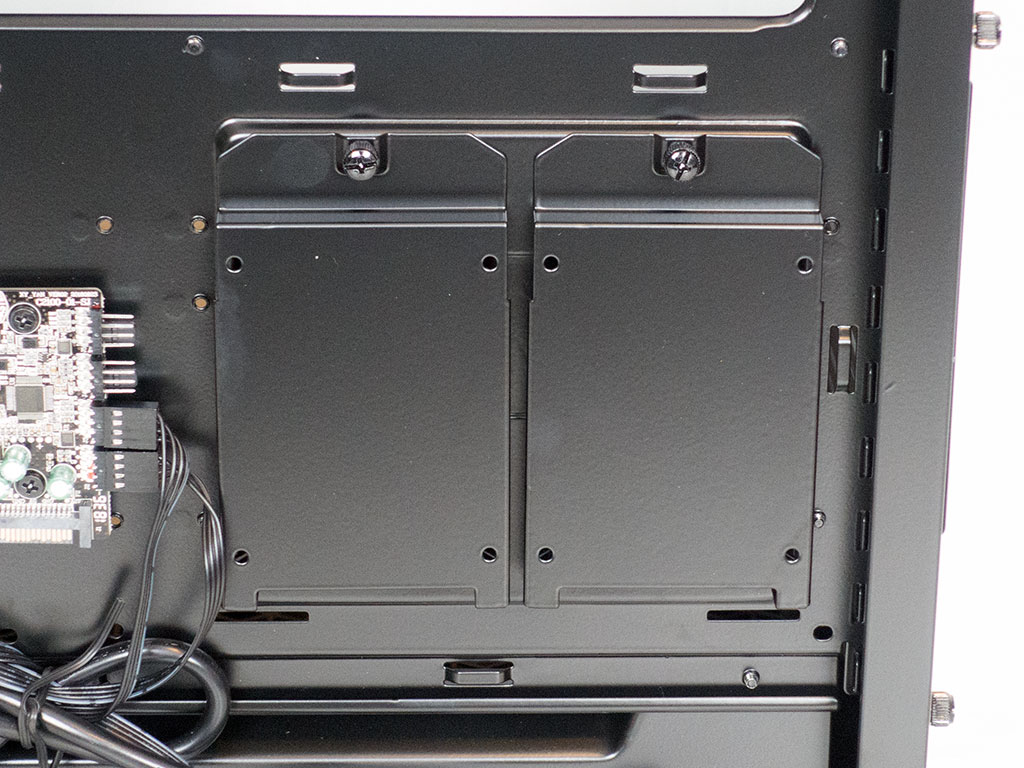
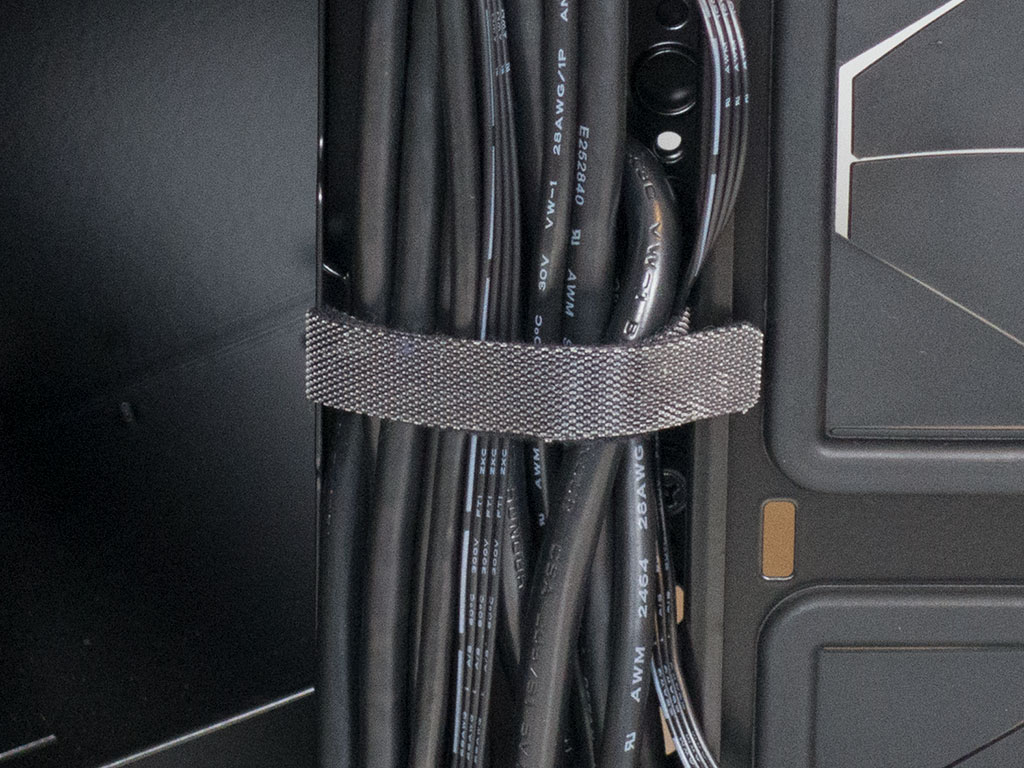
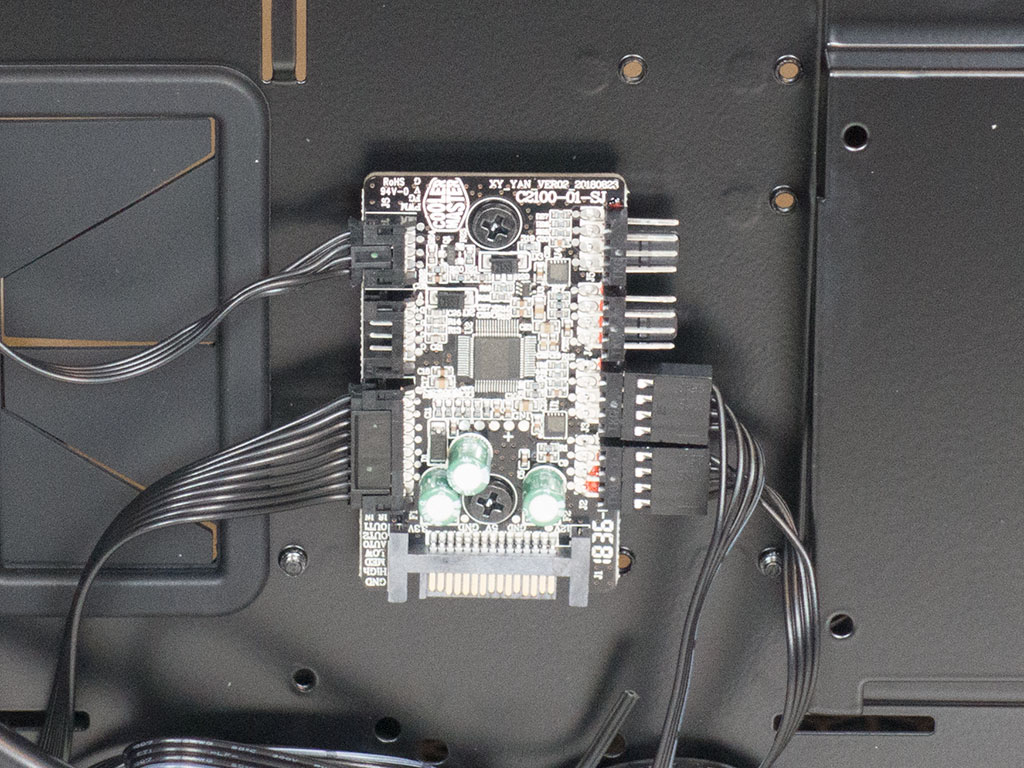
On the backside of the motherboard tray, you will find two trays for SSDs and several Velcro strips to keep things tidy. Last but not least, there is a PCB to control fan speed through the switch found in the front of the chassis.
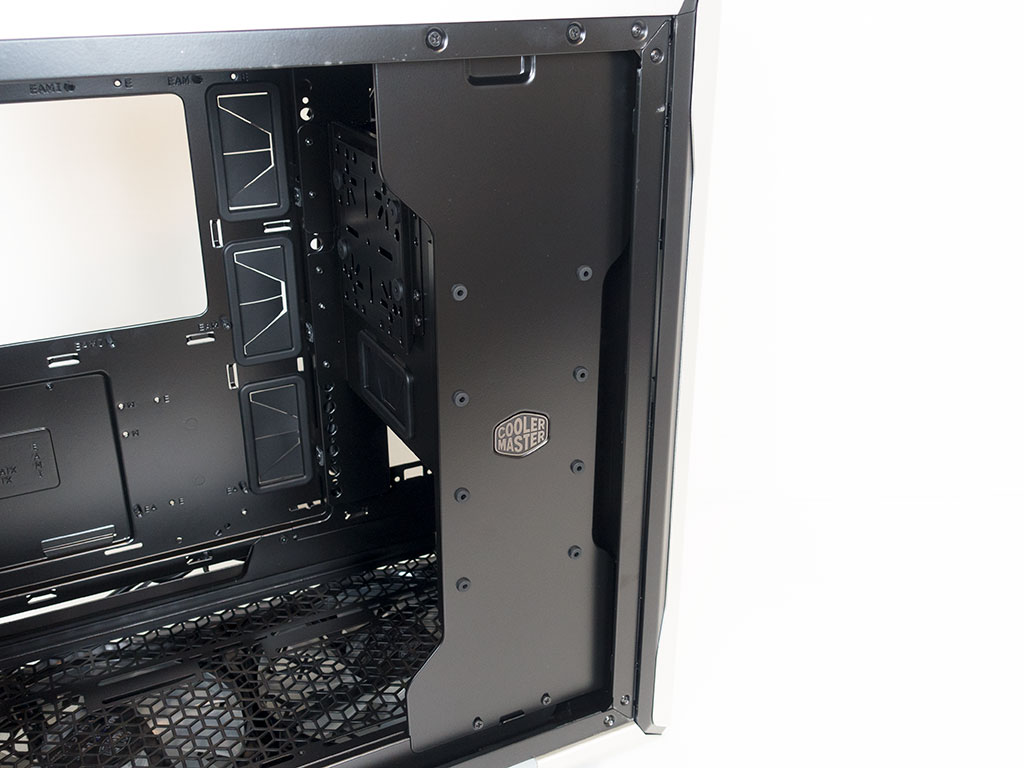
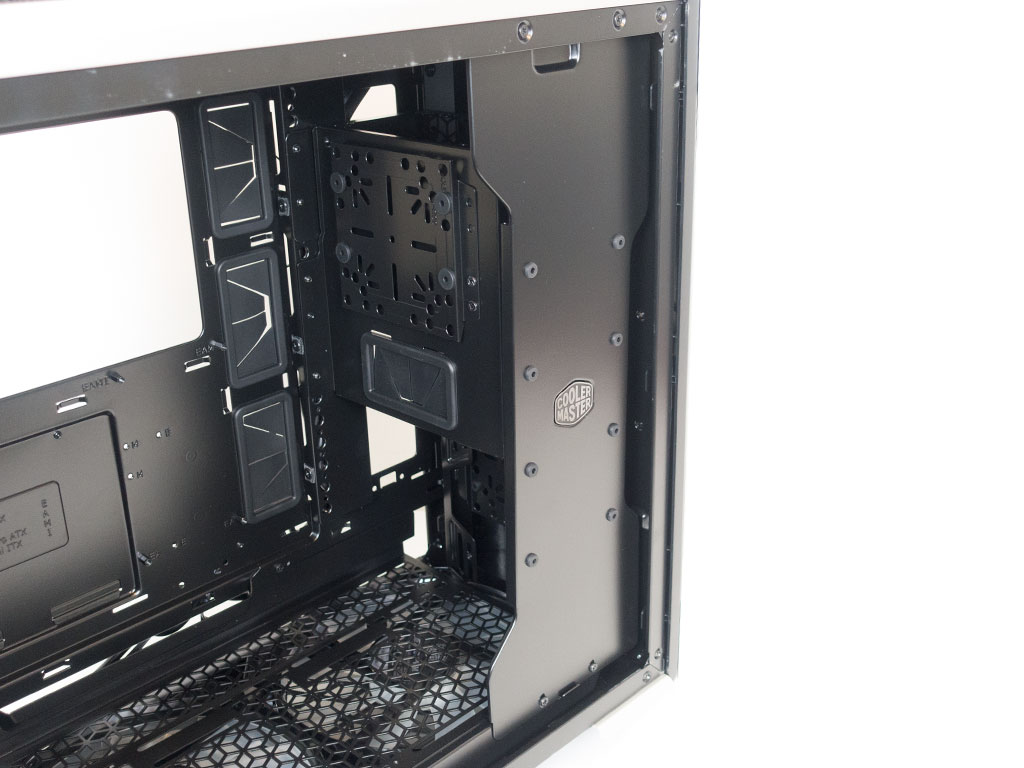
In the front, a large metal plate ensures you won't see the somewhat busy elements placed here. On it, you may install two 2.5" drives to show them off to curious onlookers.
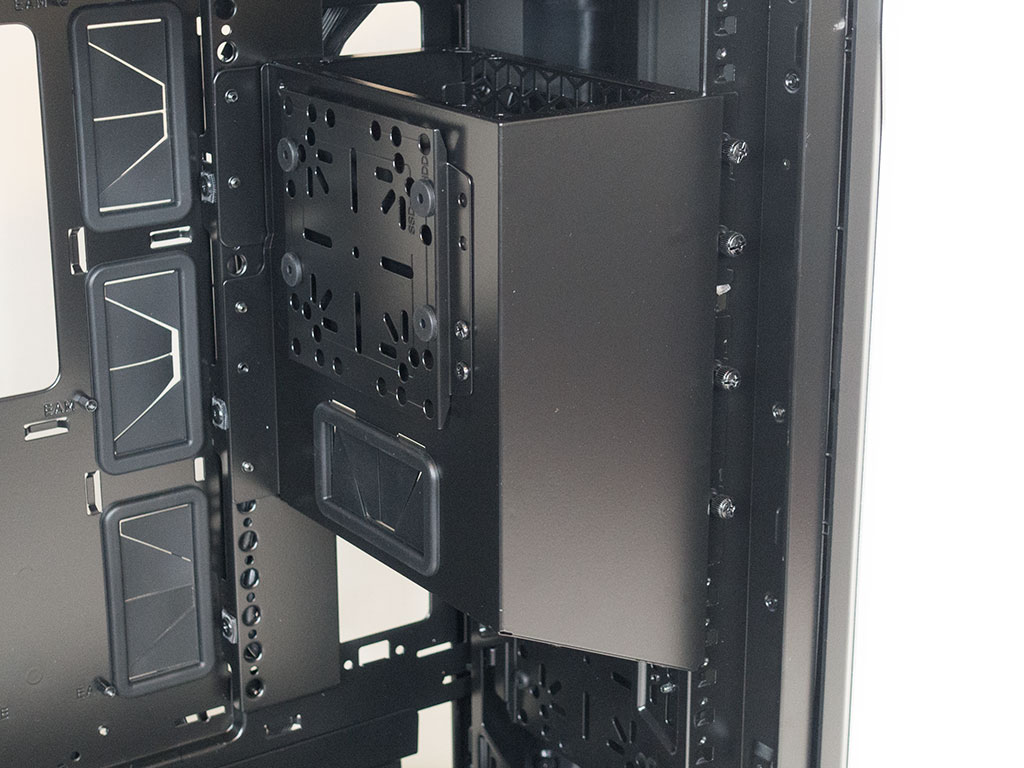
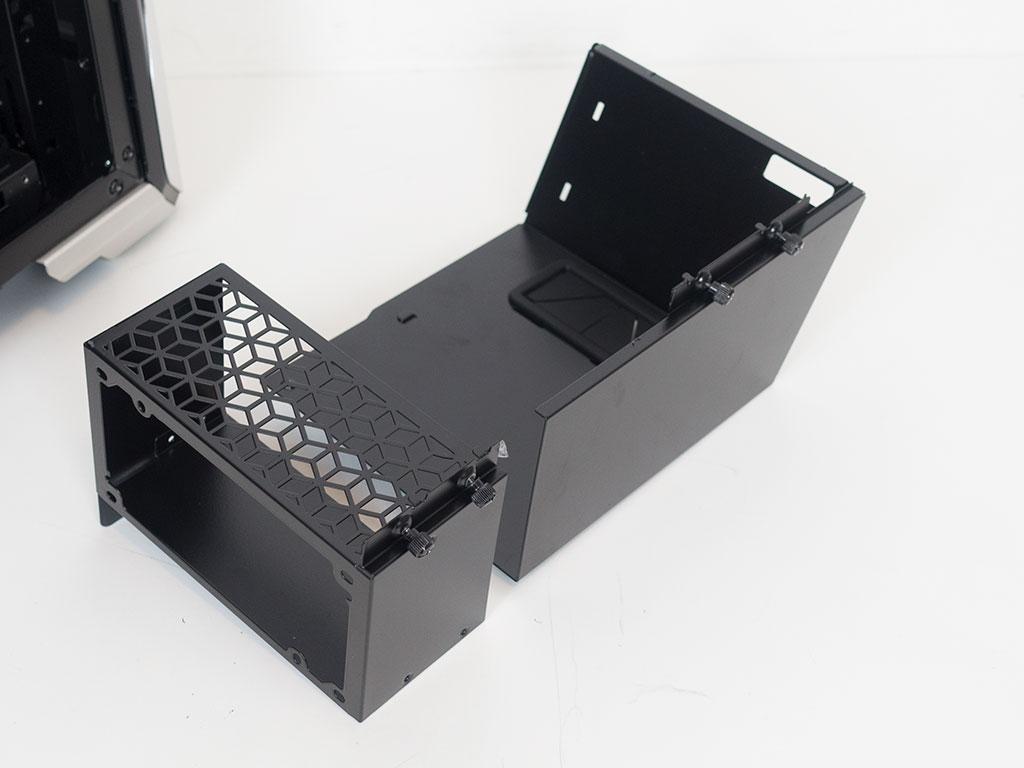
Behind the plate is a unique contraption that actually holds the PSU. It can easily be removed and comes in two parts. This allows you to install a longer unit while hiding it and, more importantly, its cables nicely.
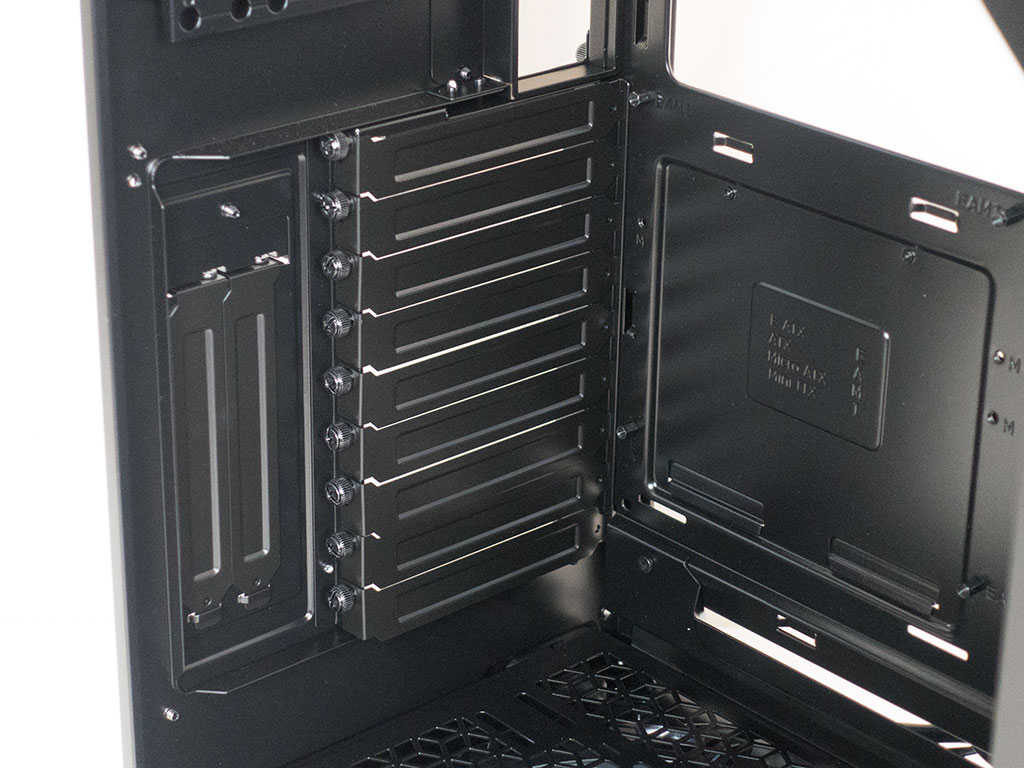

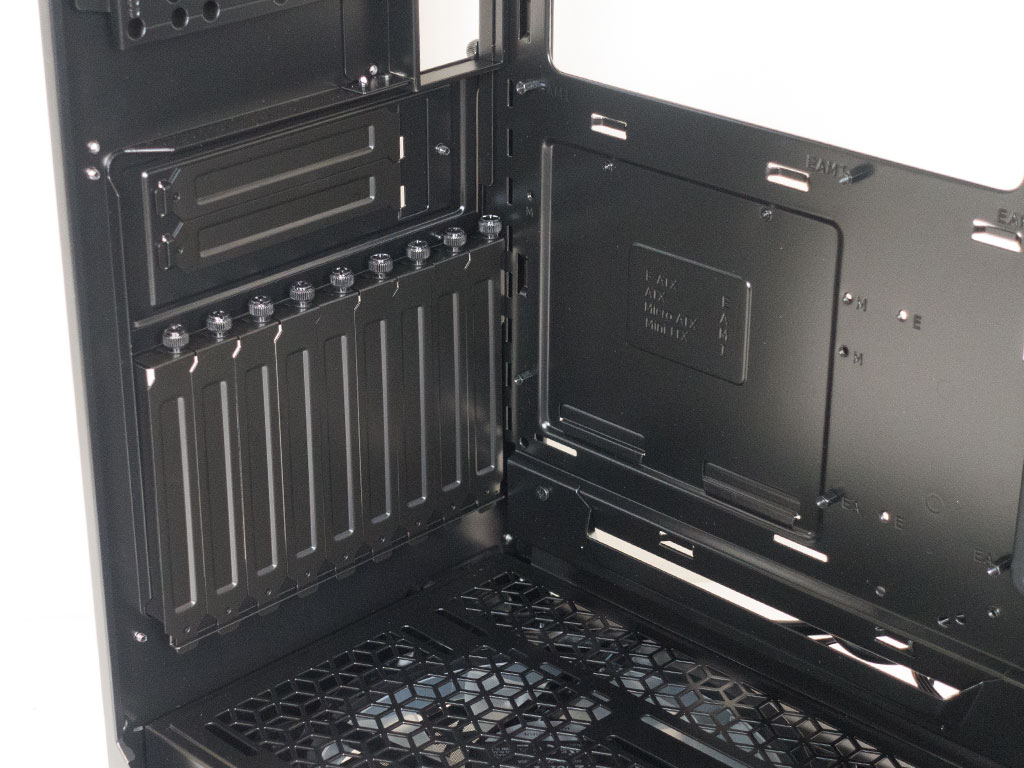
In the rear, the bottom square with the expansion slots looks quite normal, as we have seen enclosures offer two vertical slots for perfect GPU showcasing. However, Cooler Master has gone a step further by allowing you to detach it and rotate it 90 degrees. This would technically allow you to showcase not one but two GPUs in such a configuration. However, to do so, you will need PCIe ribbon cables Cooler Master only sells separately.
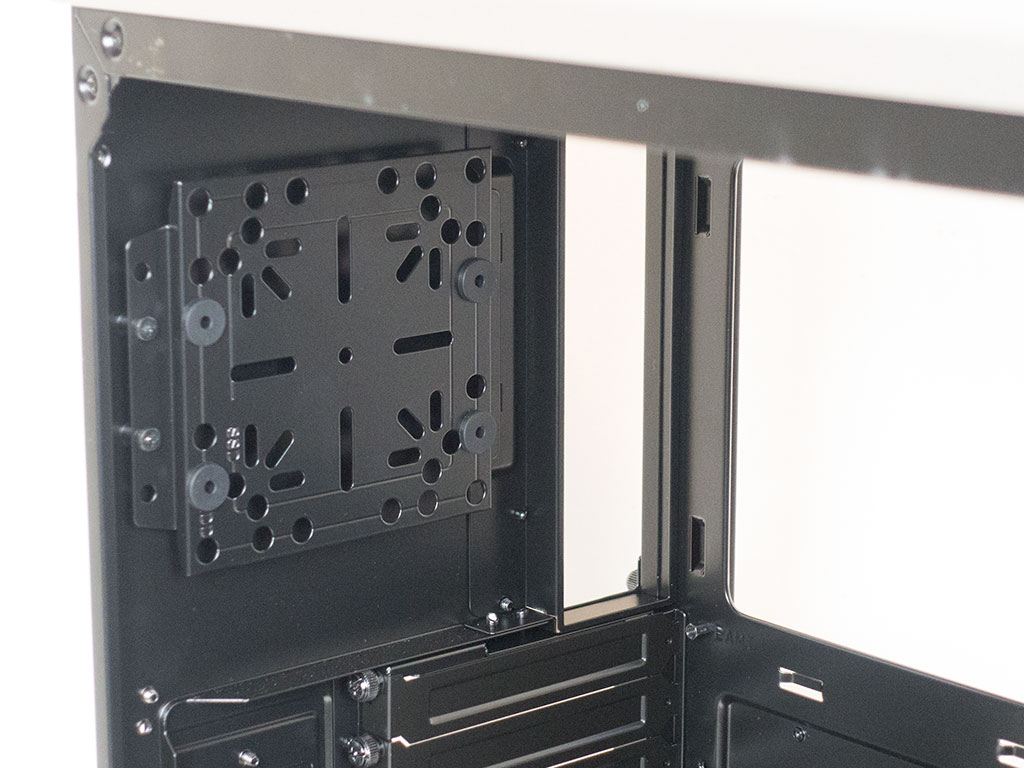
Above that, where you would usually find a fan-placement possibility, Cooler Master has instead chosen to add another mounting plate for a hard drive, which brings the total up to seven storage devices that will fit inside the case out of the box. Thanks the numerous holes in the plate, you may also use it to mount reservoirs or pumps instead.
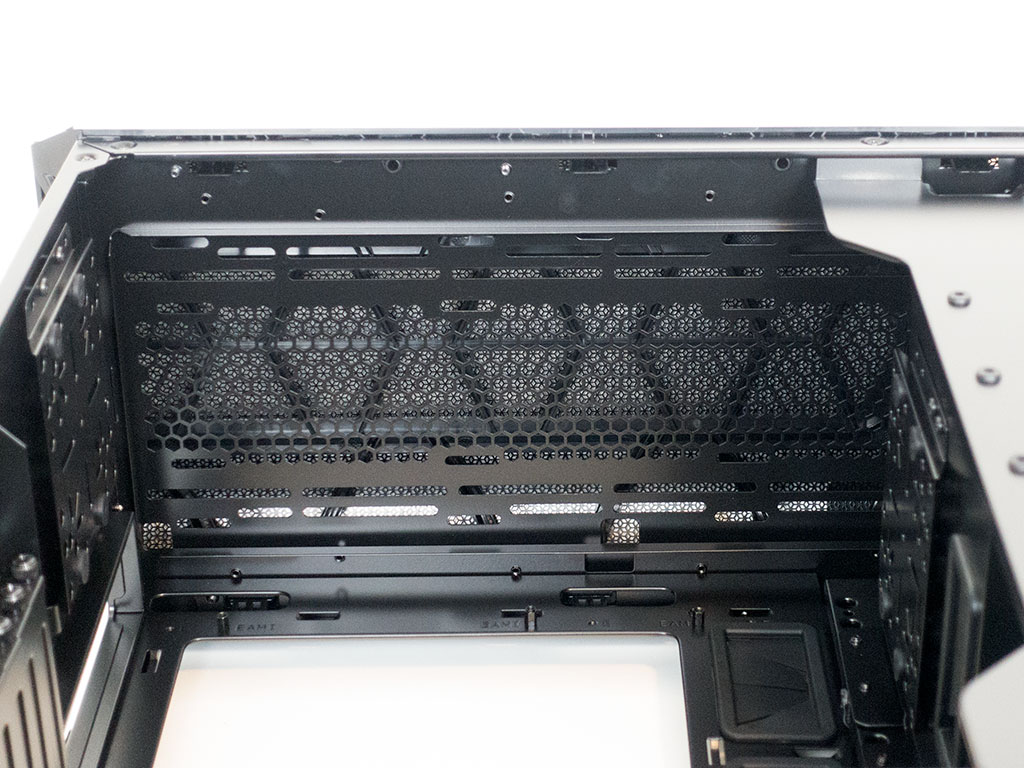
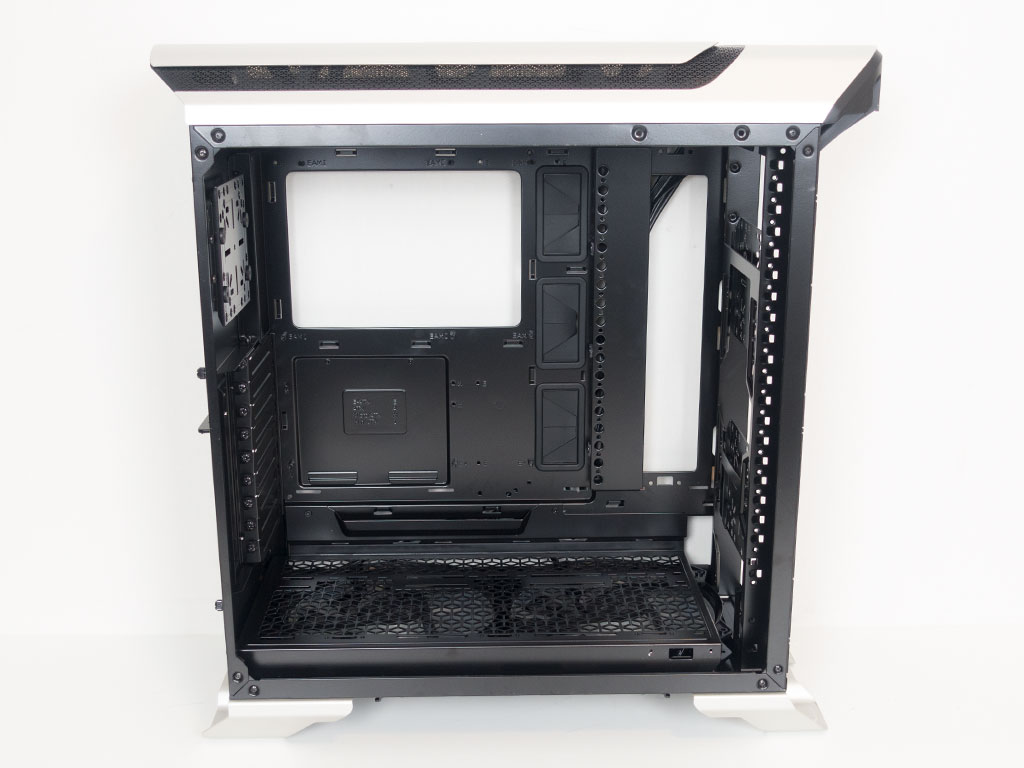
In the ceiling, you can clearly see the mounting holes that allow for up to three fans or a large radiator to be installed. Before moving on, note that the SL600M can be stripped pretty bare quite easily, allowing for easy and unobstructed assembly.
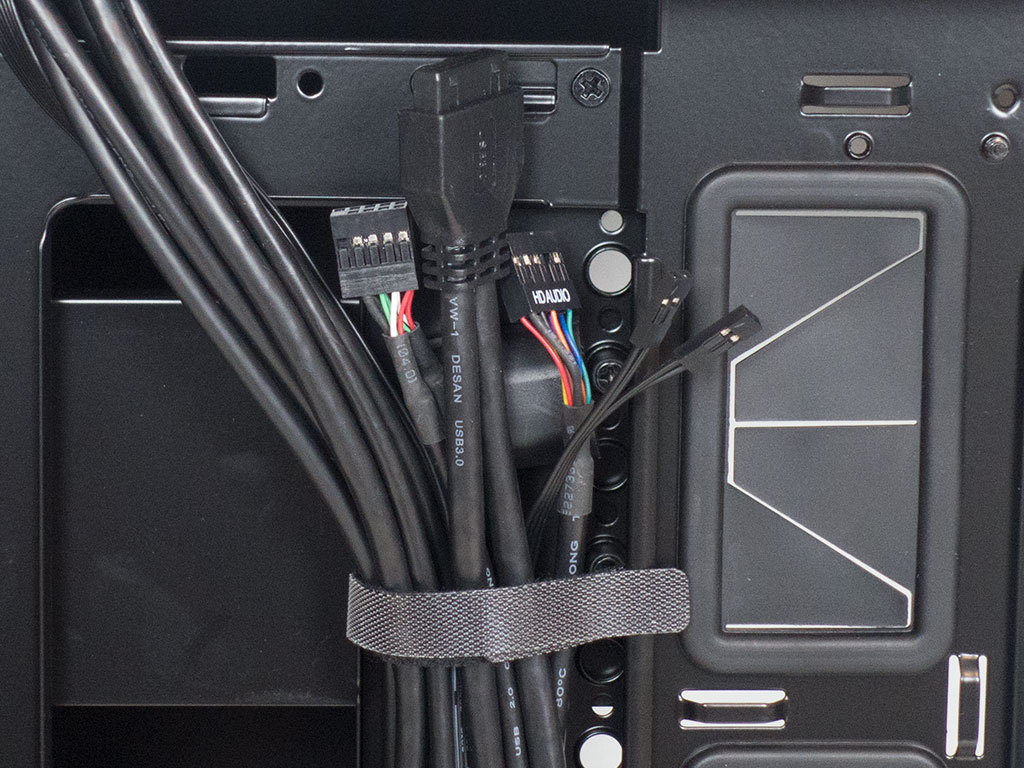
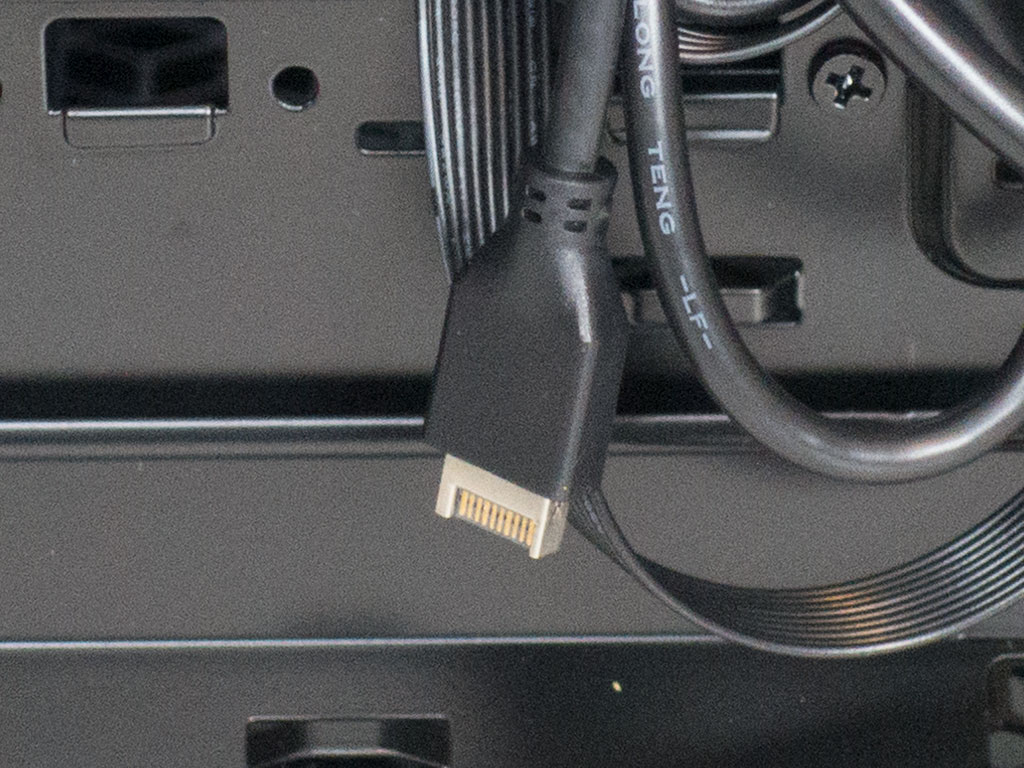
The cables within the chassis are all of the standard variety, with the only unique elements being the angled power plug to the PSU and the USB-C 3.1 Gen2 connector.
Jul 13th, 2025 02:50 CDT
change timezone
Latest GPU Drivers
New Forum Posts
- 9070XT BIOS flash (what to use?) (6)
- New ToS of Take Two and 2K (12)
- Radeon RX 6700, 6700 XT & 6750 XT users club (1138)
- 6400c30 vs 8000c36 Ryzen 9800X3D (0)
- Best motherboards for XP gaming (116)
- 9800x3D - 6400 CL32 1:1 not stable (12)
- Is there a WIFI chip I should get? (1)
- What are you playing? (23945)
- 9060 XT 16GB or 6800 XT/6900XT? (30)
- ASUS ProArt GeForce RTX 4060 Ti OC Edition 16GB GDDR6 Gaming - nvflash64 VBIOS mismatch (5)
Popular Reviews
- Fractal Design Epoch RGB TG Review
- Lexar NM1090 Pro 4 TB Review
- Corsair FRAME 5000D RS Review
- Our Visit to the Hunter Super Computer
- NVIDIA GeForce RTX 5050 8 GB Review
- NZXT N9 X870E Review
- Sapphire Radeon RX 9060 XT Pulse OC 16 GB Review - An Excellent Choice
- AMD Ryzen 7 9800X3D Review - The Best Gaming Processor
- Upcoming Hardware Launches 2025 (Updated May 2025)
- Chieftec Iceberg 360 Review
TPU on YouTube
Controversial News Posts
- Intel's Core Ultra 7 265K and 265KF CPUs Dip Below $250 (288)
- Some Intel Nova Lake CPUs Rumored to Challenge AMD's 3D V-Cache in Desktop Gaming (140)
- AMD Radeon RX 9070 XT Gains 9% Performance at 1440p with Latest Driver, Beats RTX 5070 Ti (131)
- NVIDIA Launches GeForce RTX 5050 for Desktops and Laptops, Starts at $249 (120)
- NVIDIA GeForce RTX 5080 SUPER Could Feature 24 GB Memory, Increased Power Limits (115)
- Microsoft Partners with AMD for Next-gen Xbox Hardware (105)
- Intel "Nova Lake‑S" Series: Seven SKUs, Up to 52 Cores and 150 W TDP (100)
- NVIDIA DLSS Transformer Cuts VRAM Usage by 20% (97)